


Hummingbird and flower art: Part 1 (Sculpting)
Making the armature
First, create the armature and the base. For the base we used a small round canvas with the booker rod embedded into the centre.
Place a nut and washer onto the booker rod and move onto creating the plaster. Mix the plaster so that it is one part water to two parts plaster. Pour the plaster into the water and use latex gloves to mix the plaster.
Place the base and armature on the edge of the table upside down and pour in the plaster.
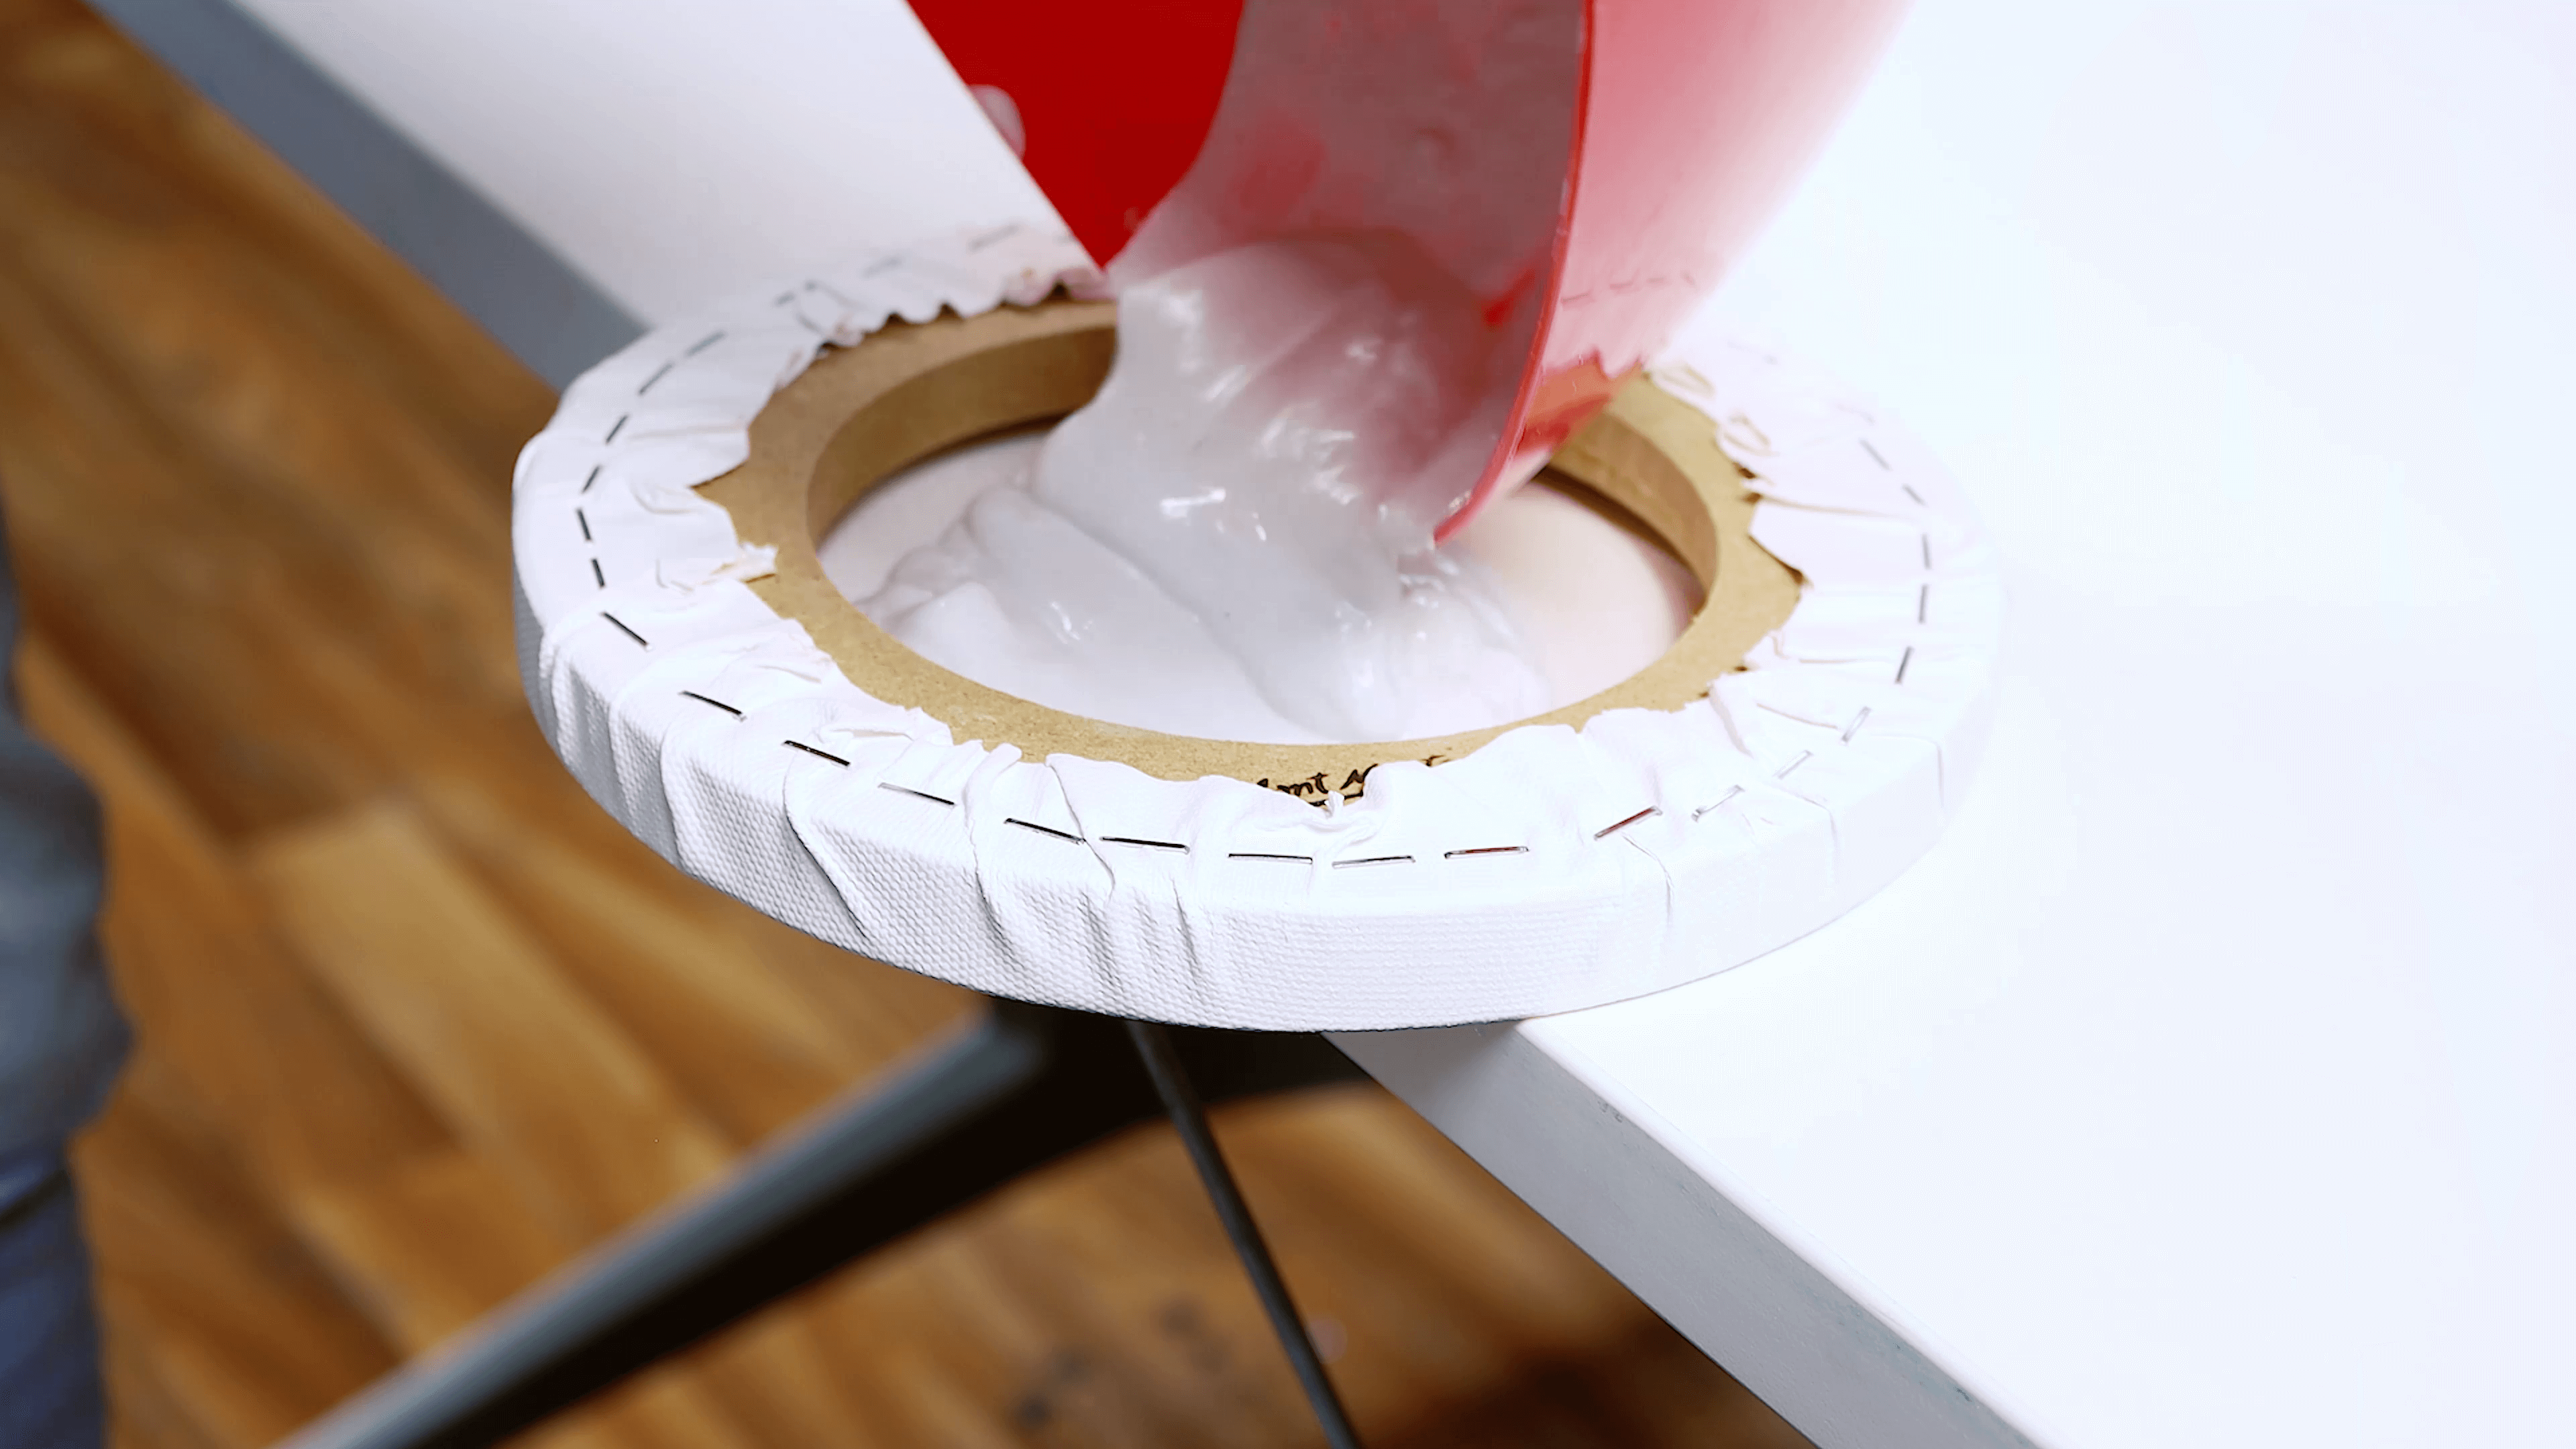
Ensure the booker rod is at the correct angle and allow it to dry. This will take approximately two days.
Take the wire from the coat hanger and use it to bind onto the rod and secure it with the tie wire. Add a few more ties to the rod before wrapping a length of wire around the booker rod and the coat hanger wire.
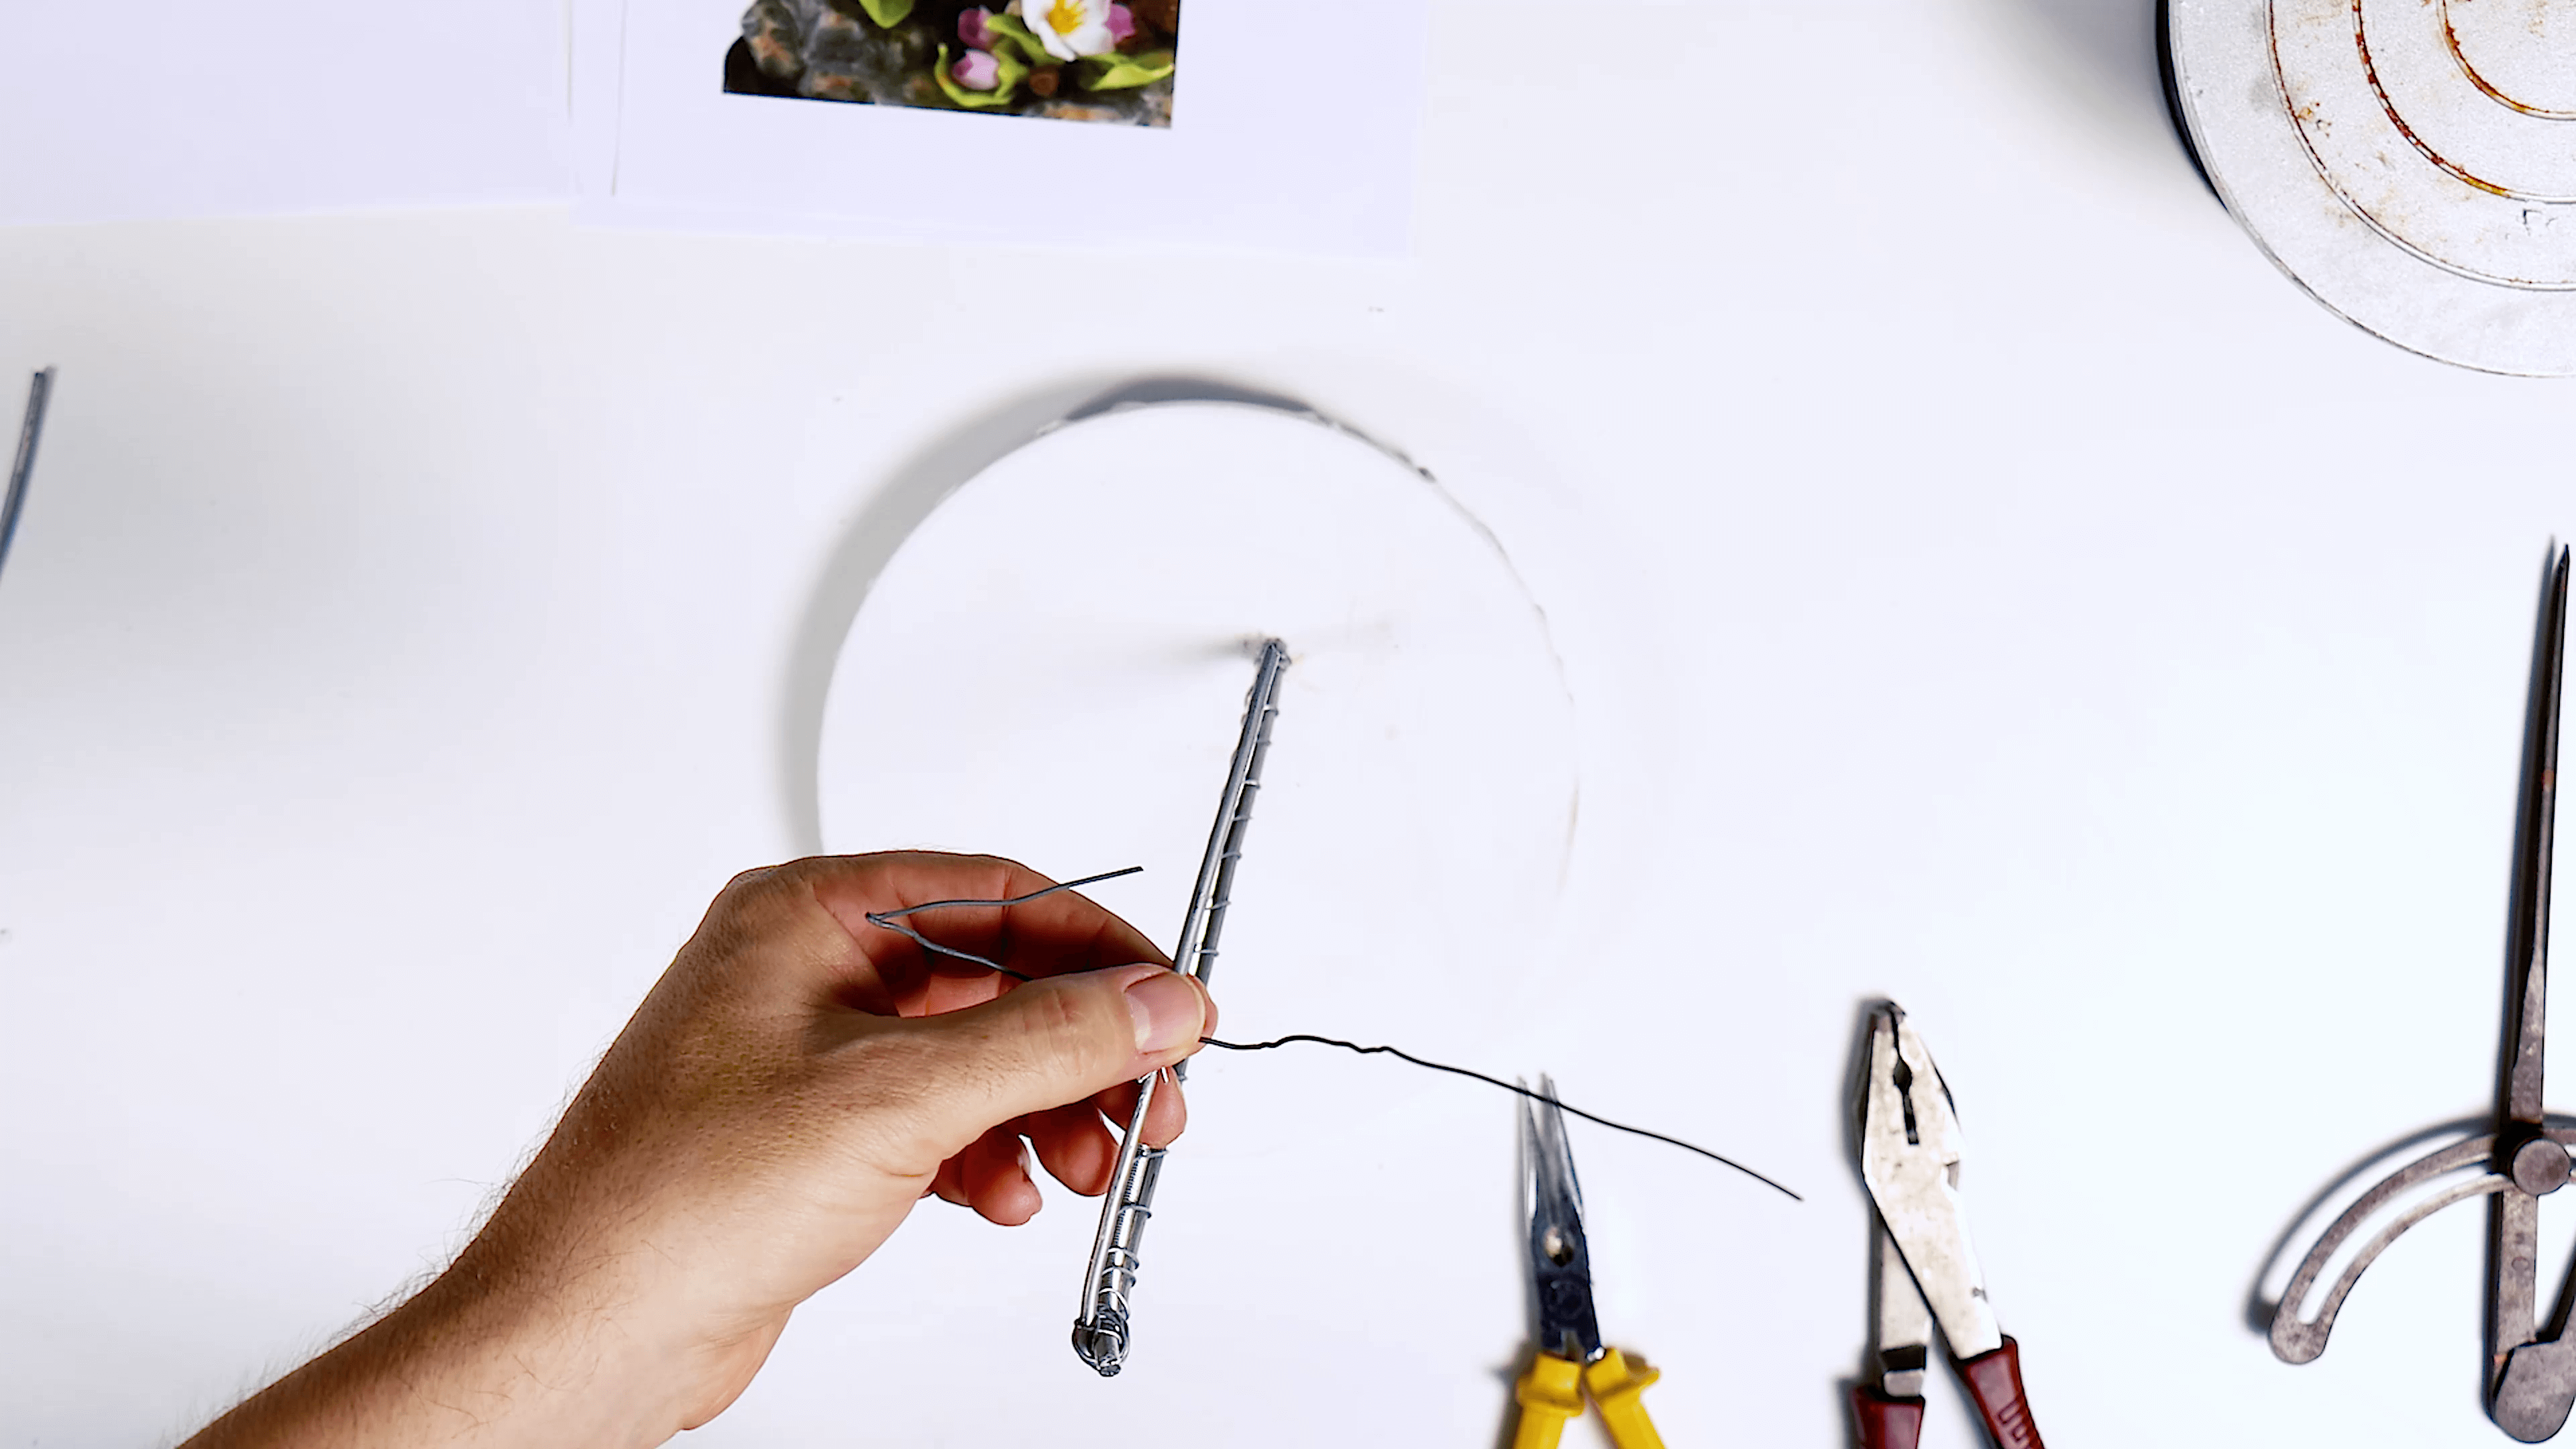
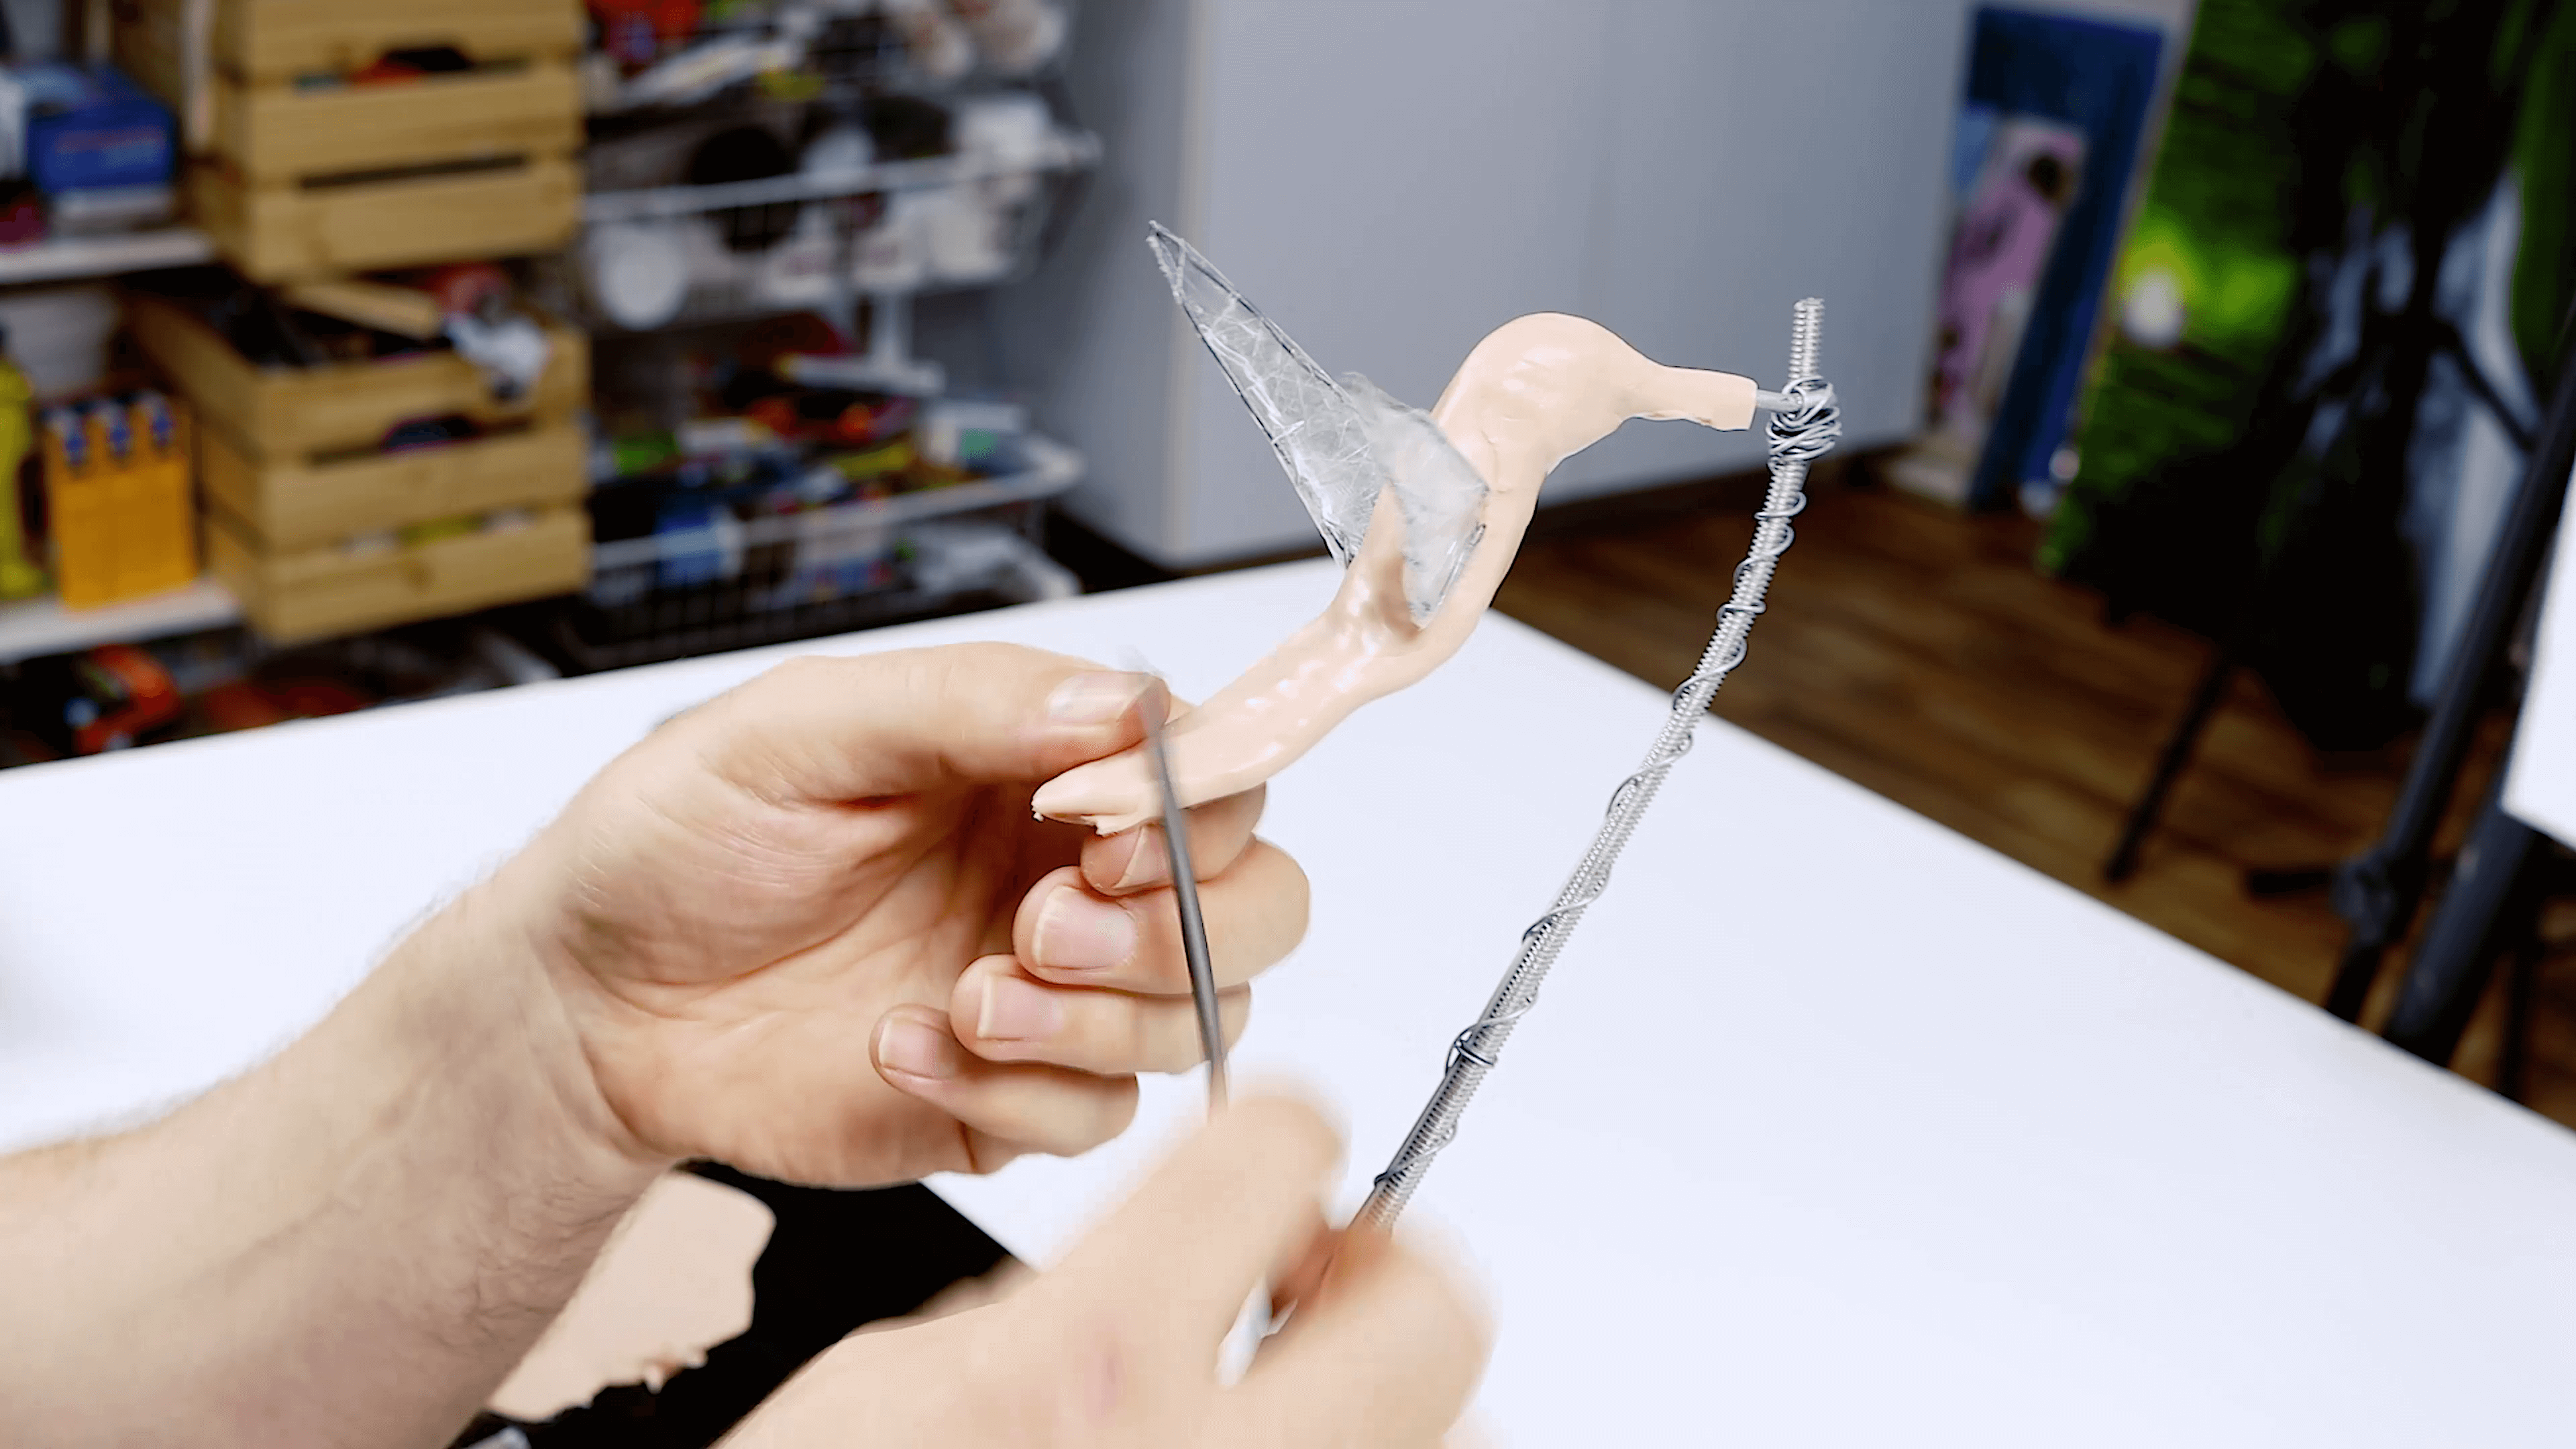
Cut the coat hanger leaving enough a bit of length. We’ve referred to this as the body wire.
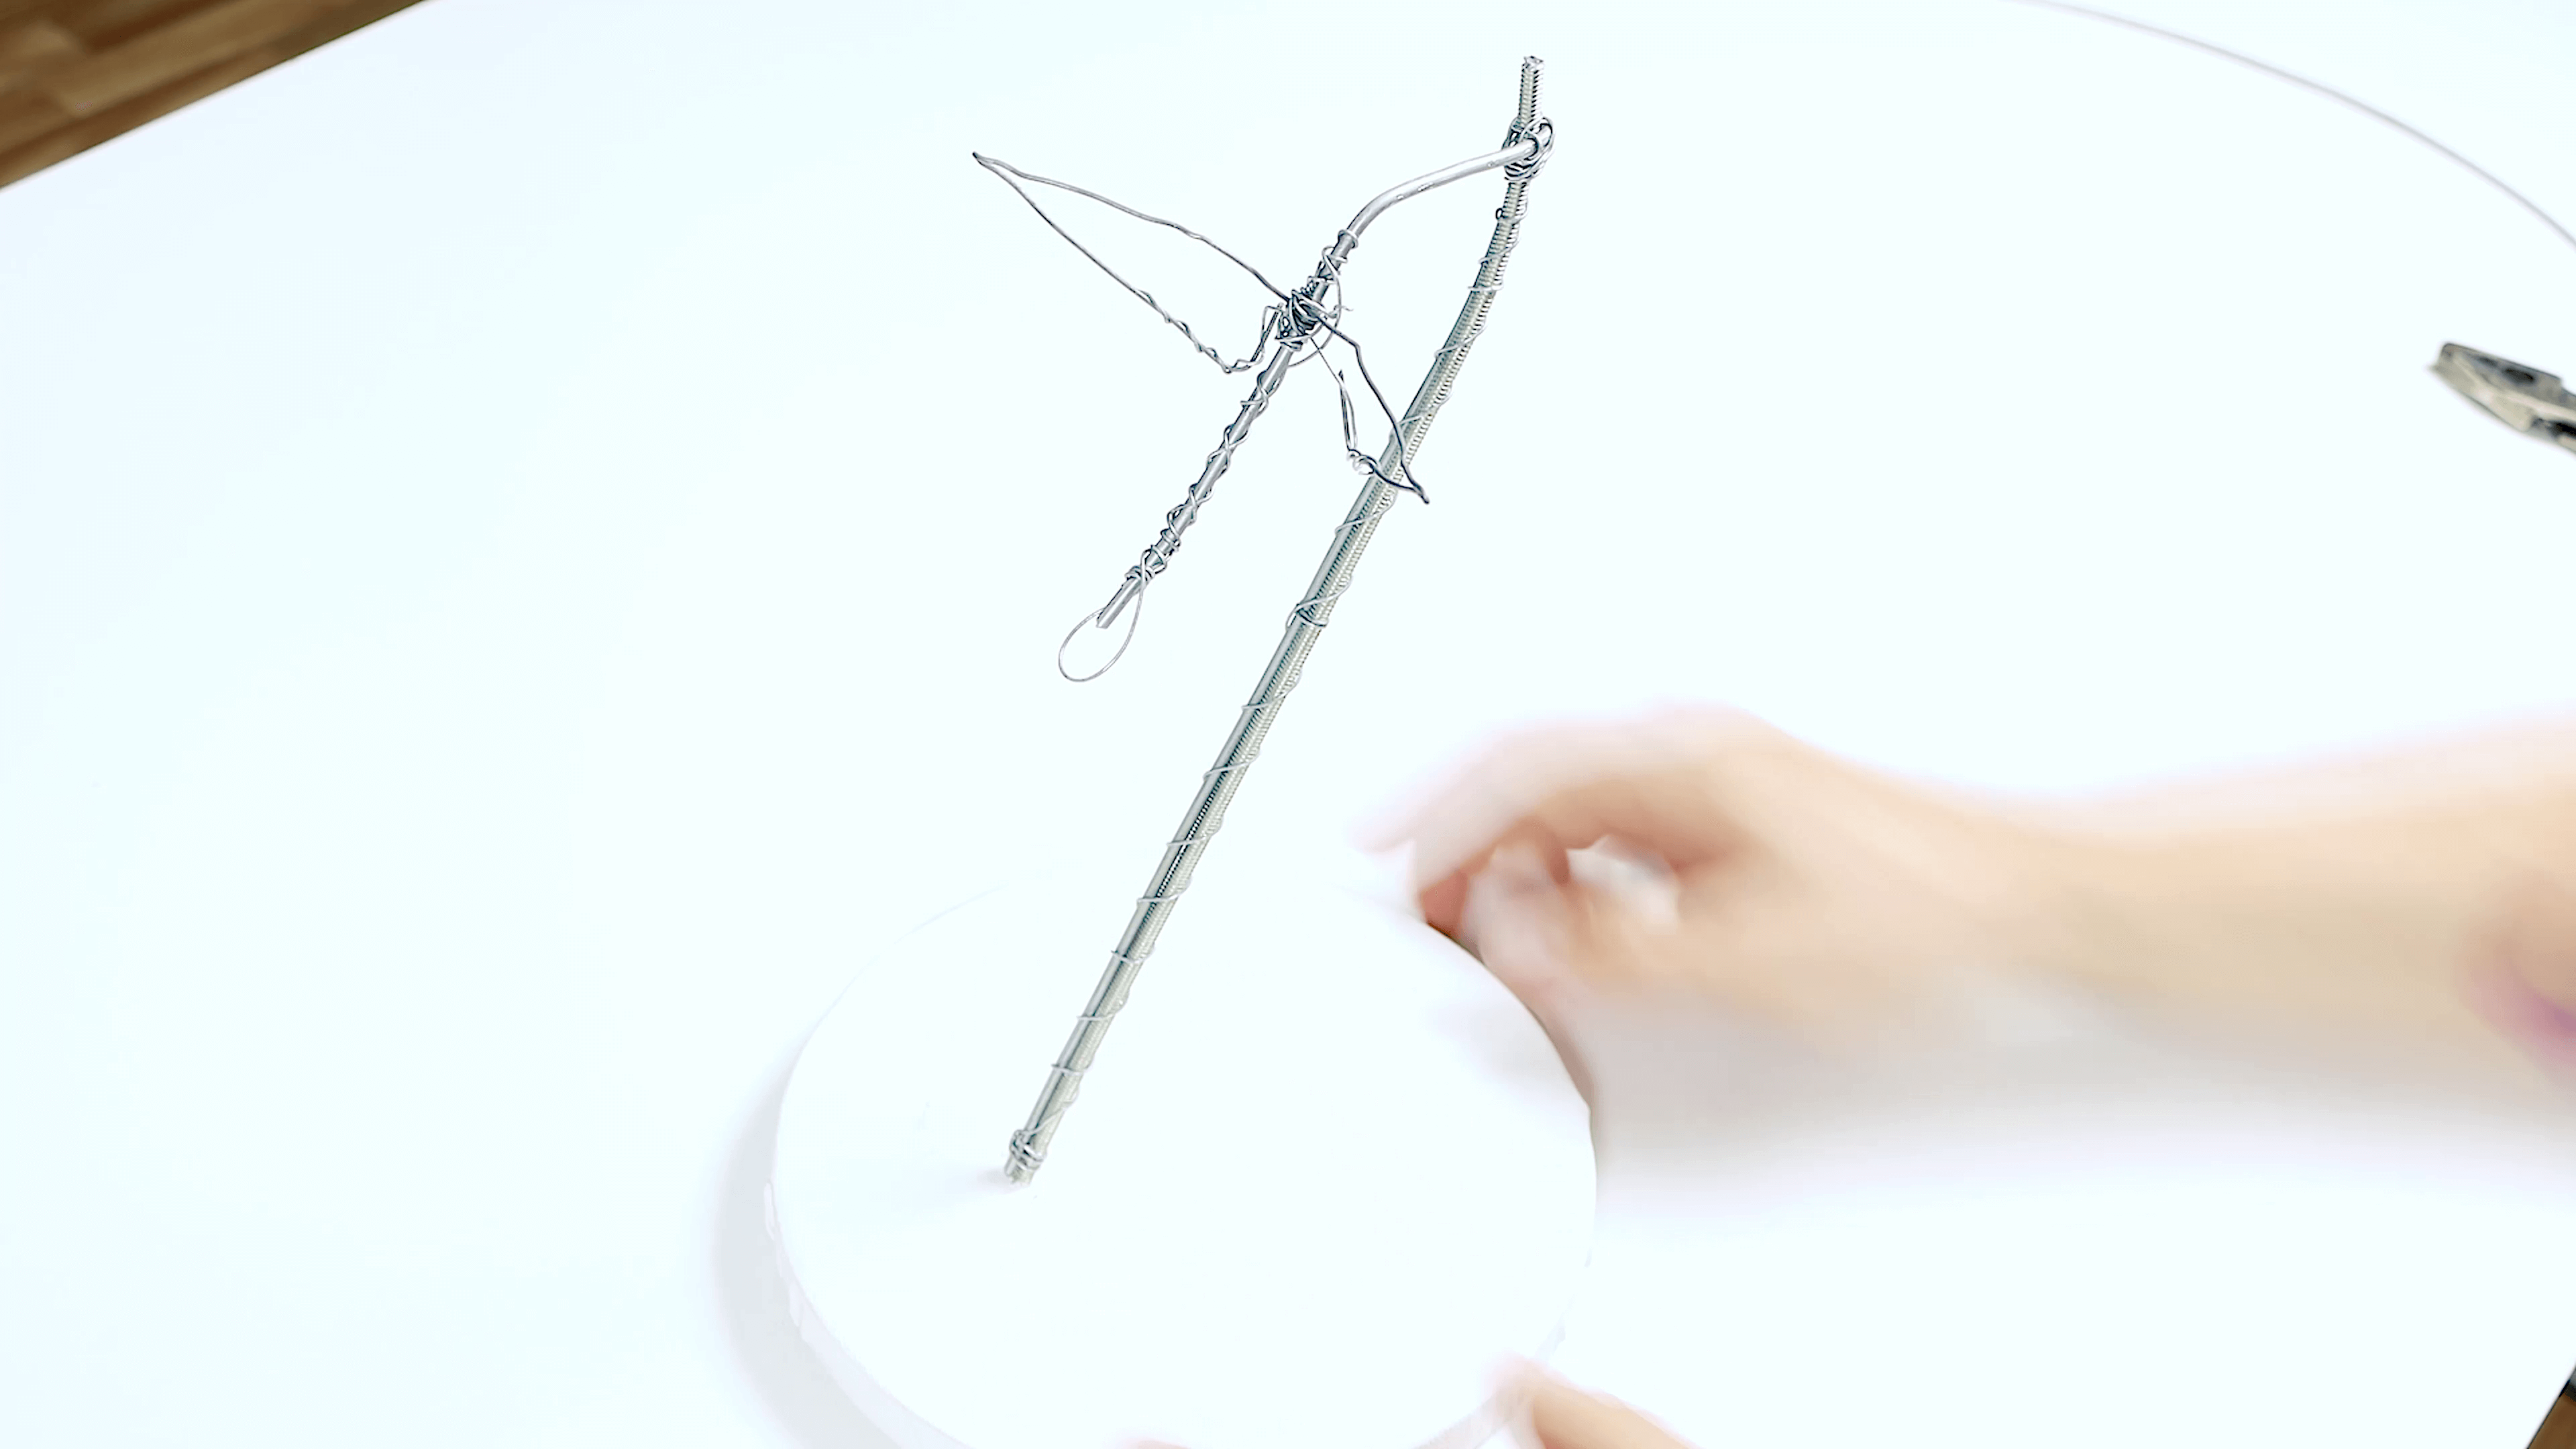
The wings can be created by bending a length of tie wire around the body wire, towards the centre. Each end can then be folded back on to themselves.
Wrap more tie wire around the body wire and onto each wing to ensure it is tight. Wrap the wire back down the body wire for the tail reinforcement.
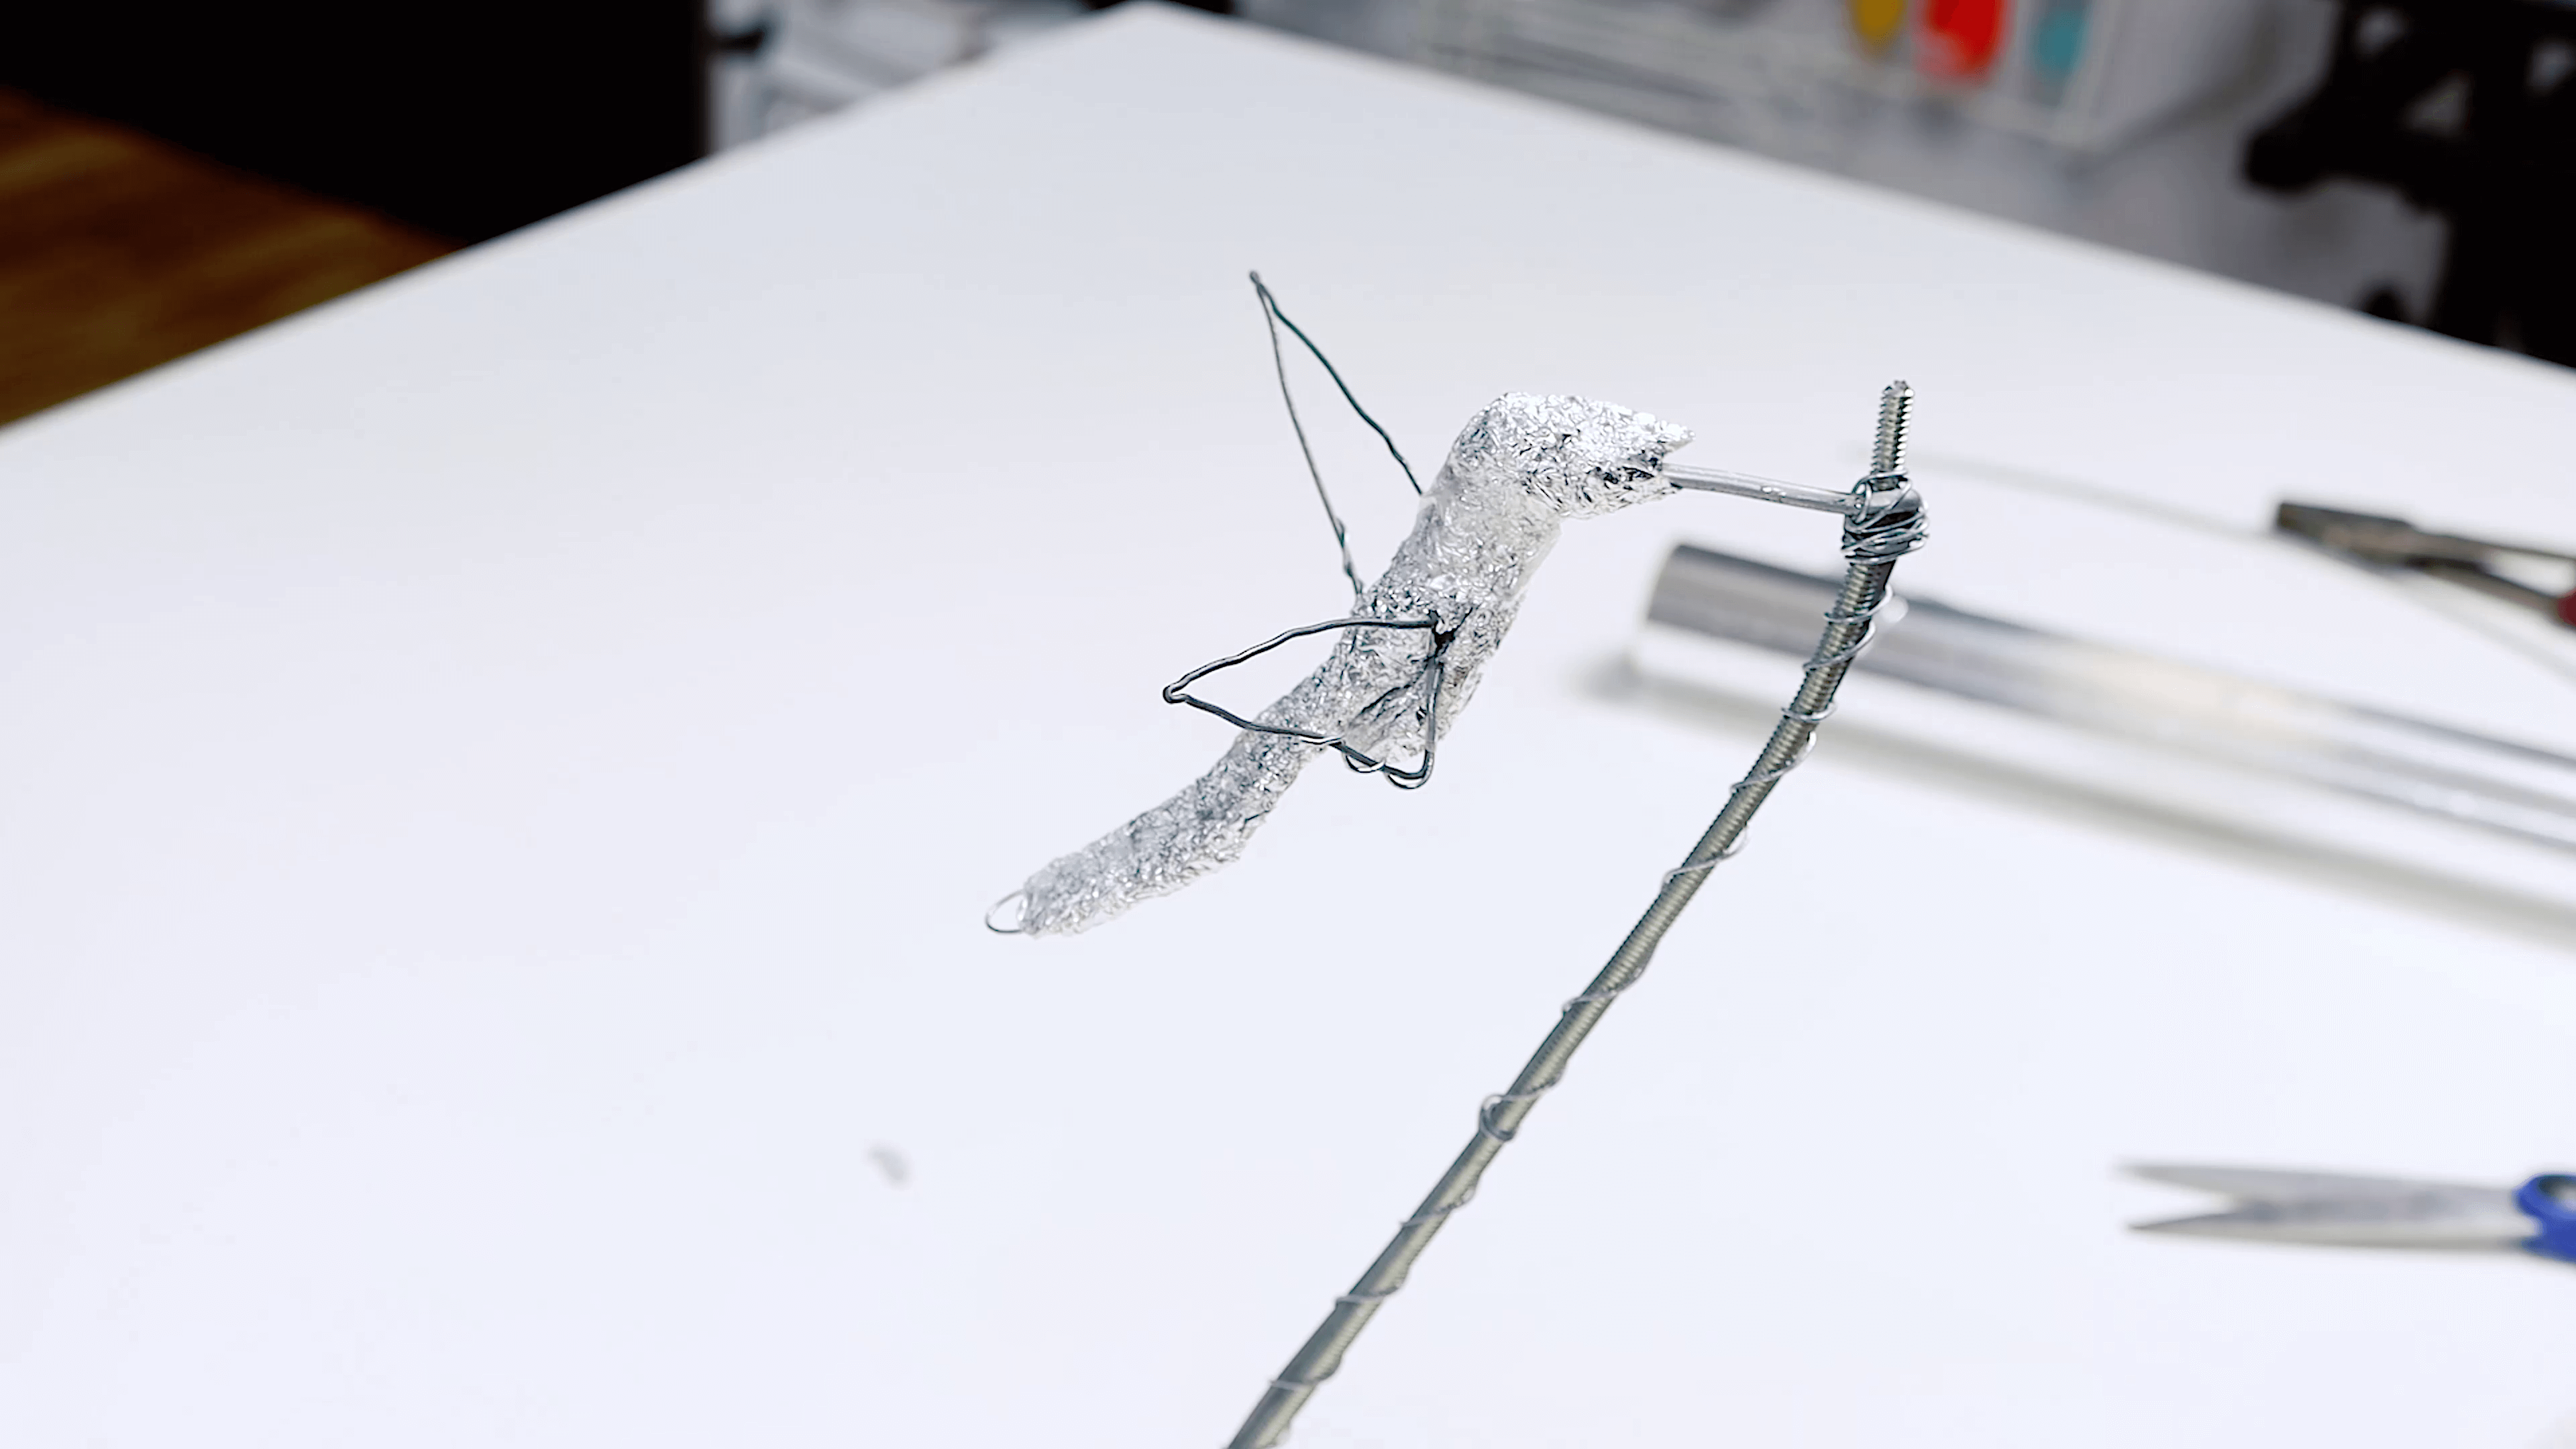
Once the wire part or skeleton of the hummingbird is finished, you can move onto packing the body with aluminium foil. Squeeze it into shape and wrap it tightly with clear tape.
Adding the polymer clay
Use a clay press or rolling pin to flatten the clay to about 5mm thick.
The clay can then be wrapped around the armature starting from the top.
Lay the clay over the armature and use a hobby knife to cut away the excess. Repeat this on the bottom side.
Bring the edges together and blend them smooth. Refine the shape of the hummingbird by adding and removing the clay until it looks right.
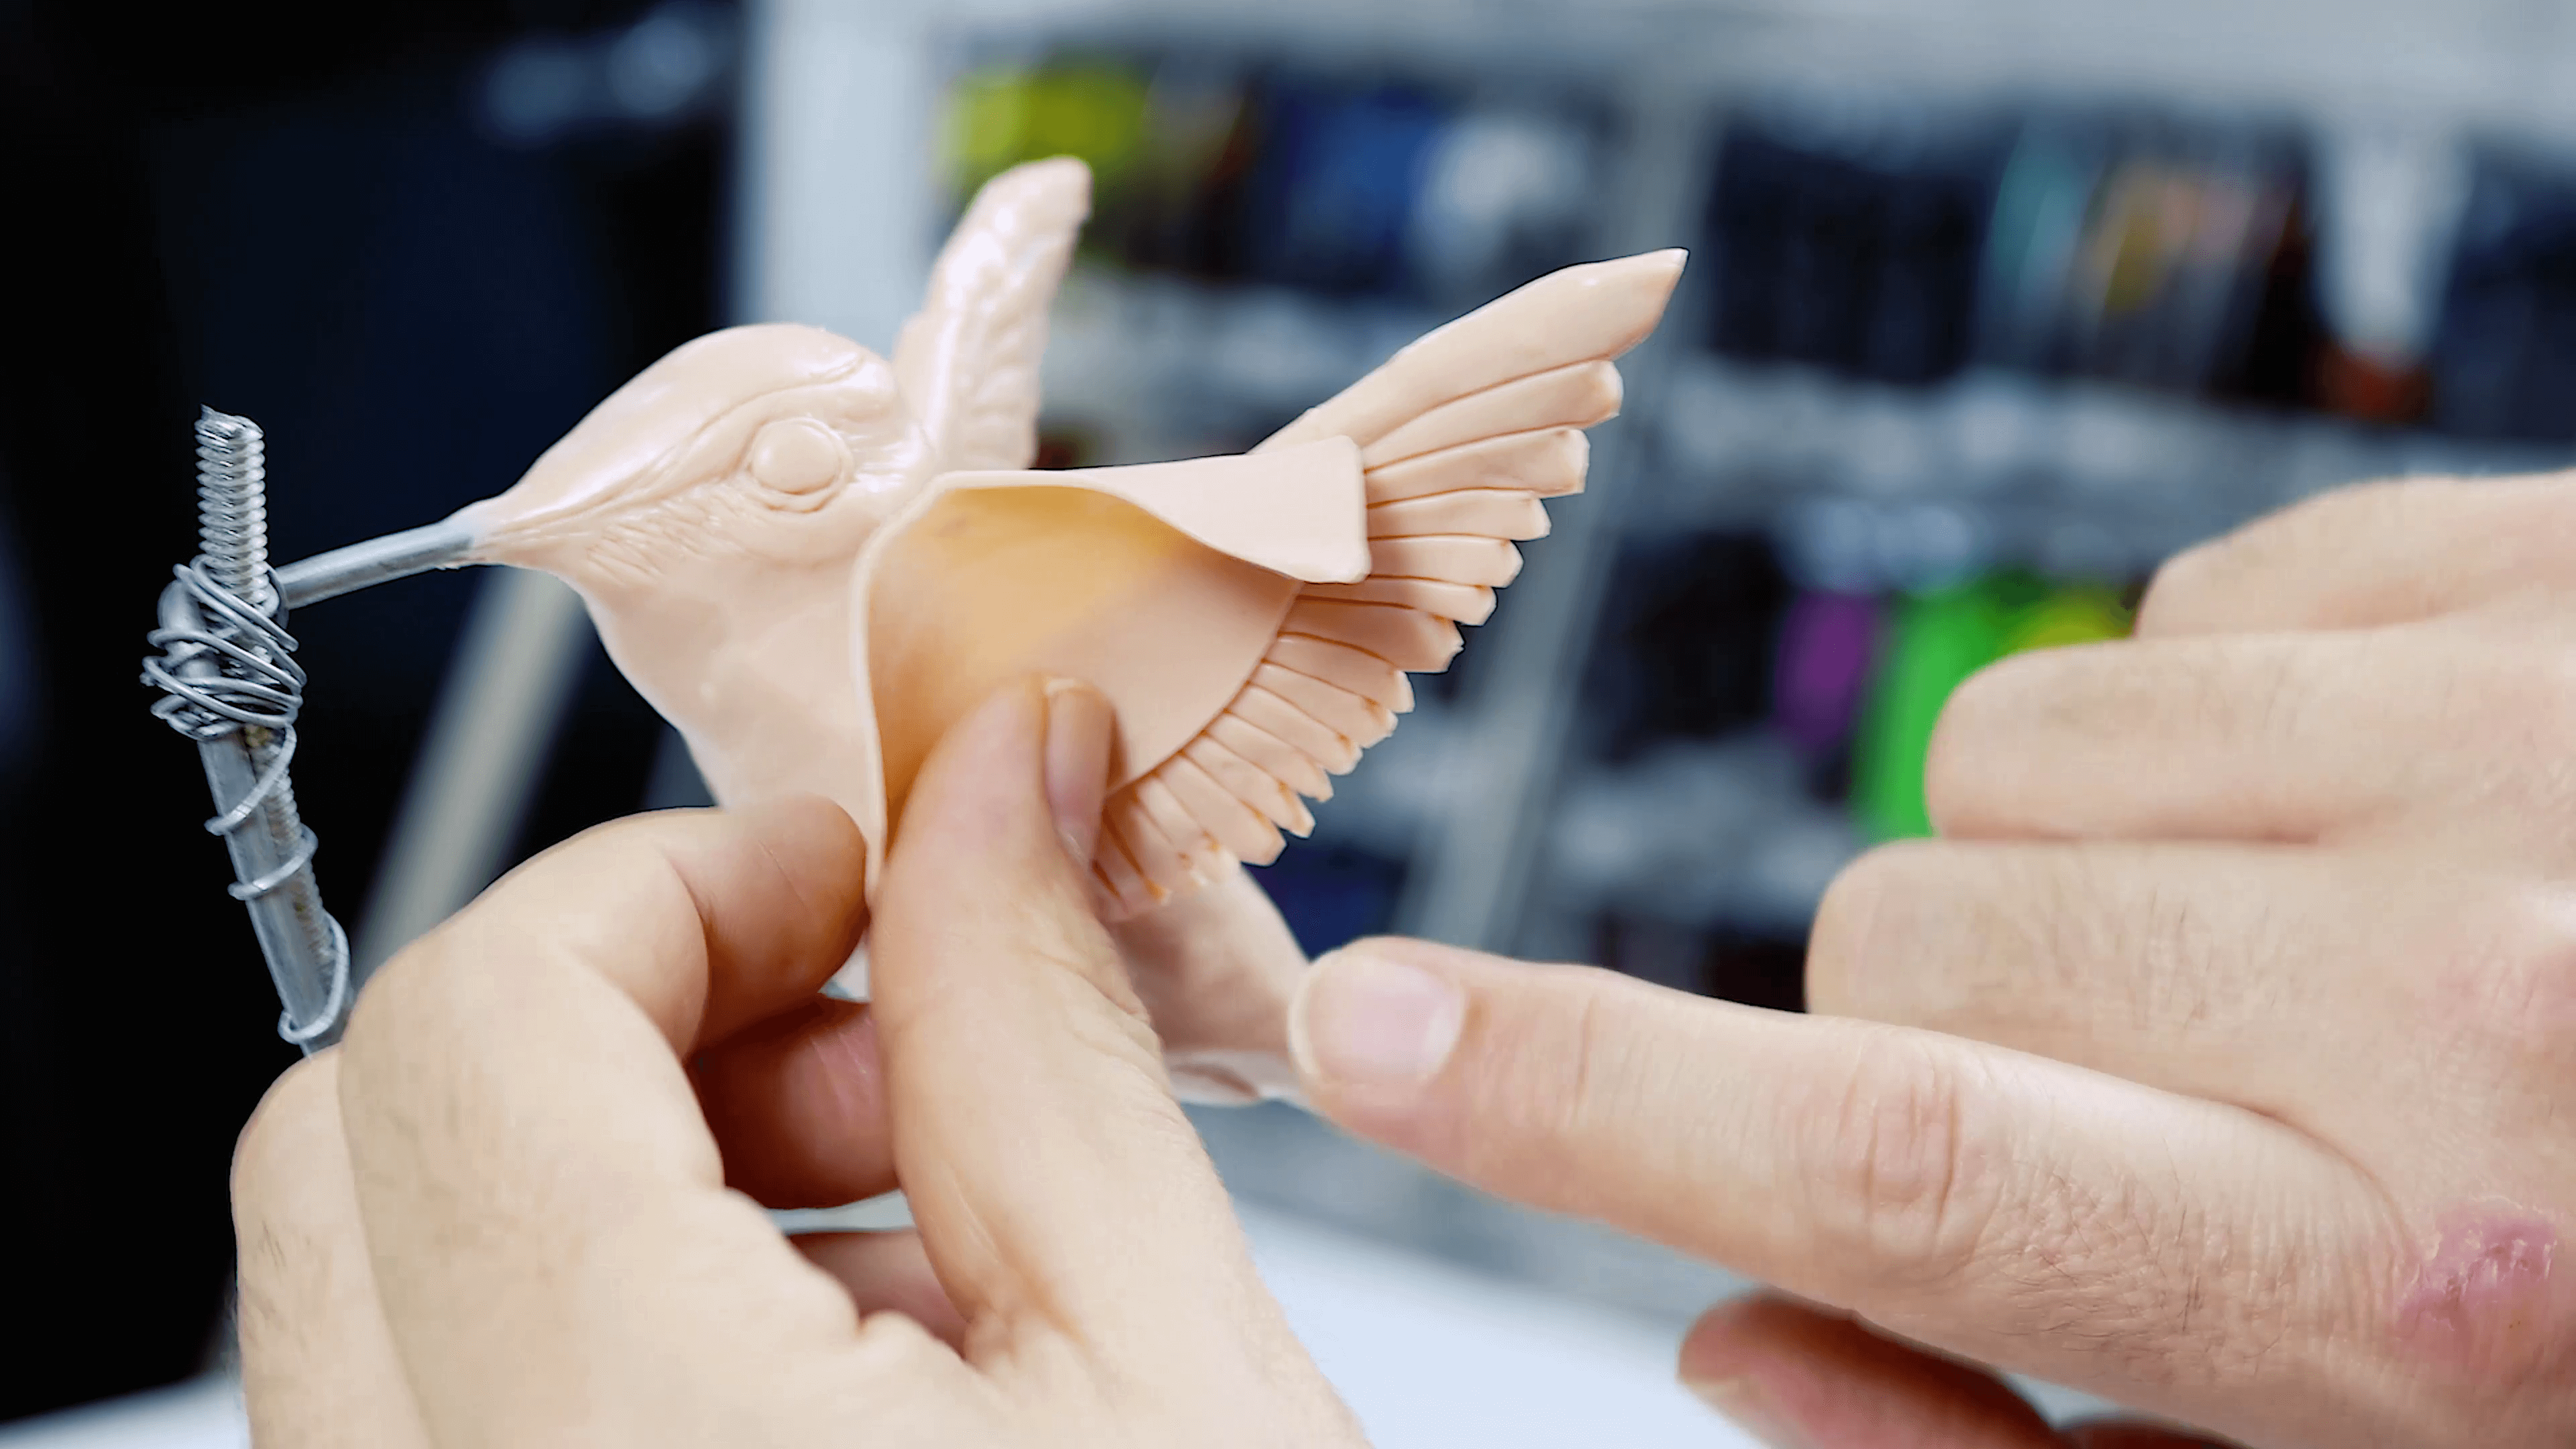
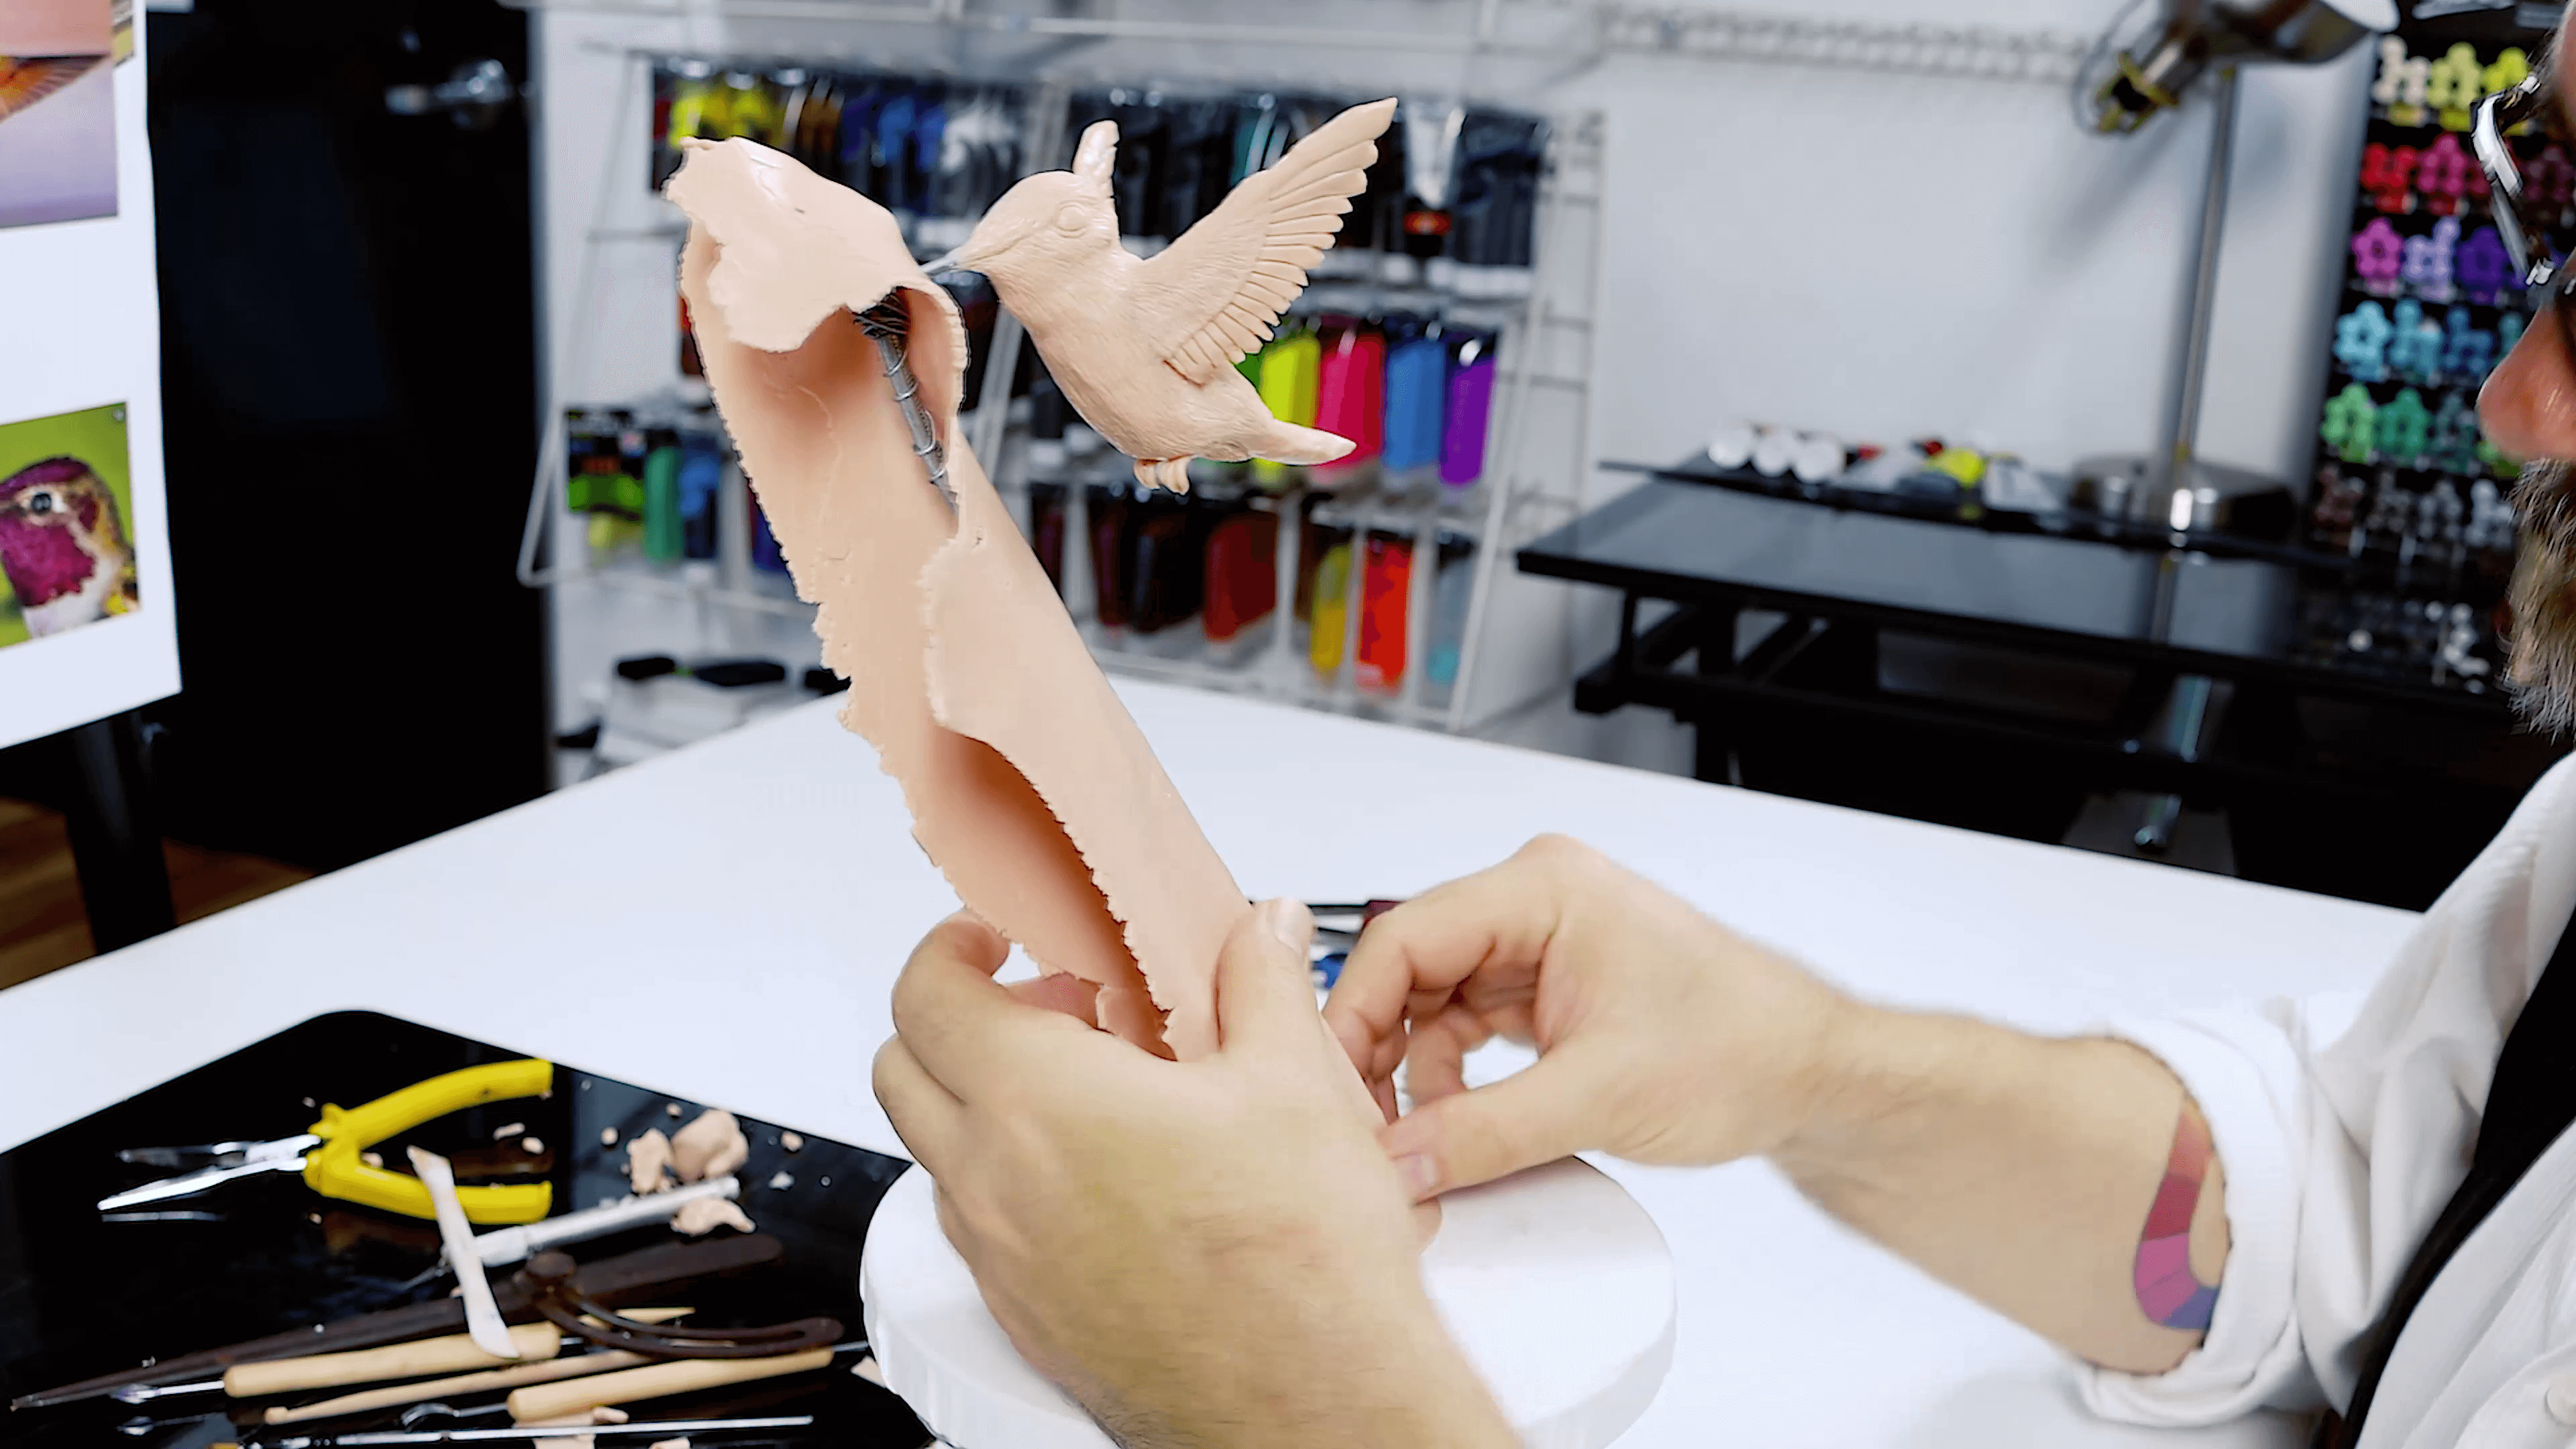
Once the body is done, warp clay around the wings and trim. Then bring the wing onto the body.
When you’re happy with shape of the wings, tail, and body, use a pin tool to mark up the eye positioning. Use the variety of tools in the set to mould the clay into the concave shape in the orbital region of the head. Then, push in a ball of clay in for the eye.
Once the eyes are in, begin marking up the wings. Mark in the covert area and then the primaries. Shape the end of the primary feathers by snipping the corner off each feather and then smooth them off.
Lay a thin sheet of clay over the covert area of the wing and carefully cut it to shape on the front and rear. Blend the edge and then smooth it out onto the body. Repeat for the other wing.
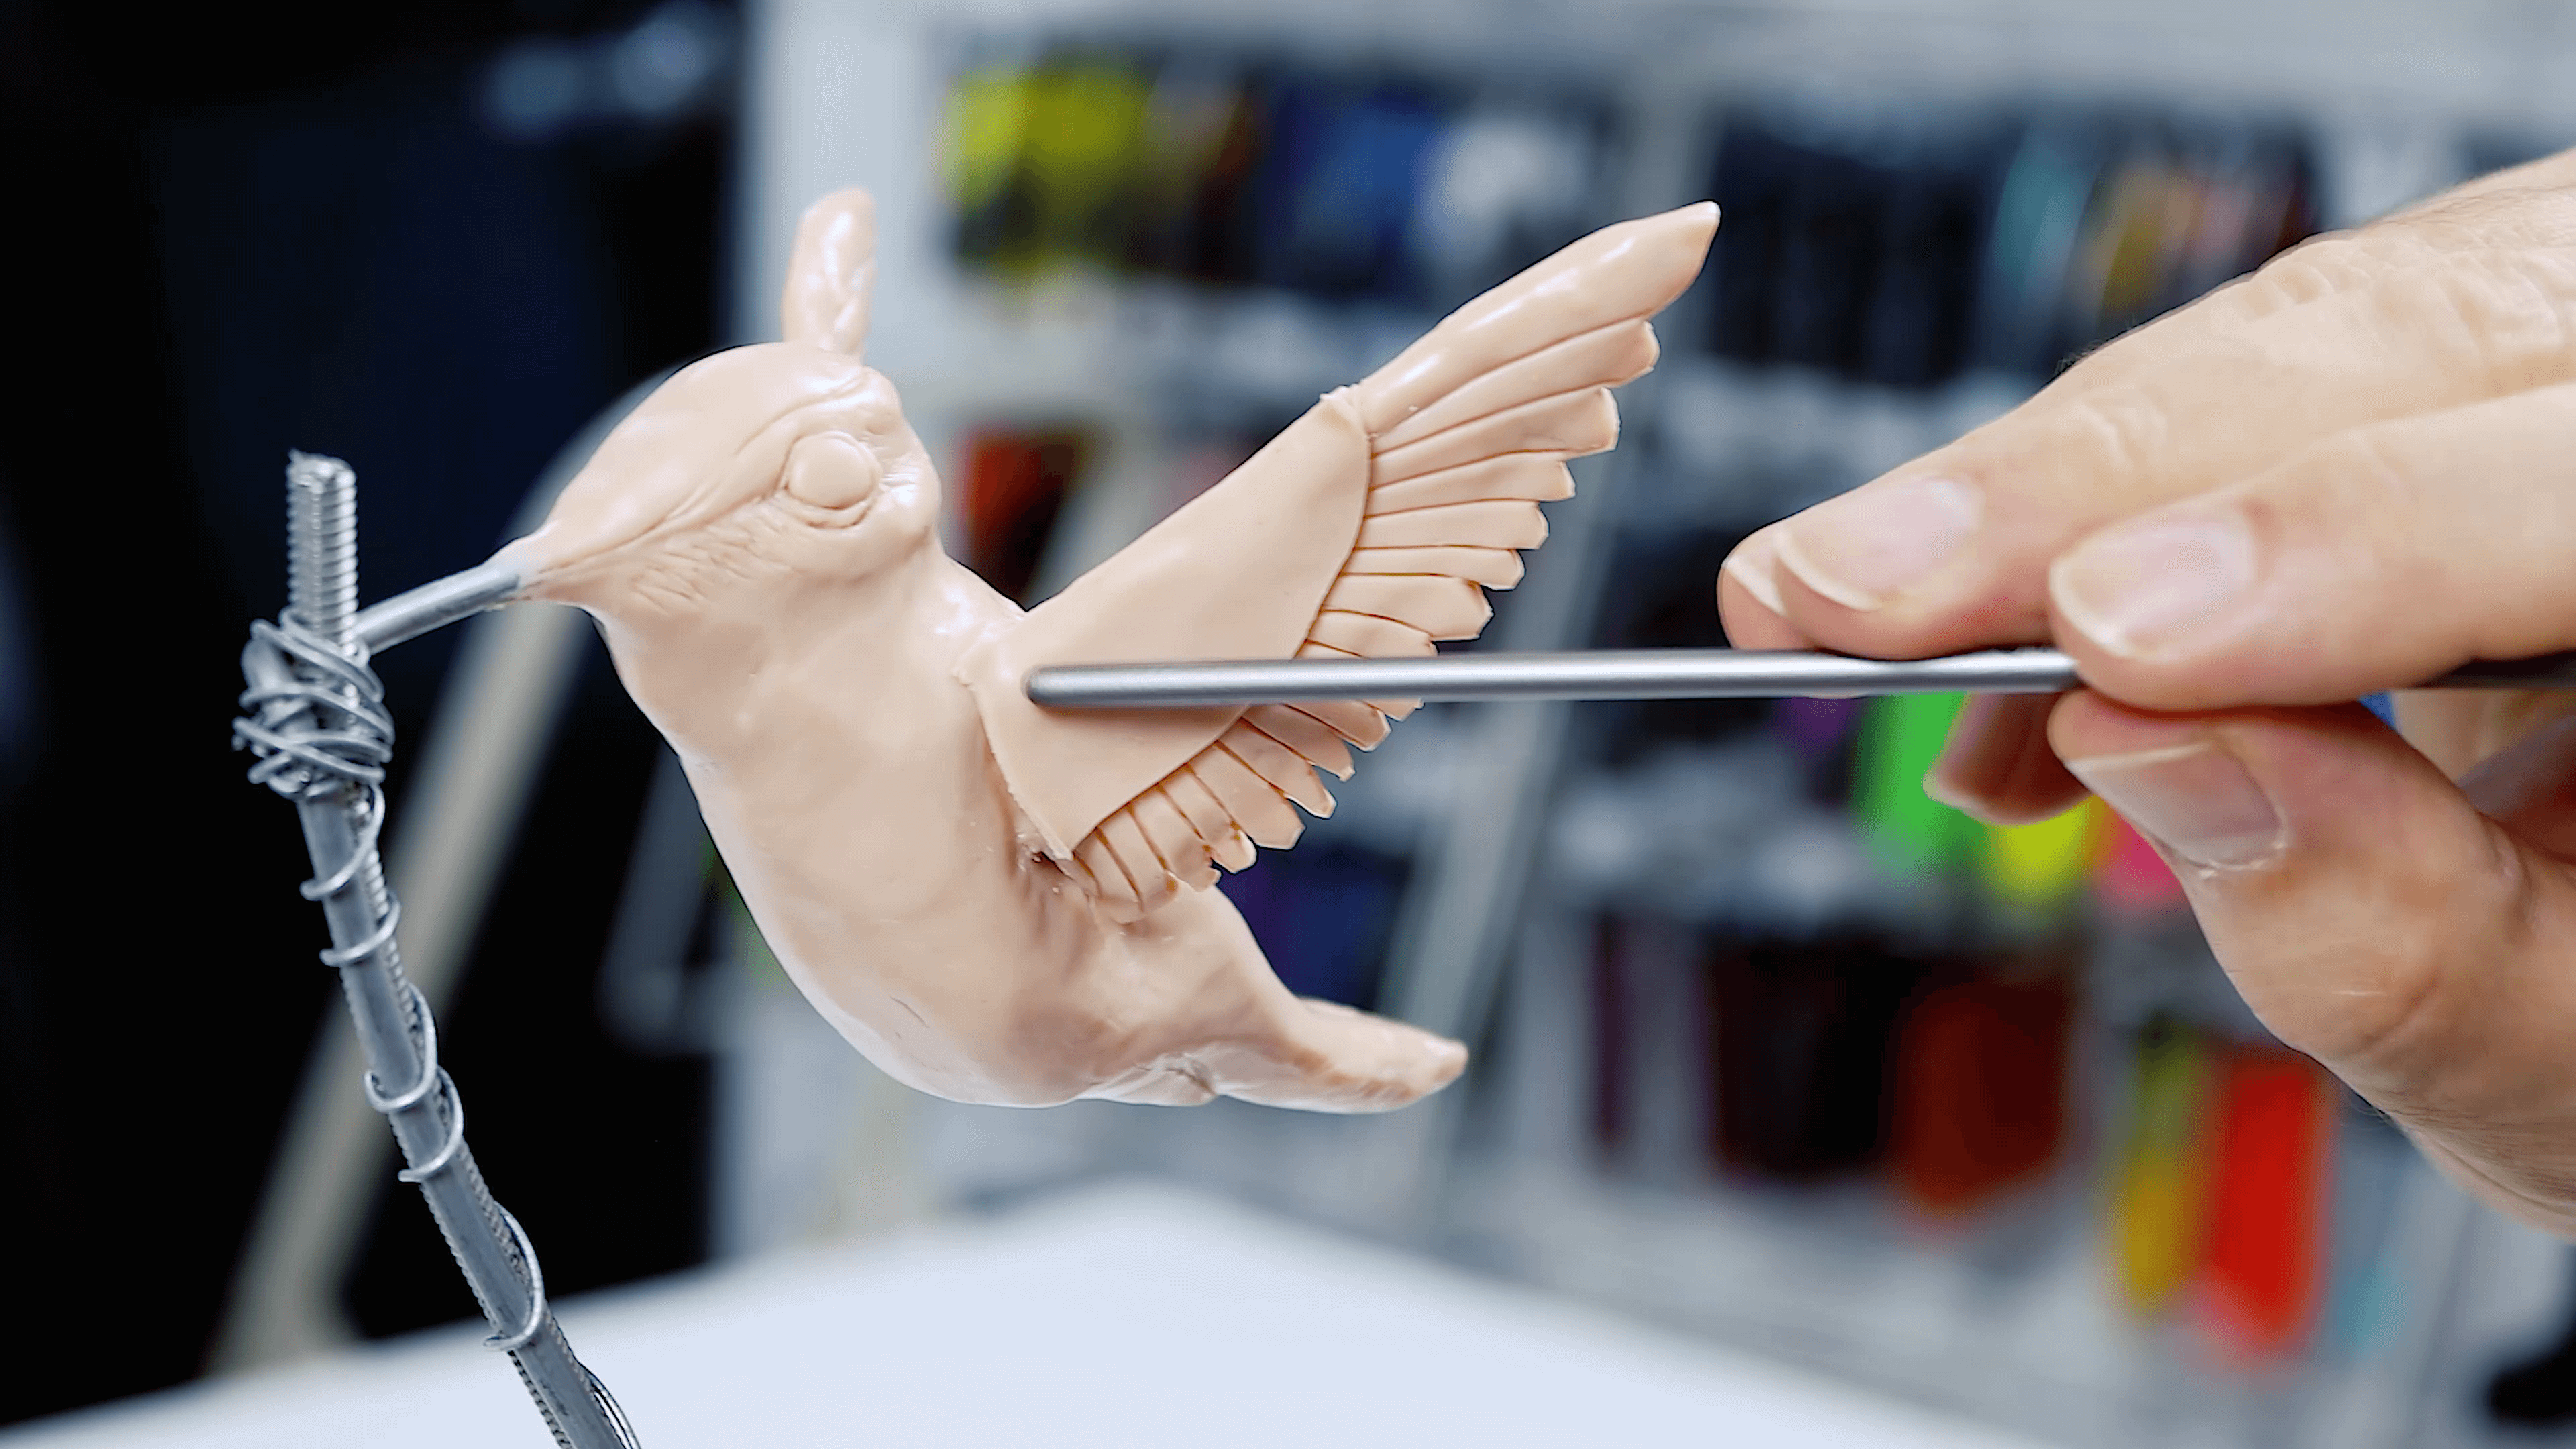
To create the feet, shape three small tubes and press them onto the appropriate position on the bird. Blend the feet from the rear.
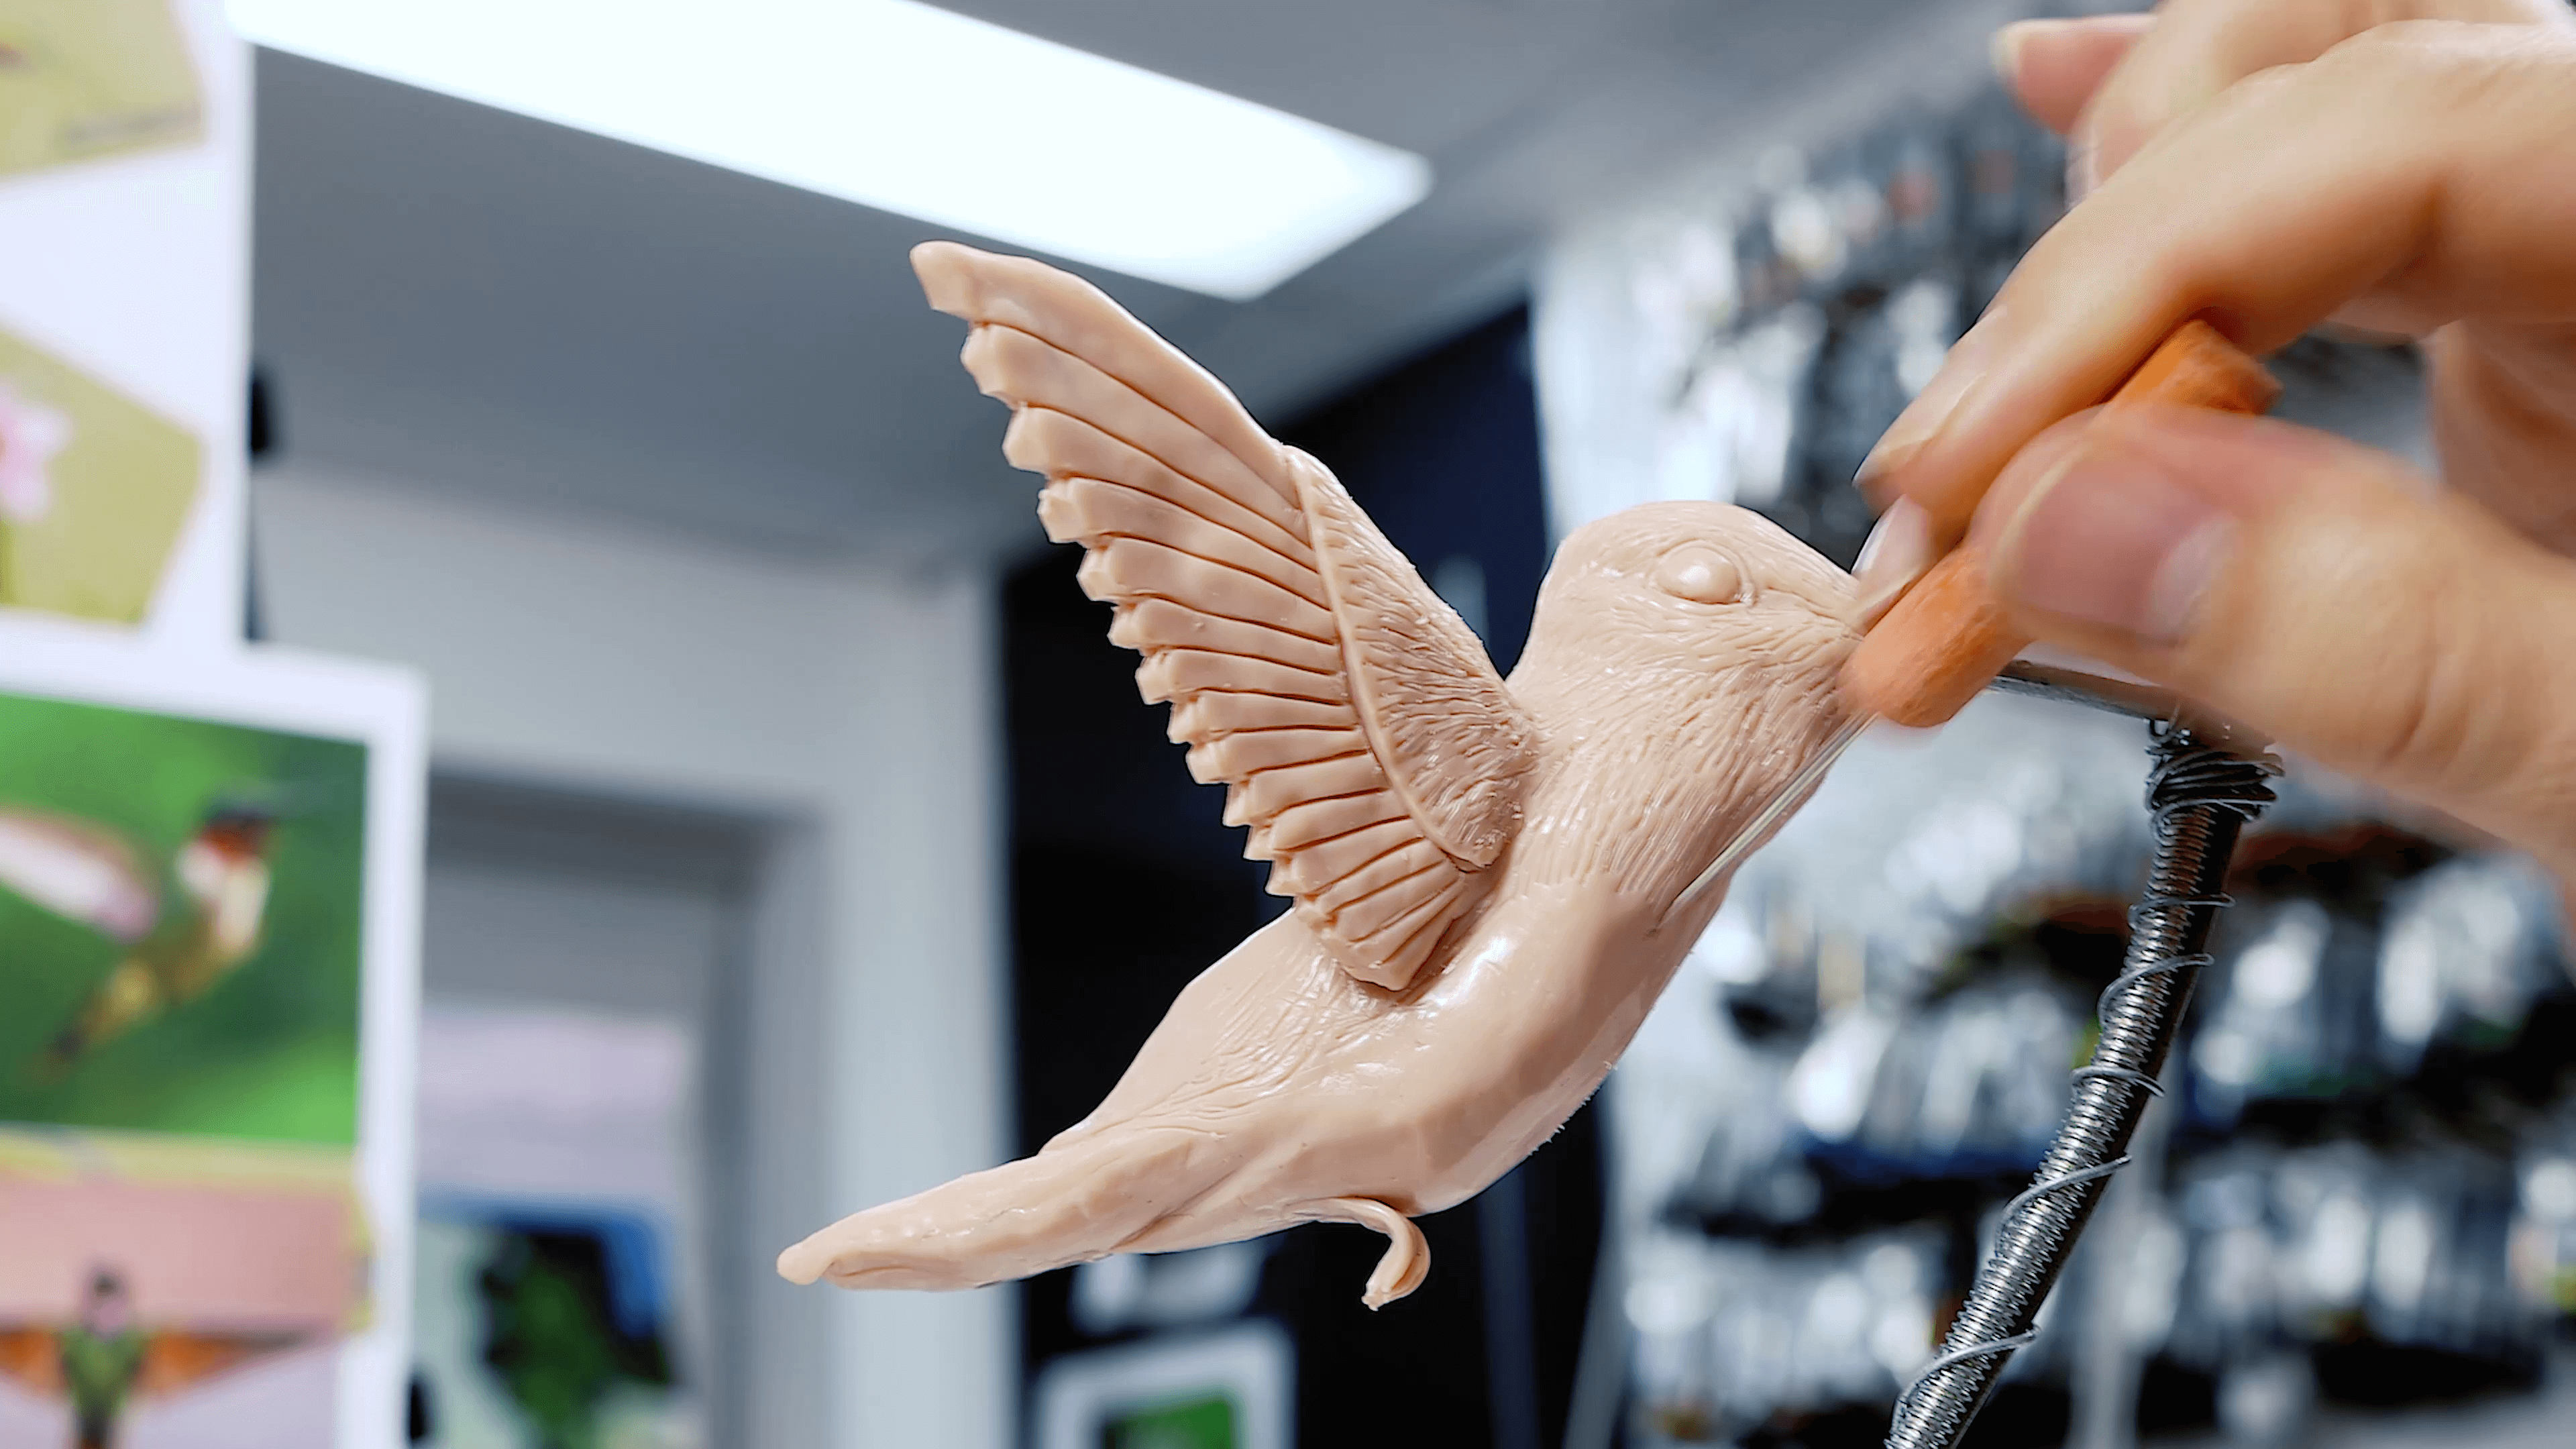
Finally, use the pin tool to suggest the fine plumage on the bird, starting from the head and working down the body. Add diagonal strokes for the tail feathers.
Then, you can move into the branch. Create a long sheet of clay approximately 5mm thick and wrap it around the booker rod. Cut away the excess.
To add some buds on the branch, wrap tie wire onto the booker rod and twist it back onto itself. Then, pack clay onto the wire supports and form the clay into bud shapes.
Next, create a series of petal shapes by flattening out balls of clay and arrange them into flower shapes on the branch.
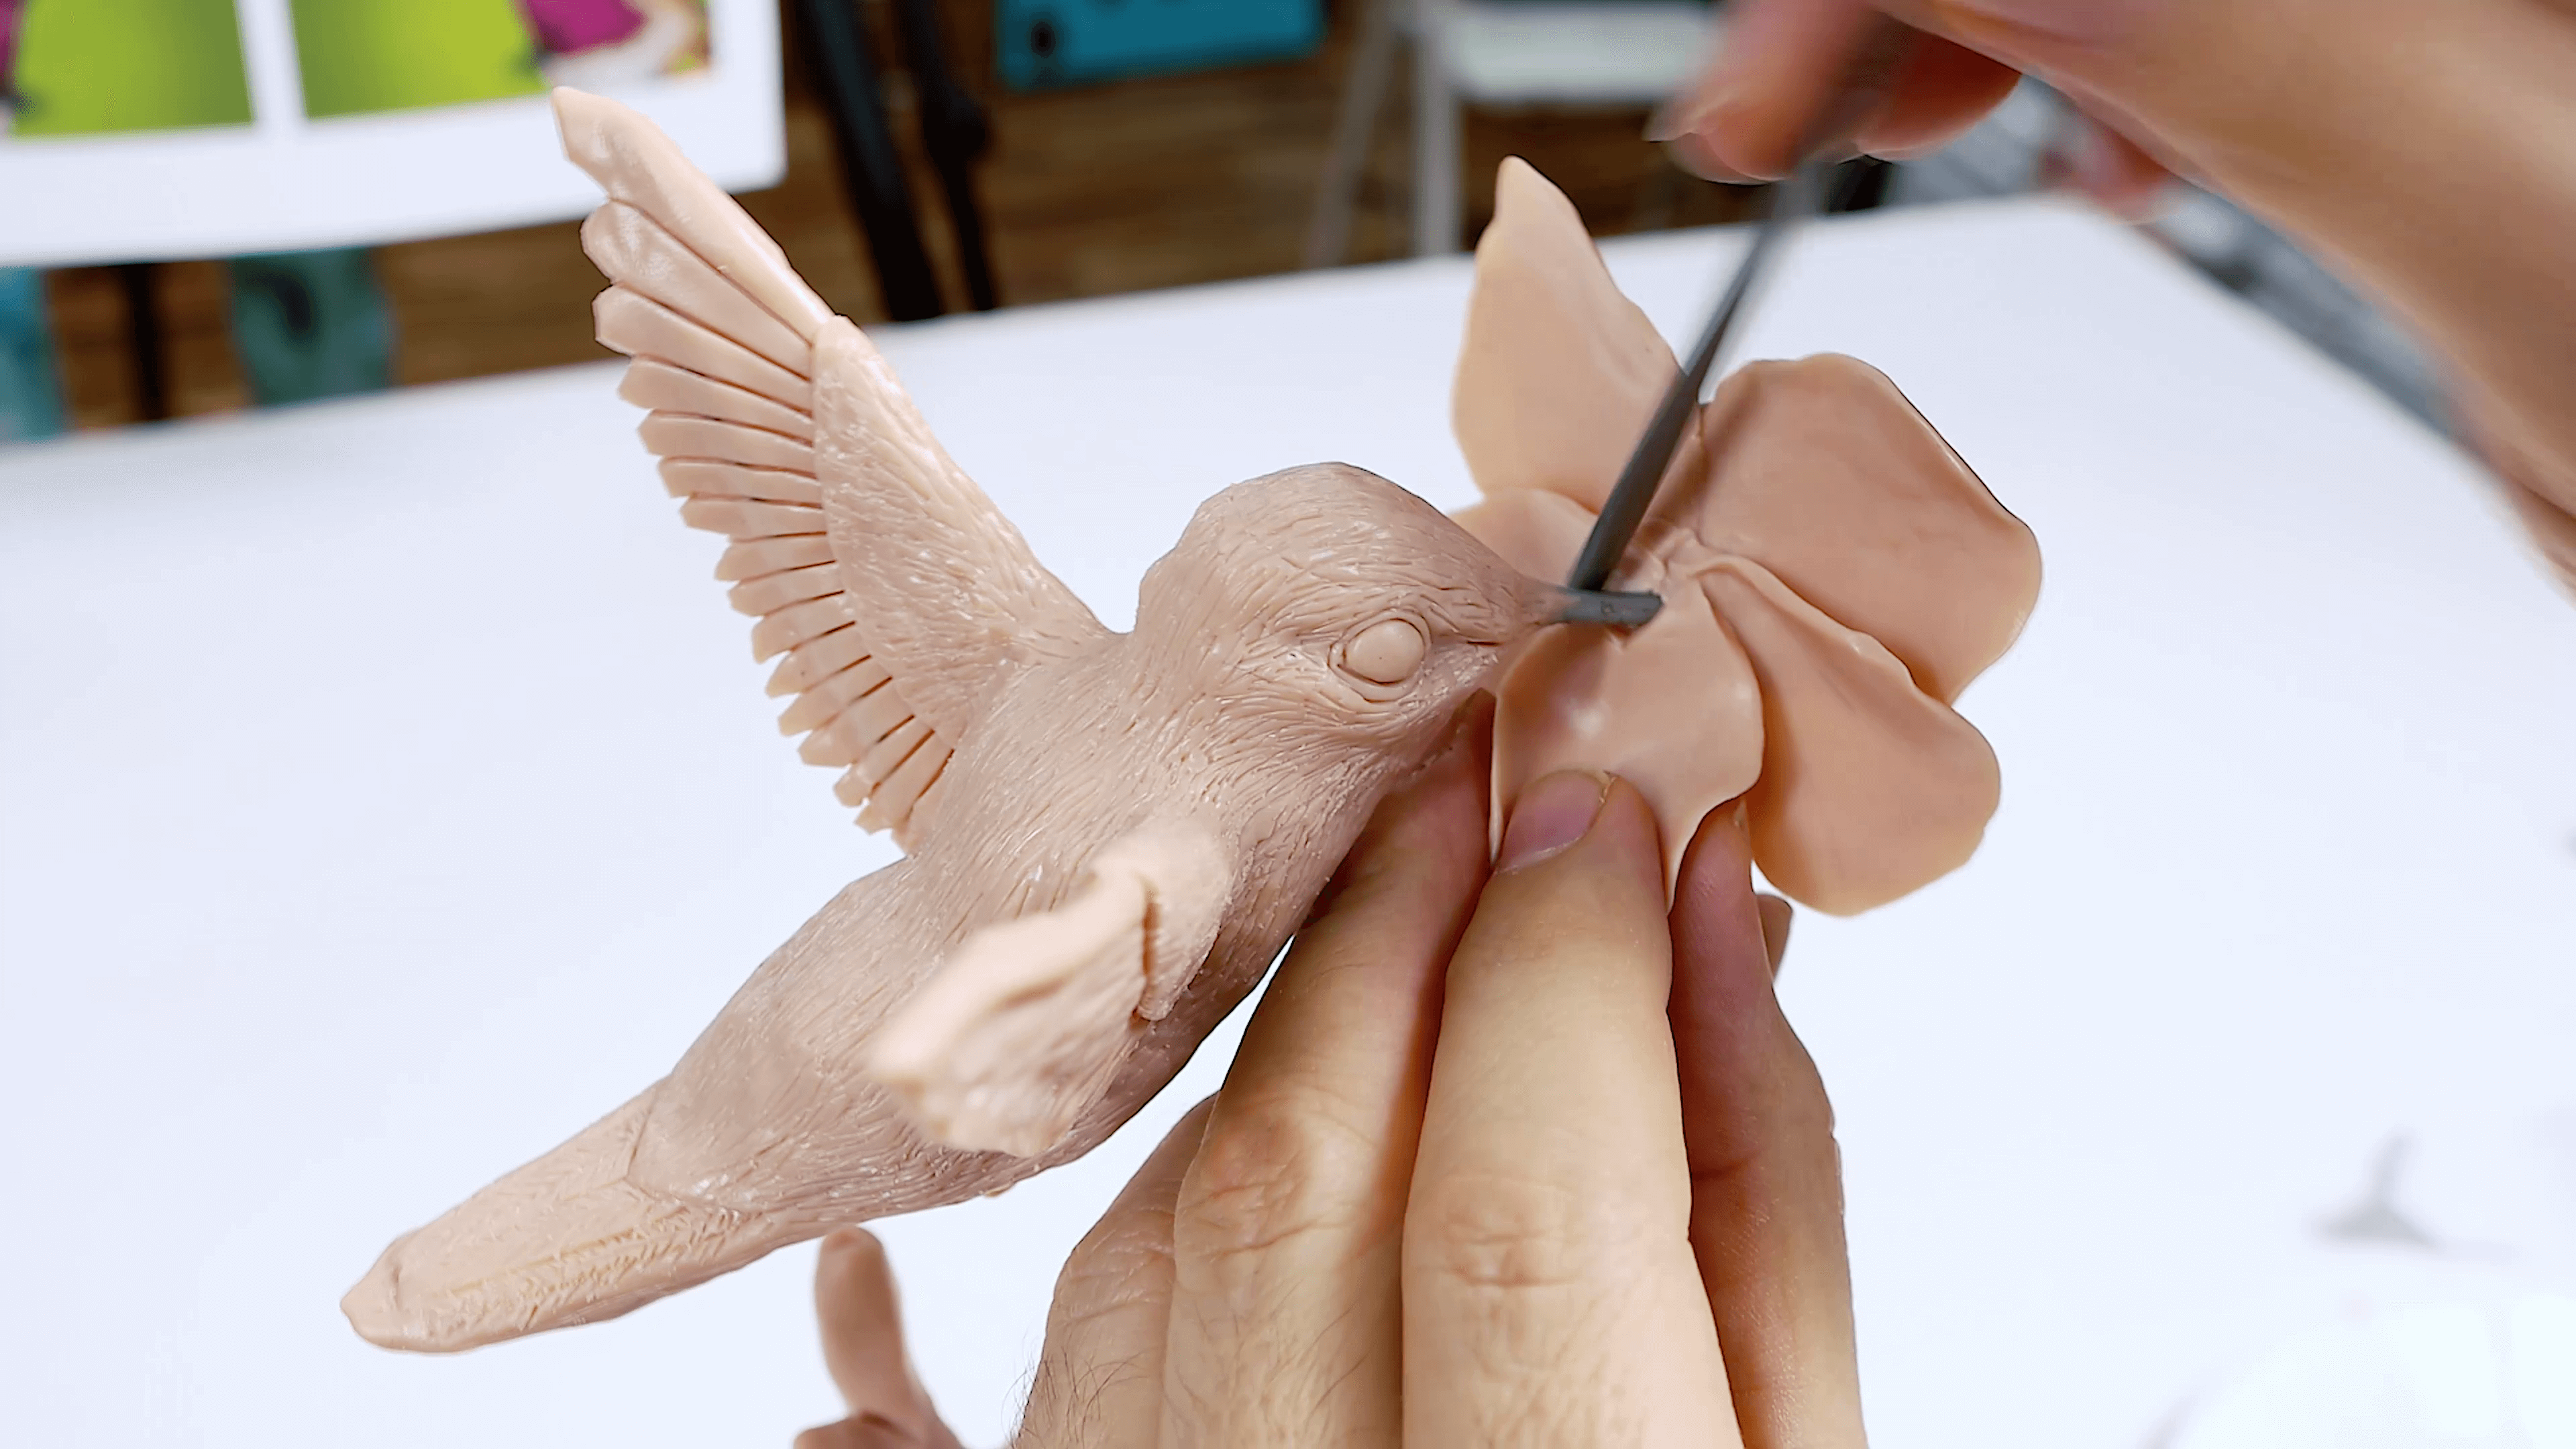
To create the leaves, create crescent shapes and mark up the mid rib and veins using the pin tool. Add them to the branch.
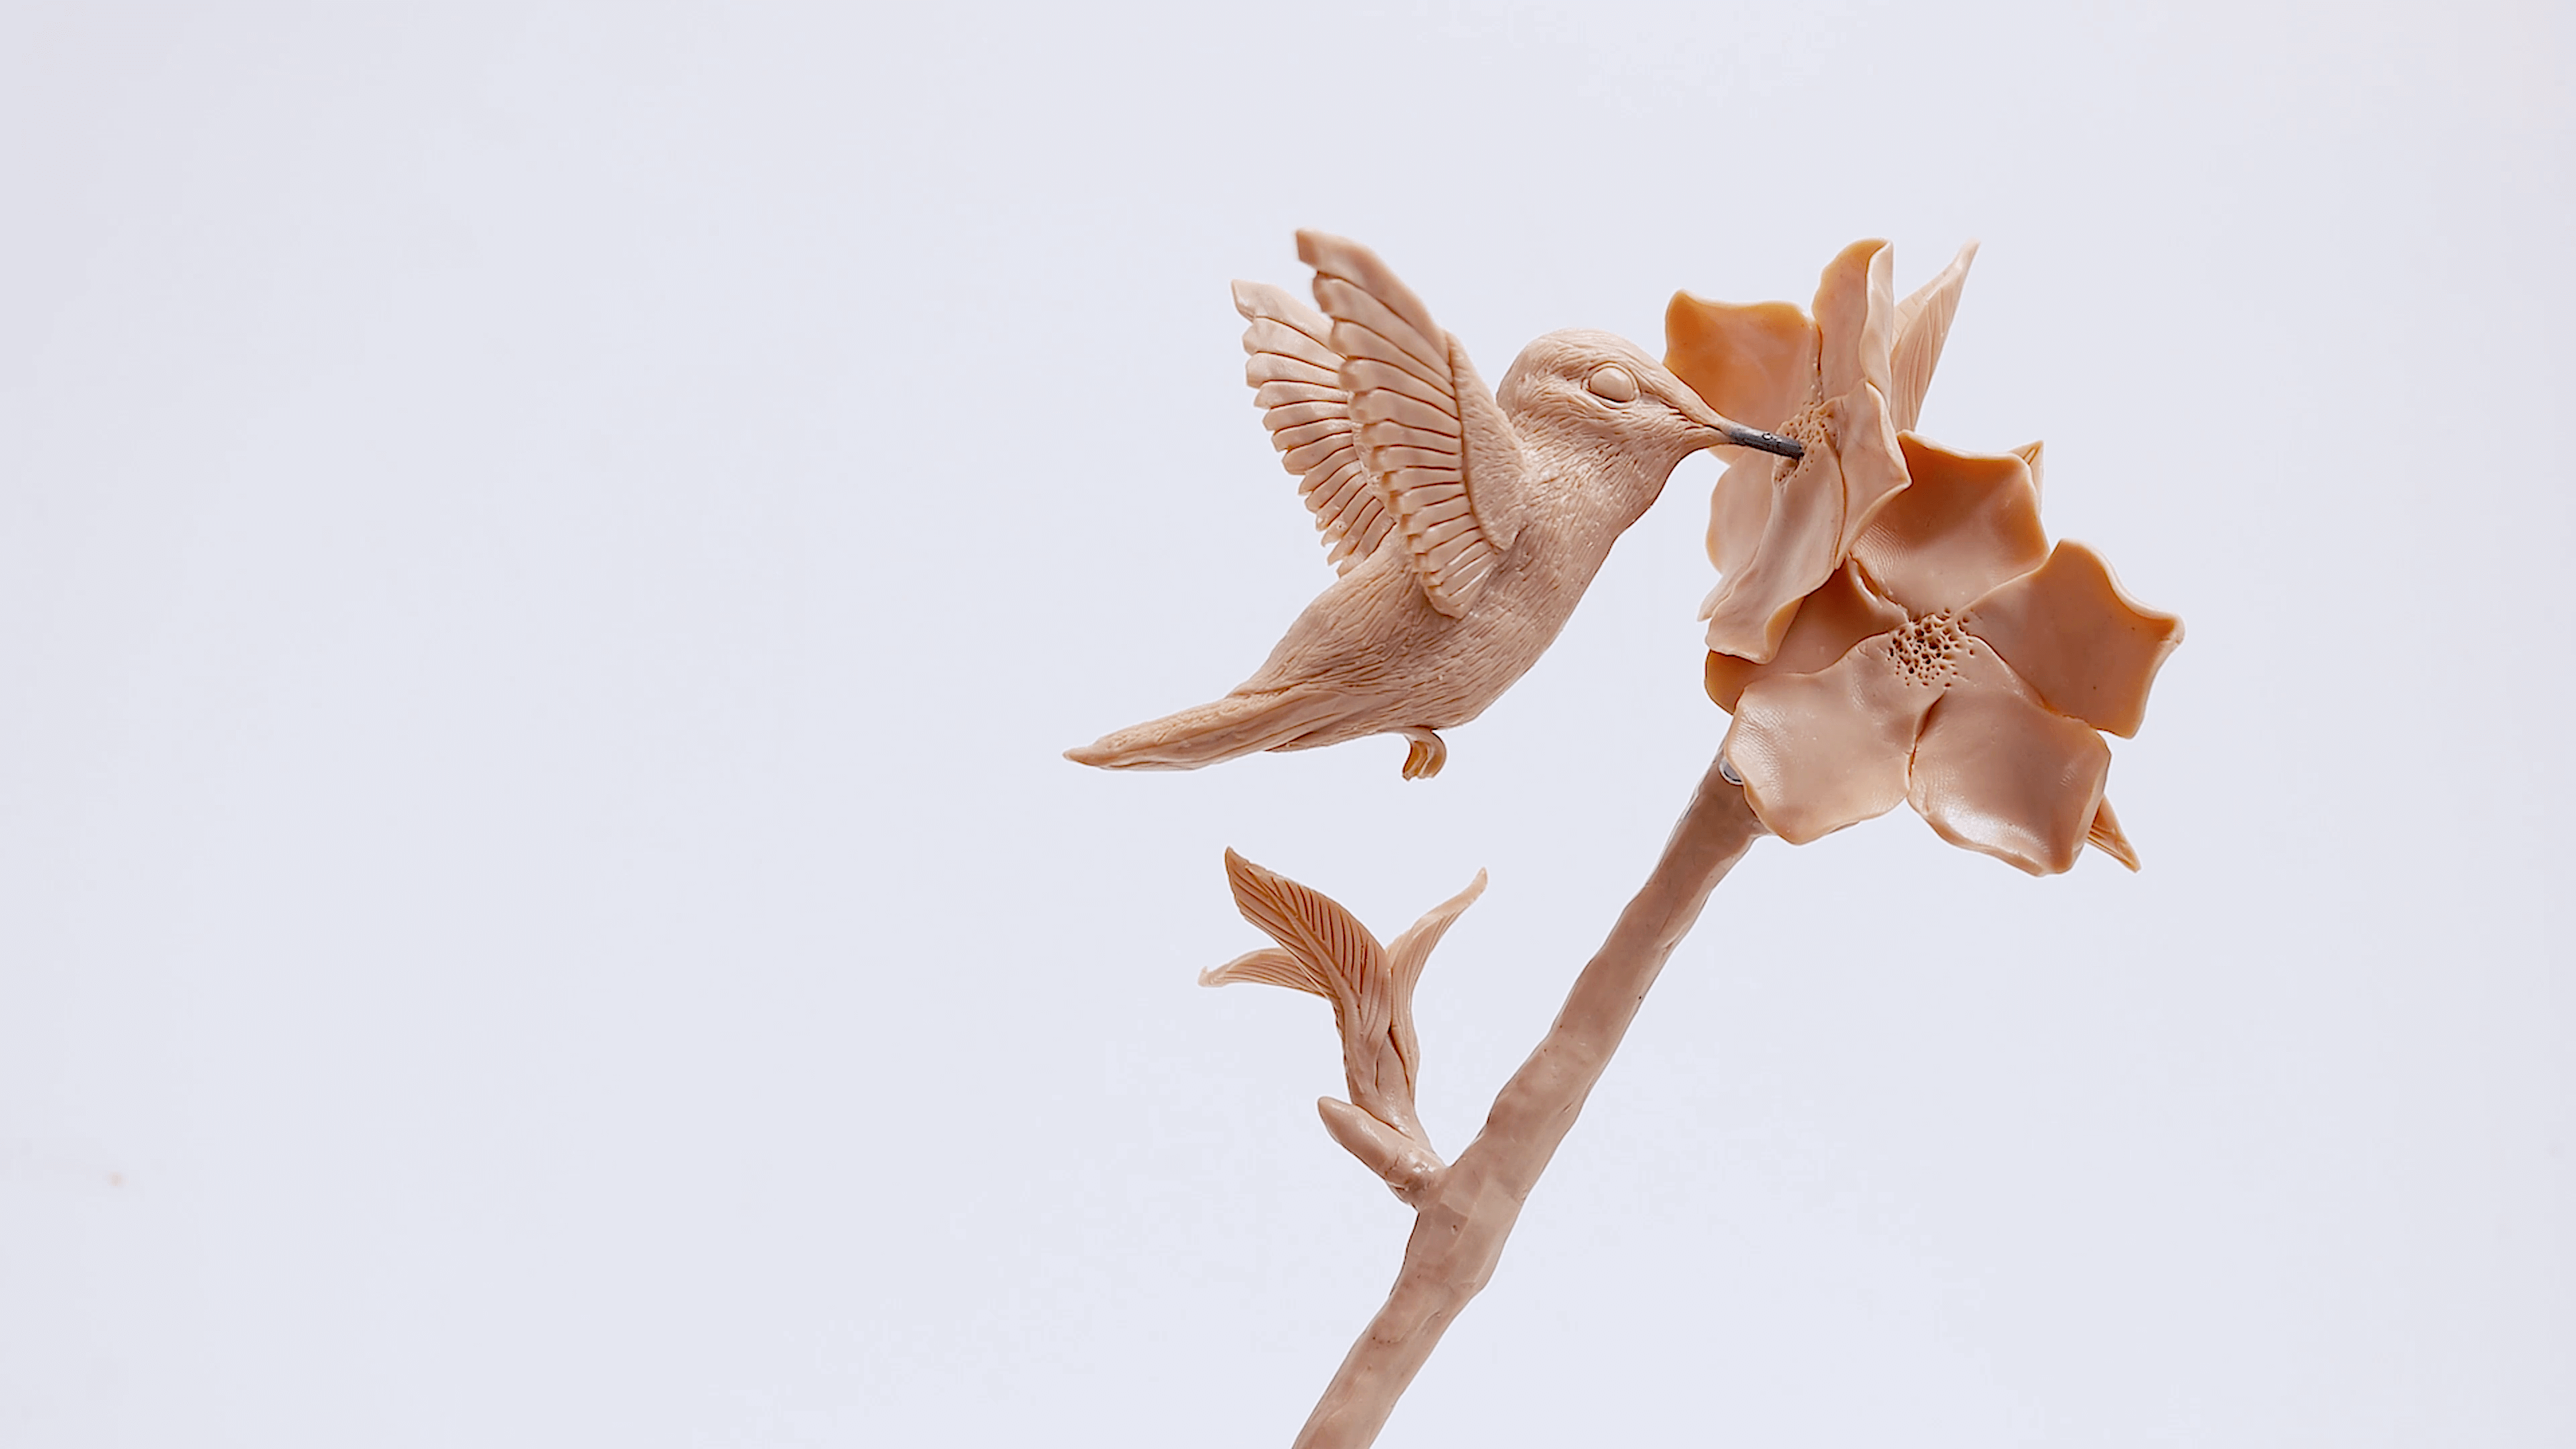
Finally, bake the sculpture for 45 minutes at 130 degrees or 266 degrees Fahrenheit on the fan forced setting. Once the clay is baked, turn off the oven and allow it to cool down slowly. This will help minimise the chance of any fine cracks.
And you’re all done!
Materials:
- MMSP6401 Make n Bake Polymer Clay – Beige
- CMRD0020 Round Canvas 20cm (7.9in)
- MMSP0022 Plaster of Paris 1kg
- MMSP0027 Pottery Tool Set 23pc
Extra materials:
- Mixing bowl
- Latex gloves
- 2/16 booker rod with matching nuts and washer
- Wire coat hanger
- Tie wire
- Clear tape
- Flat nose pliers
- Hobby knife
- Clay press (or rolling pin)
- Banding wheel (or large dinner plate)
- Dividers (or ruler)
You may also like


How to use ceramic paint on a thrifted plate

