


How to paint a flamingo sculpture with acrylics
Firstly, create a mix of Lamp Black and Pink to create a grey tone and use the largest flat brush to paint the flamingo. Add a little water to help the paint flow into all the crevasses. Once covered, allow it to dry thoroughly.
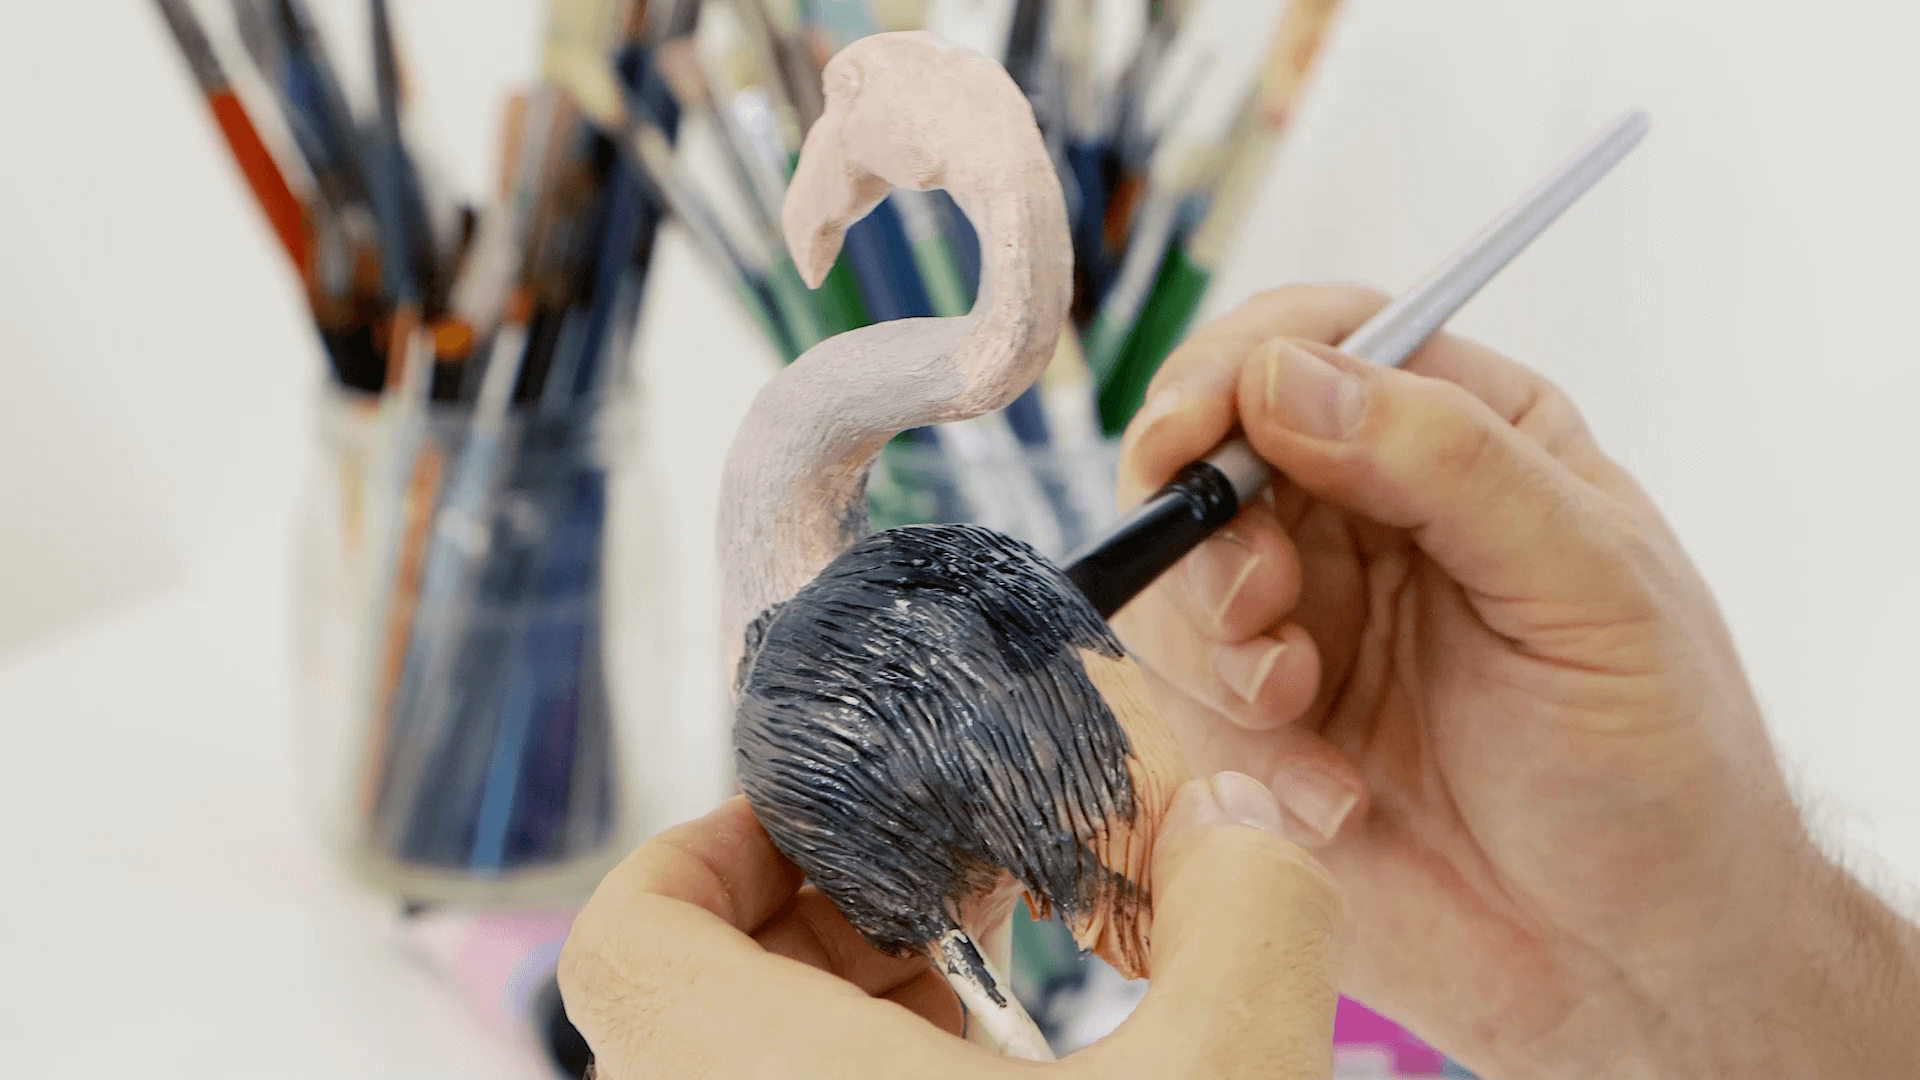
Create a cream colour by mixing Titanium White, a touch of Raw Sienna and Lamp Black. Do not mix any water into the mix and dry brush over the black coat. As a tip, charge the brush with paint then wipe the excess off onto a paper towel and use the flat part of the brush to paint. This way the paint will stay out of the grooves of the sculpture. Allow this to dry.
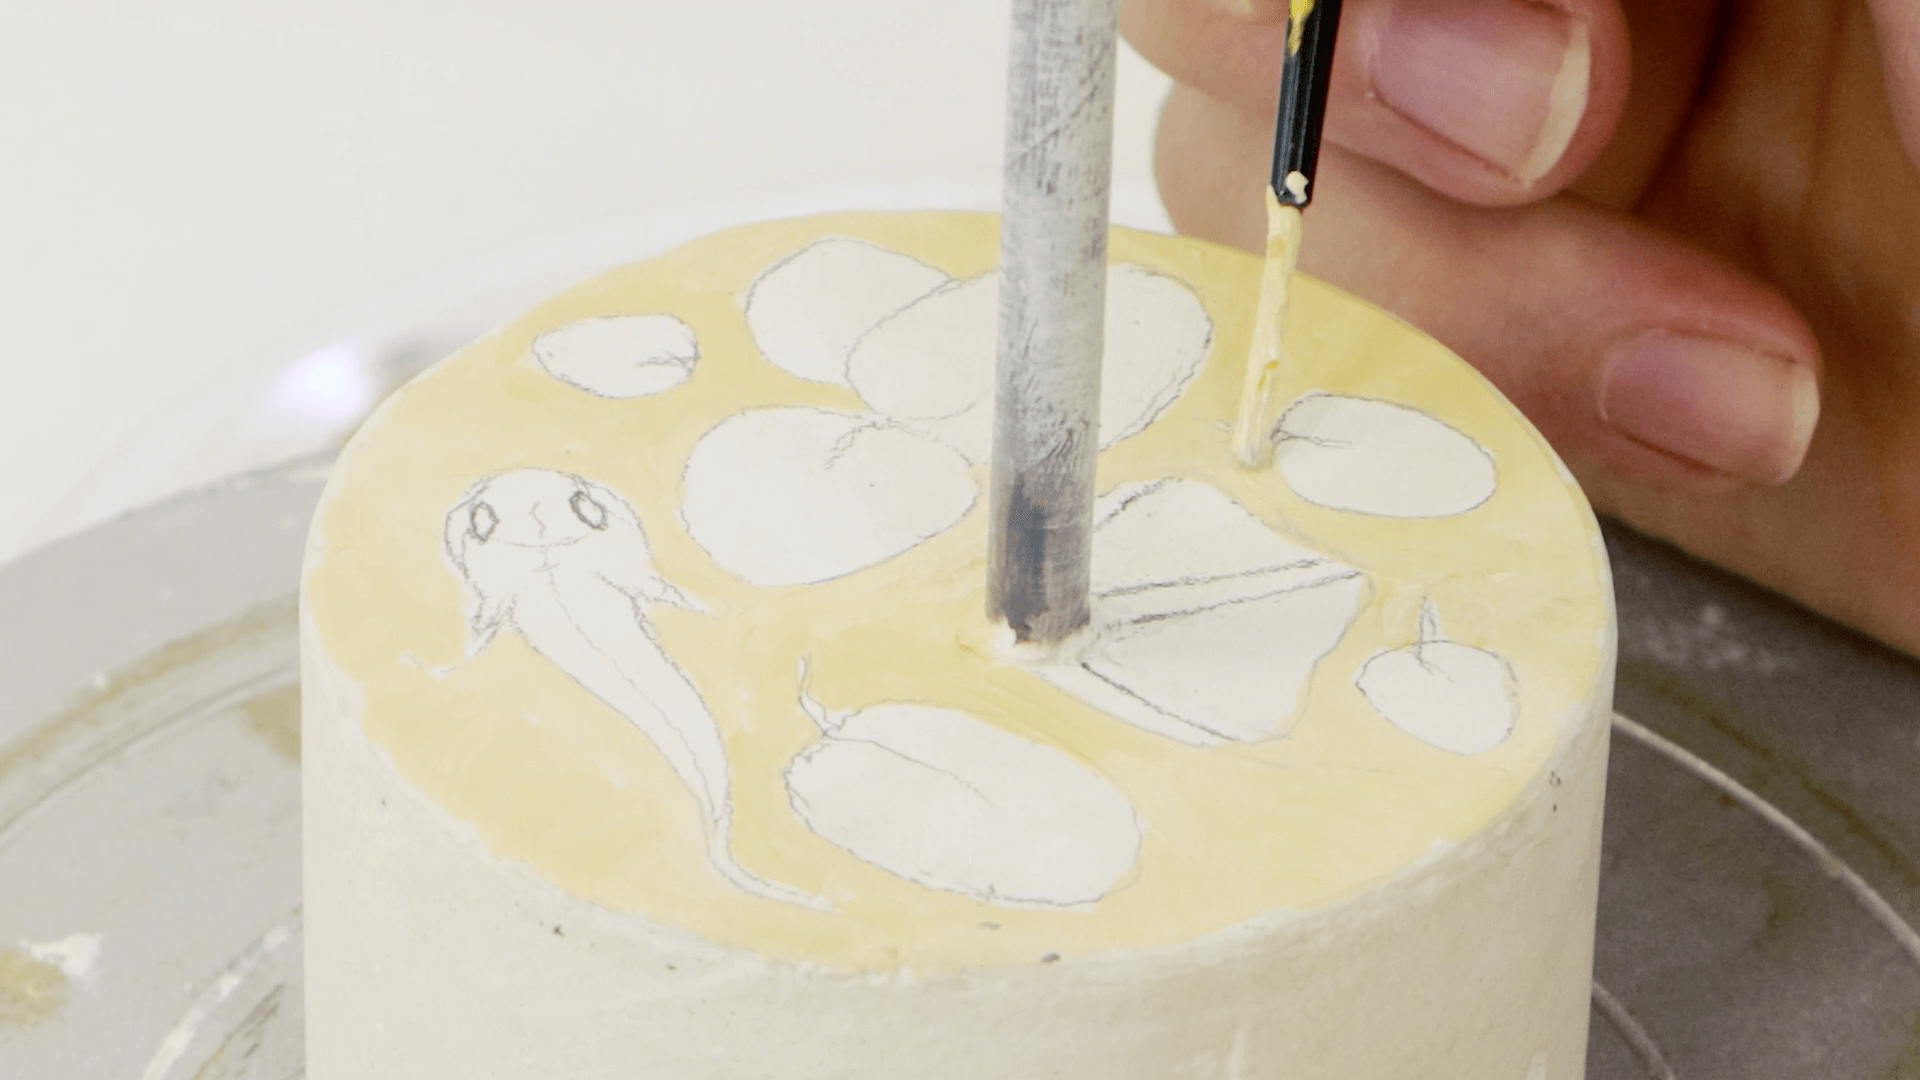
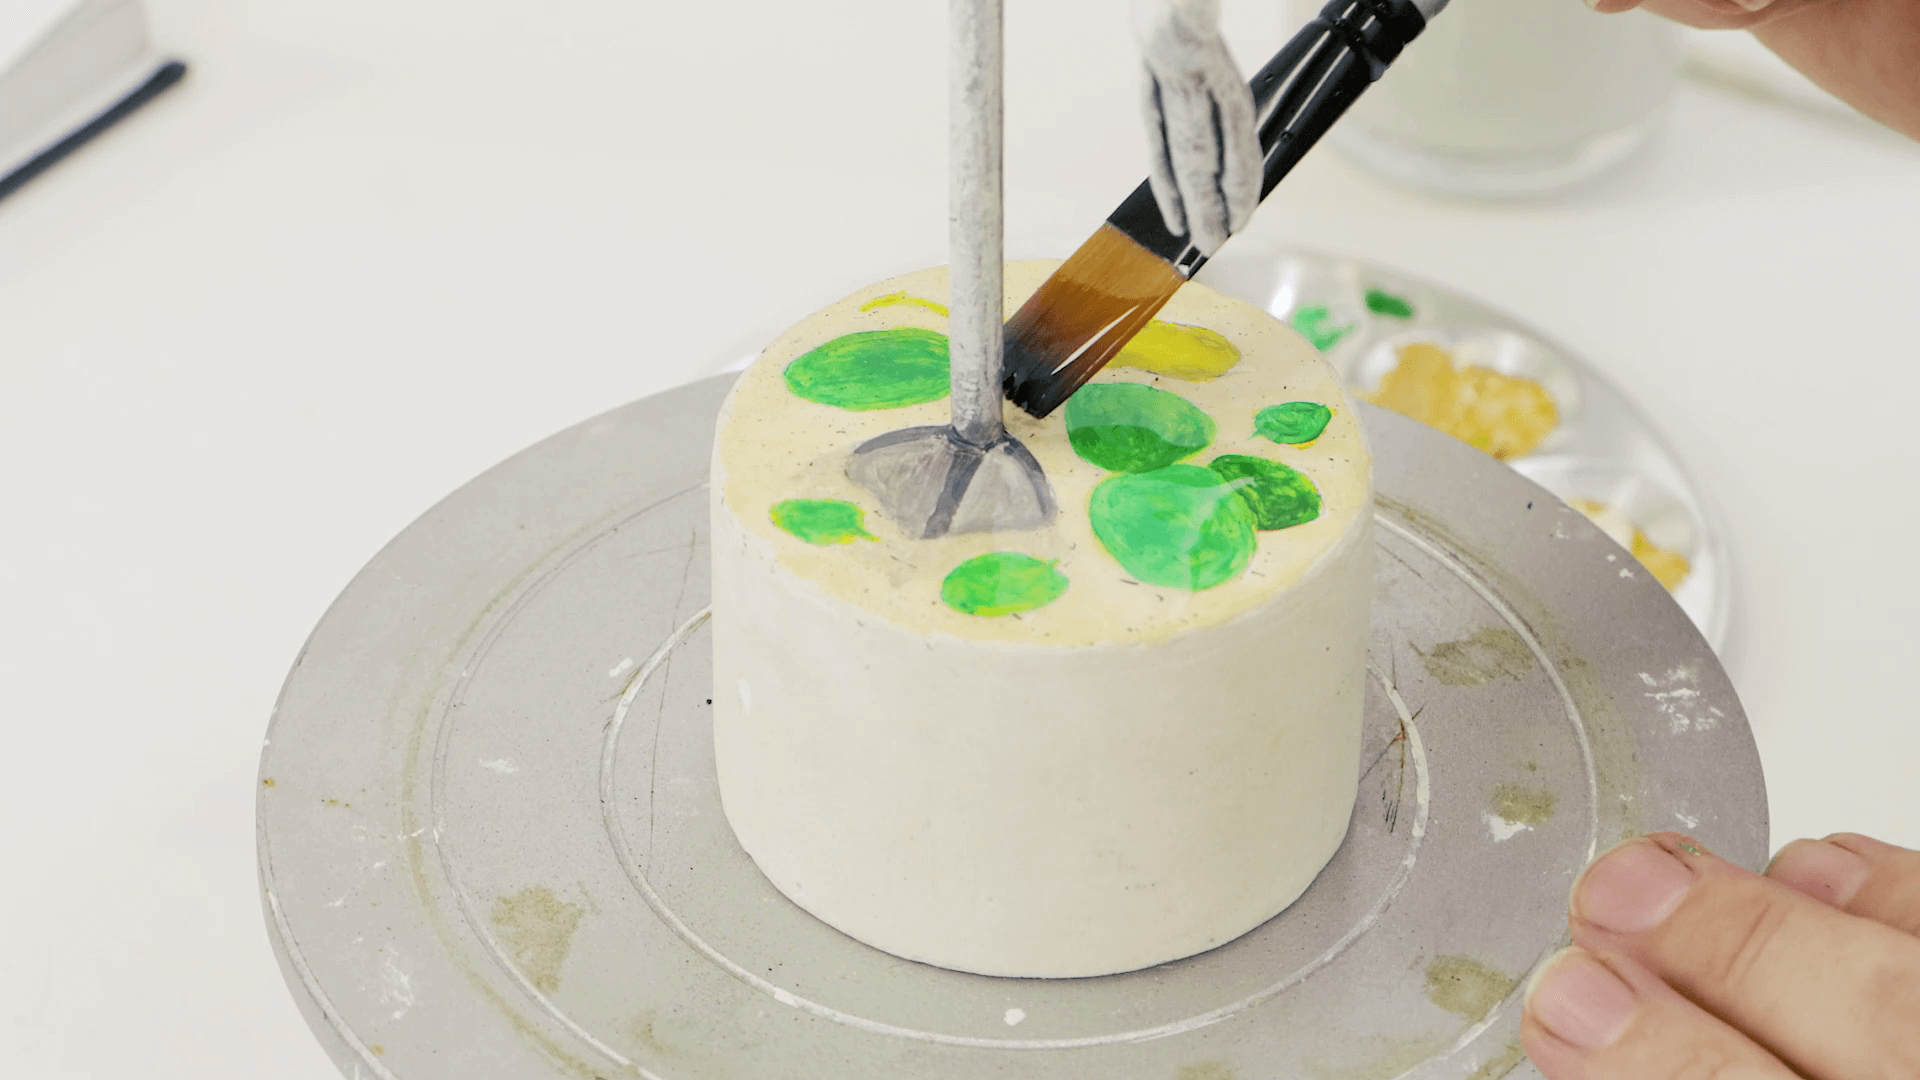
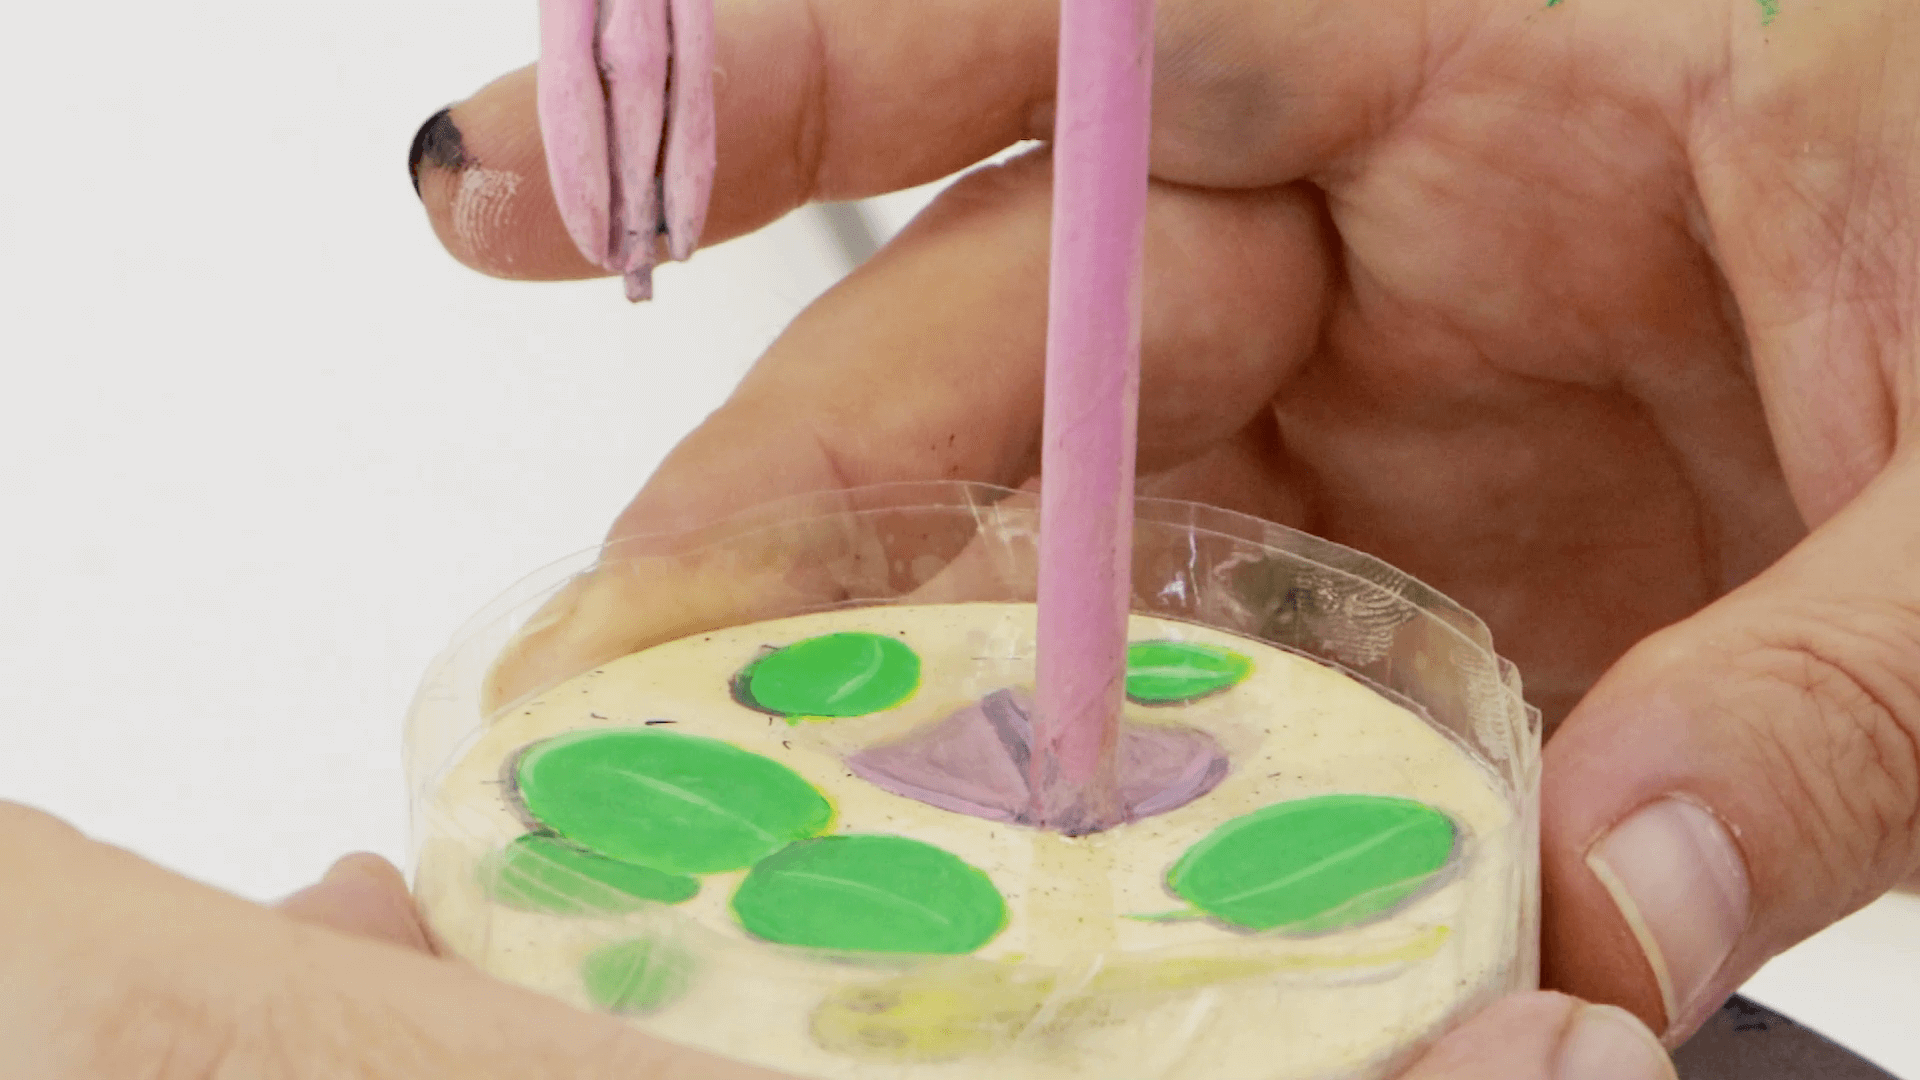
While this coat is drying, you can start on the base. If you refer to the outline, which we have provided on the project webpage, you will see a foot, water plants and a fish design. You can draw this on using the HB pencil.
To suggest that the flamingo is standing on sand, mix some Titanium White with touch of Medium Yellow and Raw Sienna. Paint this colour around the fish and water plants. To create some interest, we fleck some black over the base with a clay spoolie brush, but an old toothbrush would work too.
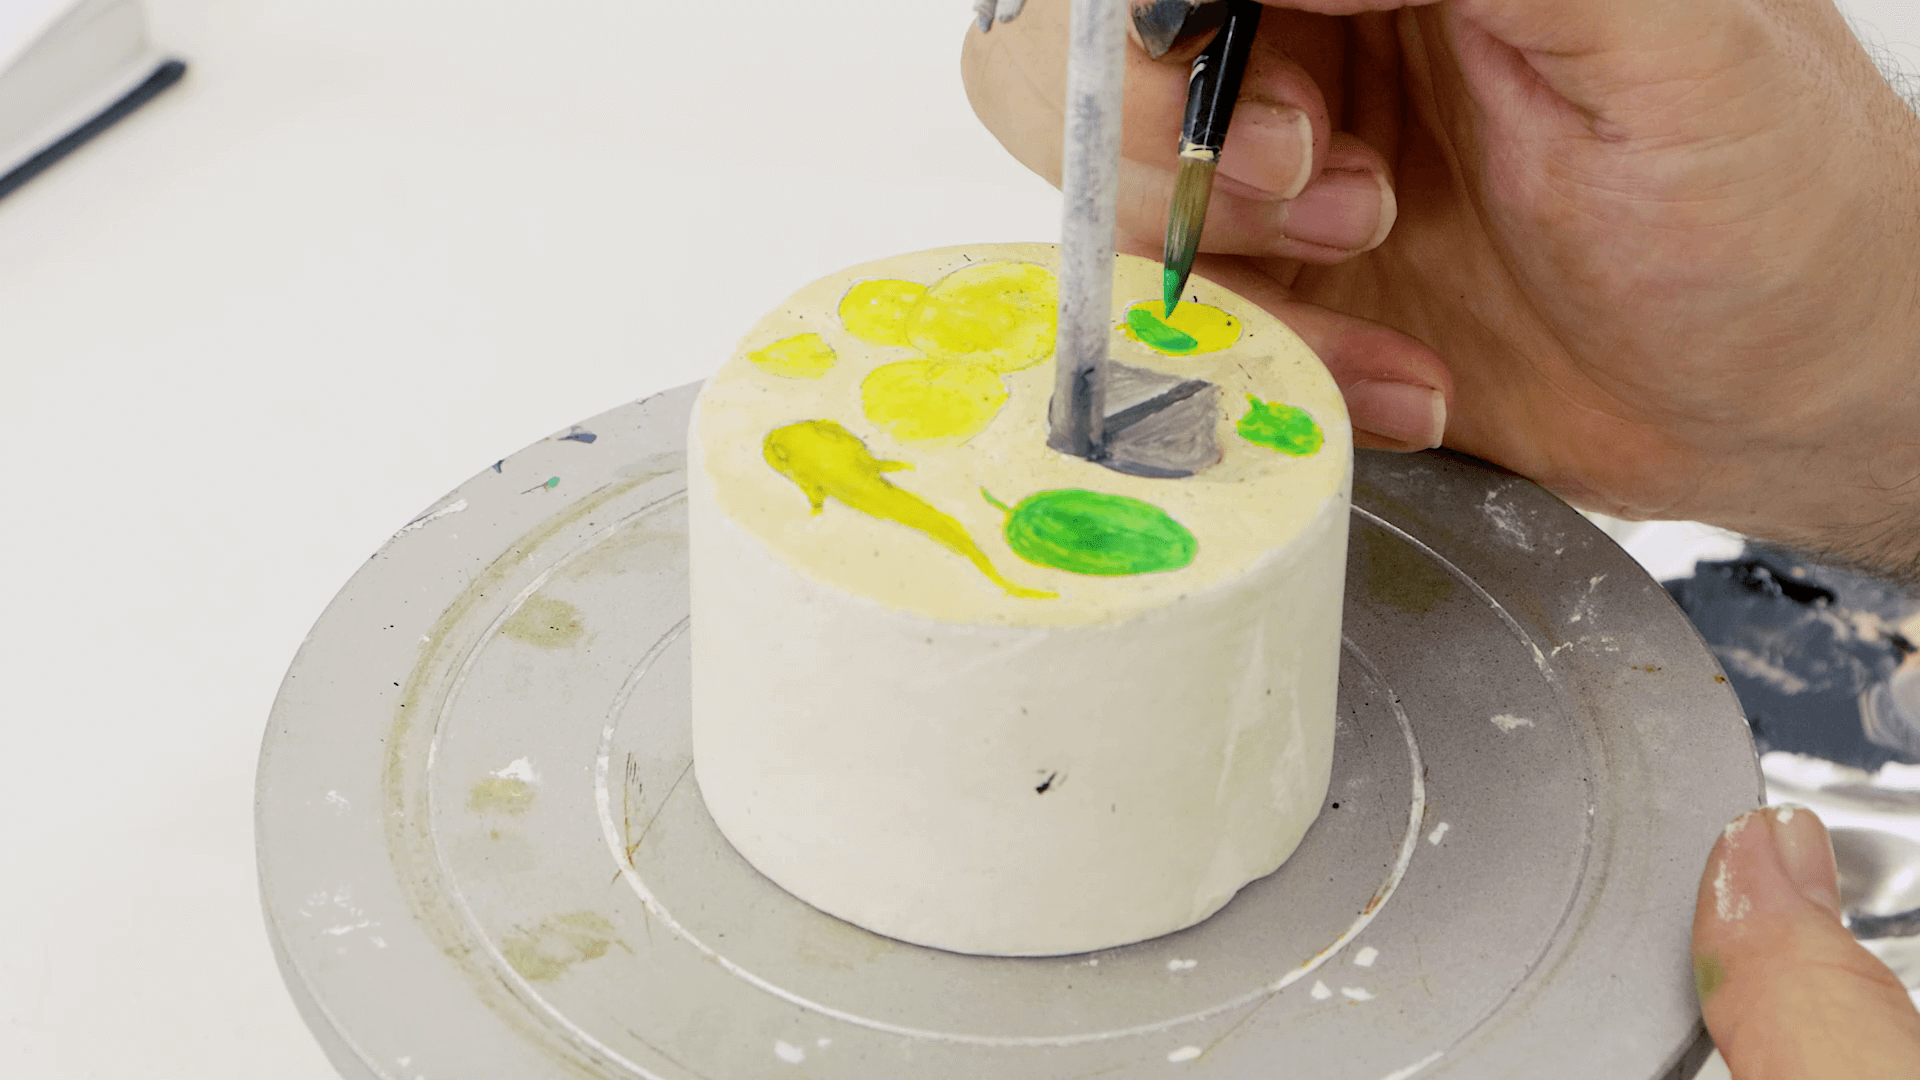
Mix some Medium Yellow and water to paint the fish and water plants. Once dry, paint some Sap Green into the water plants and allow to dry. Paint the foot using the grey tone on your palette used to coat the flamingo. Once dry, seal the base with a coat of Clay Varnish.
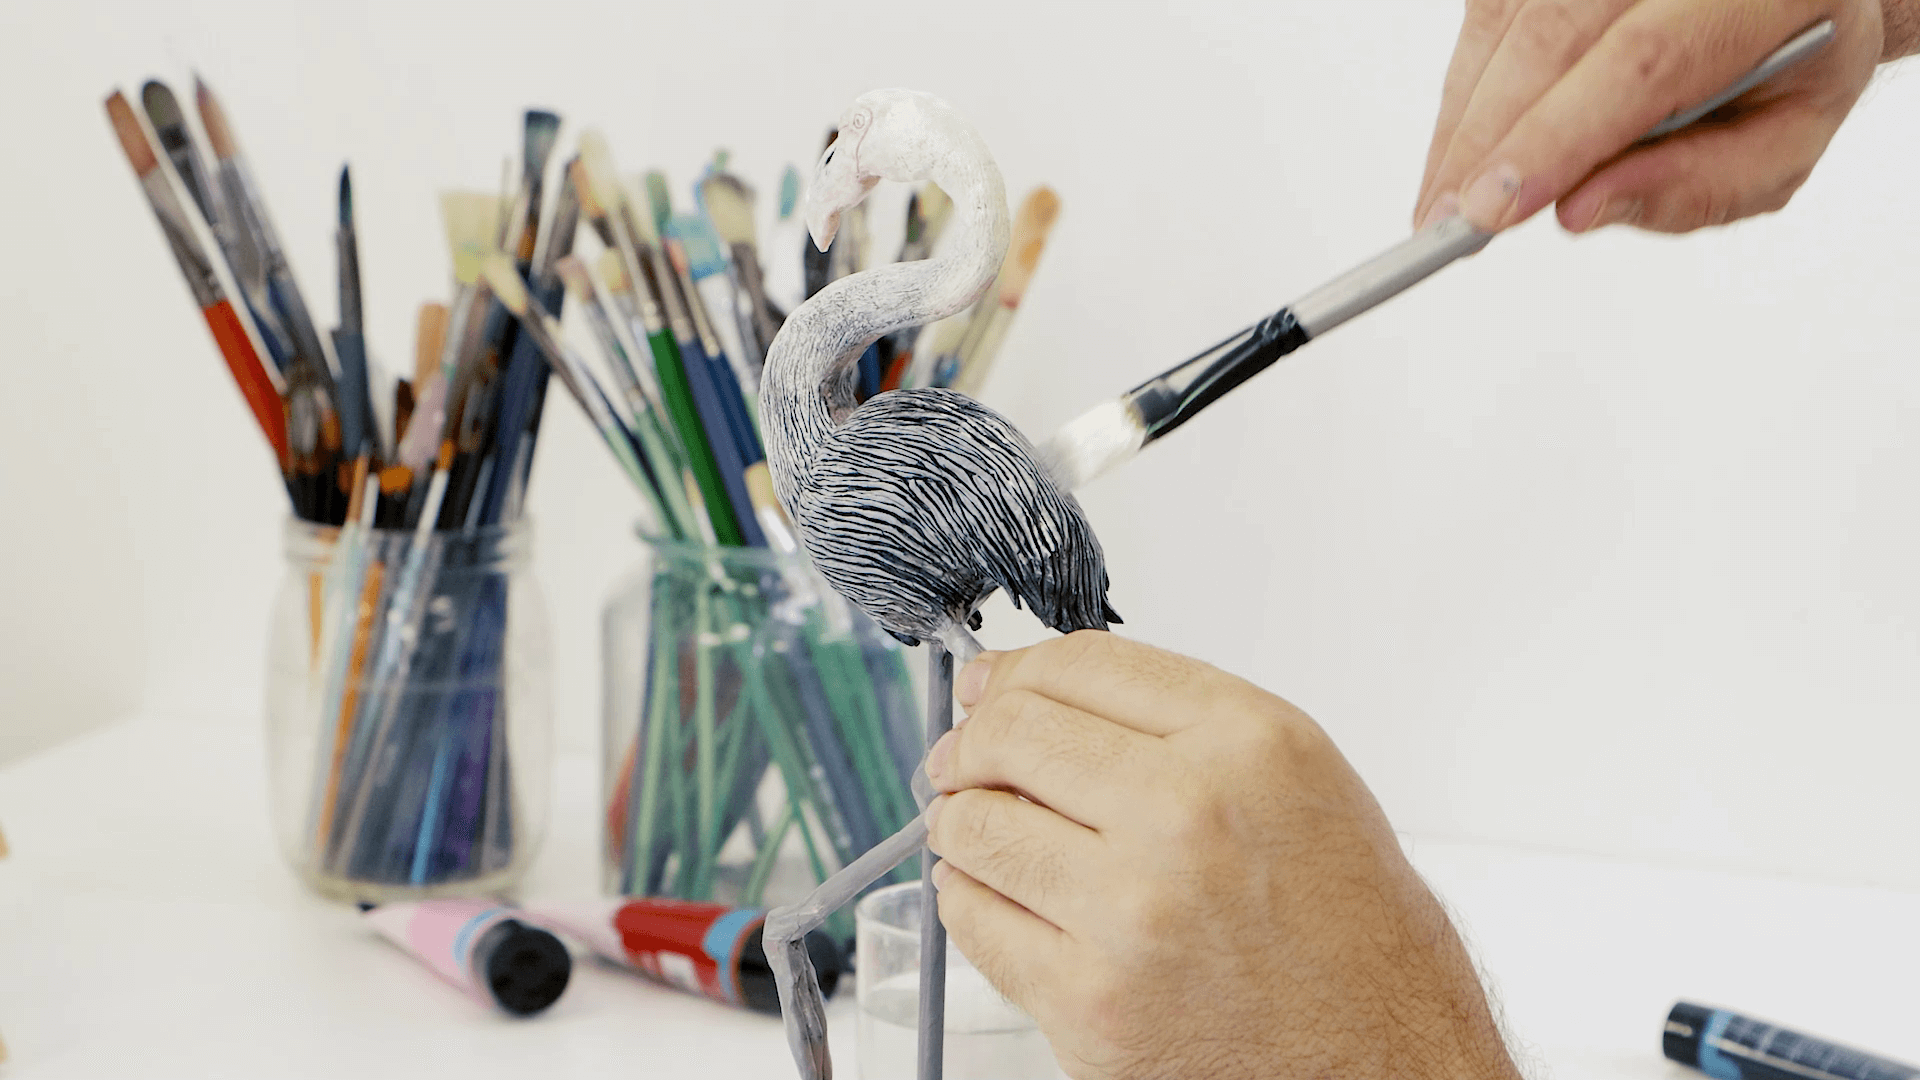
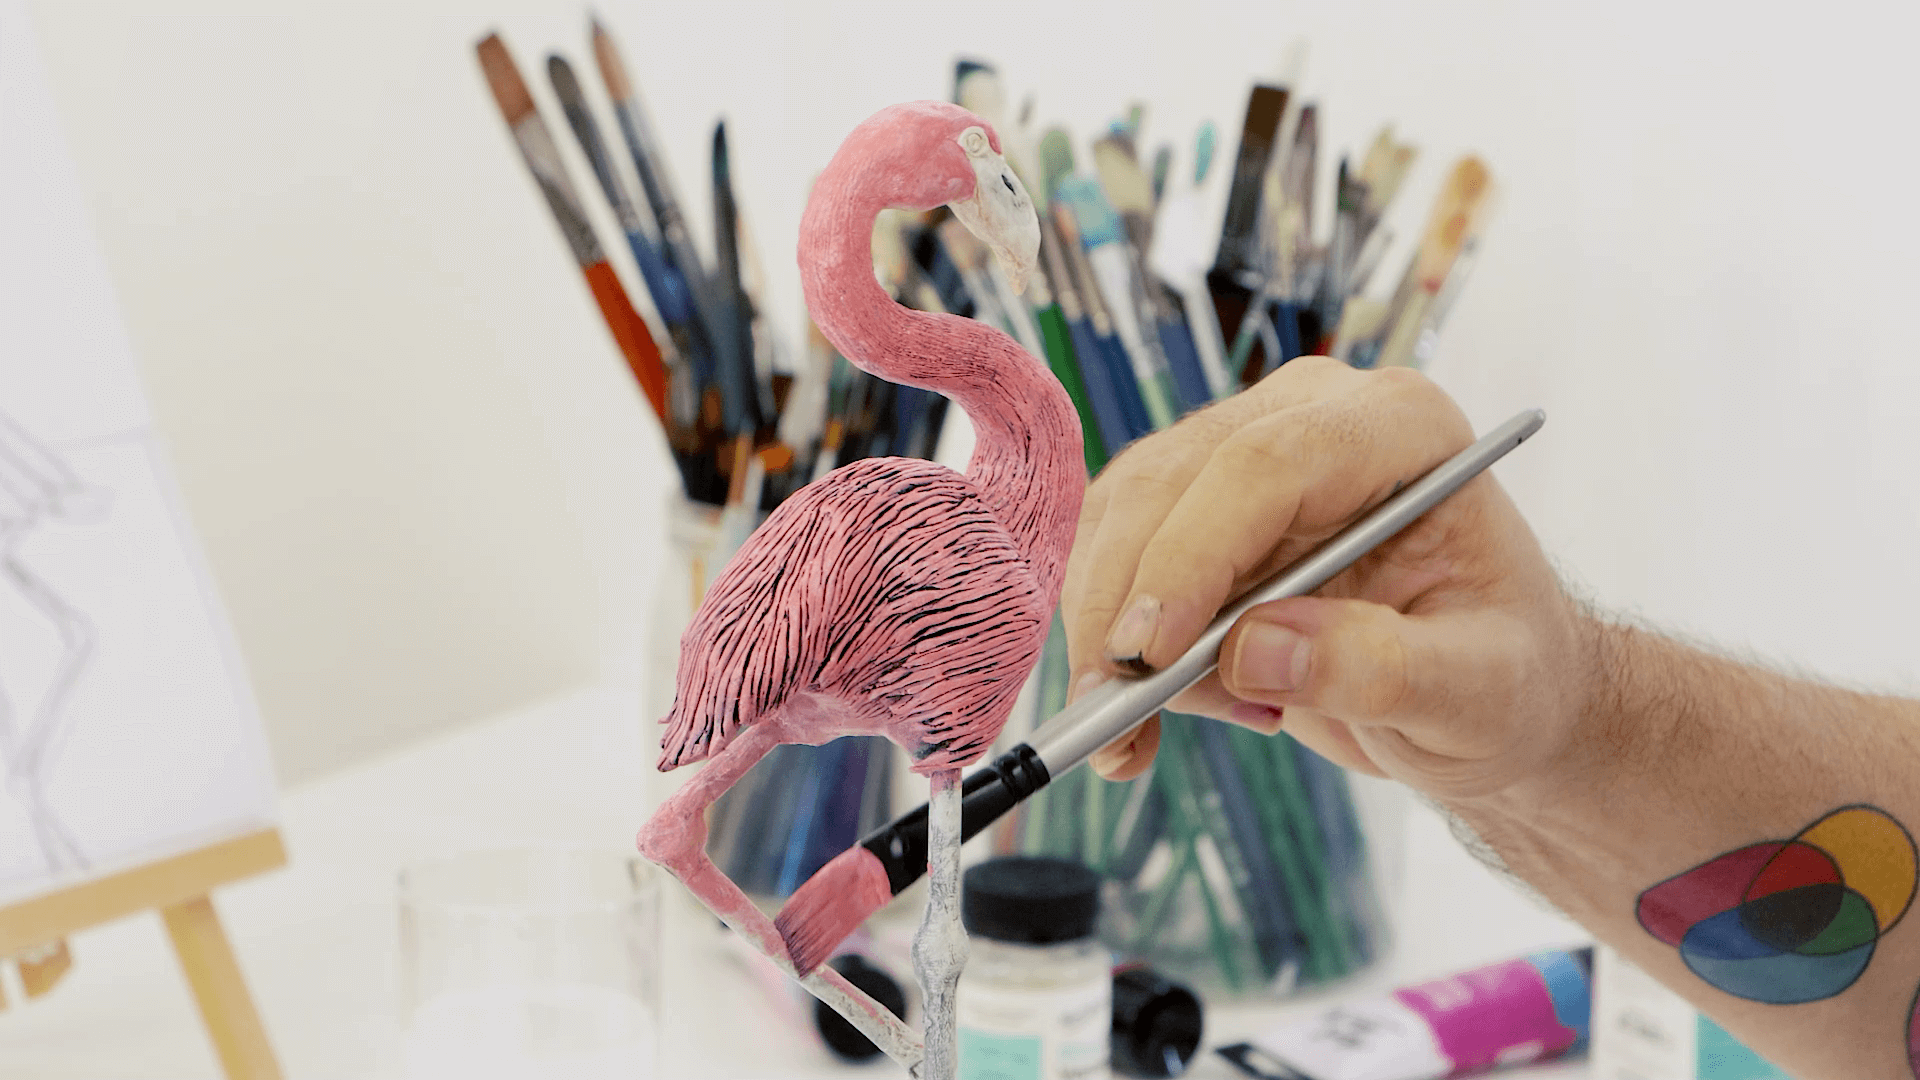
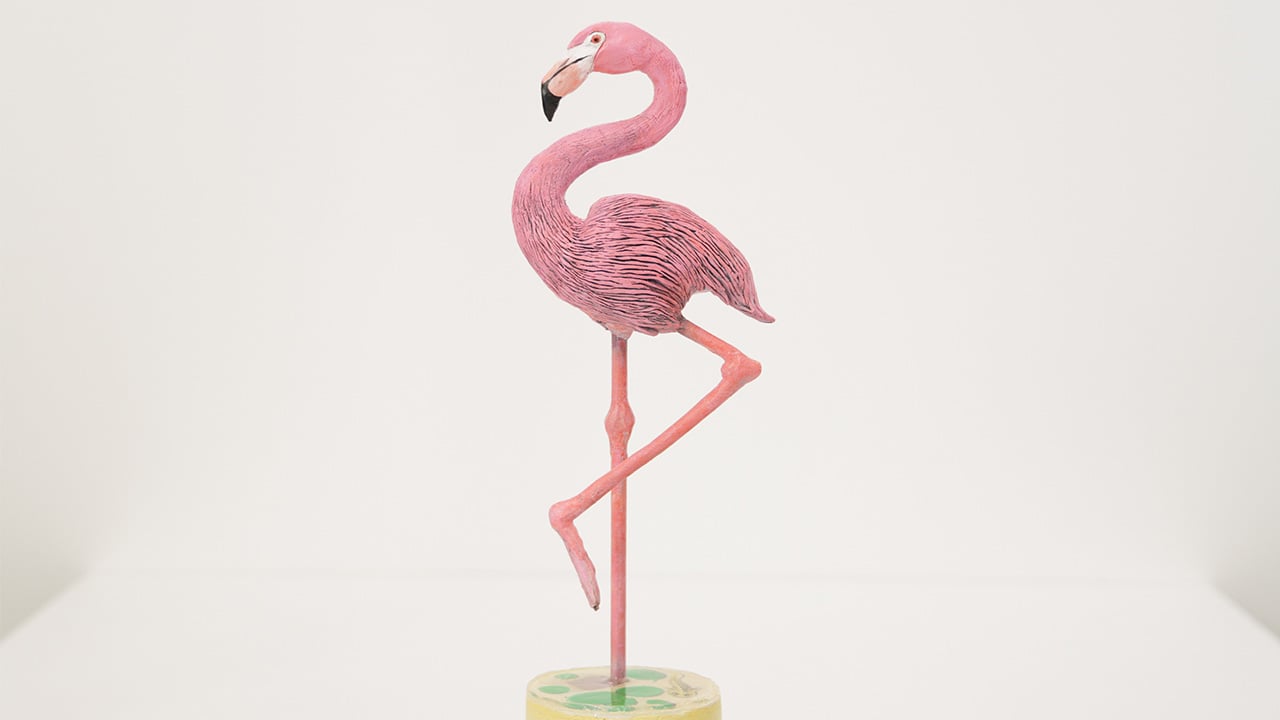
Squeeze some Pink and a touch of Vermillion and paint this over the flamingo. We started at the head and work backward. Lay the colour on lightly so that all the cream areas are covered but don't get into the grooves. We applied a second coat but mixed in a little more Vermillion to build up the tone.
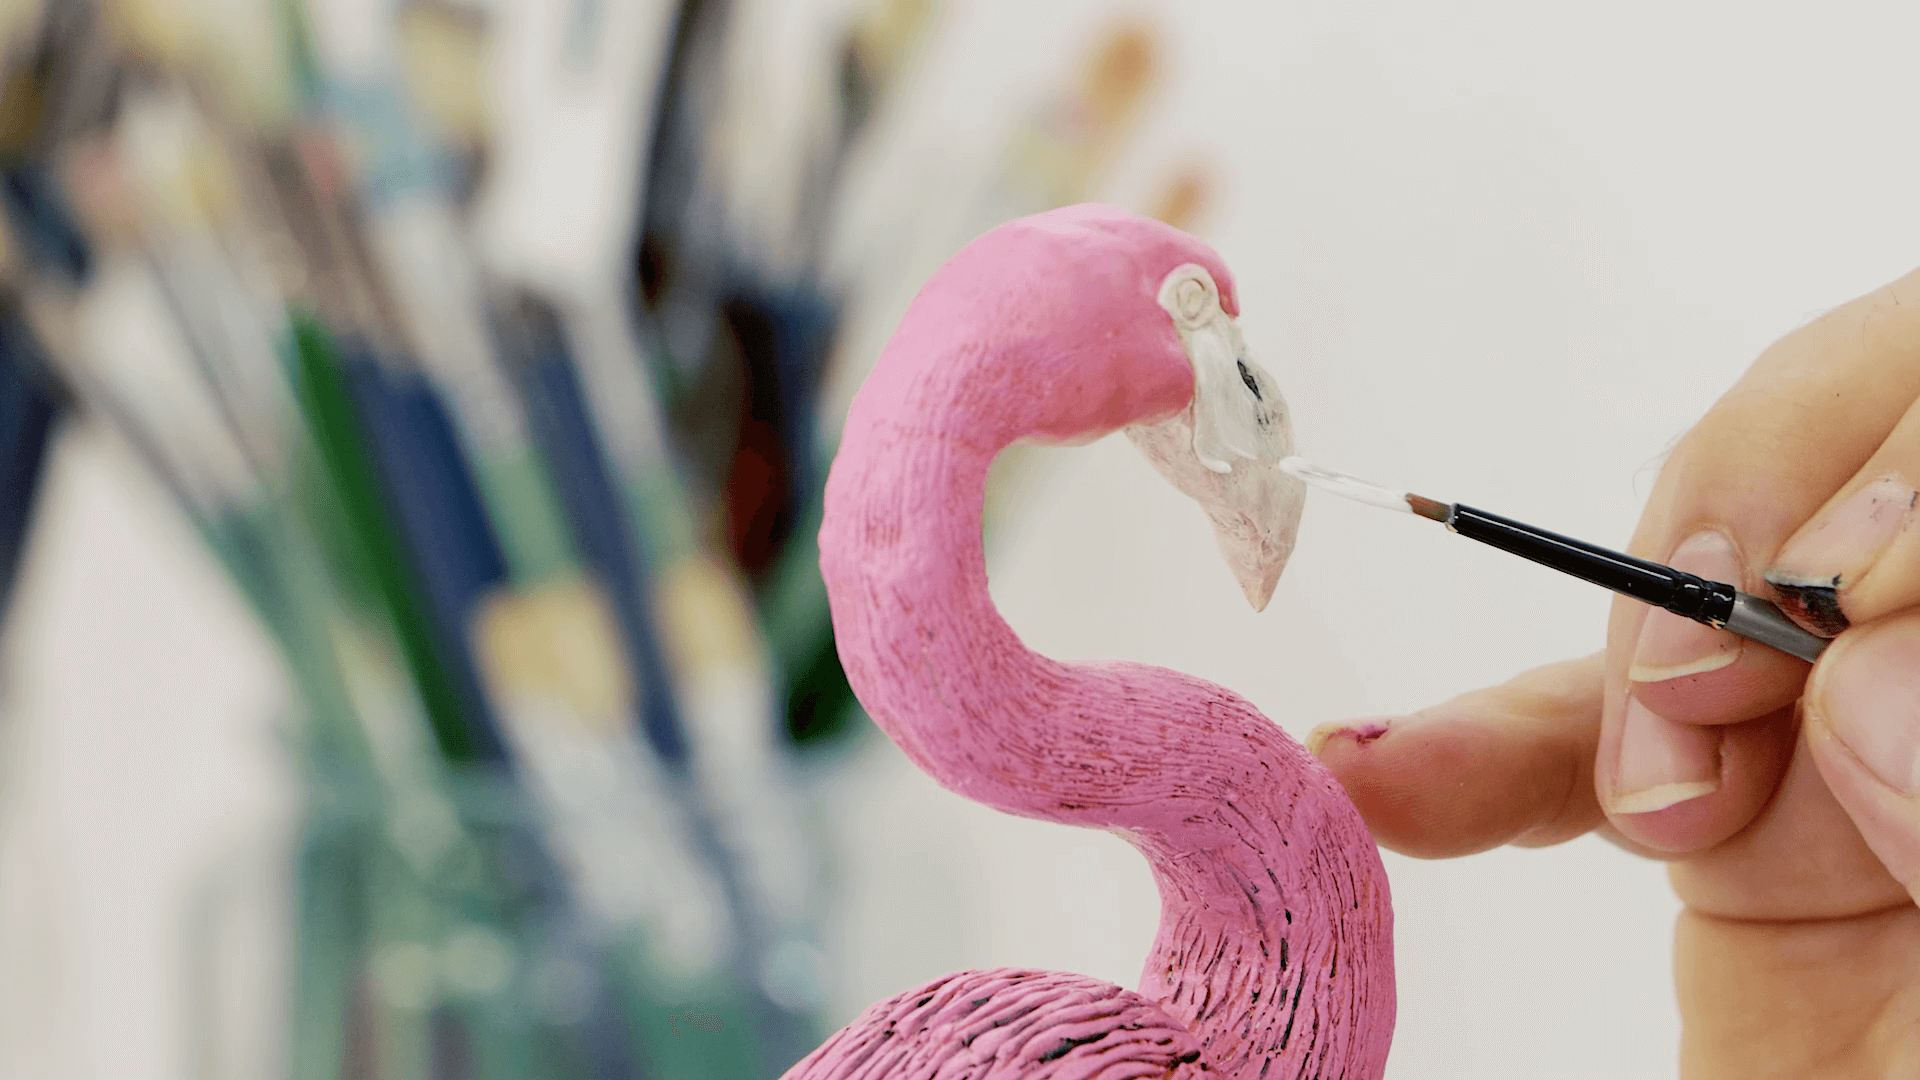
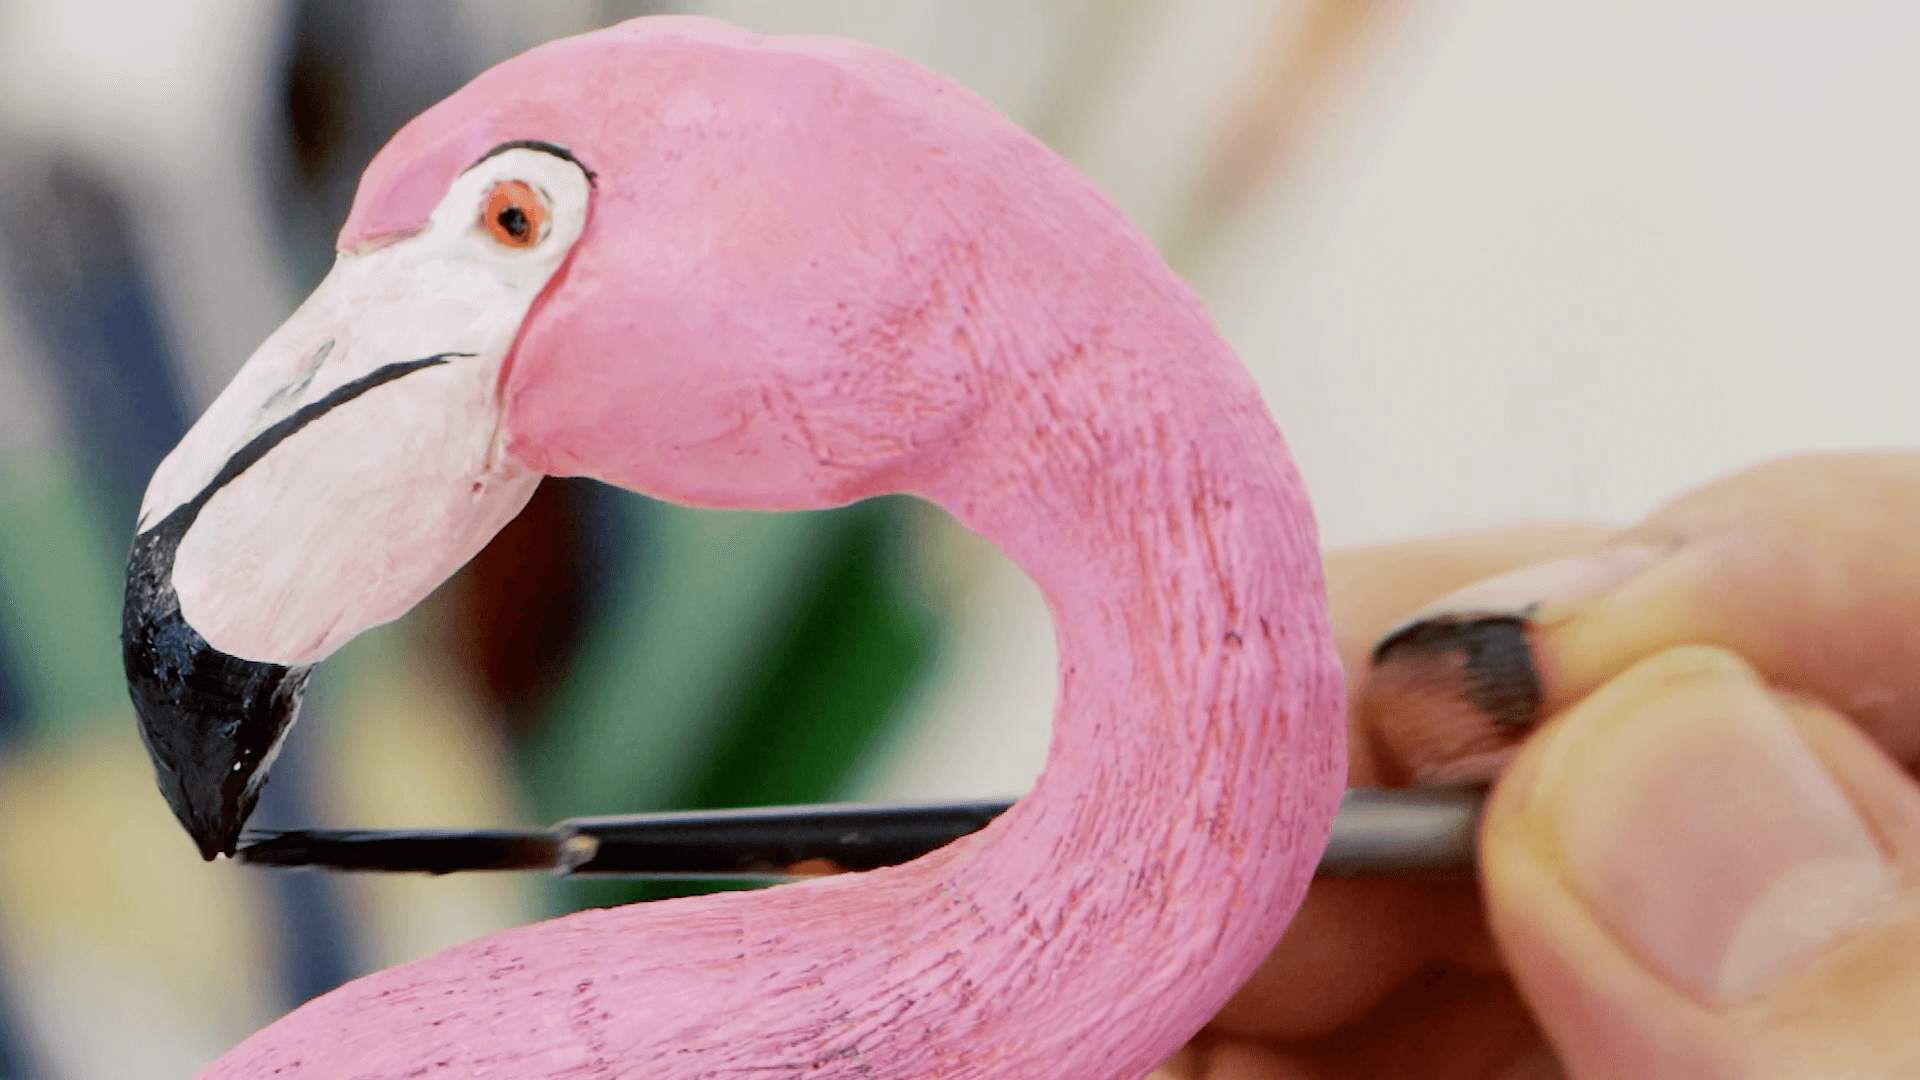
Paint the face and beak areas with Titanium White and allow to dry. Squeeze out some Lamp Black and use a rigger brush to lay in a dark line around the eye and a crescent shaped line down the beak. Paint the tip of the beak black. Use some Vermillion and the rigger brush to carefully paint the irises.
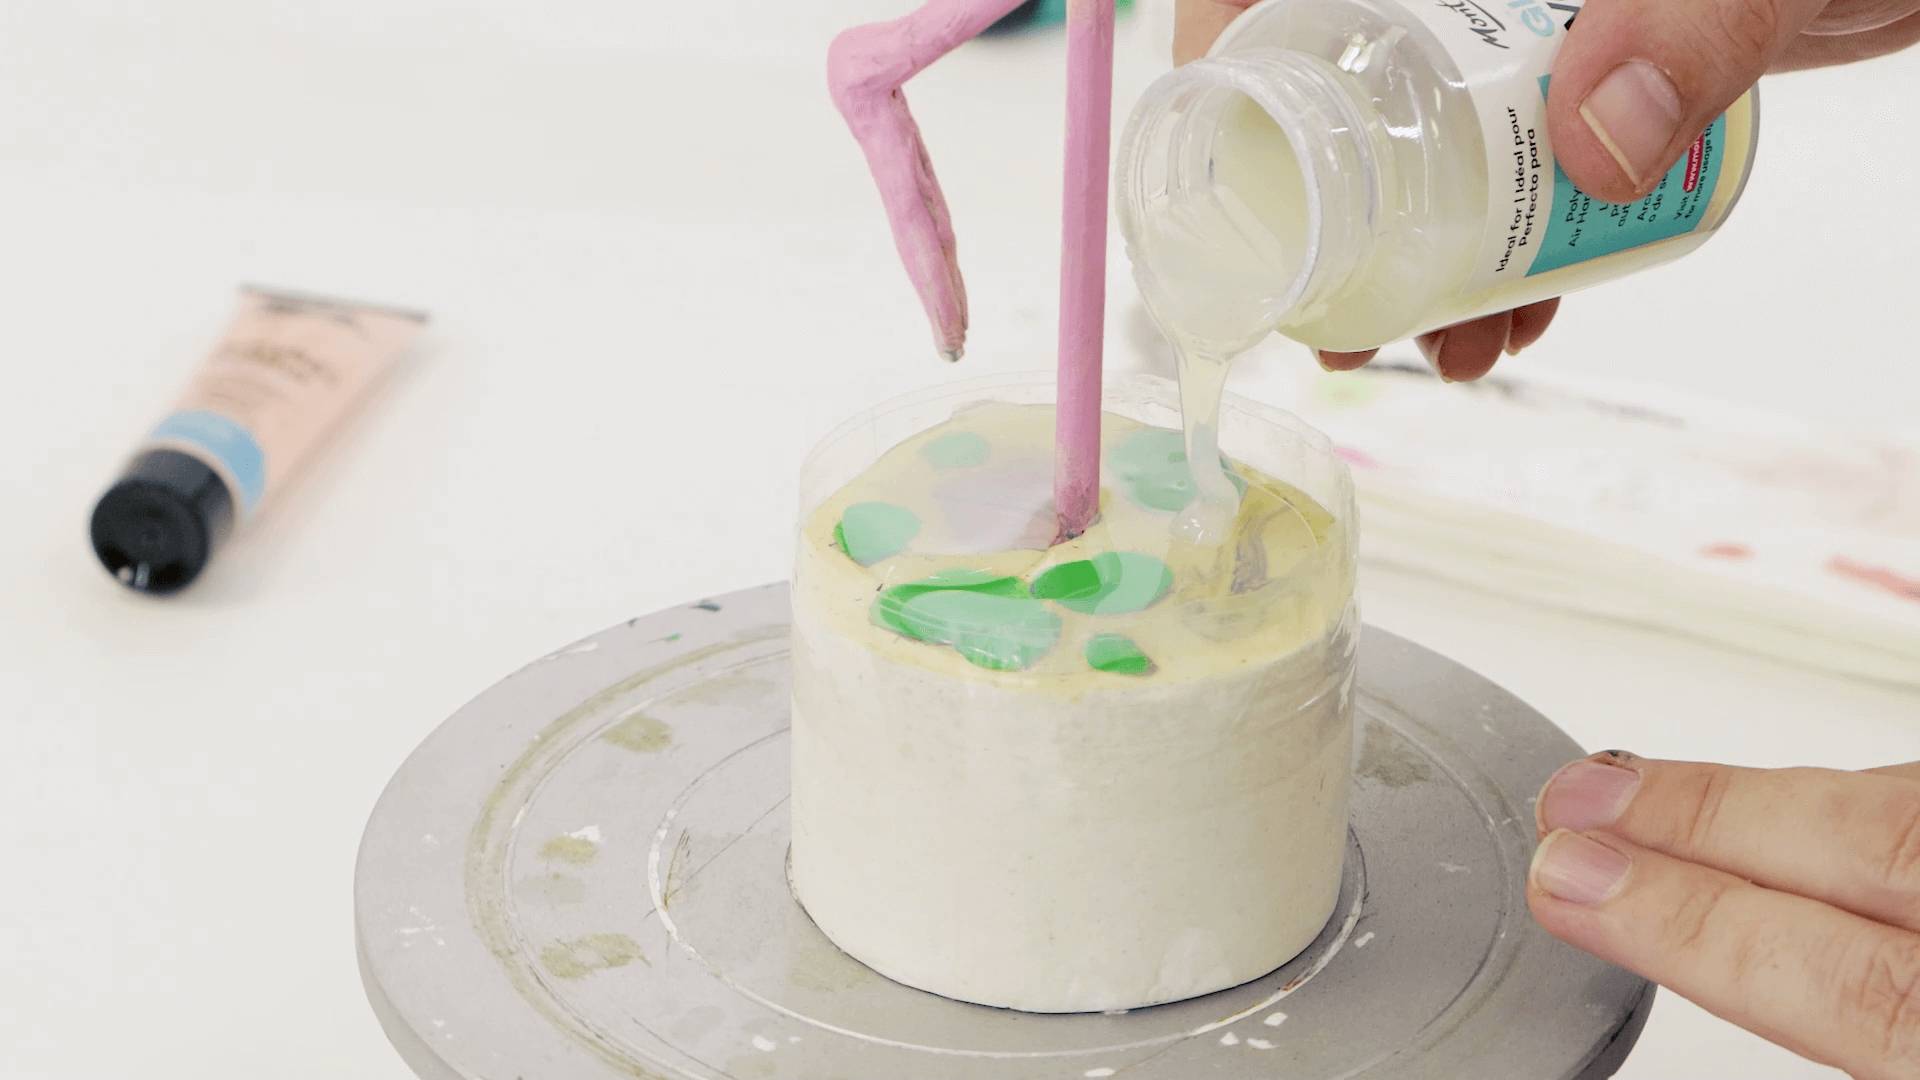
To suggest water around the base, you can apply more Clay Varnish. Firstly, create a barrier using clear tape. Wrap the tape a few times around the top of the base. Attach more tape around the top of the first layers of tape, allowing it to sit about 1cm above the flat part of the base.
Pour the Clay Varnish onto the base to a depth of about 4mm. Allow this to dry which can take up to about 3 days. Once dry, you can gently remove the barrier tape from the base and varnish.
Finally, paint the base up to the varnish layer. Mix the same colour you used for the sand with Titanium White, Medium Yellow and Raw Sienna.

And, you’re all done! Be sure to snap up a photo and #montmarteart or tag us on Instagram or Facebook so we can see what you come up with!
Materials:
- Aluminium Round Palette Signature 10 Well
- Gloss Clay Varnish Signature 120ml
- Gallery Series Brush Set Acrylic 4pce
- Acrylic Colour Paint Signature 75ml - Titanium White
- Acrylic Colour Paint Signature 75ml - Medium Yellow
- Acrylic Colour Paint Signature 75ml – Vermilion
- Acrylic Colour Paint Signature 75ml – Pink
- Acrylic Colour Paint Signature 75ml - Raw Sienna
- Acrylic Colour Paint Signature 75ml - Sap Green
- Acrylic Colour Paint Signature 75ml - Lamp Black
Extra Materails:
- Clear tape
- HB pencil
- Paper towel
- Banding wheel (not compulsory)
You may also like

Peacock drawing in watersoluble oil pastels


How to use ceramic paint on a thrifted plate
