


How to make a clay heart
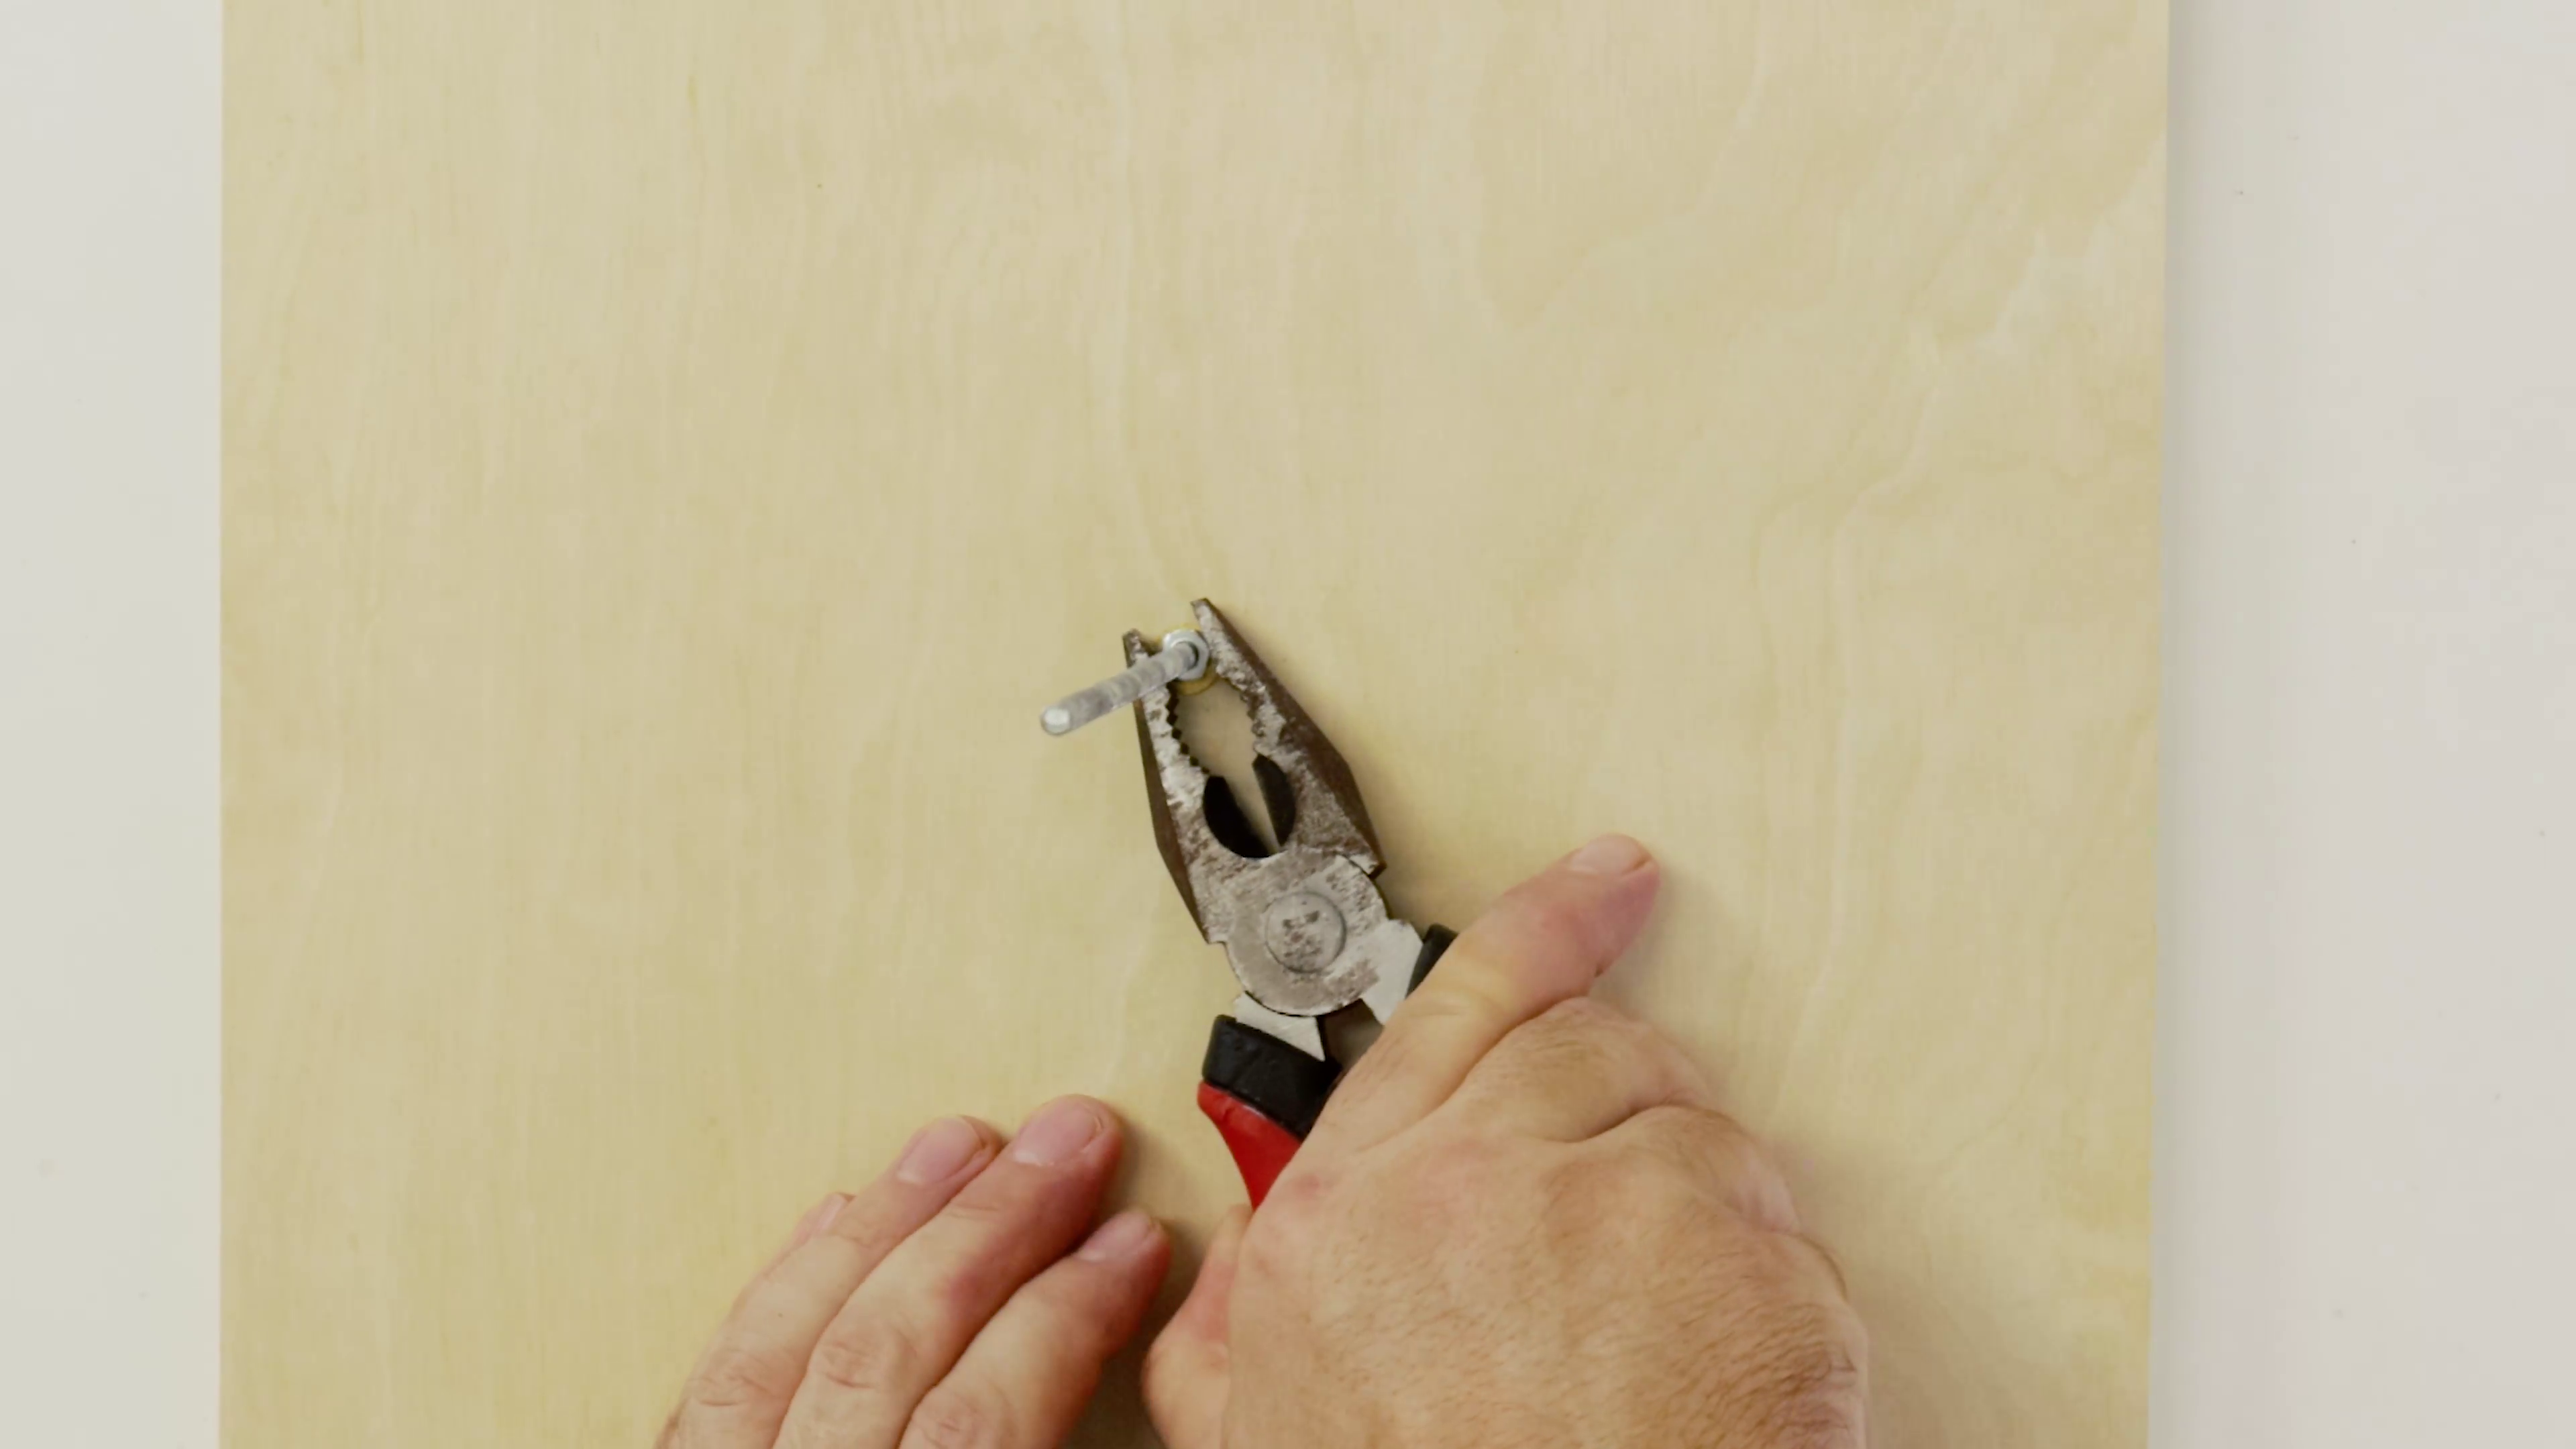
So first we need to create the stand for our heart to sit on. Mark the centre of the board and drill a neat hole. Cut the booker to length by using the printout as a guide and screw the nuts onto the uncut end down to the cut end slip on a washer, place the booker rod through the timber board from the bottom then place another washer over the rod then another nut screw it down and tighten the nuts from the top and bottom using pliers.
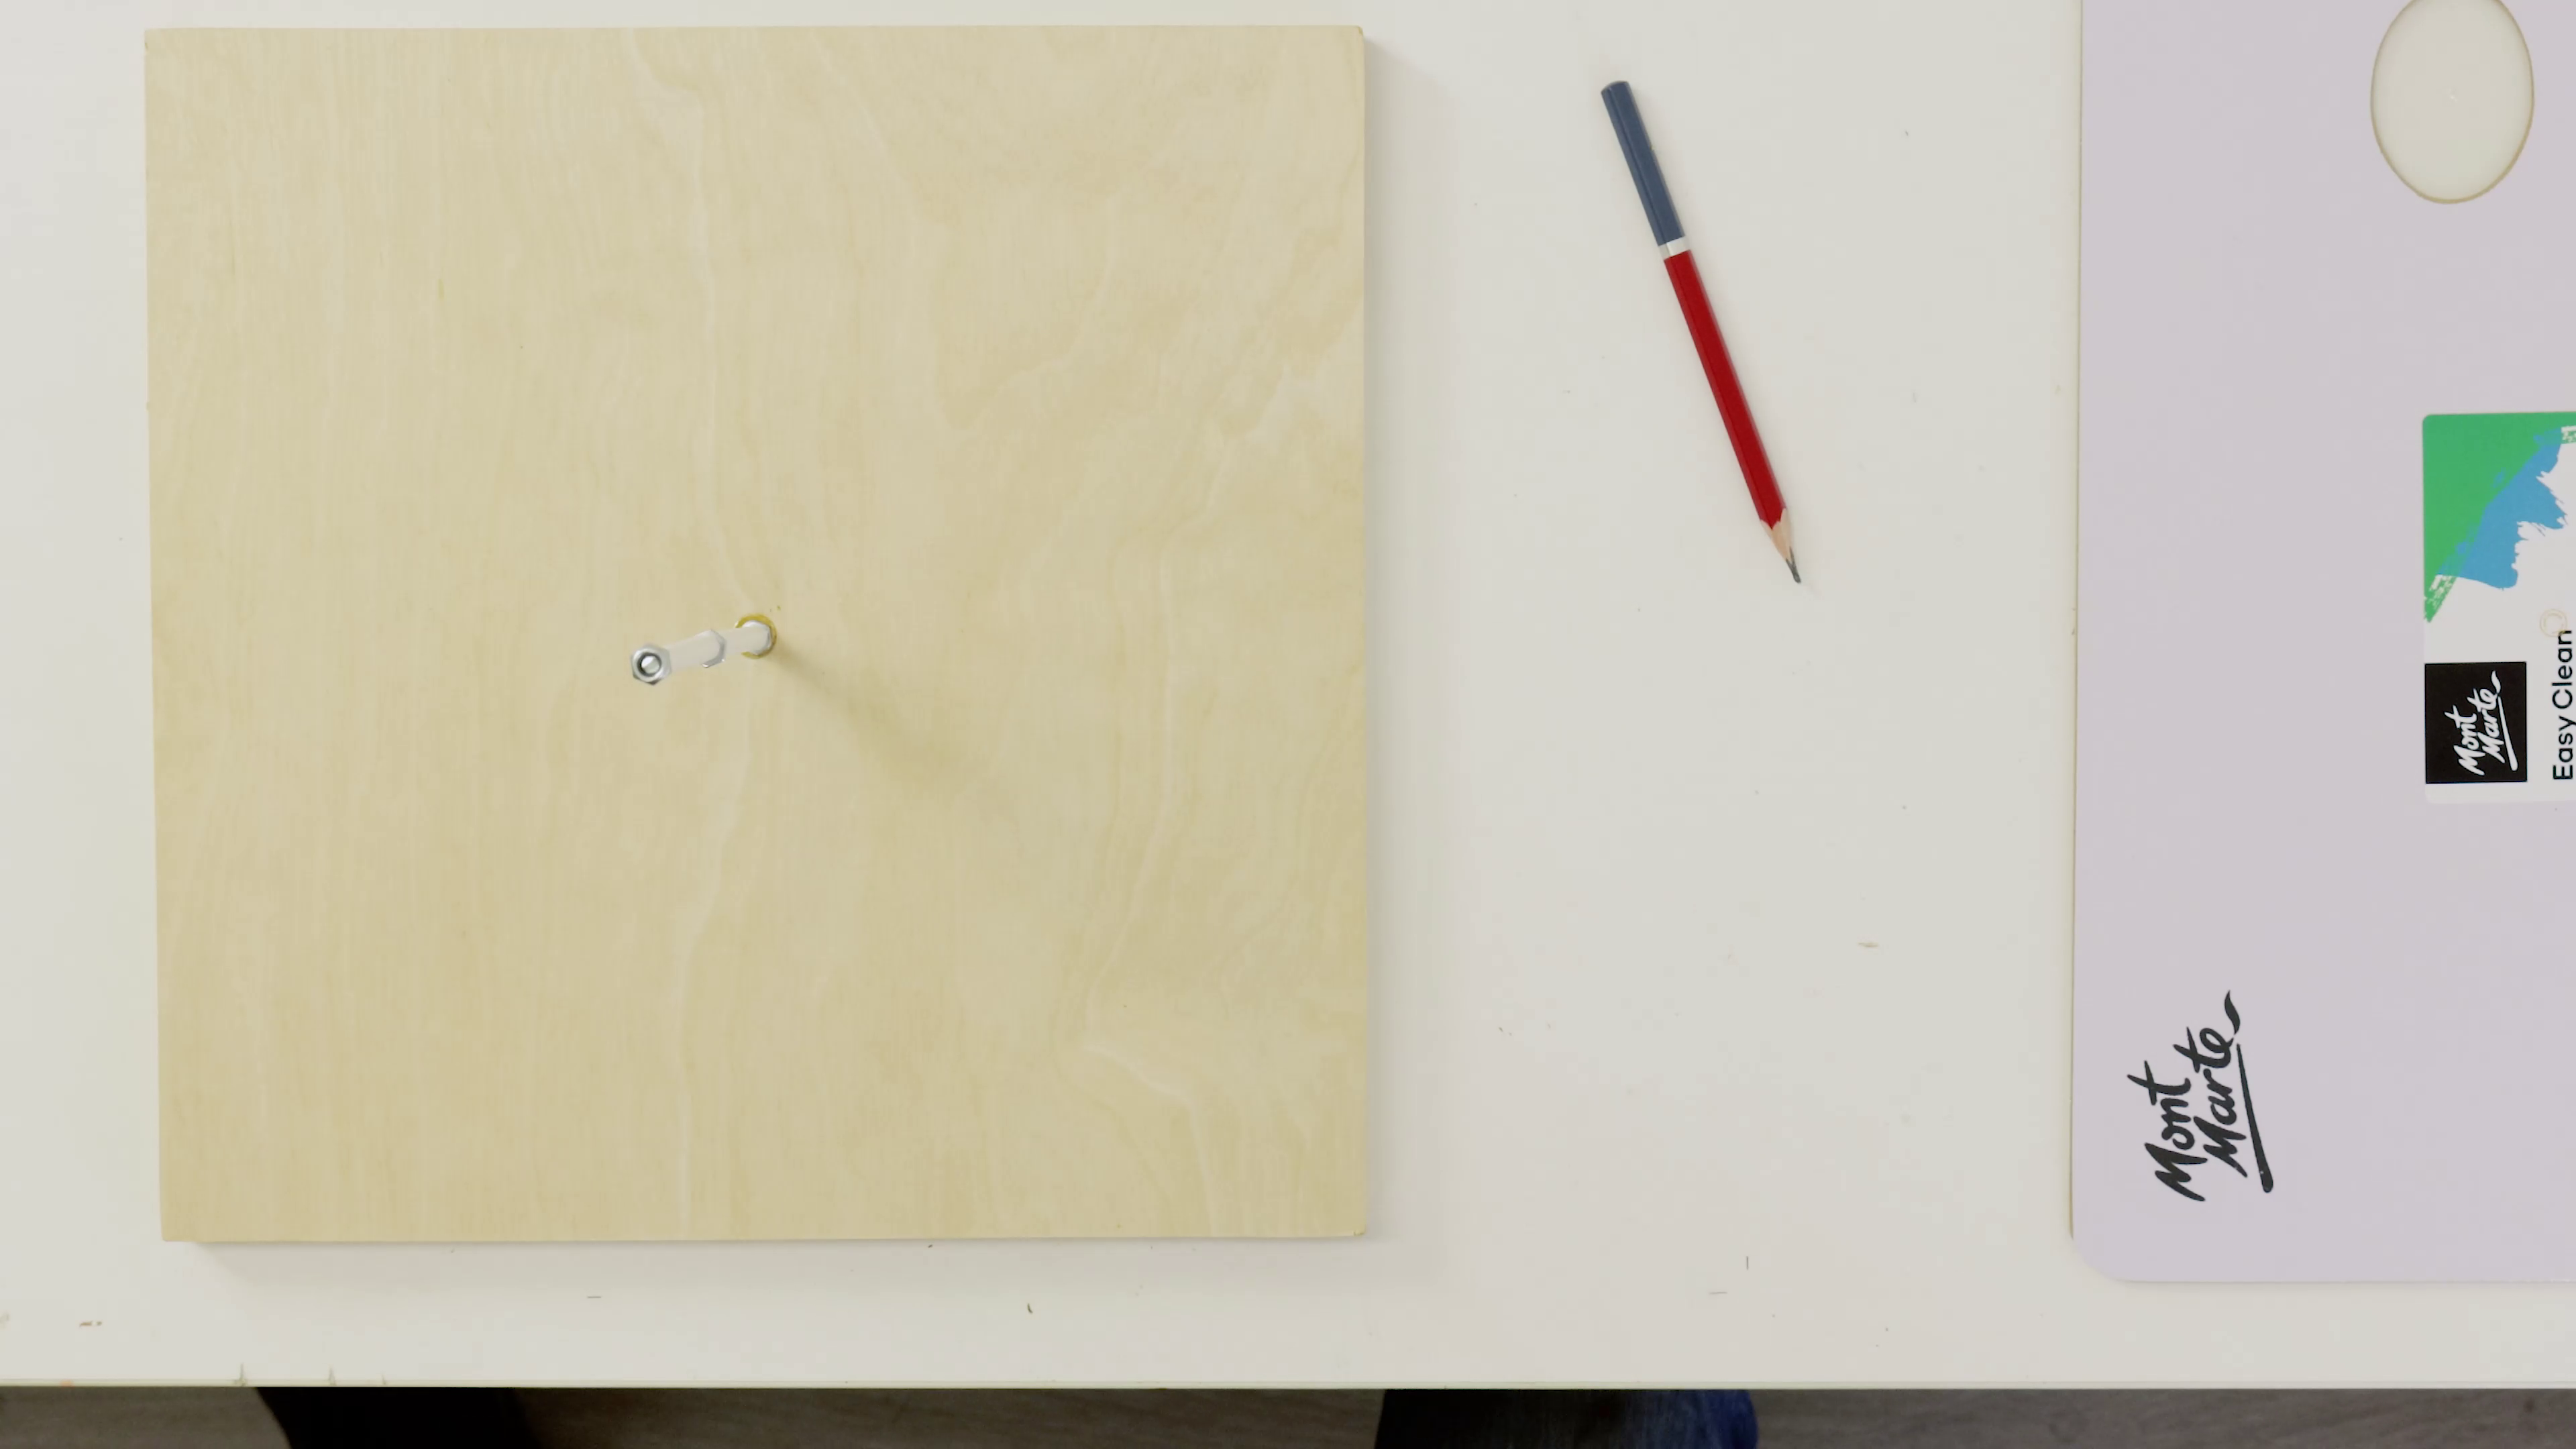
Cut a straw for the bottom part of the stand using the printout and place it over the booker rod then screw a nut down to the top of the first straw then place a washer over the nut. Cut the second straw and place it over the rod so it sits on the nut on top of the first straw. Finally screw on a round head nut onto the top of the booker rod.
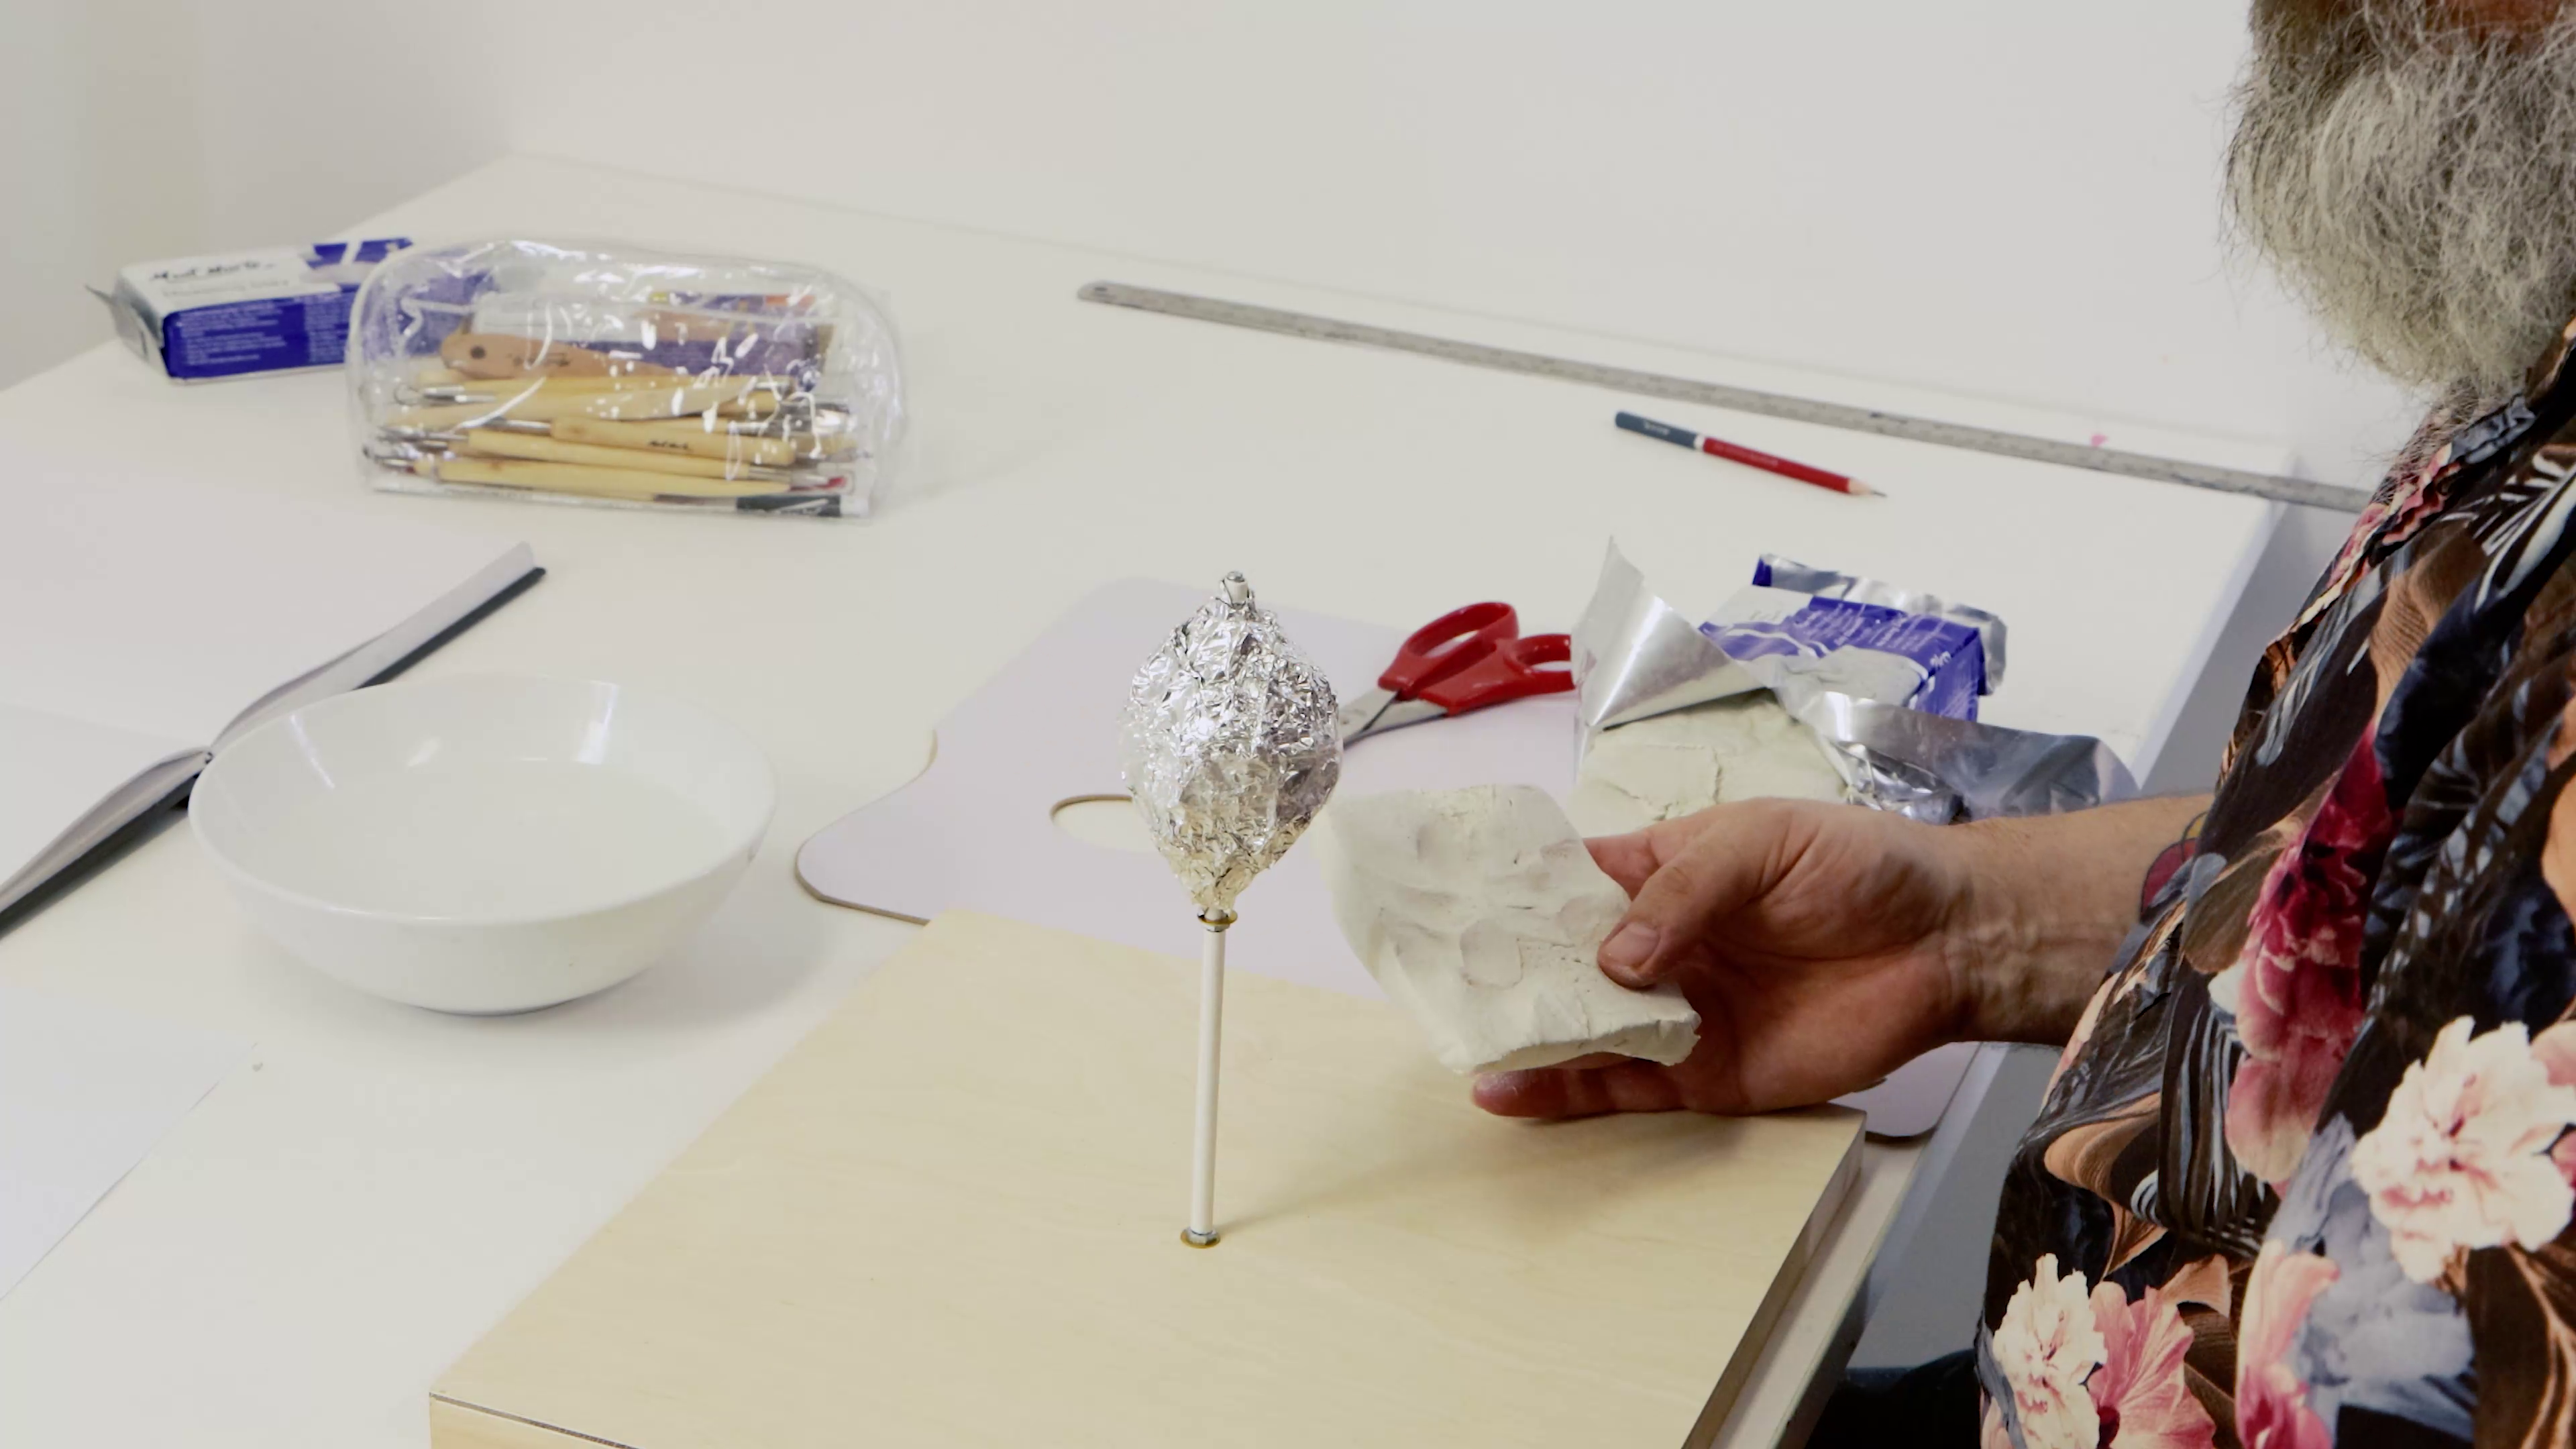
Next, we need to bulk out the heart armature with alfoil. So that the alfoil doesn’t’ spin inside the armature we wrap some double-sided tape around the straw and adhere the alfoil to it and continue to build it up until we have reached the correct shape. Ideally the heart should be the correct shape only 90 smaller than what we want the finished size with clay. We can now start sculpting.
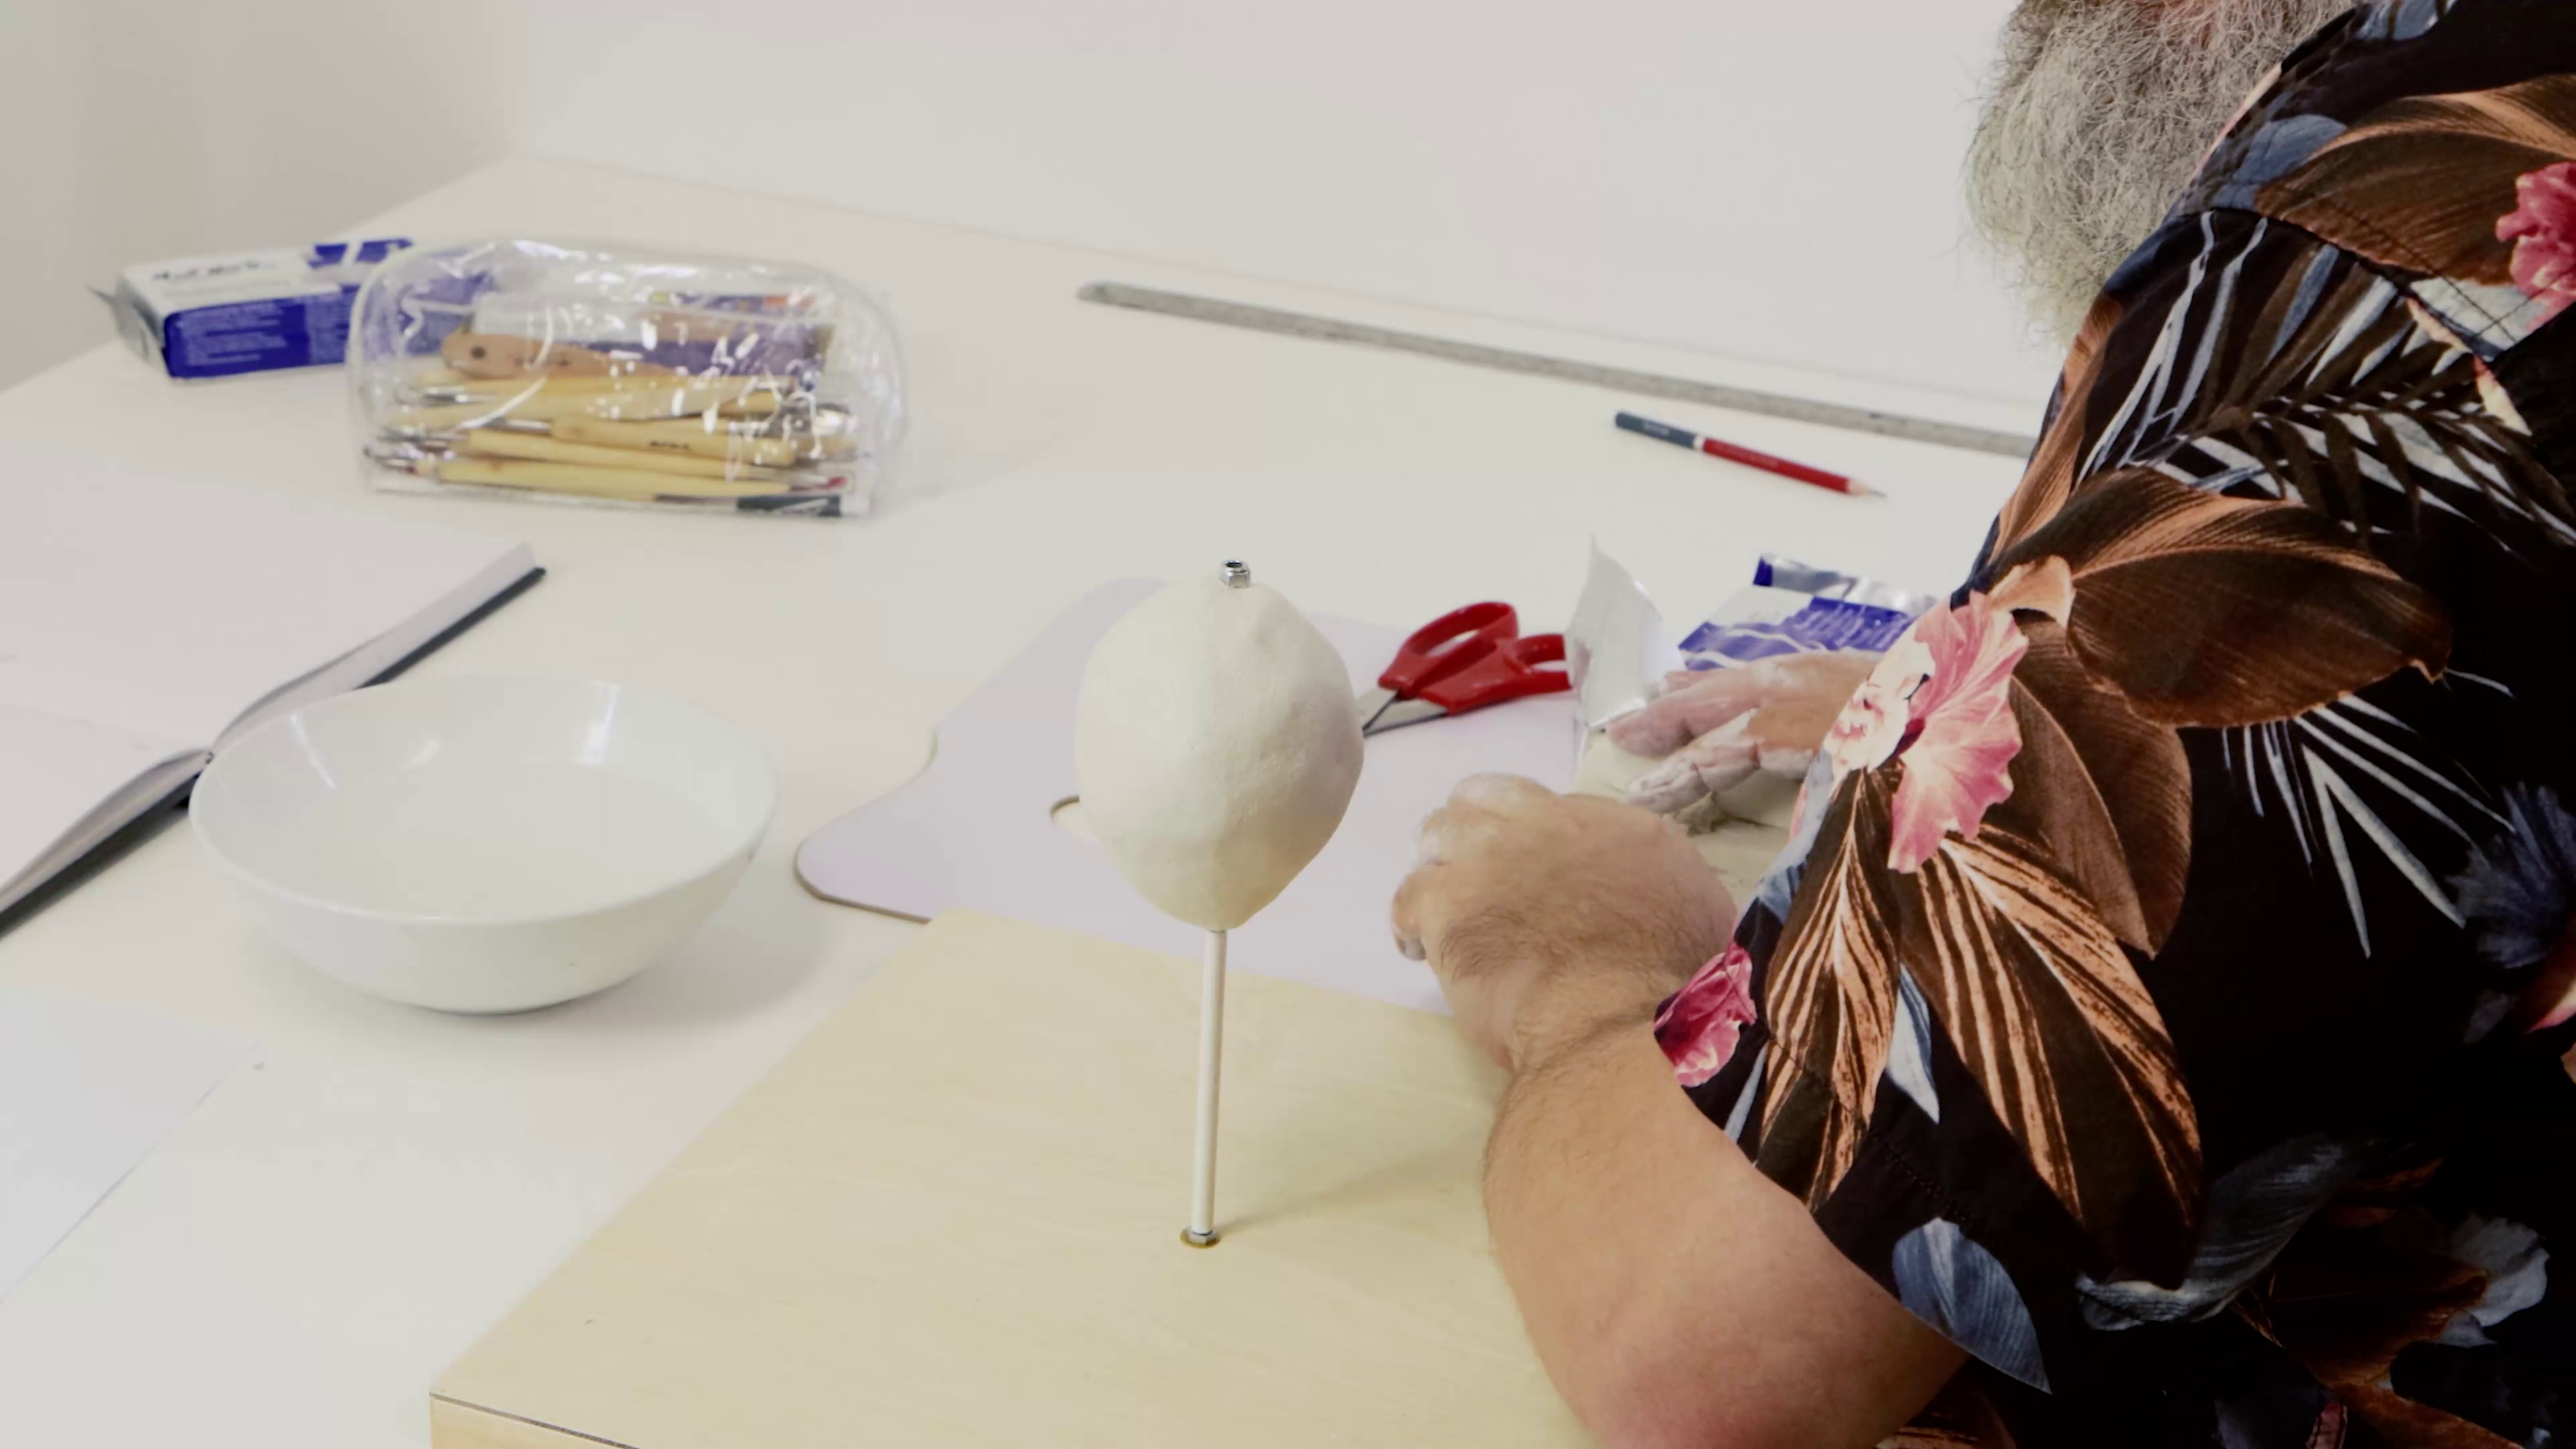
Open some clay and cut the block in half lengthways. This will give us 2 slabs around 1 cm thick. Use one of these to wrap around the alfoil armature. Try to make sure that the thickness is as consistent as you can and smooth it all off. If you dip your hands in water, it makes smoothing the clay out easier.
Next, we roll a long tube approximately the thickness of a finger. Cut this roll into 4 pieces and using the end of a pencil create a hollow in one end of each tube.
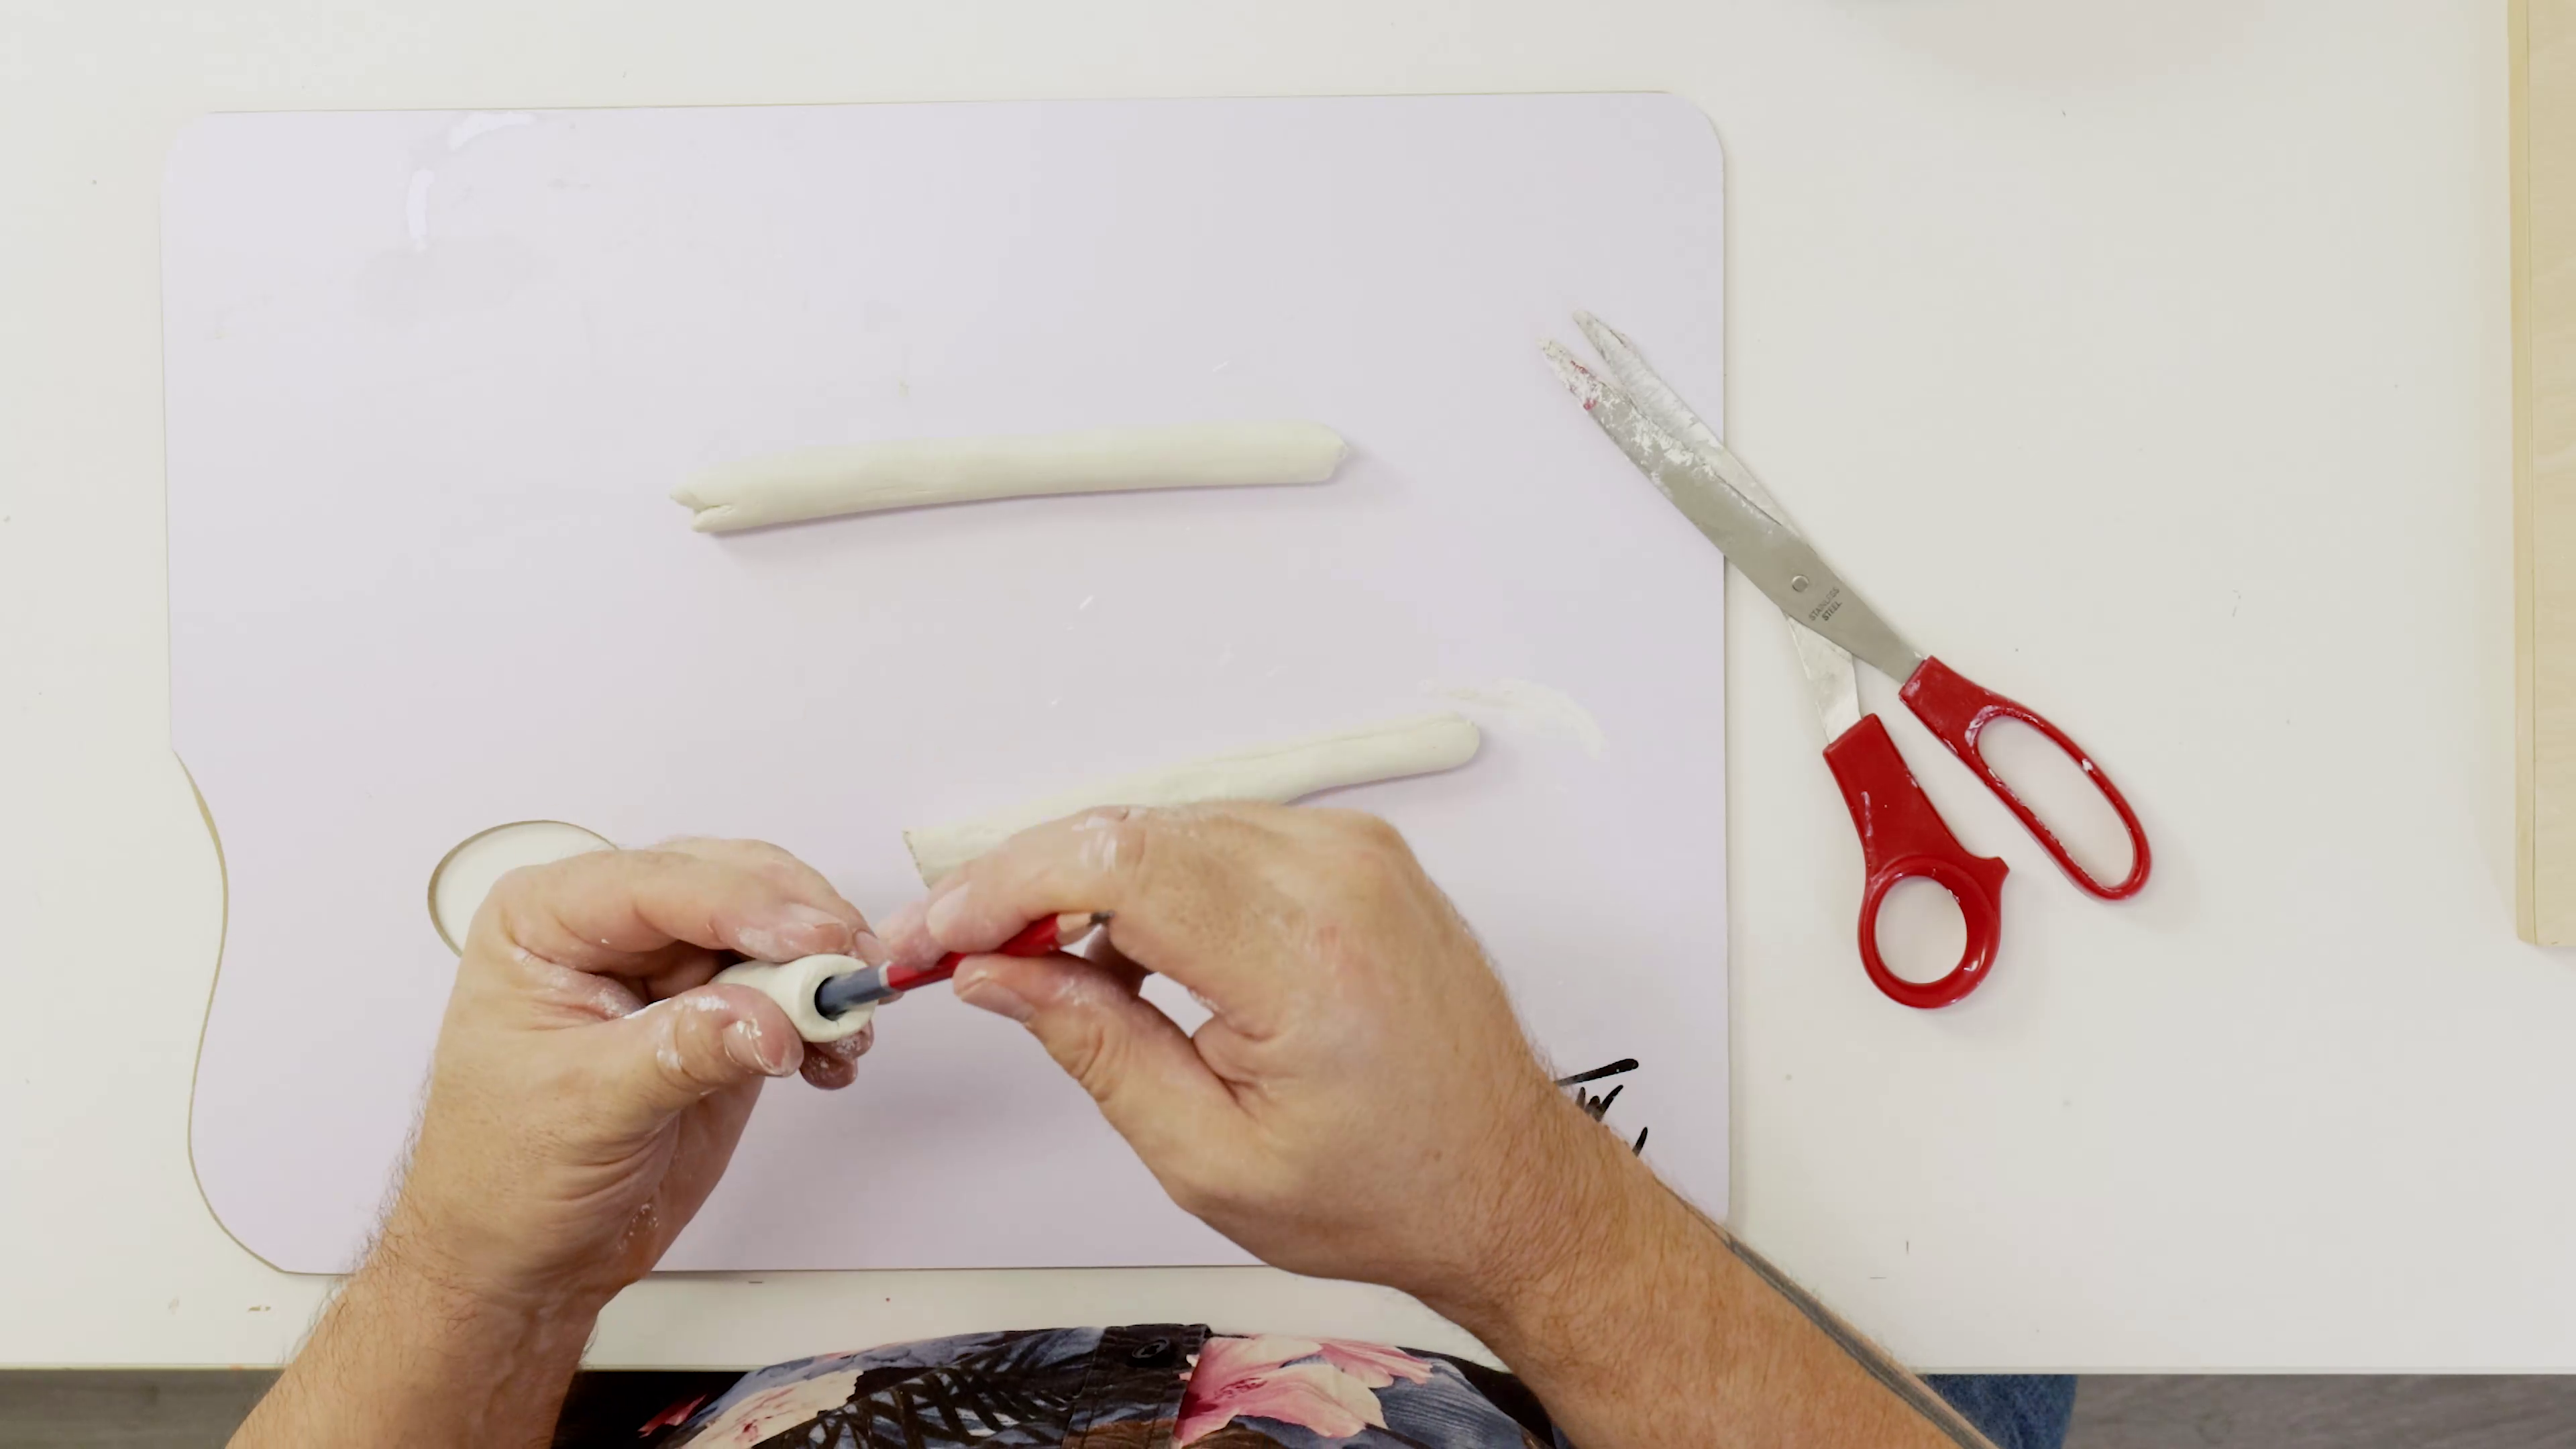
Refer to the second printout and we can add these tubes one at a time onto the top of our heart. The end to be connected to the heart can be cut at an angle and then smoothed on to the heart. Apply the second tube next to the first and then apply the third tube next to that. We then take the last tube and apply it to the third tube.
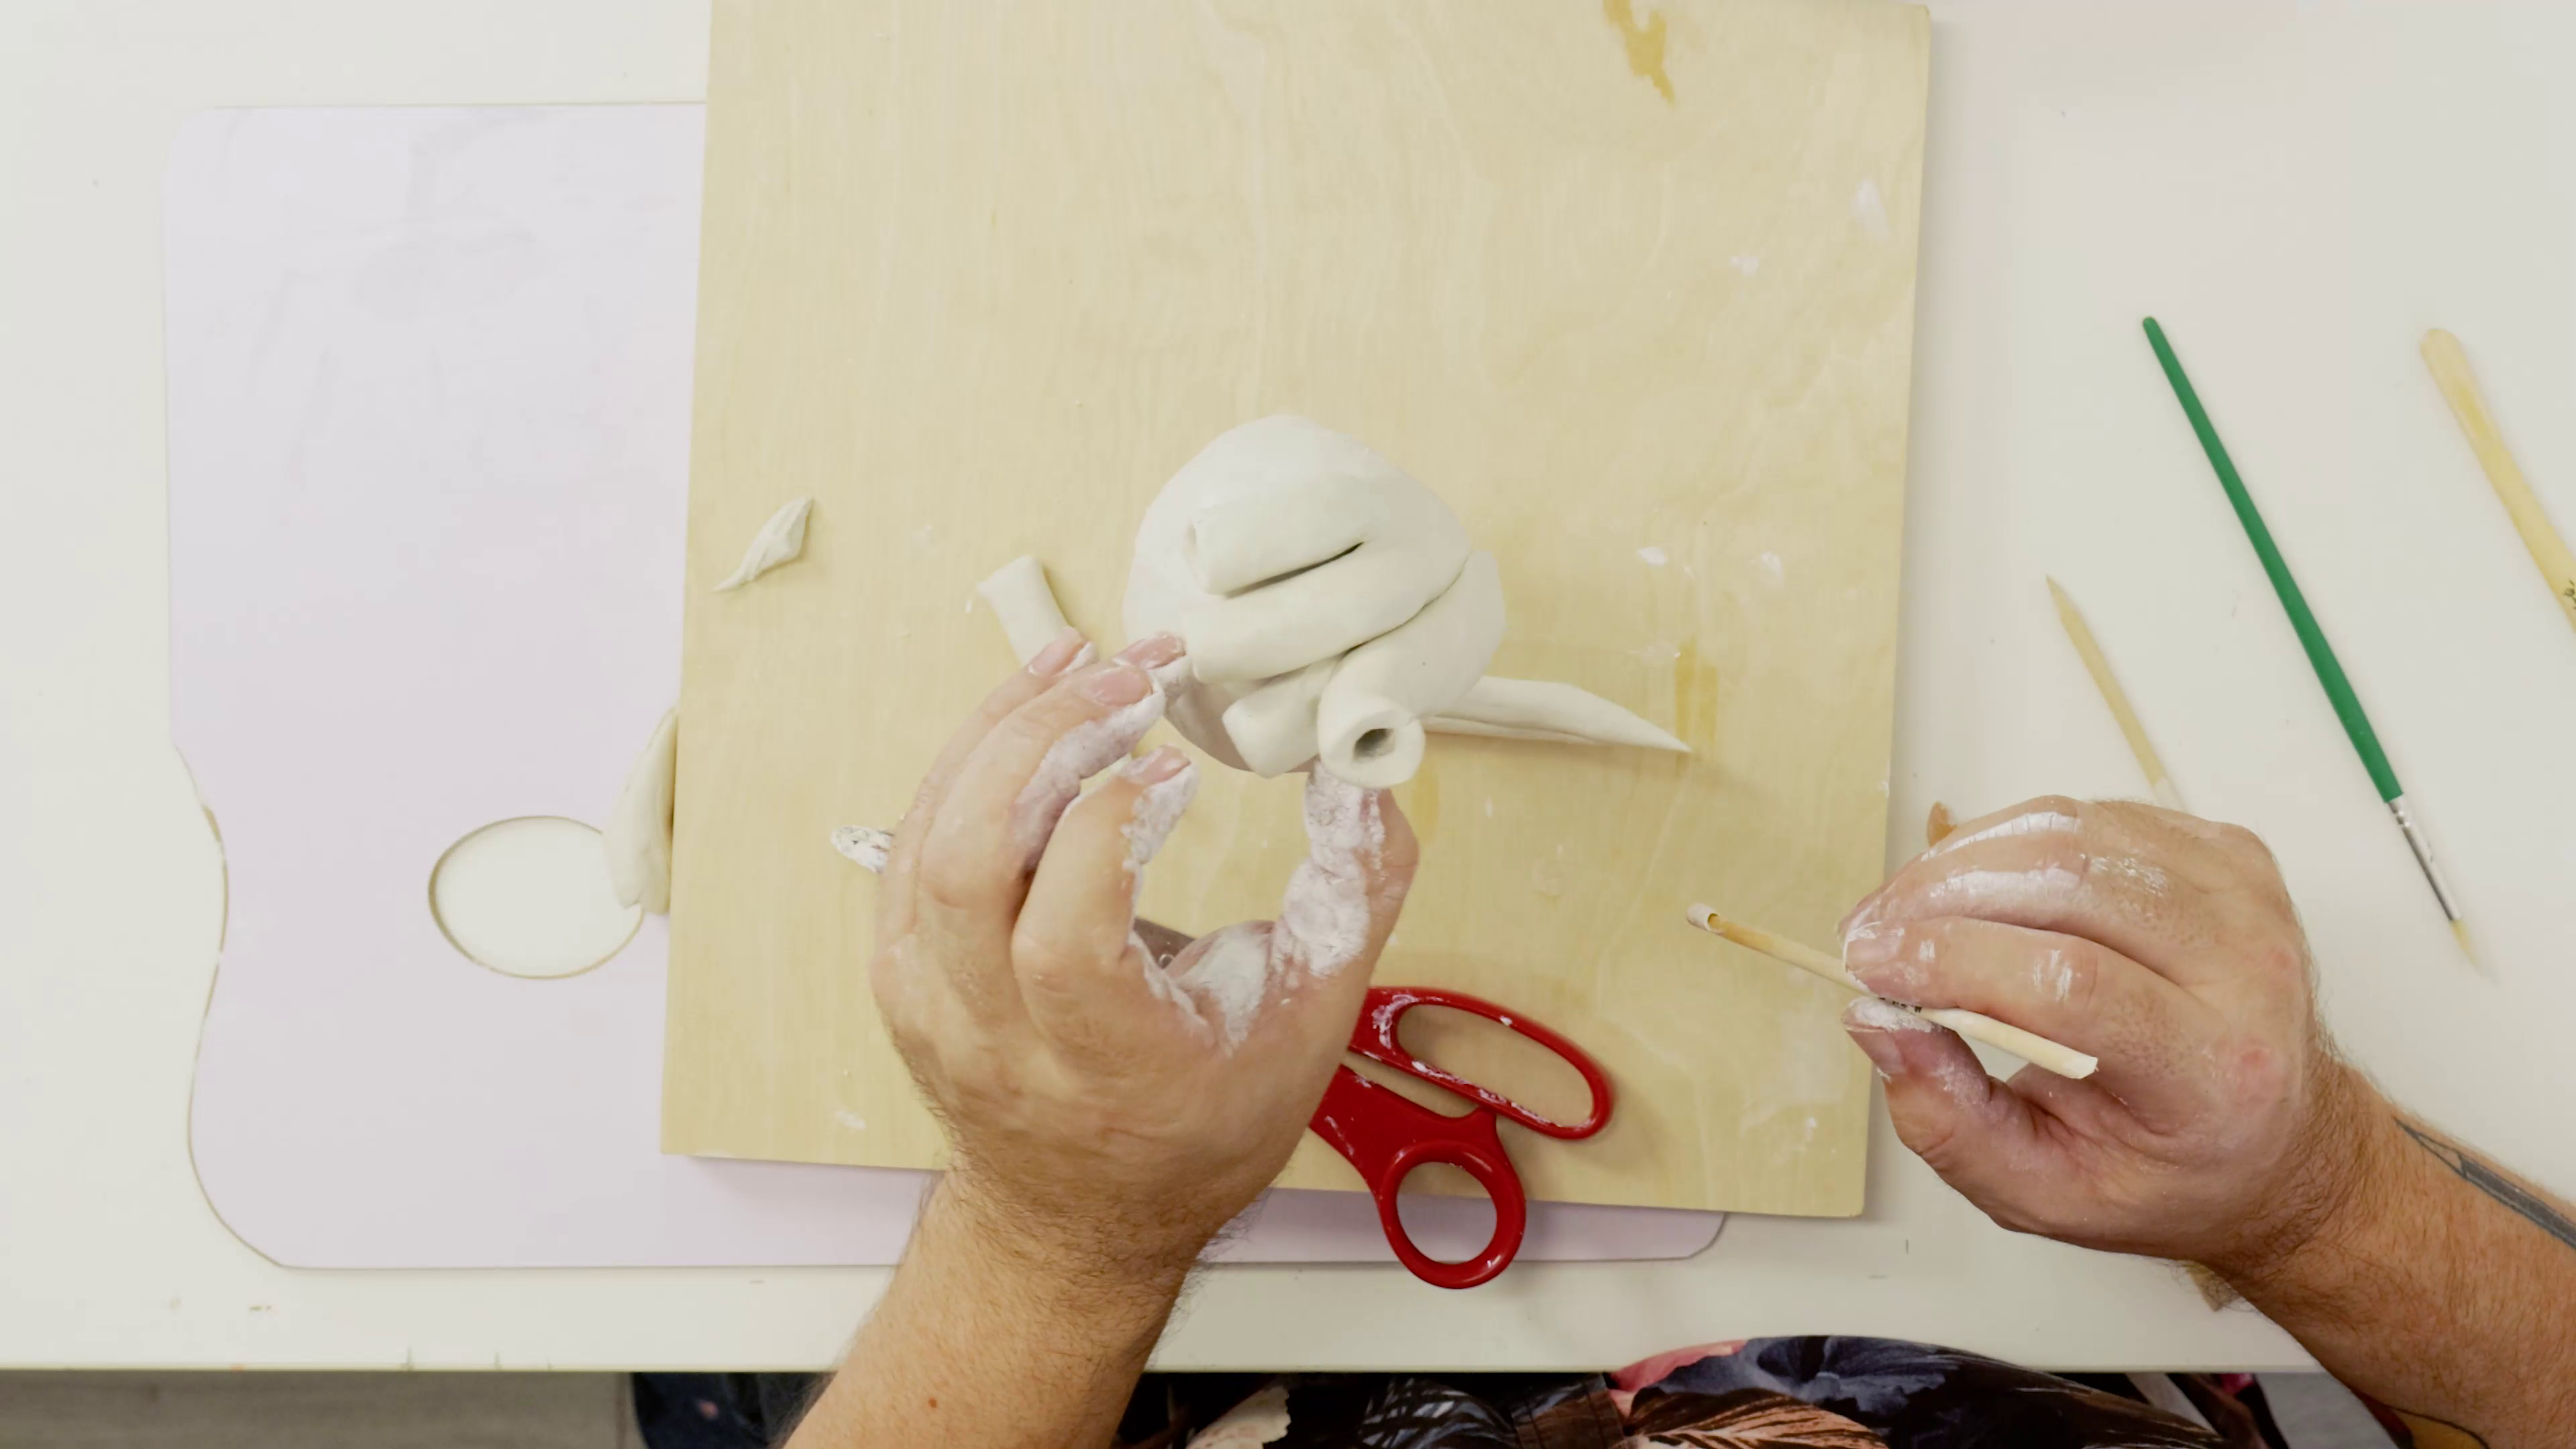
Next, we apply extra bits of clay to our heart. These are called Auricles. There is one of these on the right side and one on the left side.
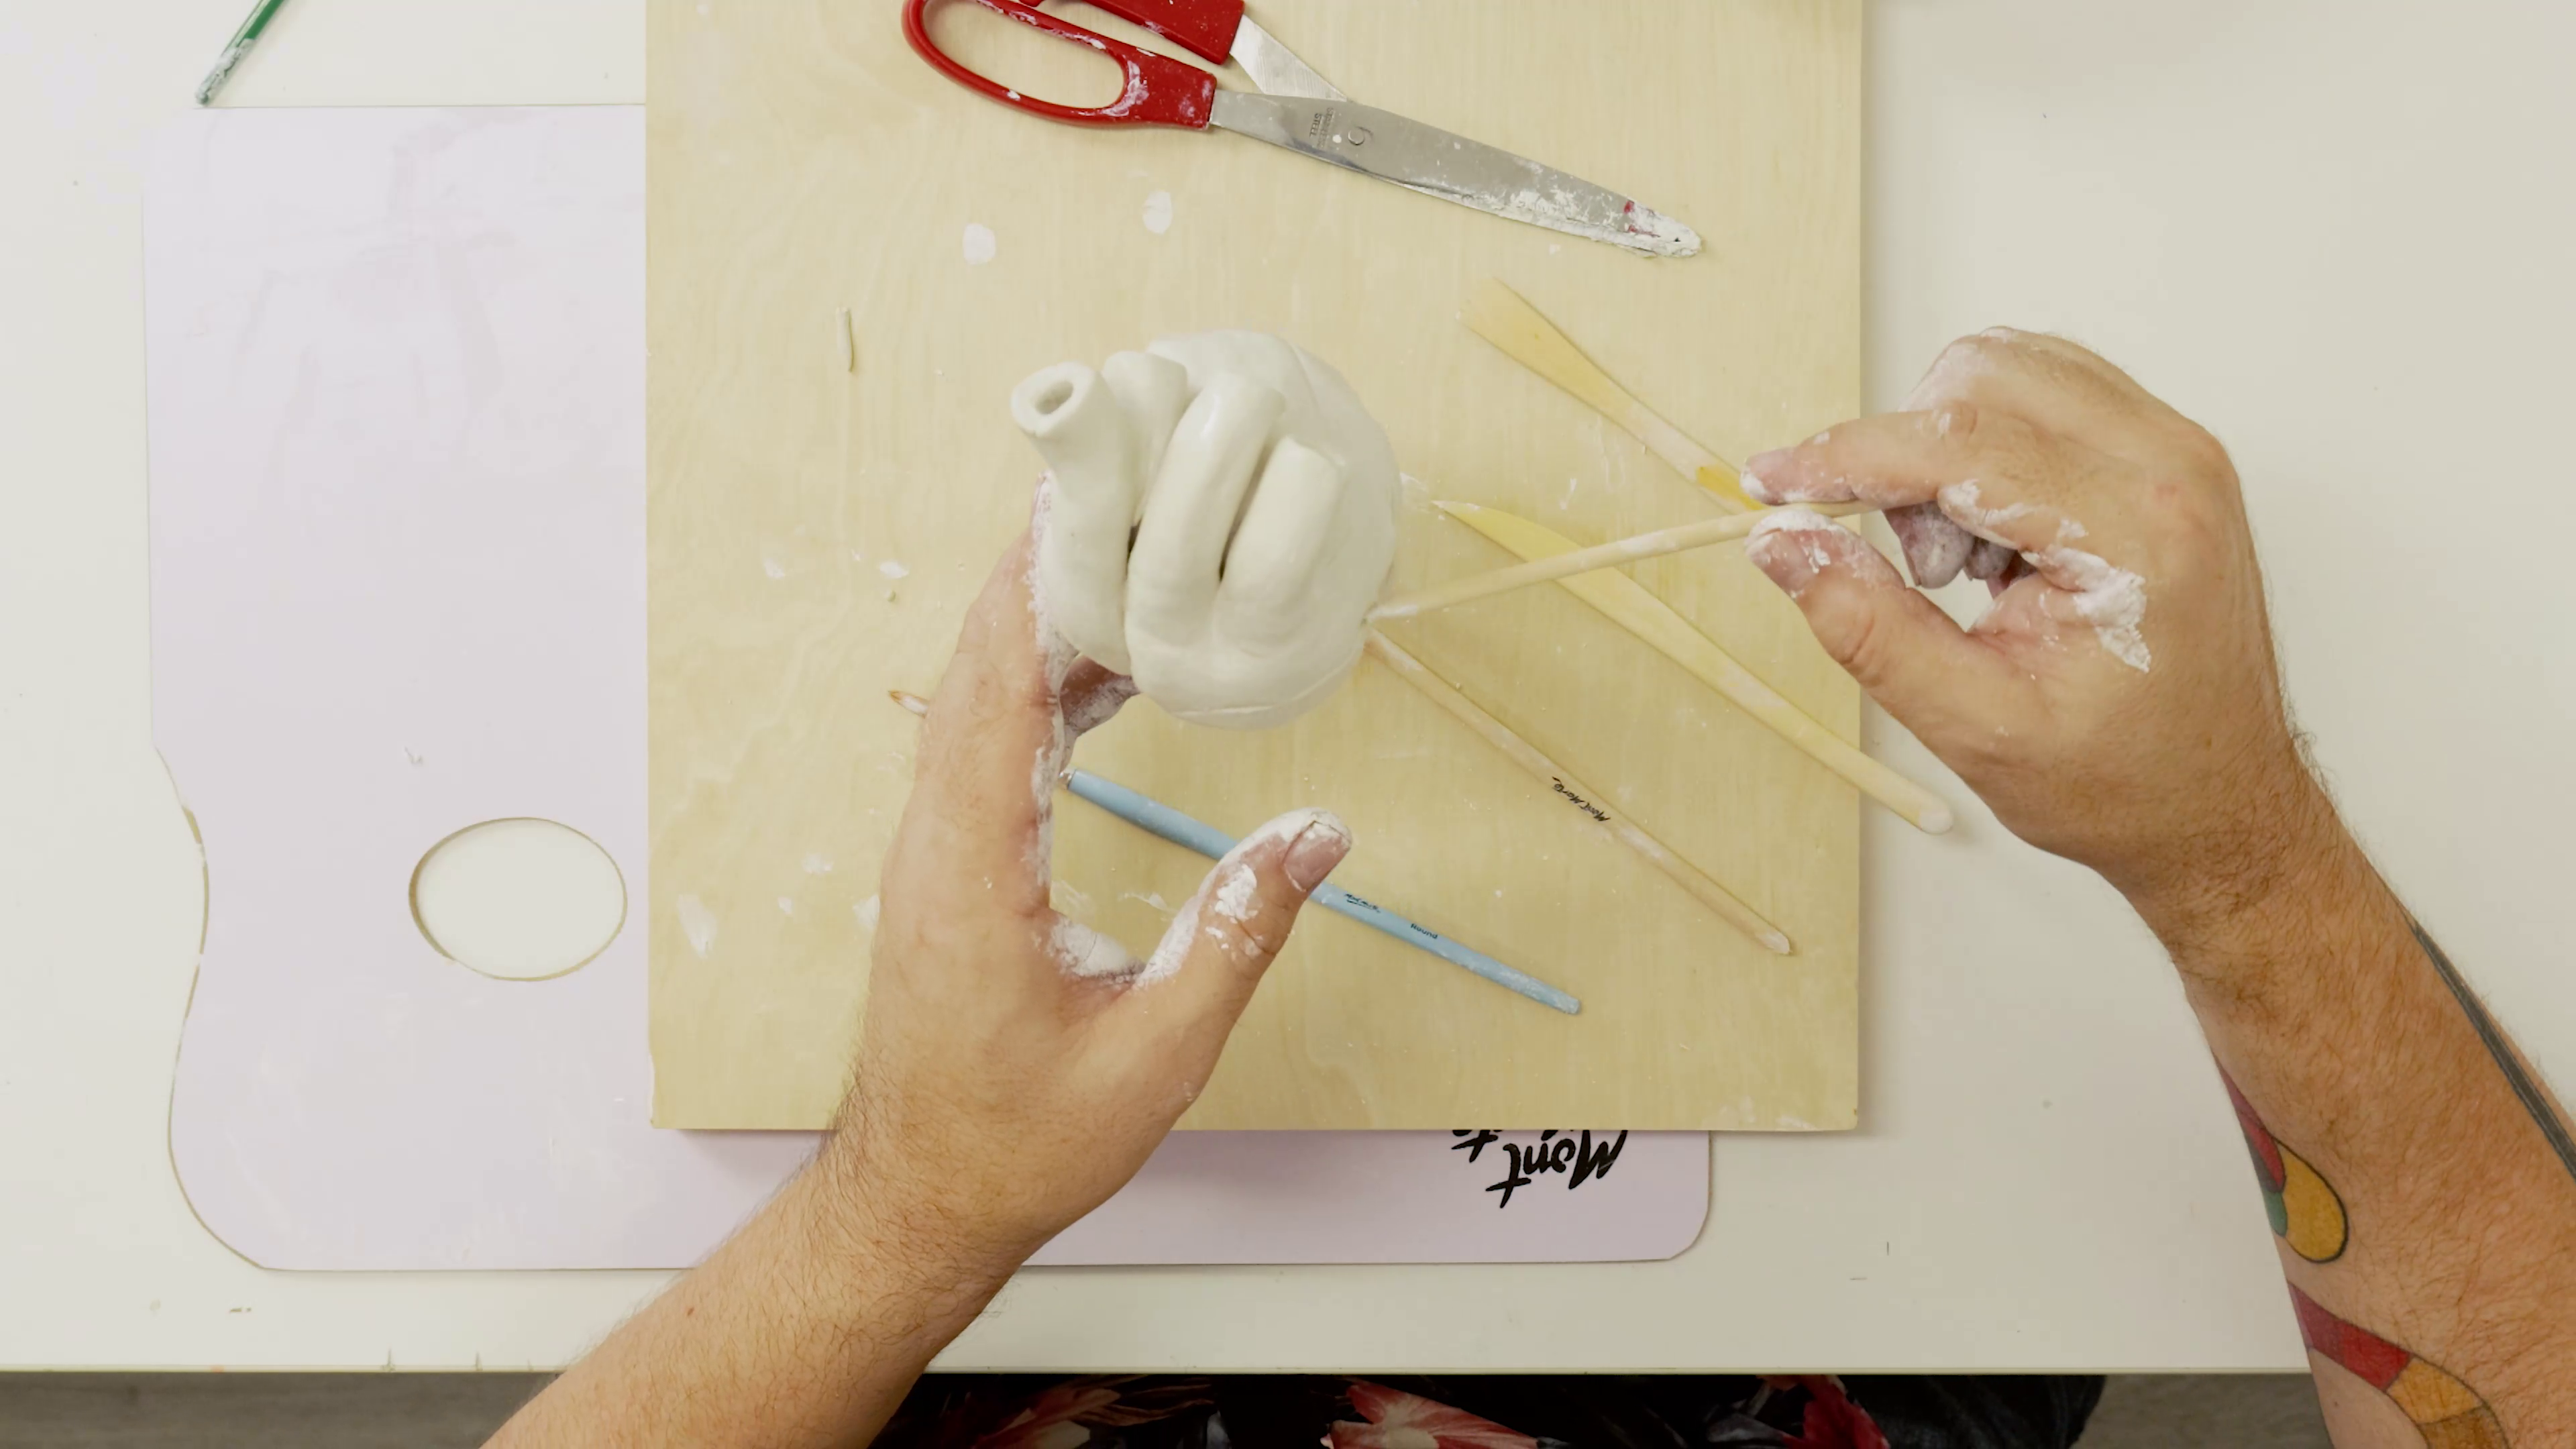
We can add some arteries onto the sides of the heart in between the Auricles. From here we can scratch into the model with a sharp tool to create details that will look like veins. We can also use a sharp tool to score ribs into the top of each tube at the top of the heart.
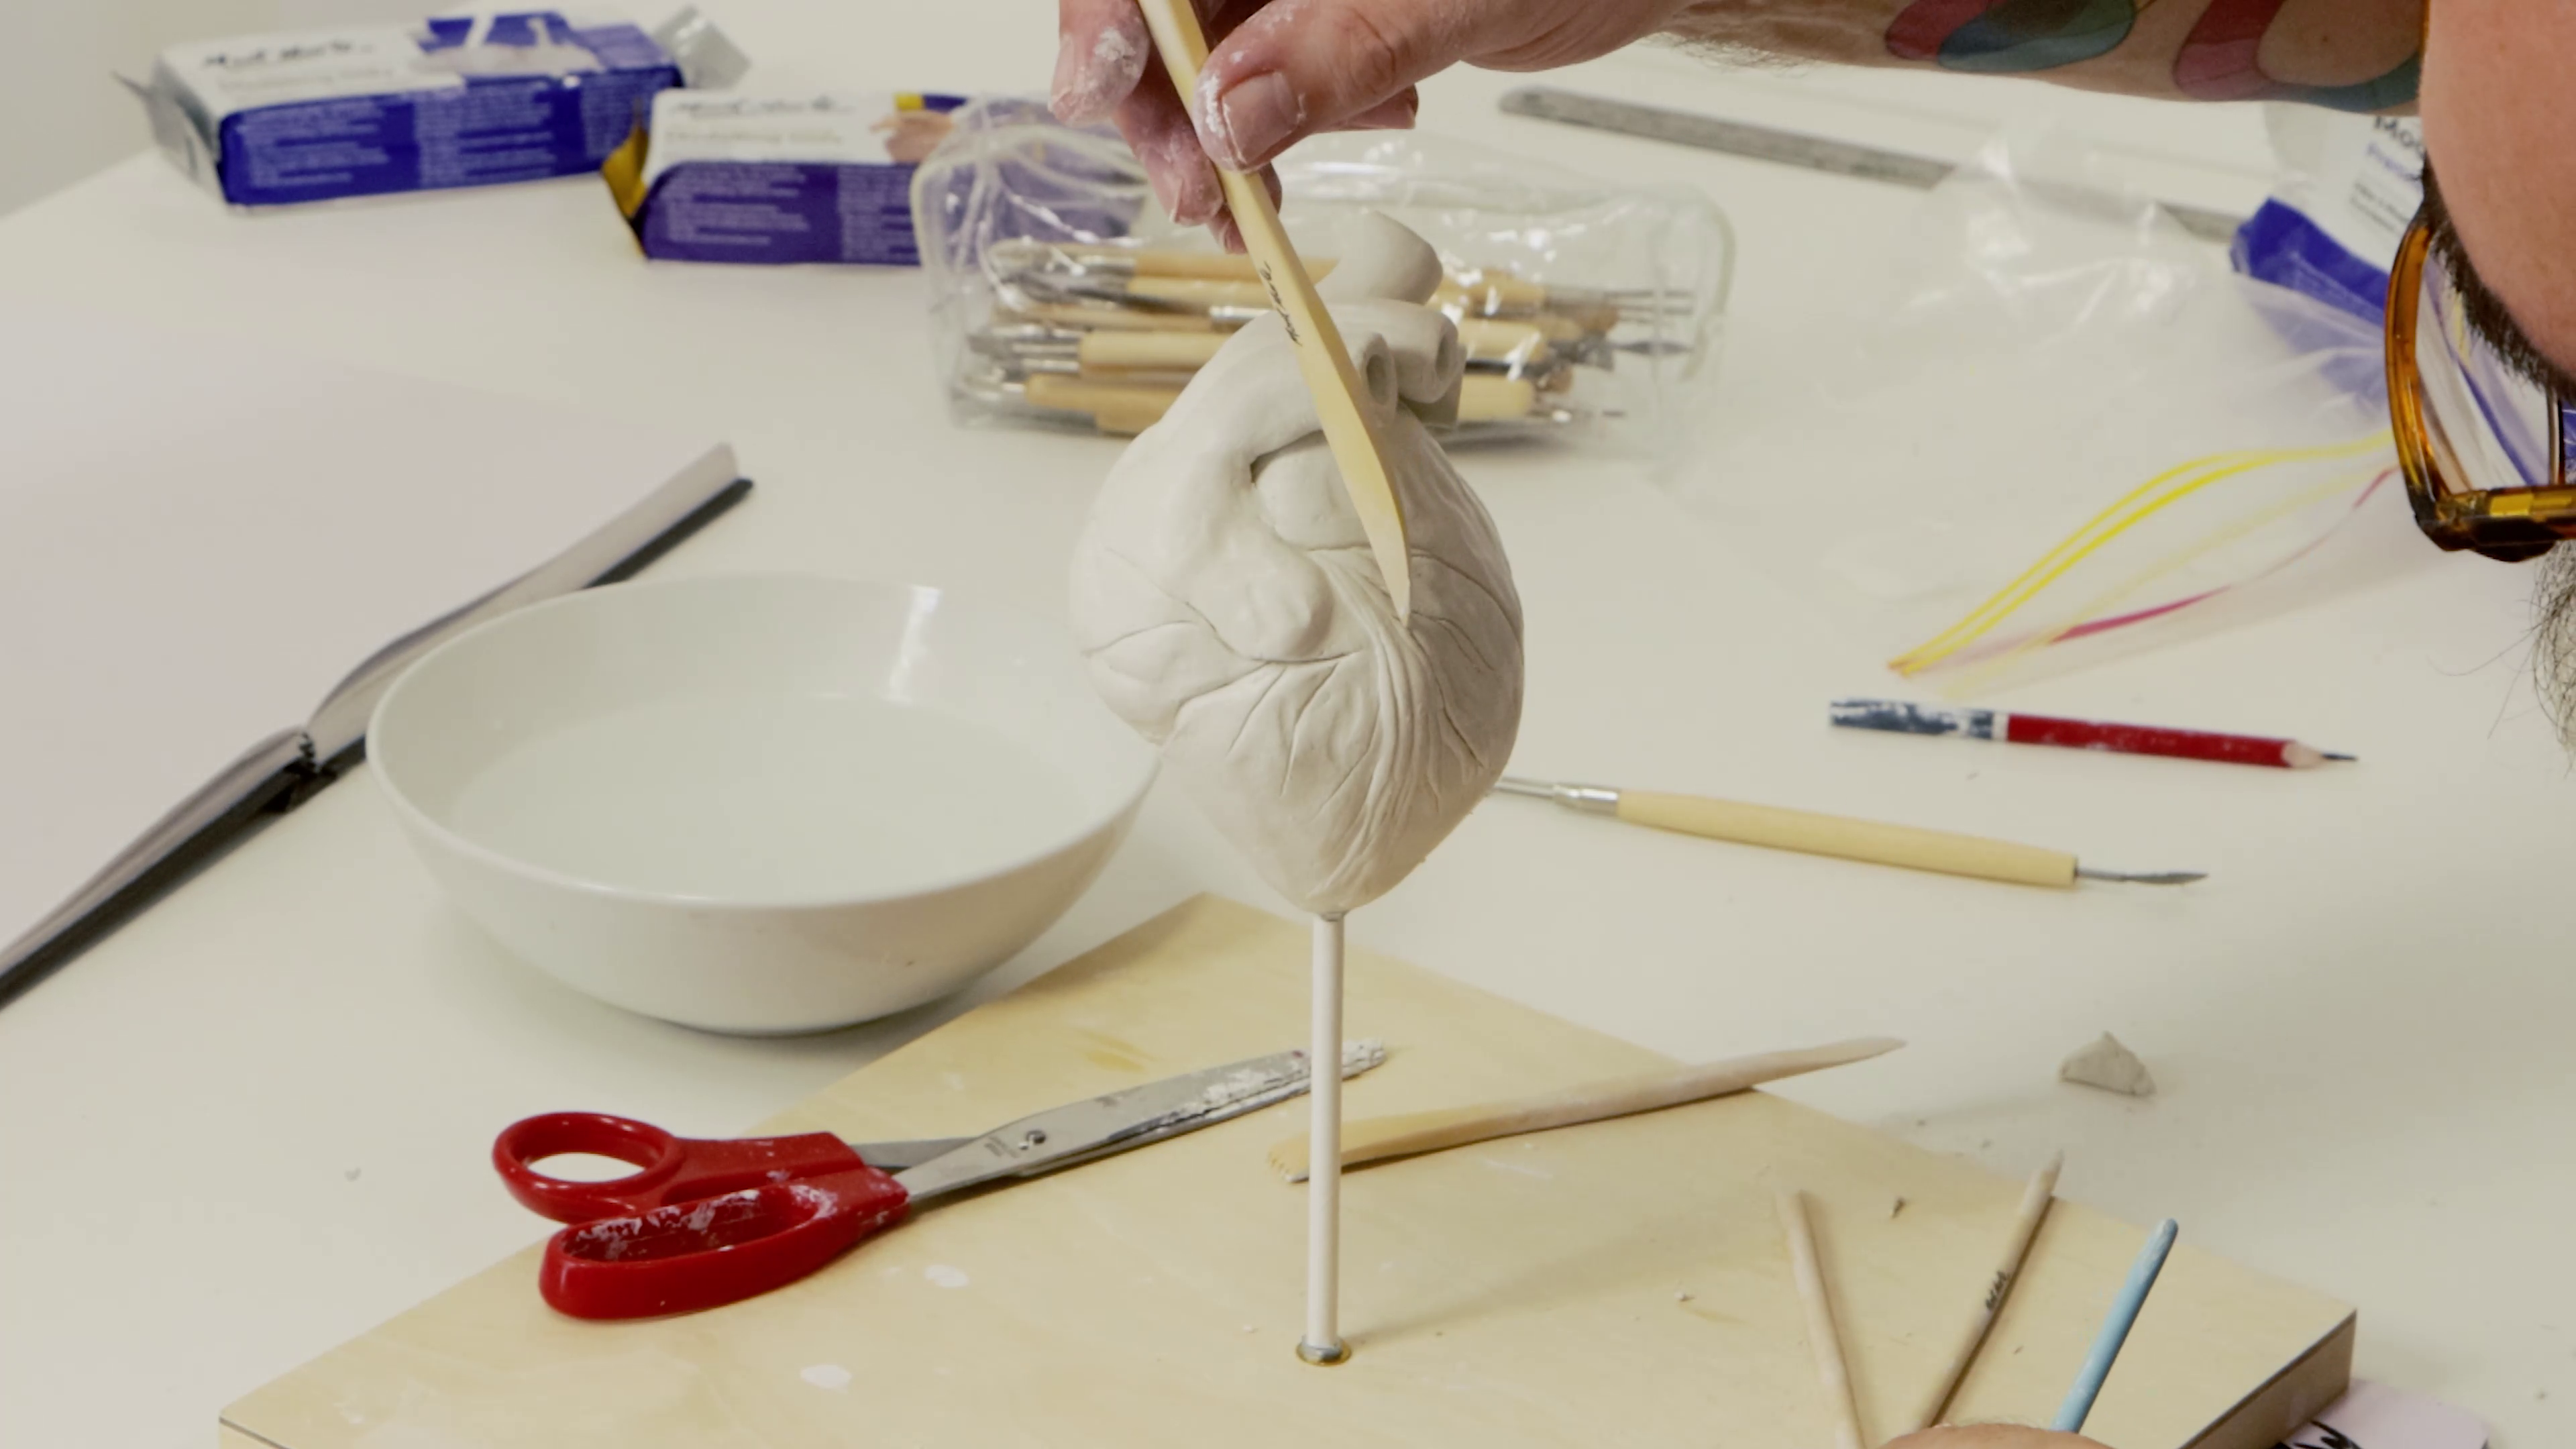
Once we are happy, we can let our heart dry this can take approximately 2-3 days to dry. Sometimes when your clay dries you may notice some small cracks have formed. This is very normal as when the water content of the clay evaporites the clay shrinks and cracks form. The good news these cracks can be easily repaired by dampening the crack and packing it with fresh small rolls of clay. These can then be blended smooth with a wet brush and allowed to dry.
Now we can paint our heart. The first step is to paint the heart in with Yellow Pink and allow this to fully dry.
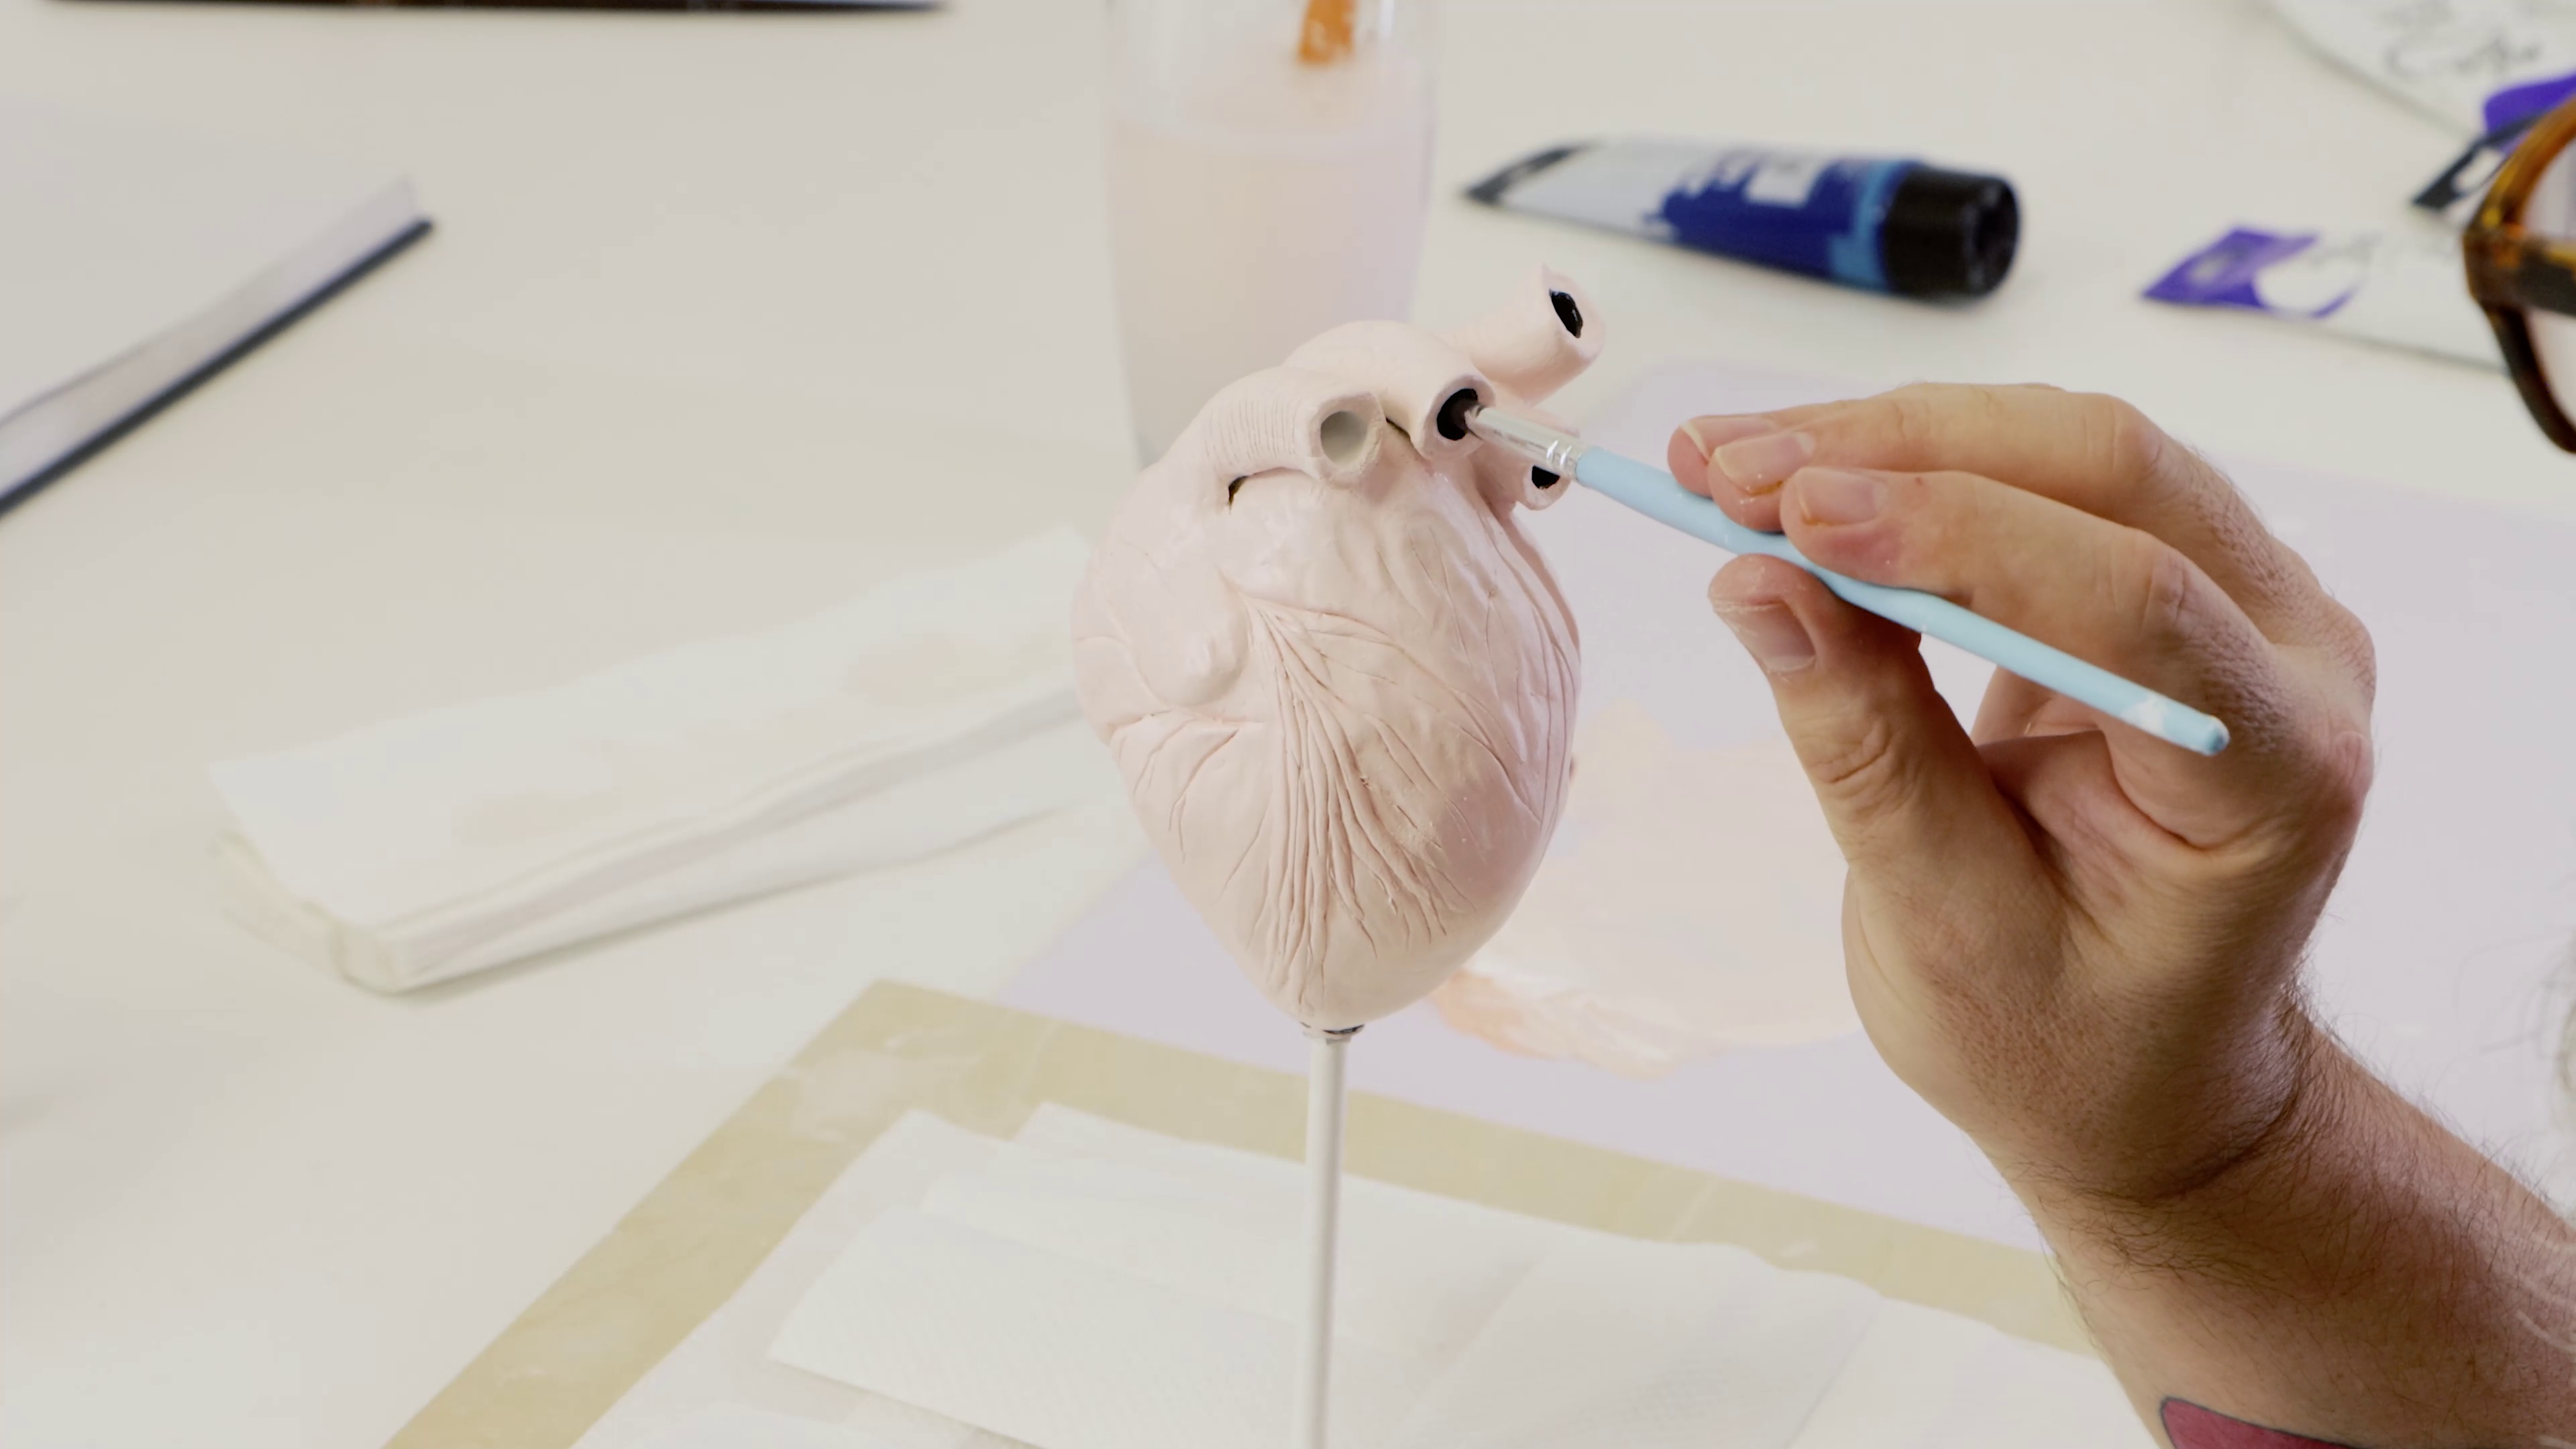
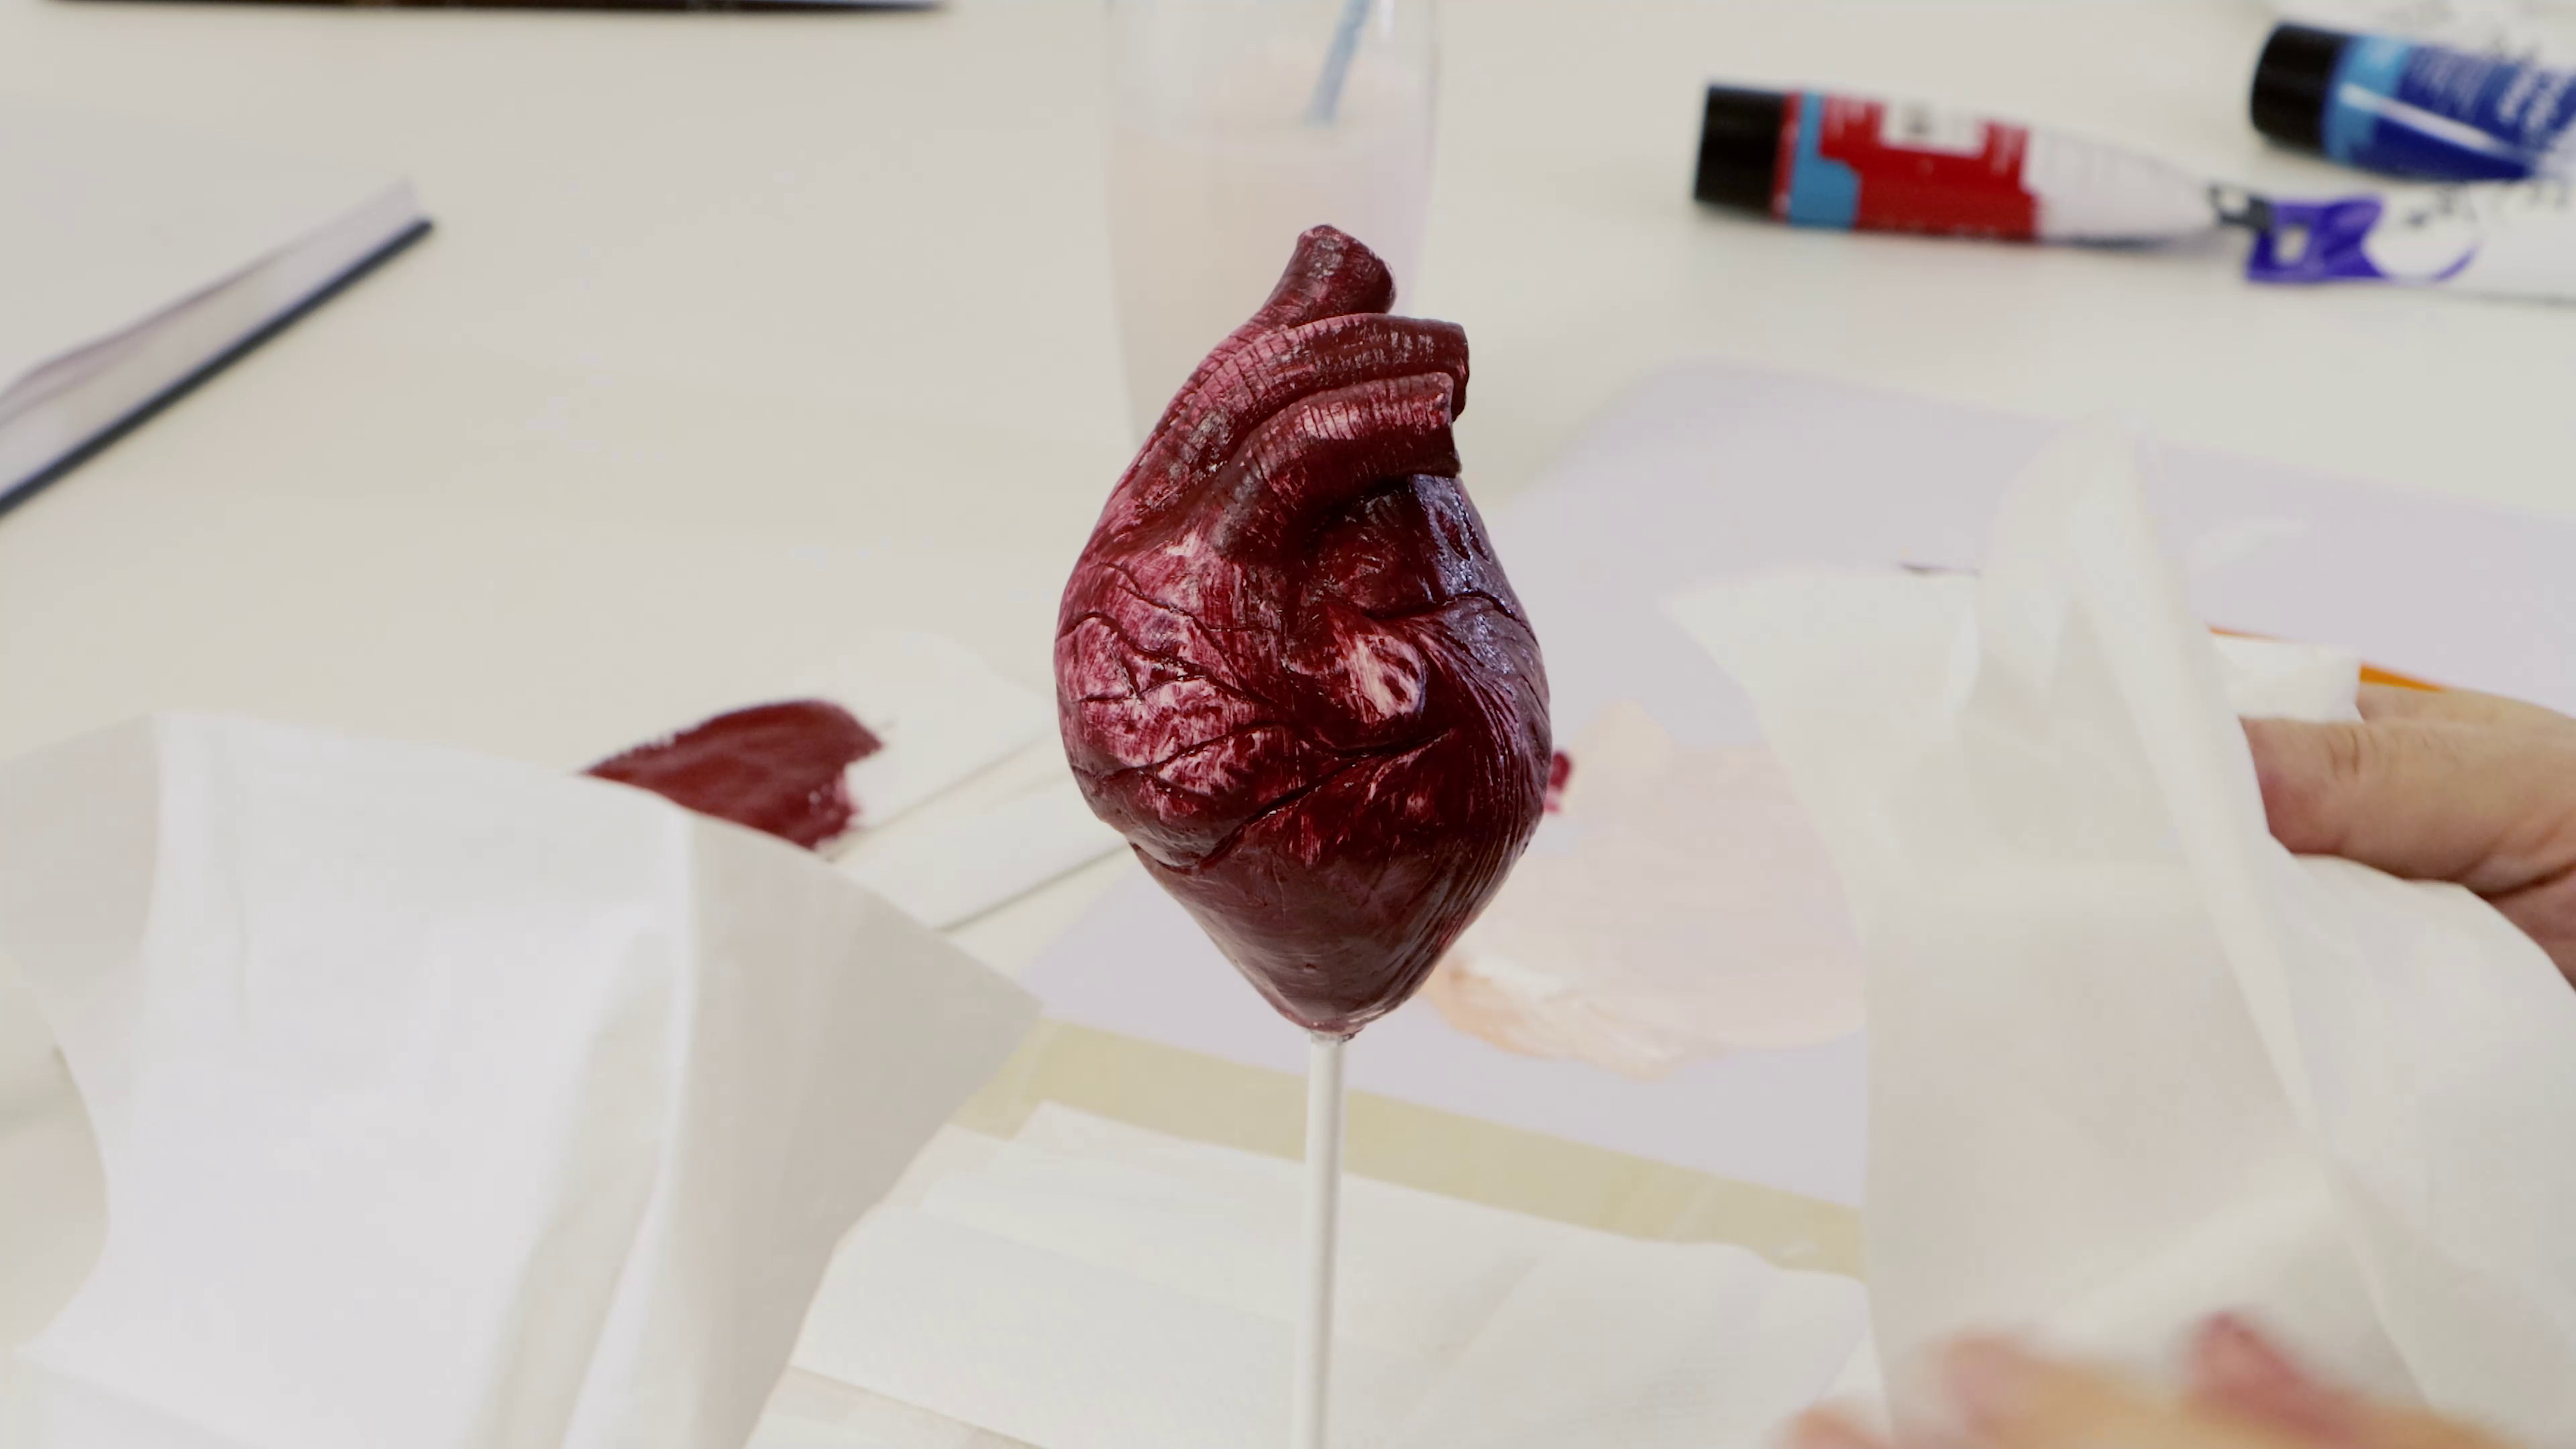
Next we create a deep rich red from Crimson and a touch of Phthalo Blue. Quickly cover the entire heart with this colour and while it is still wet wipe the excess off with a tissue. The beauty of this is that it will remain in the creases and the hollows. Once we are happy with the amount of paint removed, we allow this to dry.
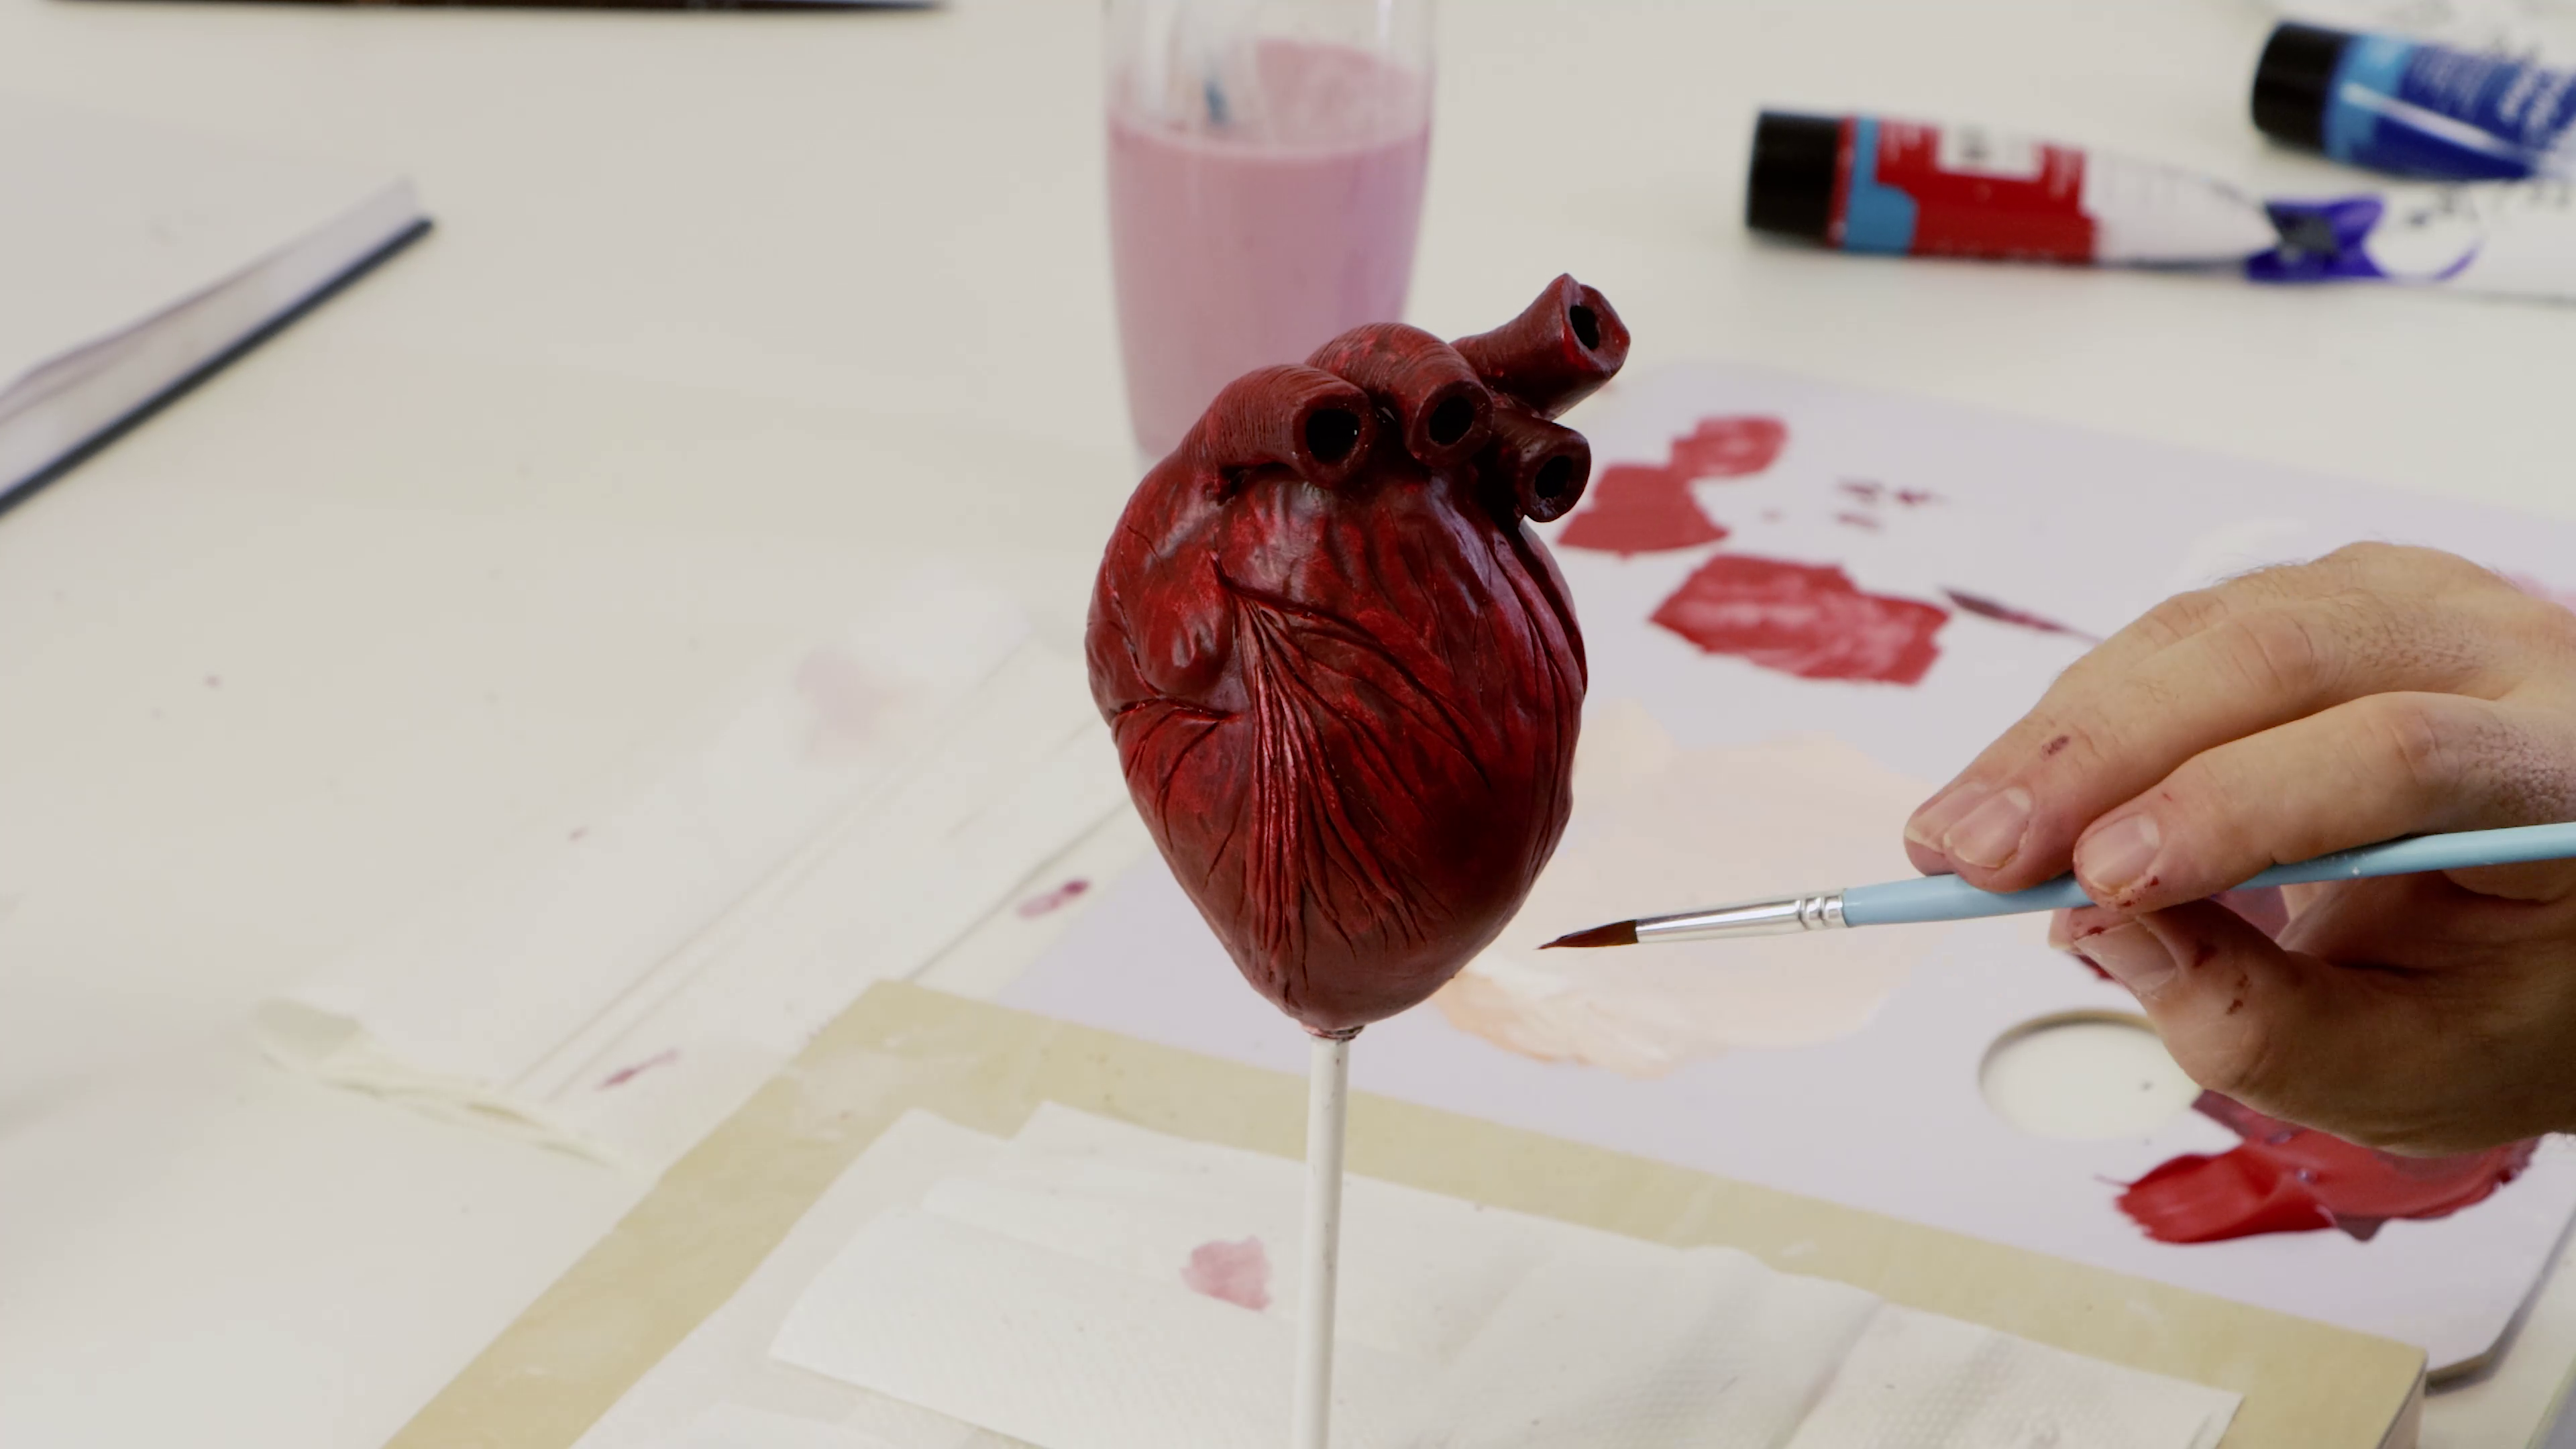
Next, we paint in the highlights with straight Brilliant red and allow this to dry.
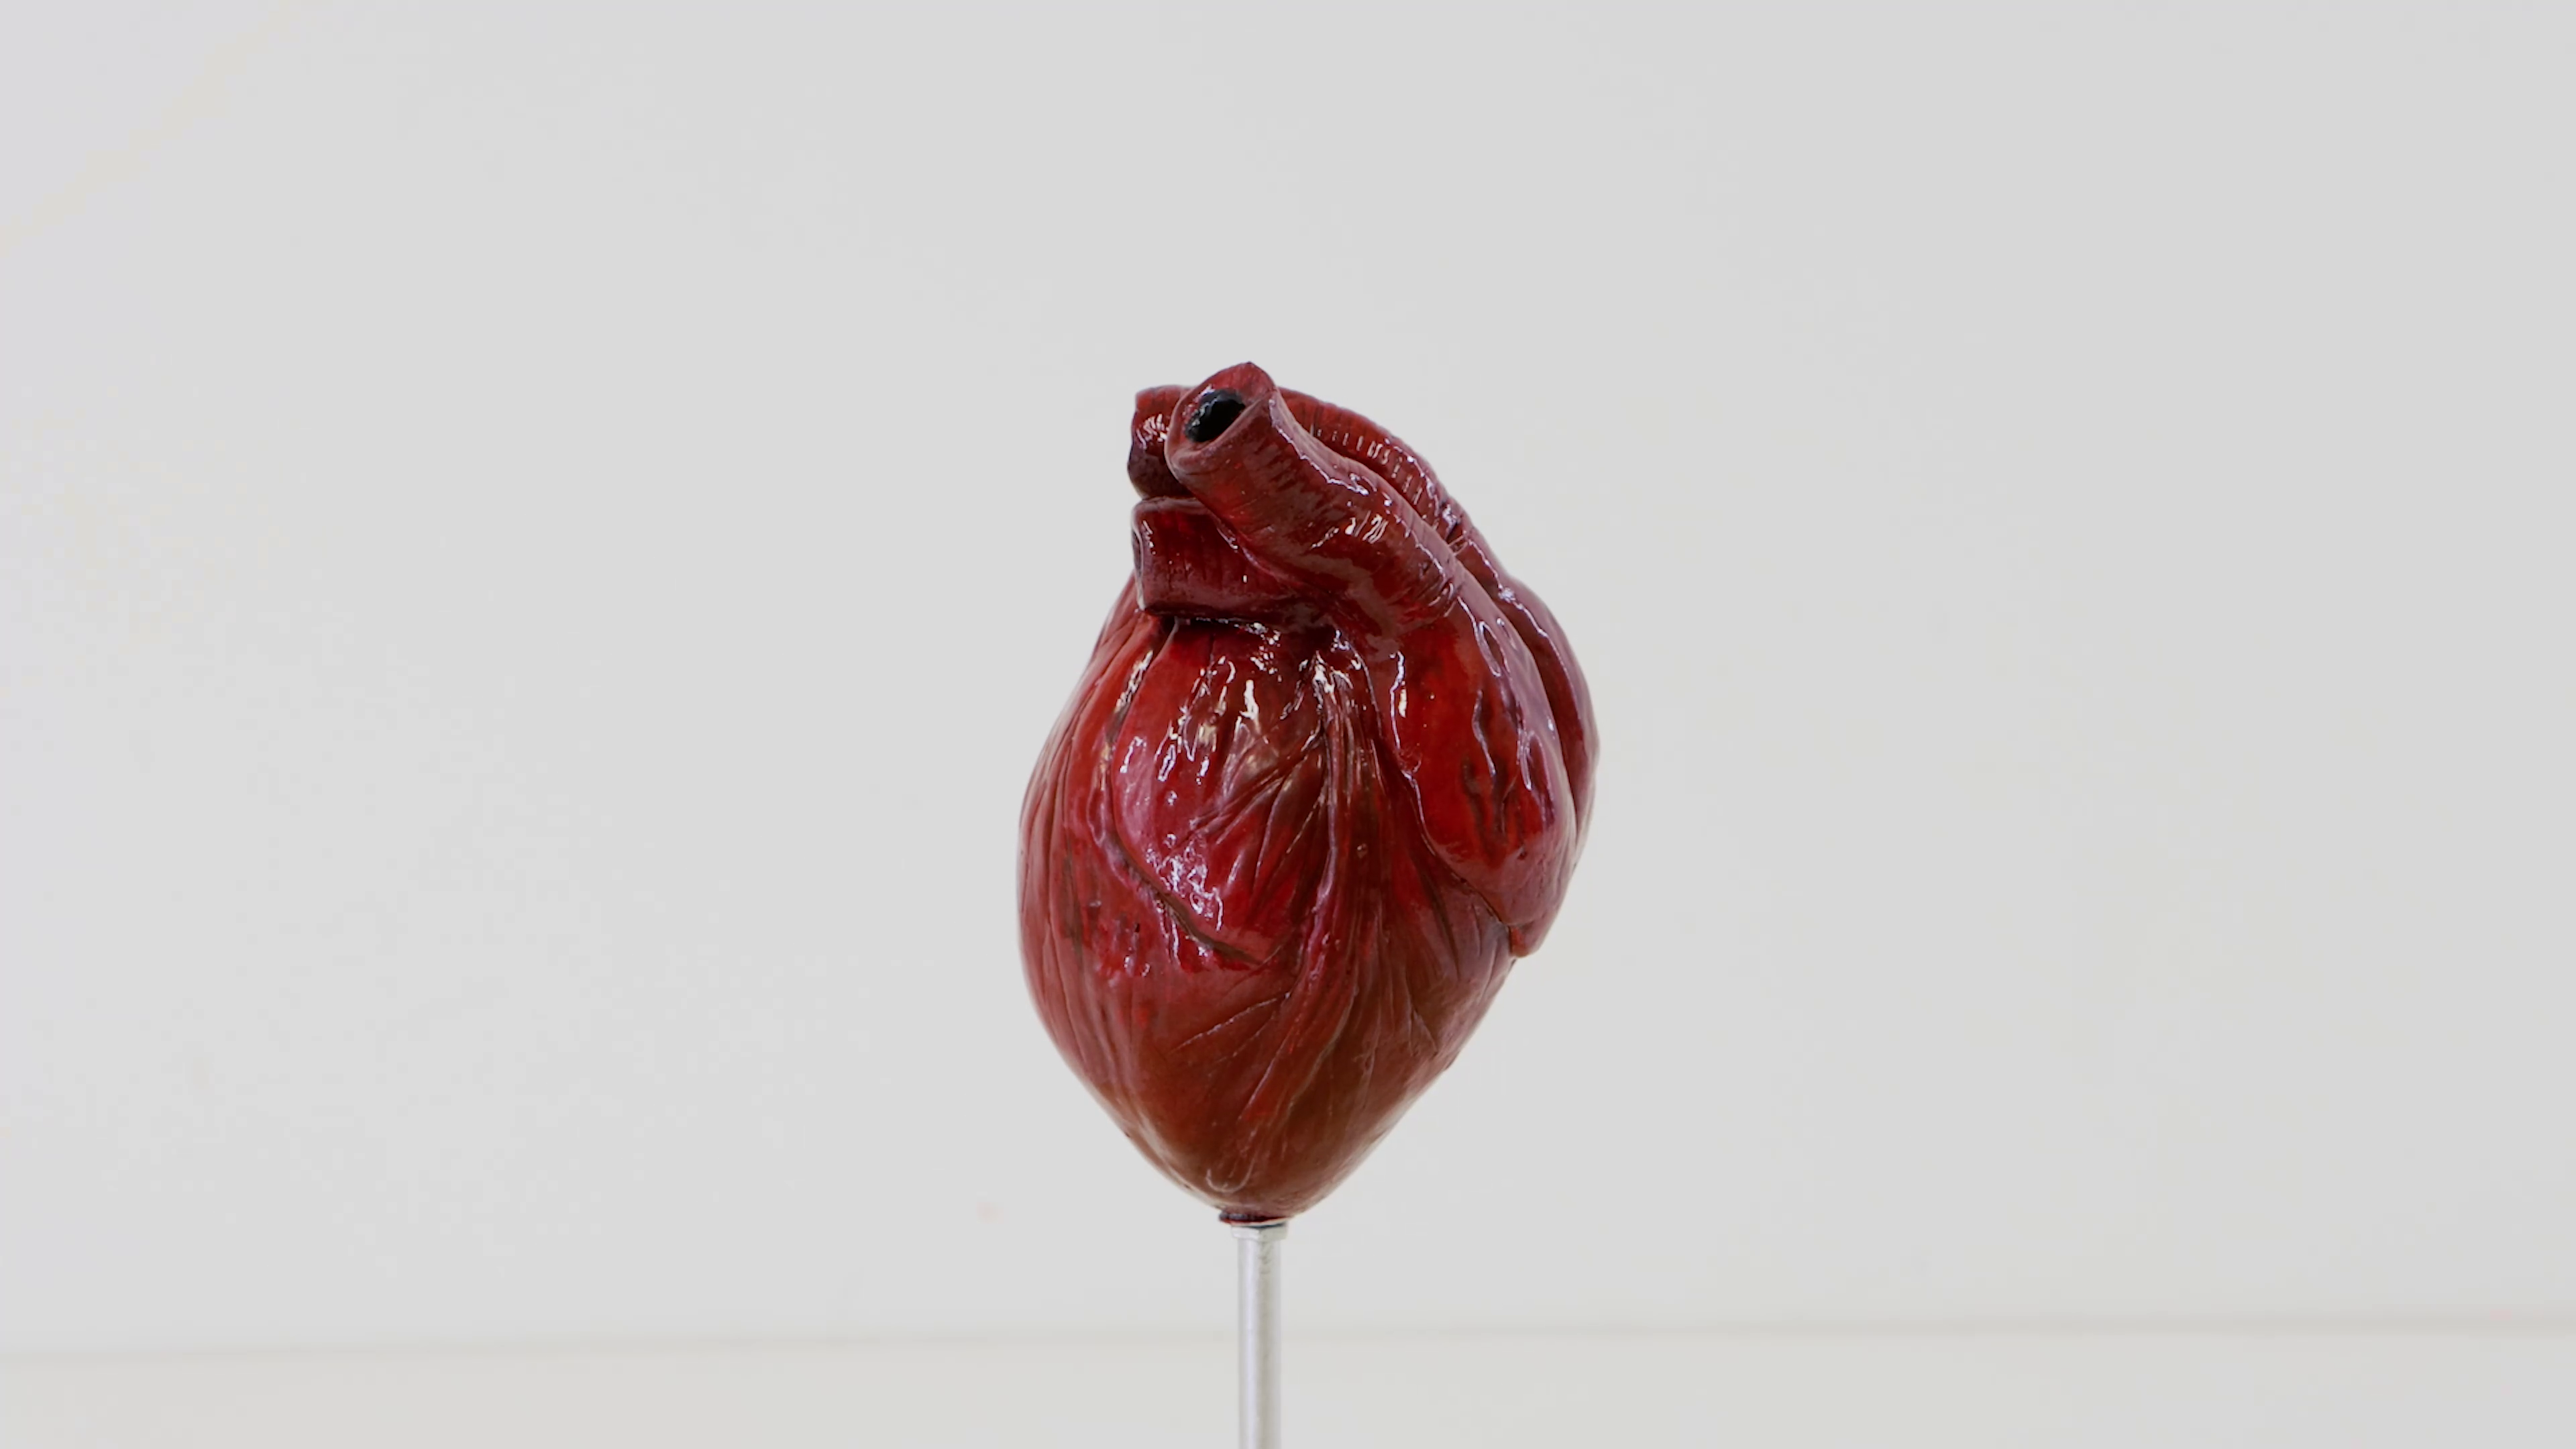
The next step is optional, but we think it really adds to the realism, and it is to paint the heart with Acrylic Gloss Varnish.
- MAPL0012 Disposable Plastic Palettes Discovery 5pc: https://www.montmarte.com/products/disposable-plastic-palettes-discovery-5pc
- MBST3030 Painting Board Premium 30.5 x 30.5cm (12 x 12in): https://www.montmarte.com/products/painting-board-premium-30-5-x-30-5cm-12-x-12in
- MMSP0005 Air Hardening Modelling Clay Premium 500g (1.1lb) - White: https://www.montmarte.com/products/air-hardening-modelling-clay-premium-white-500gms
- MMSP0003 Mini Modelling Tools Signature 10pc: https://www.montmarte.com/products/mini-modelling-tools-signature-10pc
- MSCH7510 Acrylic Colour Paint Signature 75ml (2.5 US fl.oz) Tube - Brilliant Red: https://www.montmarte.com/products/acrylic-colour-paint-signature-75ml-2-5-us-fl-oz-brilliant-red
- MSCH7535 Acrylic Colour Paint Signature 75ml (2.5 US fl.oz) Tube - Rose Madder: https://www.montmarte.com/products/acrylic-colour-paint-signature-75ml-2-54-us-fl-oz-tube-rose-madder
- MSCH7520 Acrylic Colour Paint Signature 75ml (2.5 US fl.oz) Tube - Phthalo Blue: https://www.montmarte.com/products/acrylic-colour-paint-signature-75ml-2-5-us-fl-oz-phthalo-blue
- PMSA7505 Satin Acrylic Paint Premium 75ml (2.5 US fl.oz) Tube - Yellow Pink: https://www.montmarte.com/products/satin-acrylic-paint-premium-75ml-2-5-us-fl-oz-tube-yellow-pink
- MCG0109 Artist Brush Taklon Short Bright 16: https://www.montmarte.com/products/artist-brush-taklon-short-bright-16
- Drill with a 3/16 size bit
- 1 x 3/16 threaded rod
- 3 x 3/16 size washes
- 3 x 3/16 size nuts
- 1 x 3/16 size round nut
- Paper drinking straw
- Roll of double-sided tape
- Roll of clear tape
- Roll of aluminium foil
- Flat nose pliers
- Long nose pliers
- Scissors
Find out more about the products used
You may also like
