


Watercolour pencils offer a world of creative possibilities. Their ability to achieve a range of painting and drawing effects makes them one of the most versatile art mediums you can use. To help you get the most out of your set, we’ve put together a list of our top watercolour pencil techniques and care tips.
1. Sharpen with a Hobby Knife
Since watercolour pencils are held together with dissolving binders, they are generally softer than coloured pencils. Using a standard sharpener can damage the colour strips, so give your set the care they need by carefully sharpening them with a hobby knife instead.
2. Store and Carry in a Box
When you transport or store your watercolour pencils, keep them bound together with a rubber band and put them in a box. A fabric pencil case won’t offer the protection they need and can cause the colour strips to fracture if they are rattling around.
3. Experiment with Different Painting Techniques

One of our favourite things about watercolour pencils is how versatile they are. There is an array of different effects and techniques you can achieve by taking the time to experiment and try out different approaches. If you’re not sure where to start, we’ve listed three popular and easy methods you can try out below.
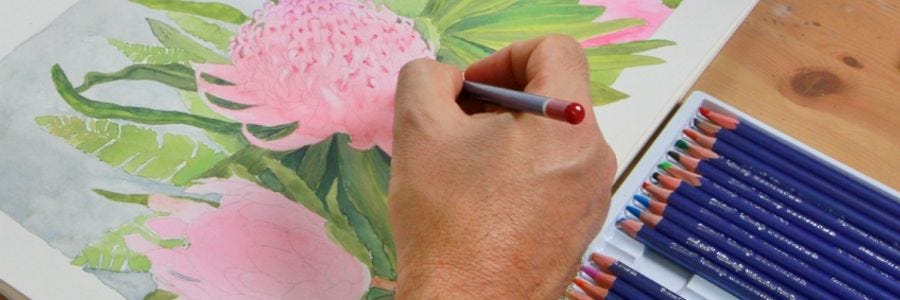
Draw Onto Dry Paper and Add Water
Let’s start with the basics. Draw directly onto a sheet of watercolour paper, as you would with regular coloured pencils, and use a watercolour paintbrush to apply water. This activates the pigment and turns your pencil marks into watercolour paint. You can then spread, blend and create different effects with your colours.
Create Swatches on a Separate Piece of Paper
Another easy watercolour pencil painting method is to create swatches on a separate piece of paper. You’ll then use this as your palette. To start, colour in a small area on your paper palette and add water to create your paint. This method is great for creating soft washes and filling in larger areas on your artworks. You can also mix colours by drawing two colours side by side and combining them with water.
Apply to Damp Paper
The third method for painting with watercolour pencils is to draw on a dampened sheet of watercolour paper. To control your water application, use a sponge or spray bottle to dampen your paper and be careful not to overdo it. This approach creates intense and vibrant line work in a similar way to oil pastels.
4. Spray Water Onto Your Drawing
To create a soft effect, use a spray bottle to gently apply water to your drawing. This is a quick and easy way to create beautiful, soft edges on your line work.
5. Paint in the Outdoors
Watercolour pencils are easy to carry and don’t require many additional art tools and materials. Make the most of the compact nature of this medium and head into the outdoors for a creative session. All you need to take is your watercolour pencil set, paper, a brush, and some water.
6. Use a Water Brush

Water brushes are perfect for use with watercolour pencils. They come in different sizes and feature a hollow barrel that can be filled with water or mixed paint. By squeezing the flexible barrel as you work, water flows out onto the brush bristles and can be applied to your artwork. It can take some practice to control the flow, but, once you get a feel for it, a water brush is an excellent tool to use with your watercolour pencils.
7. Choose the Right Paper
To achieve the best results, you will need to choose the right paper to use with your watercolour pencils. We would recommend watercolour stock with at least 185gsm in weight. This will withstand the various techniques you will be using and prevents warping from water application.
8. Start Light and Finish Dark

The best process for creating a watercolour artwork is to lay the lightest tones down first and add the darker tones last. This is because watercolour is a translucent medium, so a light colour will not cover a darker tone.
9. Add Detail to Mixed Media Artworks
Watercolour pencils can be used to add fine details and patterning over standard watercolour artworks and gouache. Don’t be afraid to experiment and explore what this fantastic medium is capable of.
10. Create Texture
There are a range of ways to add texture and effects to watercolour artworks. A fun way to figure these out is to play around with different ideas and see what happens. To start you off, we’ll share a couple of our favourite ideas. The first one is to use sandpaper on wood, then let the particles fall onto your damp watercolour artwork to create natural spots on petals, trees and other suitable subjects. You can also use a toothbrush or paint brush to create droplets or flick paint onto your artwork.
Although your watercolour pencil set is compact, it contains a range of artistic possibilities.
This article covers just a few watercolour techniques and tips, so don’t be afraid to experiment and discover more fantastic ways to create unique artworks.
To learn more about watercolour pencil techniques, watch our latest video tutorial about creating a native Australian flower artwork.
Feel free to tag @montmarteart or #montmarteart on social media to show us what you’ve created!


