


Whether you’re looking for new ways to amp your game, or you’re just getting the hang of things, we’ve piled up 13 polymer clay techniques for you to try. From conditioning to stamping, it doesn’t matter where you are on your creative journey, roll out some clay and seize the day, with some of these polymer clay techniques.
1. Conditioning polymer clay:
It’s no secret that polymer clay is a little harder to work with and less malleable (or soft) compared to its friend, air dry clay. But this polymer clay technique will help make this process easier. To condition polymer clay, cut the clay into a small slab and knead it with your hands. The clay will soften slightly thanks to the oil and warmth of your hands, so you can roll the clay into a ball or knead it further to make the clay more malleable. You can then begin by rolling it out with a rolling pin, in between two sheets of cling film. The cling film will keep the clay clean, and the rolling pin will help smooth the clay out. If your polymer clay is still a little stubborn to work with, you can also condition it using a clay press like our Signature Polymer Clay Press.
2. Blending:
If one colour isn’t cutting it, you can blend multiple polymer clay colours together using the blending technique. Roll out your first colour, then your second and then knead the two colours together. Once kneaded, you can roll the colours together with a rolling pin to flatten the clay. Repeat this technique if you want to add more colours.
3. Transitional blends:
You can use this polymer clay technique in jewellery making or in sculpting, wherever you want a smooth gradient look. For this, create two triangles and join them together by a rolling pin. Next, feed the clay through a clay press to flatten and blend the colours. Keep feeding and folding the clay for a smoother blend. You can also use a rolling pin for this if you don’t have a clay press on hand.
4. Marbling:
You can use this polymer clay technique in jewellery making or in sculpting, where you want a marble look. To marble, roll your clay colours into a snake shape, then gently twist one colour around another like a rope. Once you have combined these colours, roll the rope on your work surface, to combine the colours into one long snake shape. Then roll the clay flat using a rolling pin, this will combine the colours together and give you a marbled effect where you’ll have an even amount of colour.
5. Clay coiling:
You might have seen bowls with coils of clay snakes, swirled together to build a base or decorative design but the clay coiling technique isn’t just for pottery, clay coiling can be used in polymer clay too. Roll your polymer clay out using a rolling pin and keep rolling the clay until you have a long snake shape. Then wrap the clay around to create a coil. You can add different colours to your clay then roll the colours together to create a coloured coil too or pinch the coils together to use the clay coiling technique as the base for pots.
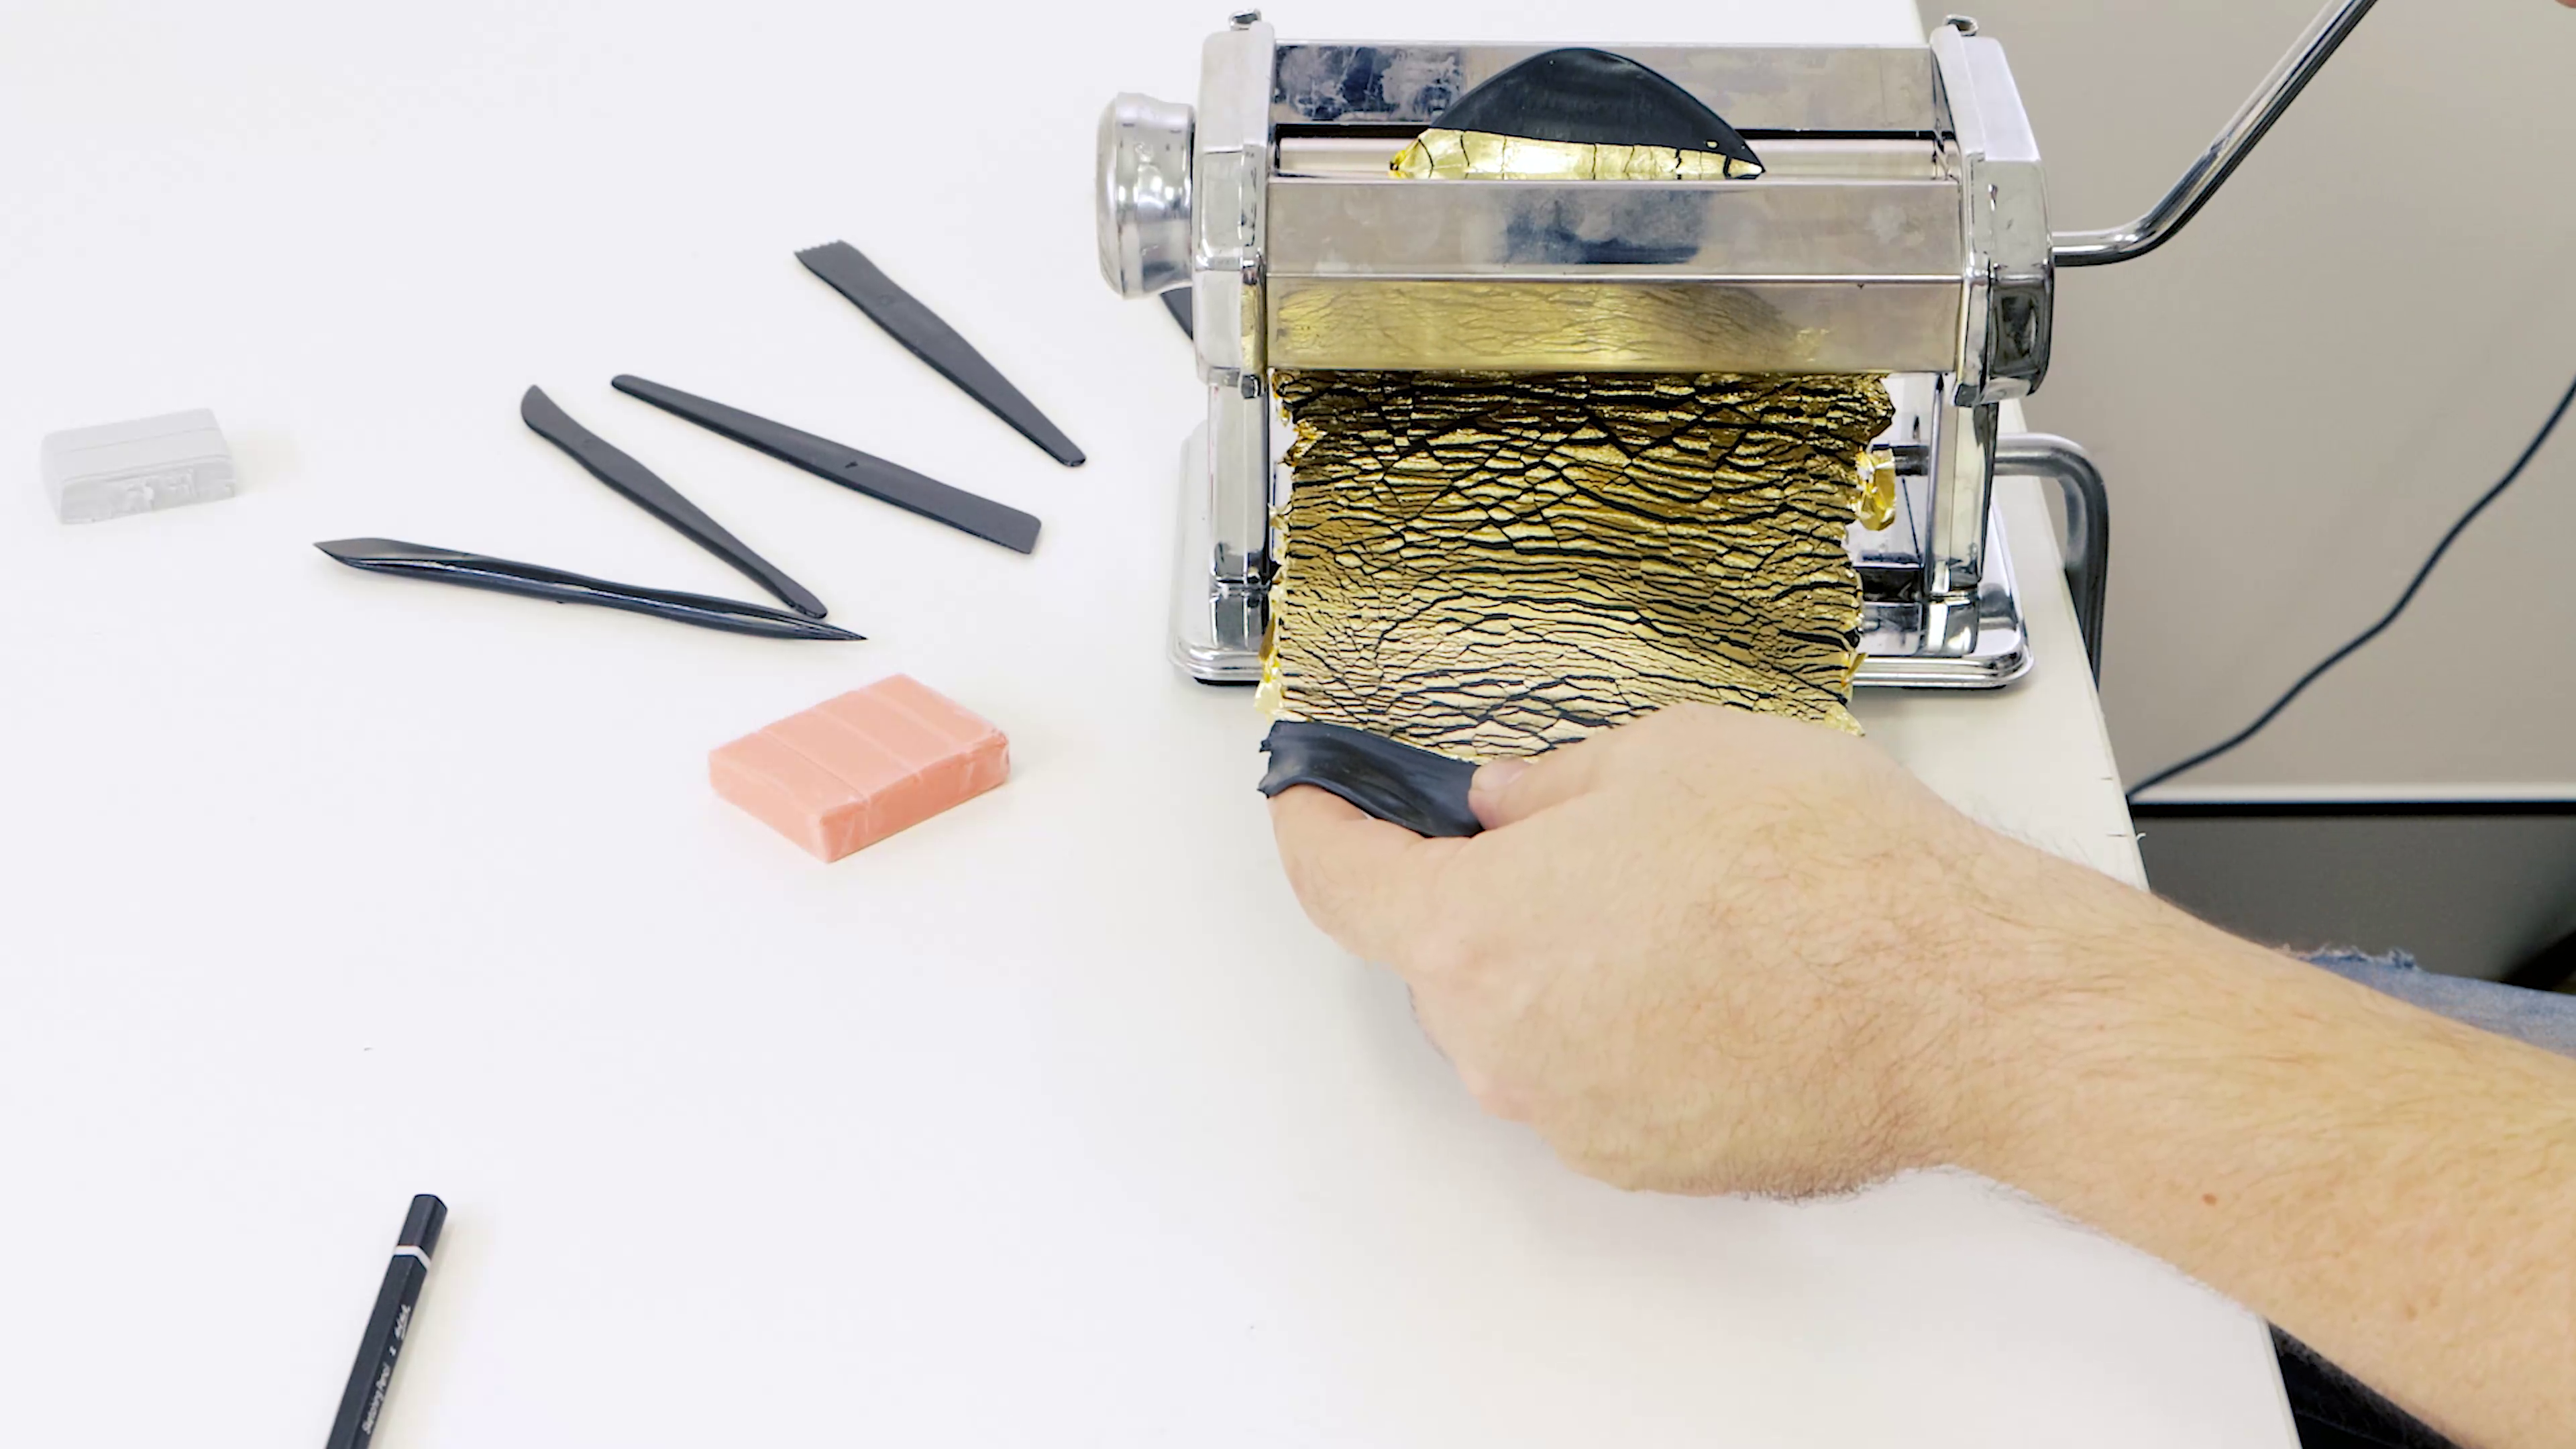
6. Gold leaf:
This gold leaf technique is a great way to add a touch of opulence to any polymer clay jewellery making. With gold leaf there are a few different ways of adding it to clay. You can roll your clay into a ball and then flake off small pieces of gold, then roll the ball into the gold. Or you can press in pieces of gold leaf to the clay using your hands. For a marbled gold effect, roll a slab of clay out flat then add gold leaf to the slab, next place cling film over the top and roll the clay to bind the two materials together with a rolling pin, or pass the clay through a clay press to join the two materials together. You won’t need to add any leaf sizing for this, unless you want to add gold to the clay after baking, just press the gold into the clay and then bake to seal the deal.
7. Stamping:
If you’re looking to add texture or interest to your polymer clay pieces, try the stamping technique. Whether you use actual stamps or add texture using rope, shells, lace or even things around the home like glasses, jars or plastic cutting boards that have a texture to them. Dried flowers can be used to stamp clay as well, but keep in mind, that the heat of the oven will most likely take away the colour from a flower. To stamp, press the object firmly into the clay before baking, then once it’s baked your texture can be seen in all its glory.
8. Speckles/Faux Terrazzo:
You can create a terrazzo effect that looks like a mix of marble, granite and quartz without the hefty price tag. To make your own terrazzo effect in polymer clay, use a mix of earth tones and slice off square edges of coloured polymer clays using a palette knife. Think Umber, Black, Burnt Umber, Metallic Mauve and Crimson colours on white clay. Experiment with metallic colours or even chips of already blended colours. Then place cling film over the top to keep the clay clean and then roll over the top using a rolling pin to flatten and keep the clay pieces together.
We love this terrazzo polymer clay technique, so much so we’ve created a project where you can create your own homewares using this technique, check out the project here.
9. Adding powder pigments:
Powder pigments can also be used with polymer clay, from glitter to mica powder. If you don’t have any pigment powder, you can also use a soft chalk pastel by lightly shaving the pastel with a hobby knife. Please take note to not inhale any of the loose pigment and work in a well-ventilated area. Experiment with adding powder to the clay to colour and grab the end of a pencil or paintbrush, you can score the clay for a sgraffito effect too. Or roll the clay out, then add your desired pigment on top, place cling film over the top and then roll it again to bind the pigment to the clay.
10. Clay Canes:
Clay canes make wonderful beads for clay jewellery making, think of those circular, hard-boiled rock candies that have a colour or pattern inside the sweet. Clay canes can be a simple one colour “bullseye” in the middle or become more complex in design, like a flower inside, swirls or even butterflies.
Start by rolling a thick cylinder shape with your first colour and then have a thin, flat sheet of the second colour (the colour of the rod will be the inside), roll the cylinder up using the flat clay then once the top layer blankets the cylinder, trim the clay. Then press the outer layer around the cylinder using your fingers, be careful not to squish it too hard or you’ll lose the roll shape, this is reducing the clay. Push out any air bubbles on either side and roll it on your work surface. By rolling the clay it’ll grow longer, cut the cane in half and you’ve got a bullseye clay cane, that can then be cut again to create beads.
11. Varnishing:
After your polymer clay has been baked and cured, it can be sealed to strengthen and protect your clay. This polymer clay technique will help keep your clay creations in good nick and can be sealed using a soft taklon brush and a coat or two of a clay varnish such as our Gloss Clay Varnish Signature or with a few coats of an acrylic paint.
12. Sanding:
Once your clay has cooled down, it will have “cured” and can be sanded back. Sanding is a great way to remove sharp edges and smooth out your polymer clay. Start with a fine grit sandpaper to remove any texture and make your sculpture smooth. Once you’ve sanded down the edges and removed any sharp edges or corners, your clay can be painted, varnished or drilled.
13. Watercolour effect:
Watercolour and polymer clay aren’t two words that often go hand in hand but hear us out here. For this polymer clay technique, you’ll need a white colour, some chalk or chalk pastel pigments, a palette knife or knife and gold leaf for an extra touch. Begin by flattening the white colour using a clay press. Then add your pressed pigment or chalk pigments to the white clay using the pressed powder technique. Then spread the dust around using your finger. Then add the gold leaf on top, bake the clay and you’ll have a watercolour effect.
Looking for more? Clay the day away and check out our 20 polymer clay tips and tricks for beginners. Or if polymer clay is a little too much to start with right now, turn to air dry clay and give some of these air dry clay techniques a go.
We hope that you feel inspired to try one or all of these polymer clay techniques for yourself and #montmarteart or tag us @montmarteart on Instagram or Facebook, we’d love to see what you create.


