


Painting a welcome mat with a DIY stencil
1. How to make your own stencil
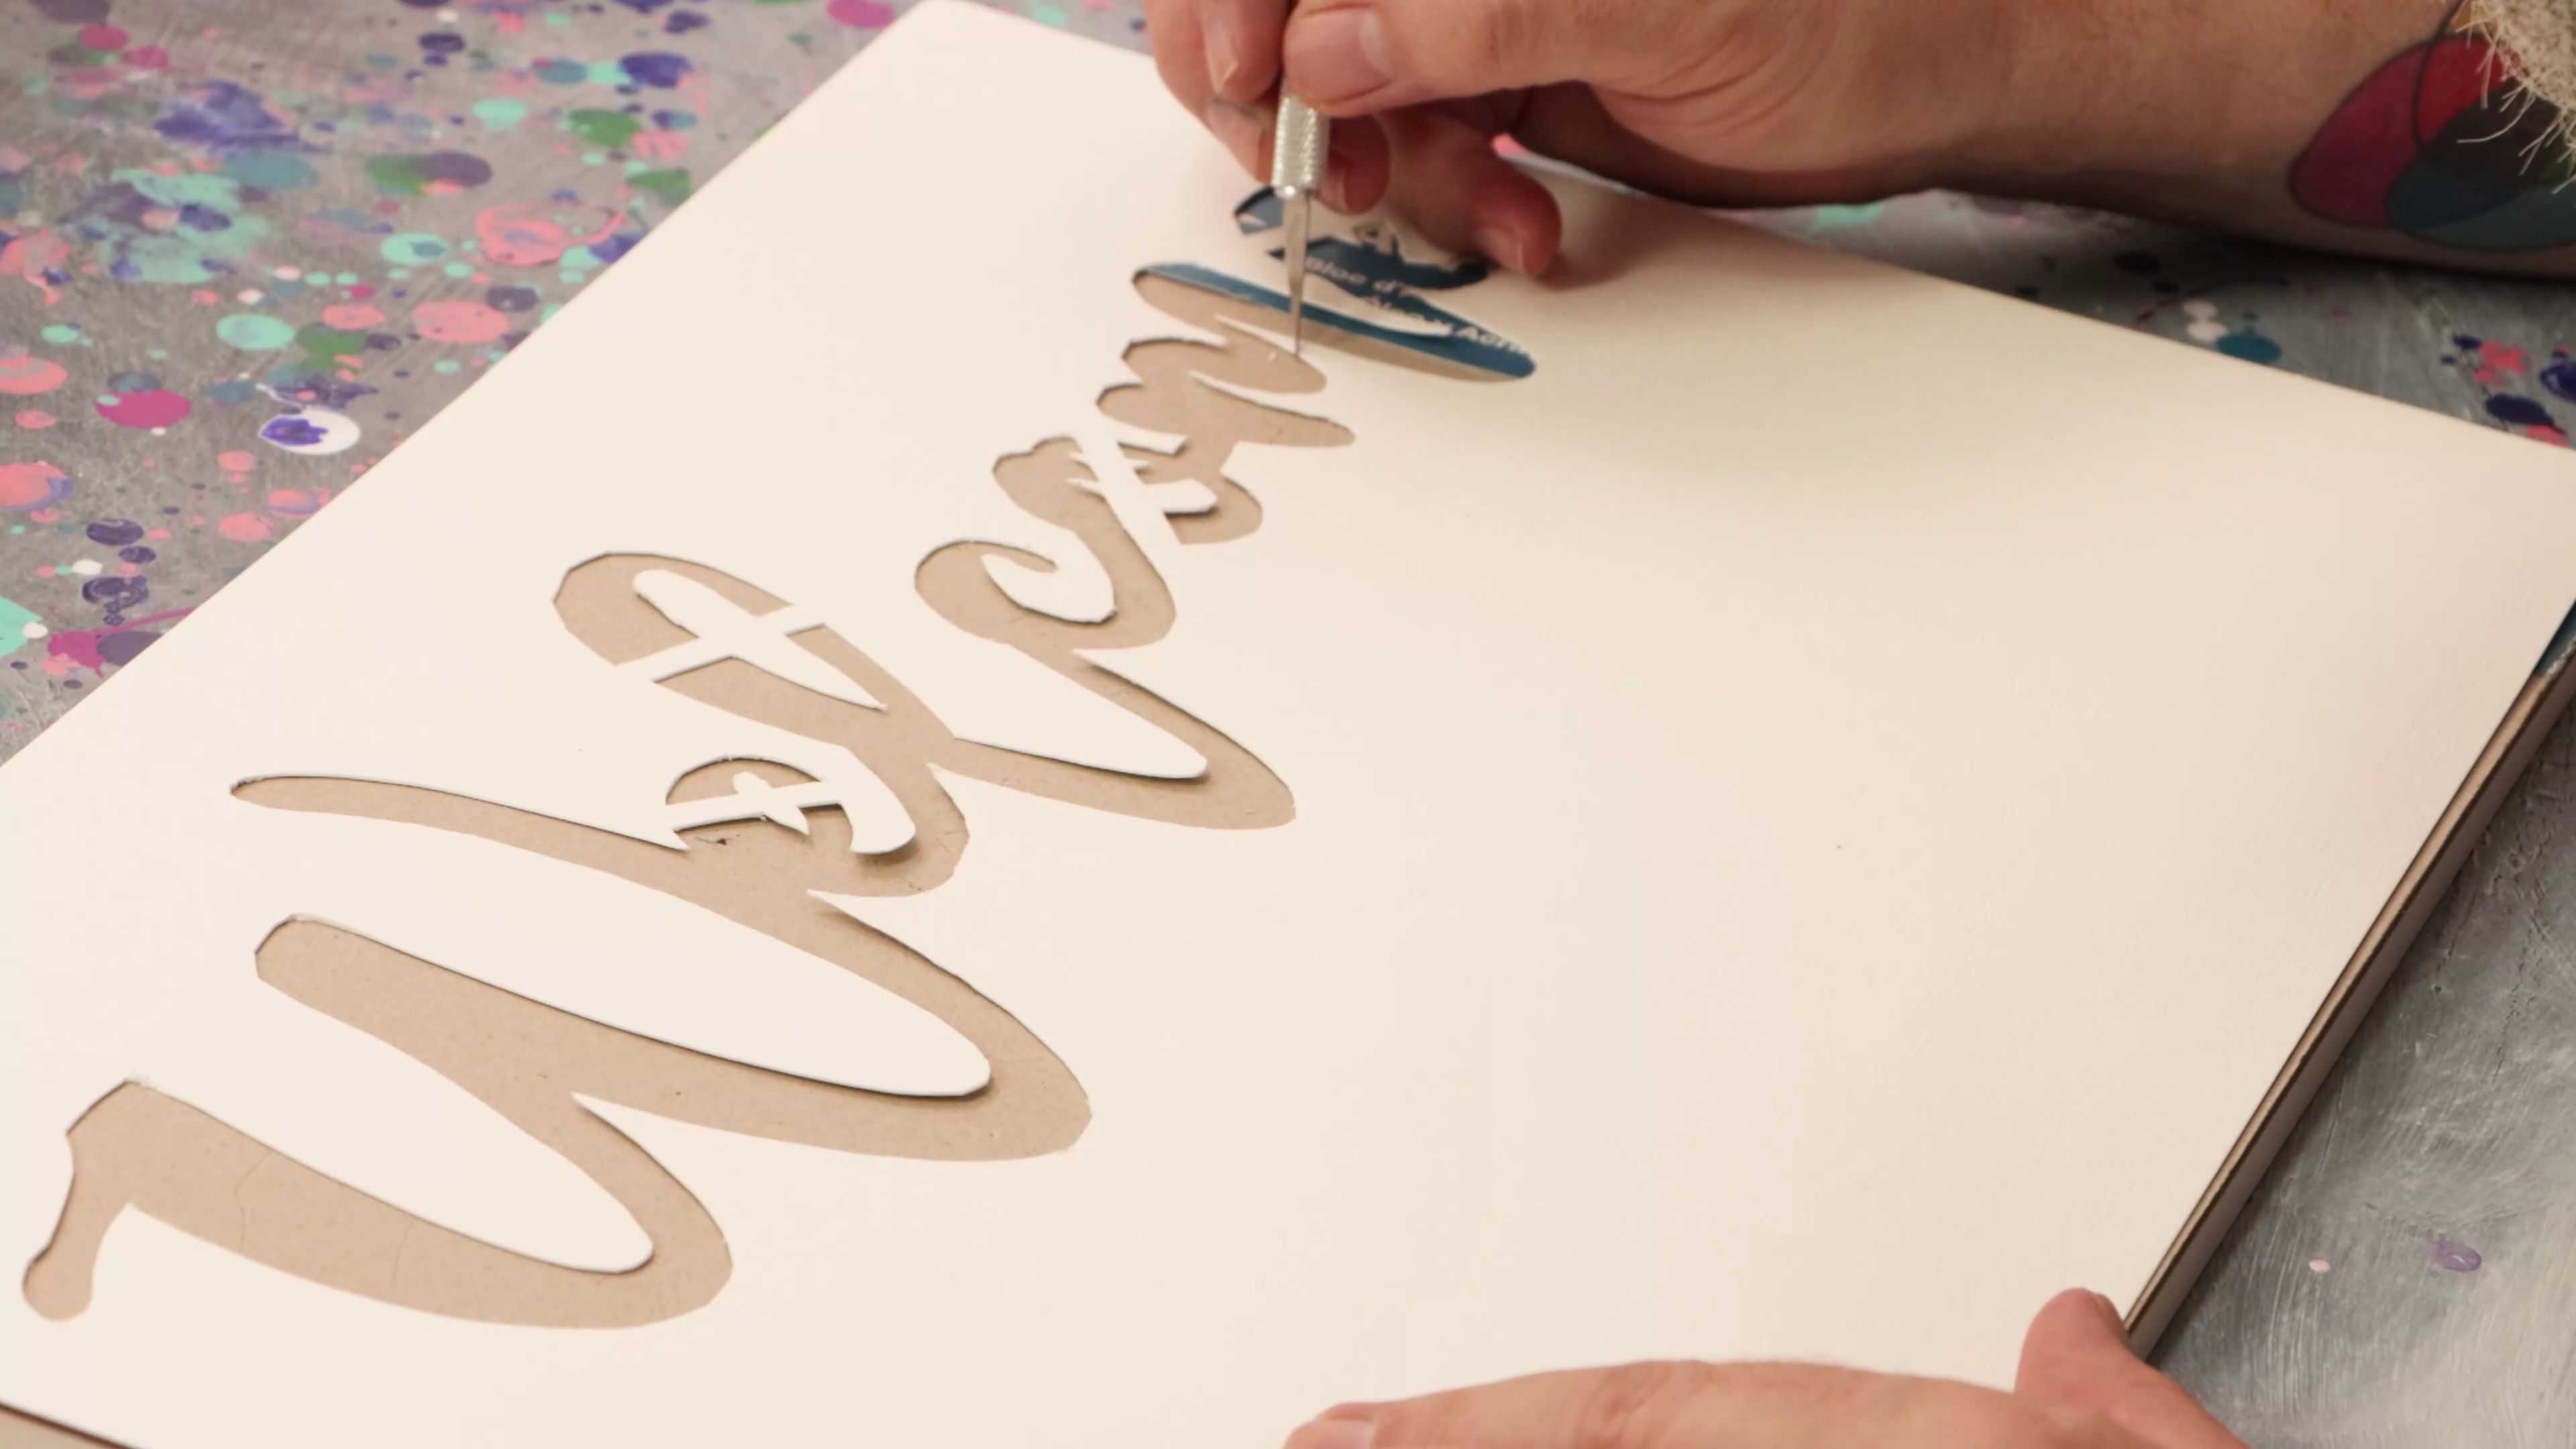
- Trim corners off the A3 stencil printout
- Tape the printout onto a sheet from the Oil and Acrylic Pad
- Cut through both layers using a craft knife
- Peel off the printout and clean up any edges
- Trim stencil corners again and cut small triangle details
2. How to paint a stencil
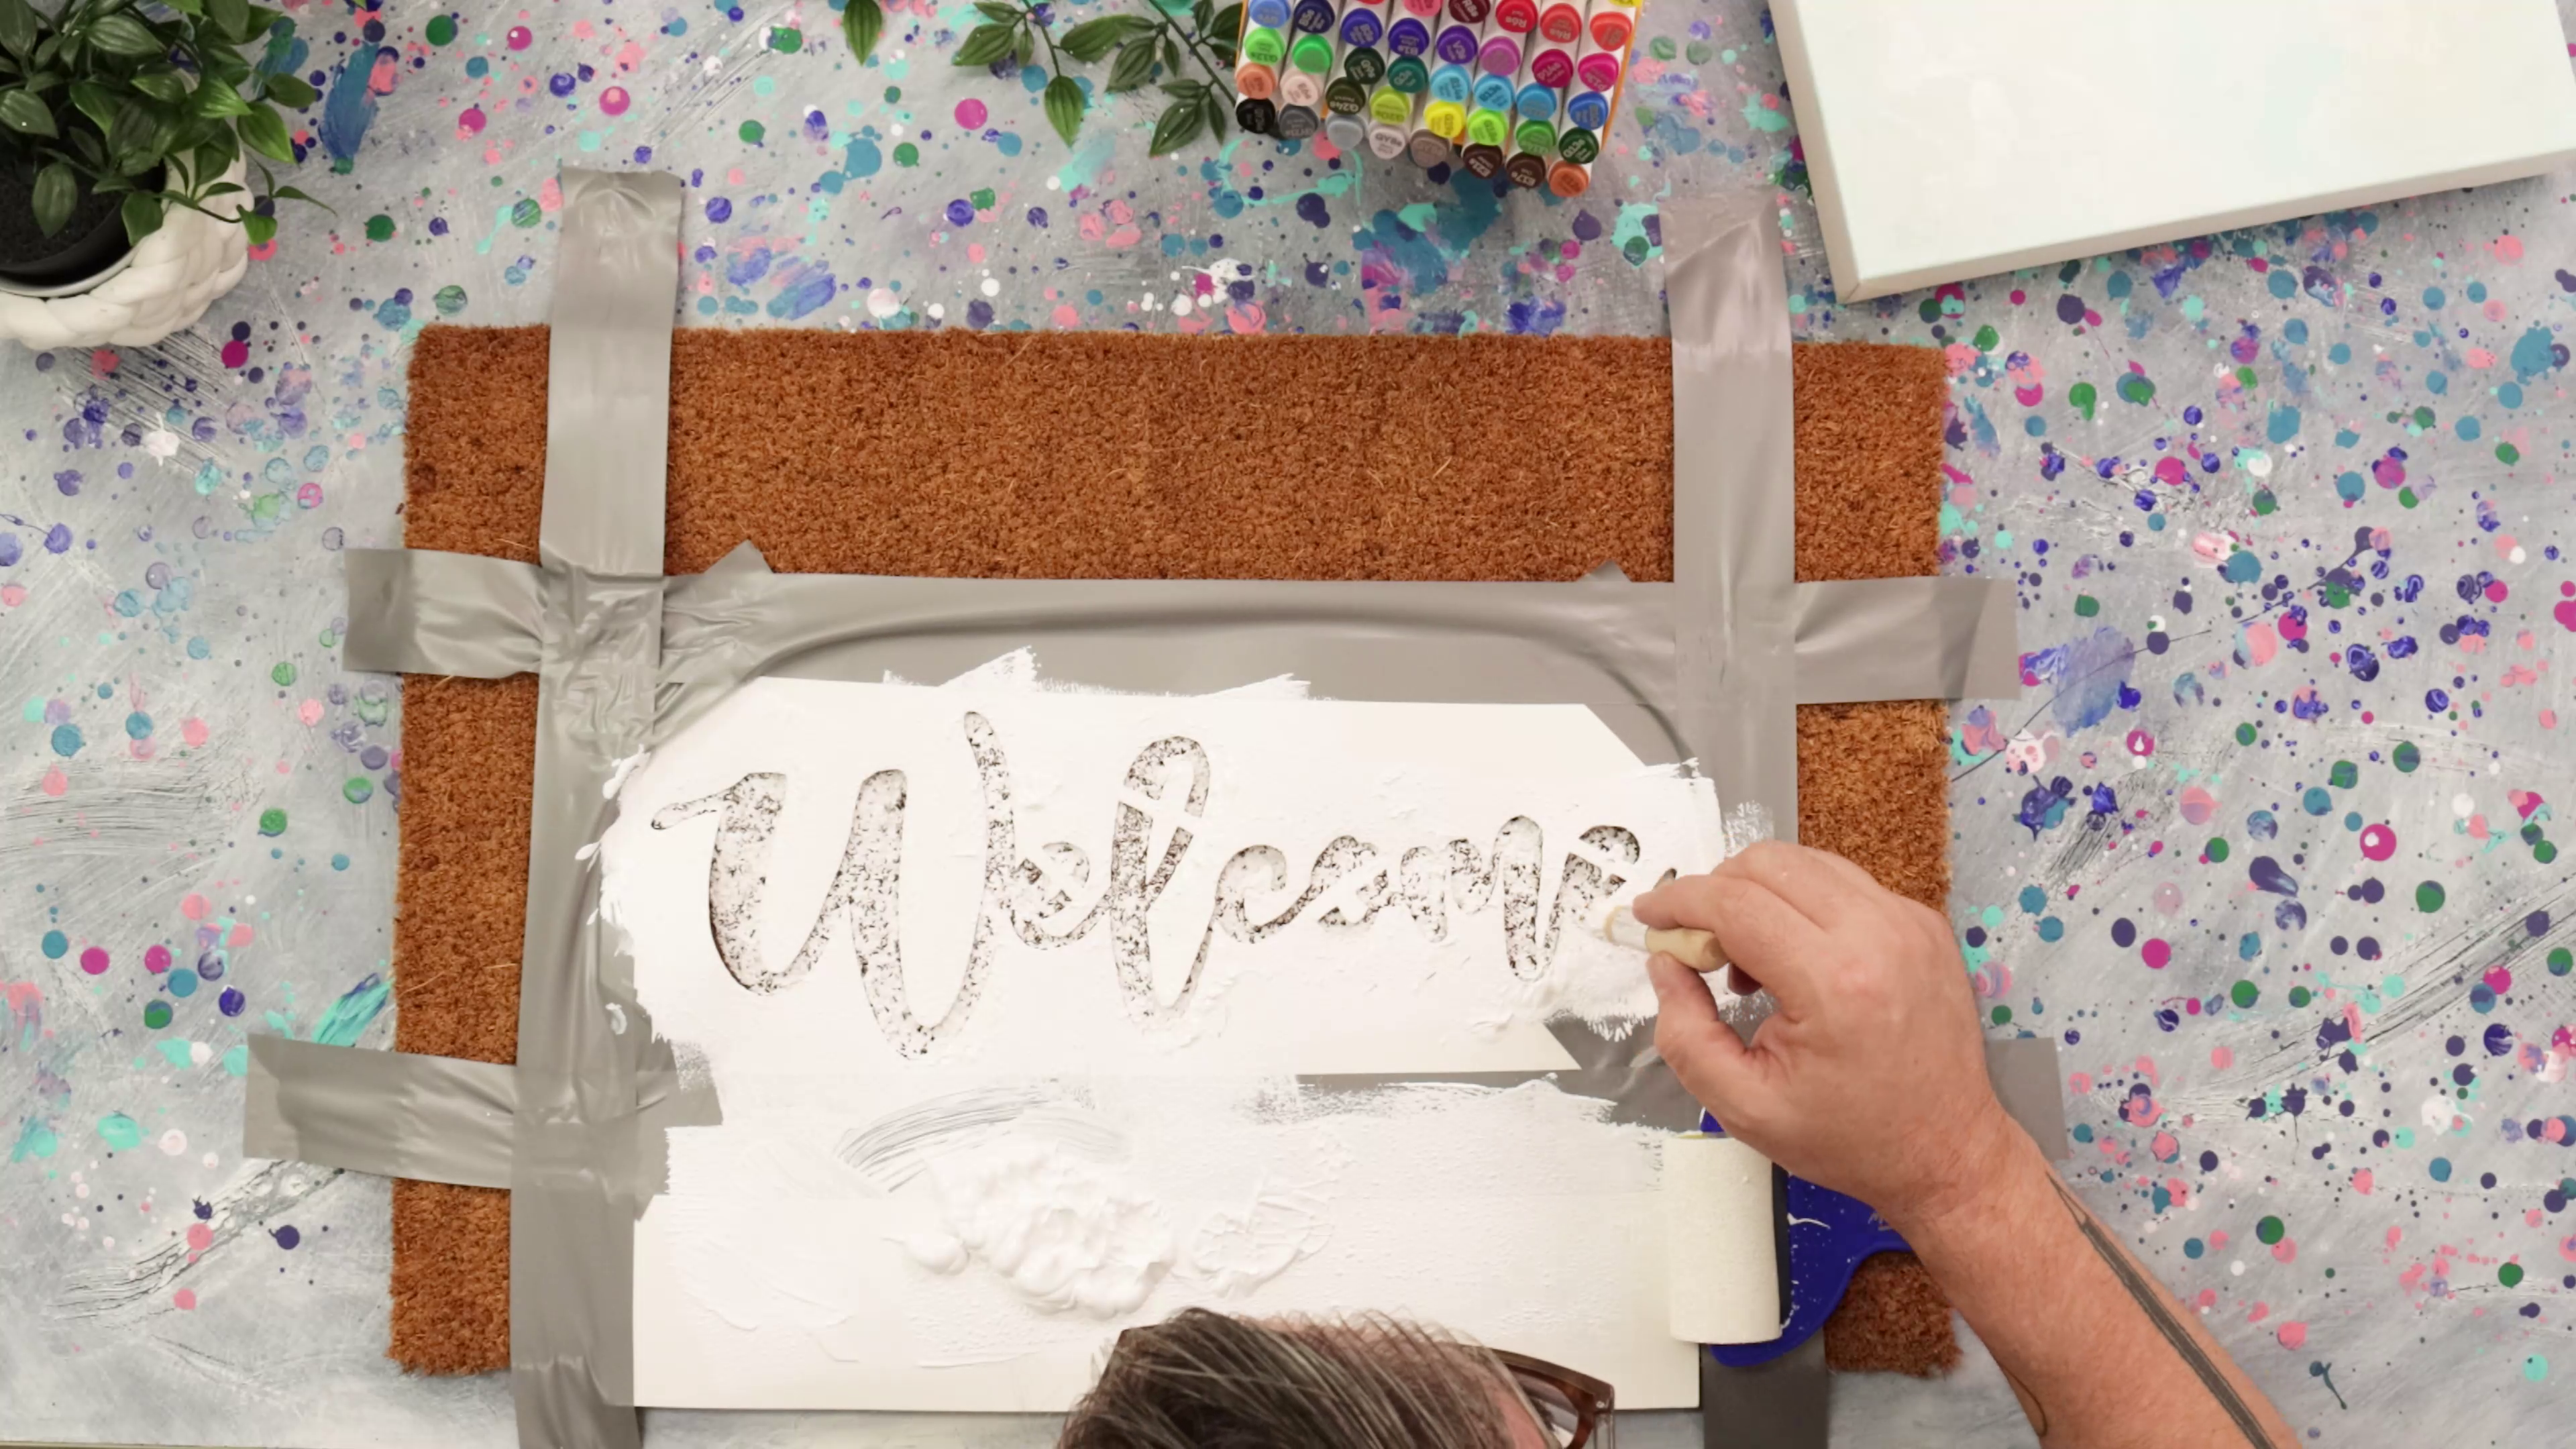
- Wipe and vacuum the mat to remove any dust or debris
- Tape the stencil tightly onto the mat with duct tape
- Use the Tear Off Palette to squeeze out Titanium White
- Load the 75mm roller and apply paint over the stencil
- Switch to a stencil brush if needed for thicker mats
- Remove the stencil and touch up gaps with a fine brush
4. Painting a border

- Use a ruler and brush to paint a guide line for the border
- Thicken the border by dabbing more paint on
- Extend the tail of the “e” and start of the “w” into the border
5. How to seal a doormat
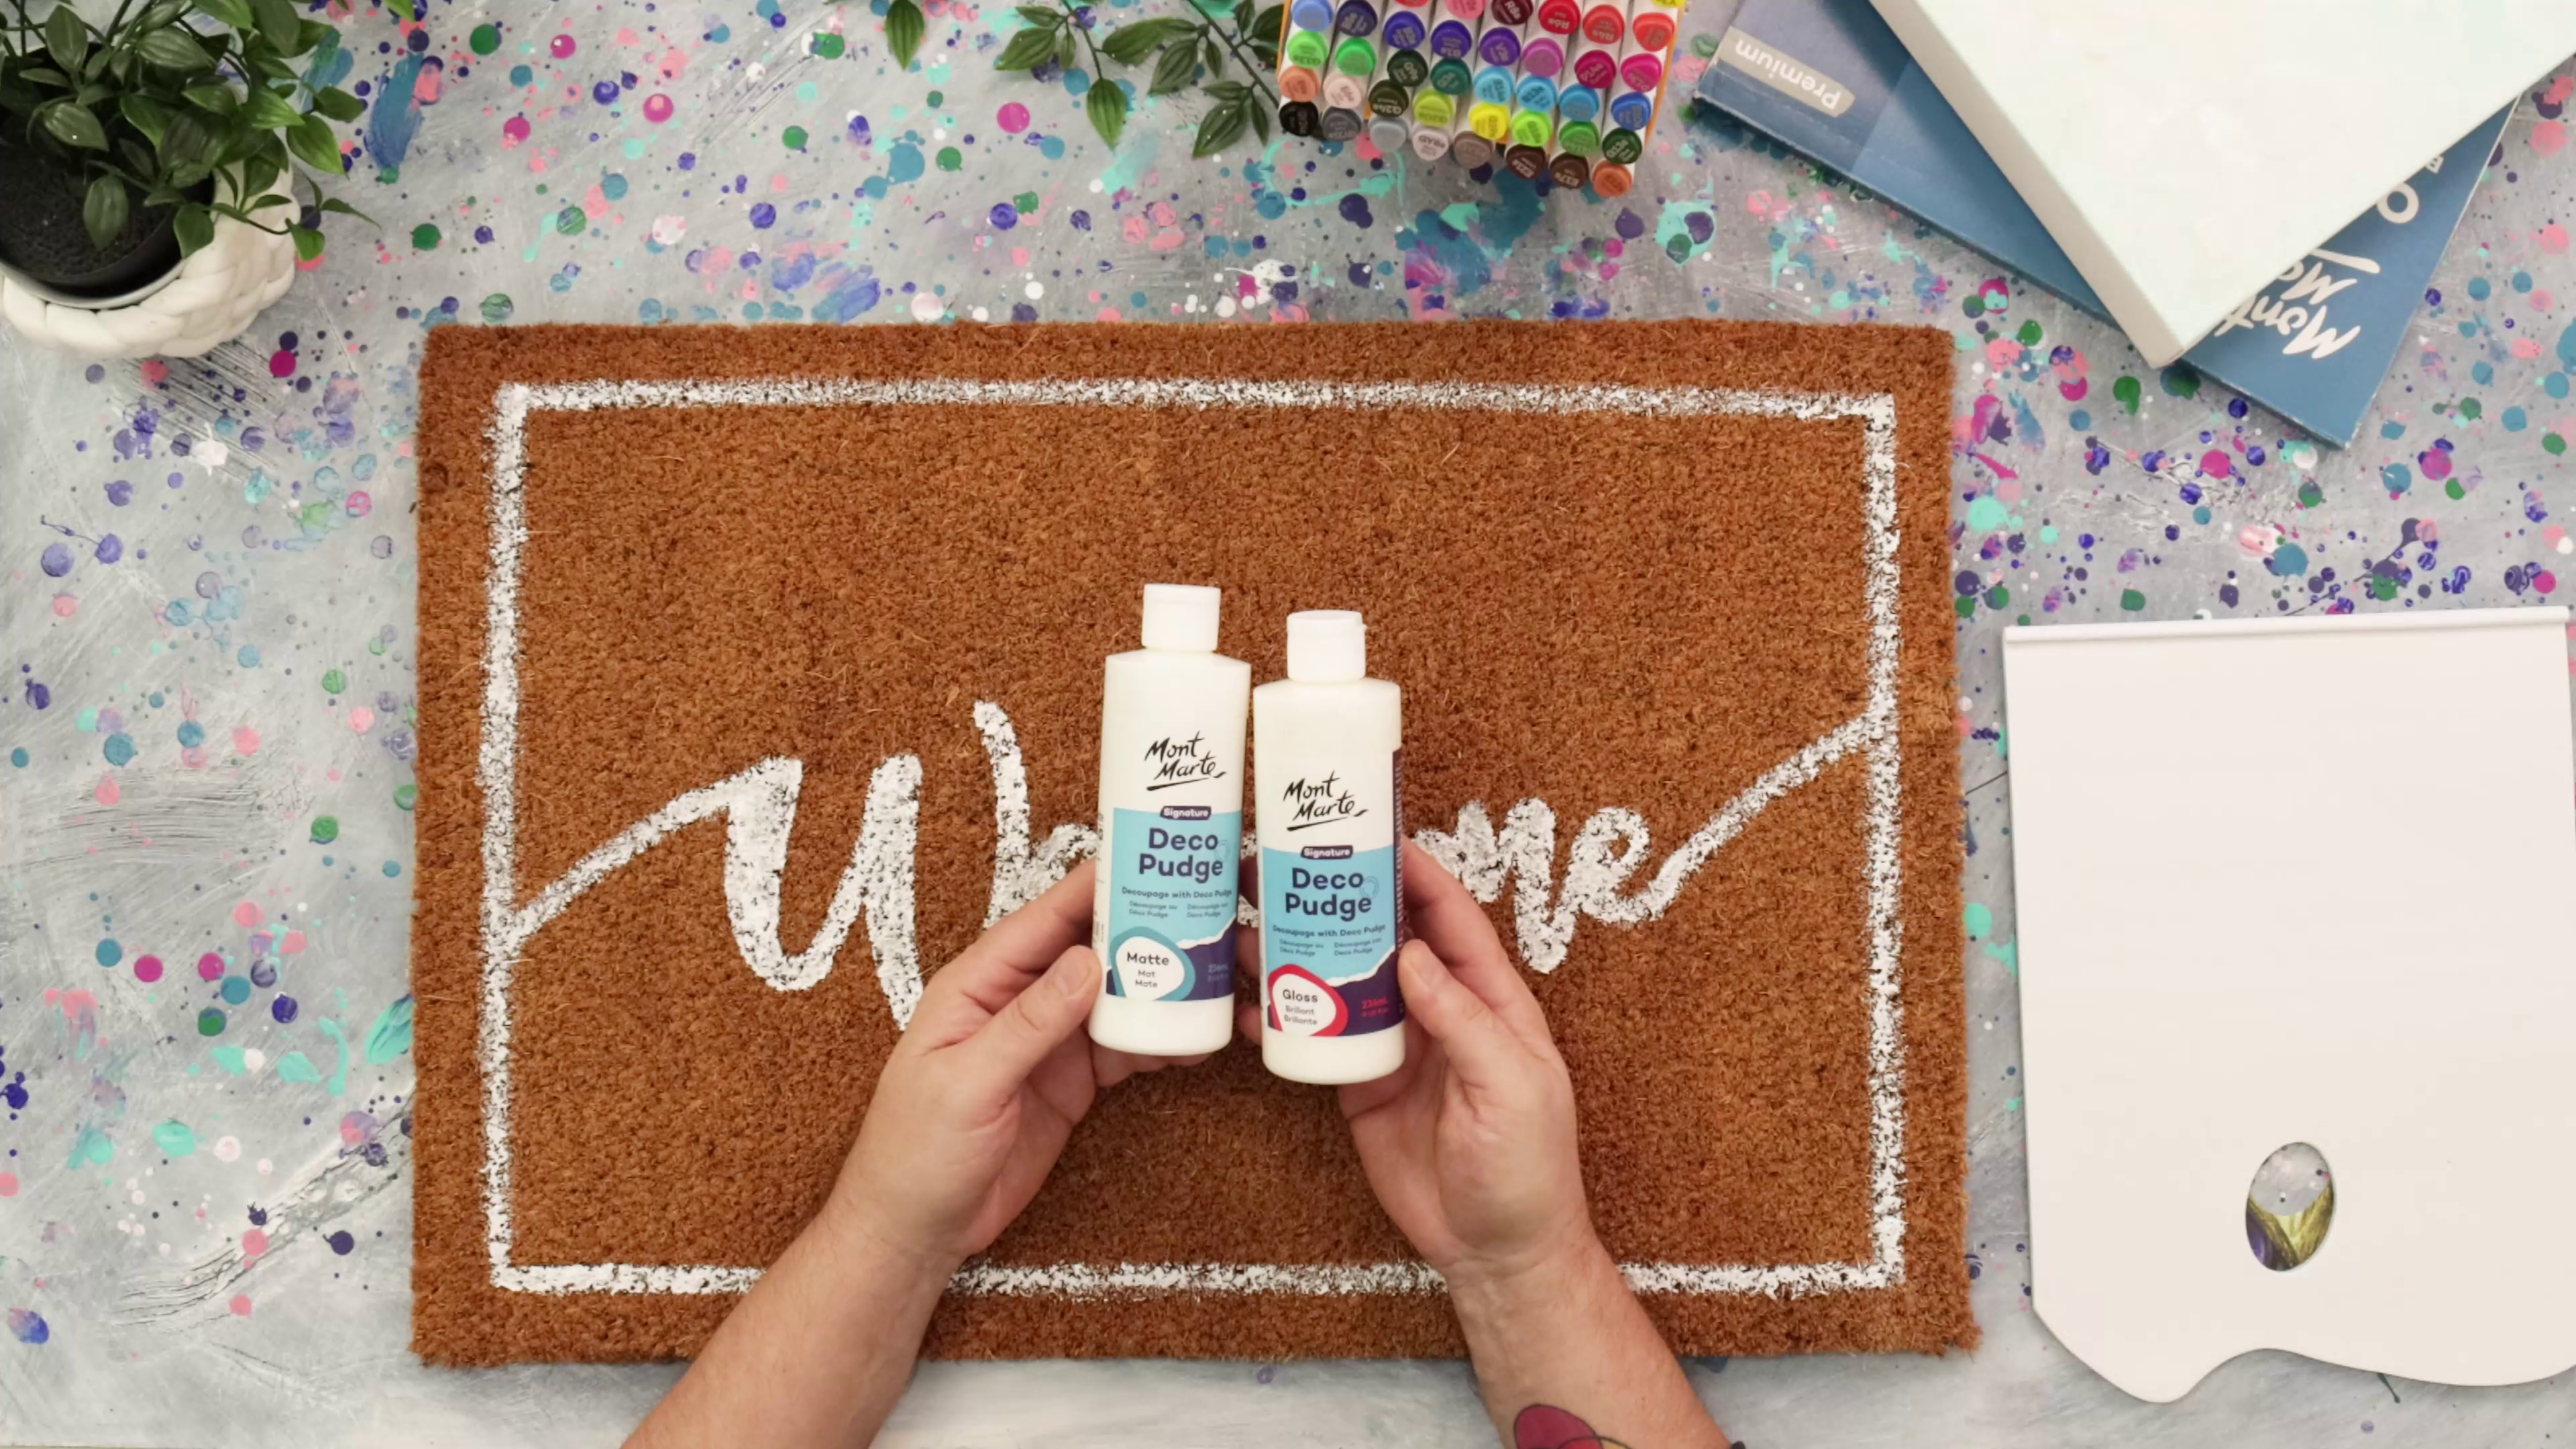
- Once dry, brush Deco Pudge over the painted areas
- Use a slightly damp brush if needed to help the varnish glide
- Allow to dry fully
Now you’ve got a handmade welcome mat ready to greet your guests or gift to someone special! And because the stencil is durable, you can reuse it for more doormats anytime.
- Doormat (coir style)
- Oil and Acrylic Pad Premium A3
- Precision Craft Knife
- Satin Acrylic Paint Titanium White
- Satin Acrylic Paint Lamp Black (optional choice for the border)
- Deco Pudge Matte or Gloss (for sealing)
- Stencil Brushes Discovery 3pc
- Flat paint brush
- Tear Off Paper Palette
- A3 stencil printout (or freehand design)
- Duct tape
You may also like

Stamp techniques for little artists

Nicole Macey's tips for clay slab earrings

6 tips for how to draw without reference
