


Looking for something to take your creative project to the next level? Why not embellish your art with gold leaf application? By adding sheets of gold leaf (or metallic foil flakes) to your dried paintings, you can really make your finer details stand out. You can even use gold leaf as the star of the show, adding warmth and shine to your masterpiece. Check out our DIY guide for applying gold leaf to your art below!
Clean the surface

Preparation is a major part of the gold leaf application process – after all, you won’t want anything to interfere with your final result! Clean your surfaces well with a cloth, paper towel or a dry brush with soft bristles.
Brush on adhesive – size

To get the right adhesive (or size), you need to note what paint you used underneath. Make sure to bring out the oil-based adhesive if you’re working with an oil painting so that it doesn’t slip. If you’re using acrylics underneath, try our Leafing Size. The original painting should be dry before you start with your gold leaf.
Gently lay your gold leaf down

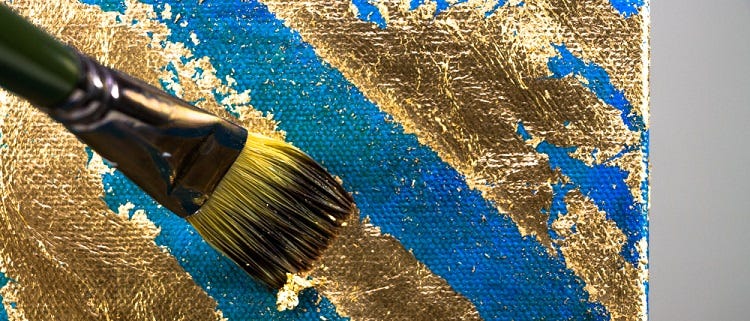
Gold foil sheets tear very easily – that’s how they get brushed away to reveal your final result. While it makes the next few steps easier, it also means you have to be very careful when laying it down to avoid breakage. We suggest wearing cotton gloves so that the leaf doesn’t stick to the oils of your skin and tear. Use a soft bristled paint brush or a fine paint roller and cover the gold leaf over any areas you added size.
Use a clean dry paint brush to smooth out leaf

After laying down the sheet, the next step of your gold leaf application is to use a clean brush and press down from one side to the other to ensure it becomes firmly attached. It’s important to use a clean brush as you don’t want any debris sticking to the adhesive or scraping the thin leaf sheet.
Brush away any excess leaf

This is the part you’ve been waiting for – once the adhesive has dried and the leaf has properly stuck, you can gently brush the excess away with a soft bristle brush to reveal the main component of your artwork. If the amount of leaf on your artwork is less than you hoped for, you can carefully repeat the gold leaf application steps to achieve your desired look.
Seal with a varnish

When your golf leaf is how you like it, the next step is to set it in place with a varnish so that it lasts for a long time. A varnish will help to stop the leaf from oxidising and changing colour over time. For a sparkling finish, quickly apply our Premium Iridescent Varnish with a soft brush, working from side to side and slightly overlapping each stroke. Multiple coats will increase shimmer.
Store leftover leaf in a dry place

Organisation can save you a lot of money in the long run. Store your leftover gold leaf in a set of drawers, a plastic folder if it fits, or another safe place you can find in your home. Make sure that they won’t get wet or crumple, as it might ruin the product.
Use tweezers for smaller pieces

When applying gold leaf to highlight intricate details, you’ll be working with a lot of smaller pieces. Cotton gloves will help this process too, but you might want to save yourself some time and use craft tweezers to help you apply the leaf with precision.
Interested in trying out these leafing techniques but want a different colour? Try our Copper Leaf or Imitation Silver Leaf options.
Have you decided to follow our steps for DIY gold leaf application? Don’t forget to tag us on Facebook or Instagram using #montmarteart so we can see what you’re creating!


