


9 tips for realistic drawing
Drawing is a powerful way to express yourself, allowing you to manifest your imagination on paper. Reflect the world around you and create realistic drawings by learning and practicing certain techniques. We’ve got a few tips and tricks to get you on the way to realism and add a lifelike quality to your artwork.
Reference drawing

We recommend using a reference picture to get a grasp on realism. You may end up drawing without one someday, but starting with a reference is a great way to get used to drawing proportions and shading accurately. When looking at your picture, pay close attention to the way the light changes and moves across your subject. Take note of different textures and analyse the proportions carefully. Breaking down complex subjects into simpler shapes can provide you with a roadmap for more accurate drawing.
One way to get used to this process is by using a grid. Blow up your reference so it’s printed on paper the same size as your sketch pad. Lightly draw a grid with the same dimensions over your reference and on your sketching surface. This helps divide your subject into bite-sized chunks so you can measure proportions exactly and replicate the picture as accurately as possible. This technique is great for newbies to get used to drawing from a reference, but even professional artists use grids!
Sketching basic shapes

The foundation of any artwork is crucial, and this is especially true for realistic drawings. Start by mapping the basic shapes and forms in your reference, drawing lightly so you can erase parts of your guide as you develop details.
Once your major elements are in place, you may draw lines to map out the perspective and shadowed areas. This preliminary framework serves as a guide throughout the drawing process, giving you a solid foundation to build realism.
A strong starting point not only helps structure your approach but also helps grow your confidence while drawing. As you progress, this initial sketch is there to fall back on and serve as a map if you get lost in the details!
Drawing anatomy

When sketching a portrait, understanding your subject’s anatomy is essential to capturing them accurately. Whether you're sketching a person, animal, or any living being, grasping basic anatomy will help you reflect their proportions and postures. We recommend studying skeletal structures, muscle groups, and how they interact – you may want to grab a Manikin to better understand how the body connects in different positions. This is super handy to refer to while sketching, as you can rotate it to see the anatomy from all angles.
After you’ve mapped out the basic shapes in your sketch’s foundation, try lightly drawing the muscle groups, posture, and bone alignment of your subject. This will look like a lot of lines surrounded by circles and oblongs; be sure to press lightly so you can erase the guide as you add details later on!
Adding shading

Shading is an art in itself, adding a three-dimensional effect to your drawings. Learning to read the direction of light in your reference will help you nail accurate shading. Find the light source, whether it’s shown in your image or it’s off the page and pay attention to the direction it travels.
For example, in portraiture, if the light source is directly above the subject, shadows will appear underneath protruding details, such as a nose or chin. If the light source is coming from the right, shadows will appear to the left of the nose or chin.
It also helps to understand the difference between core shadows and cast shadows. Core shadows are on the subject itself while cast shadows are created by the subject and cast onto its surroundings. Cast shadows happen when the subject blocks the light! To find out more, check out our video on How to Find Tonal Values.
Mastering shading techniques will help bring depth and realism to your drawings. Try sketching references with different light sources, directions, and conditions to get used to the process.
Drawing texture

To capture how your reference picture feels, you’ll need to use various shading techniques. Whether it's the smooth surface of glass, the roughness of tree bark, or the softness of fabric, pay attention to what makes each surface unique.
Use varied line weights and directions to bring out rougher texture, and smoother, blended shading to communicate less texture. Shading techniques such as hatching, cross-hatching, and stippling are great to layer for more noticeable texture, adding noticeable contrast and interest where the blank page shows through.
Texture is emphasised by highlights, whether it’s a rounded, bubble highlight, or jagged light peeking through rough texture. Bring an extra layer of depth and realism to your sketches, helping the viewer imagine how the surfaces would feel if they were in the painting.
Drawing highlights

Highlights create contrast and luminosity, adding to the realism of your shading. Work out which areas of your subject catch the most light and carefully add in your brightest highlights using an eraser or a lighter medium. Then work out your light-mid tones and make sure they bridge the gap between your shadows and highlights.
Striking the right balance is crucial; too many highlights can diminish the overall realism of your artwork. Pay close attention to your reference and try to match the tones as closely as possible. Thoughtful use of highlights brings attention to areas of your sketch, creating interest, and leading the viewer’s eye.
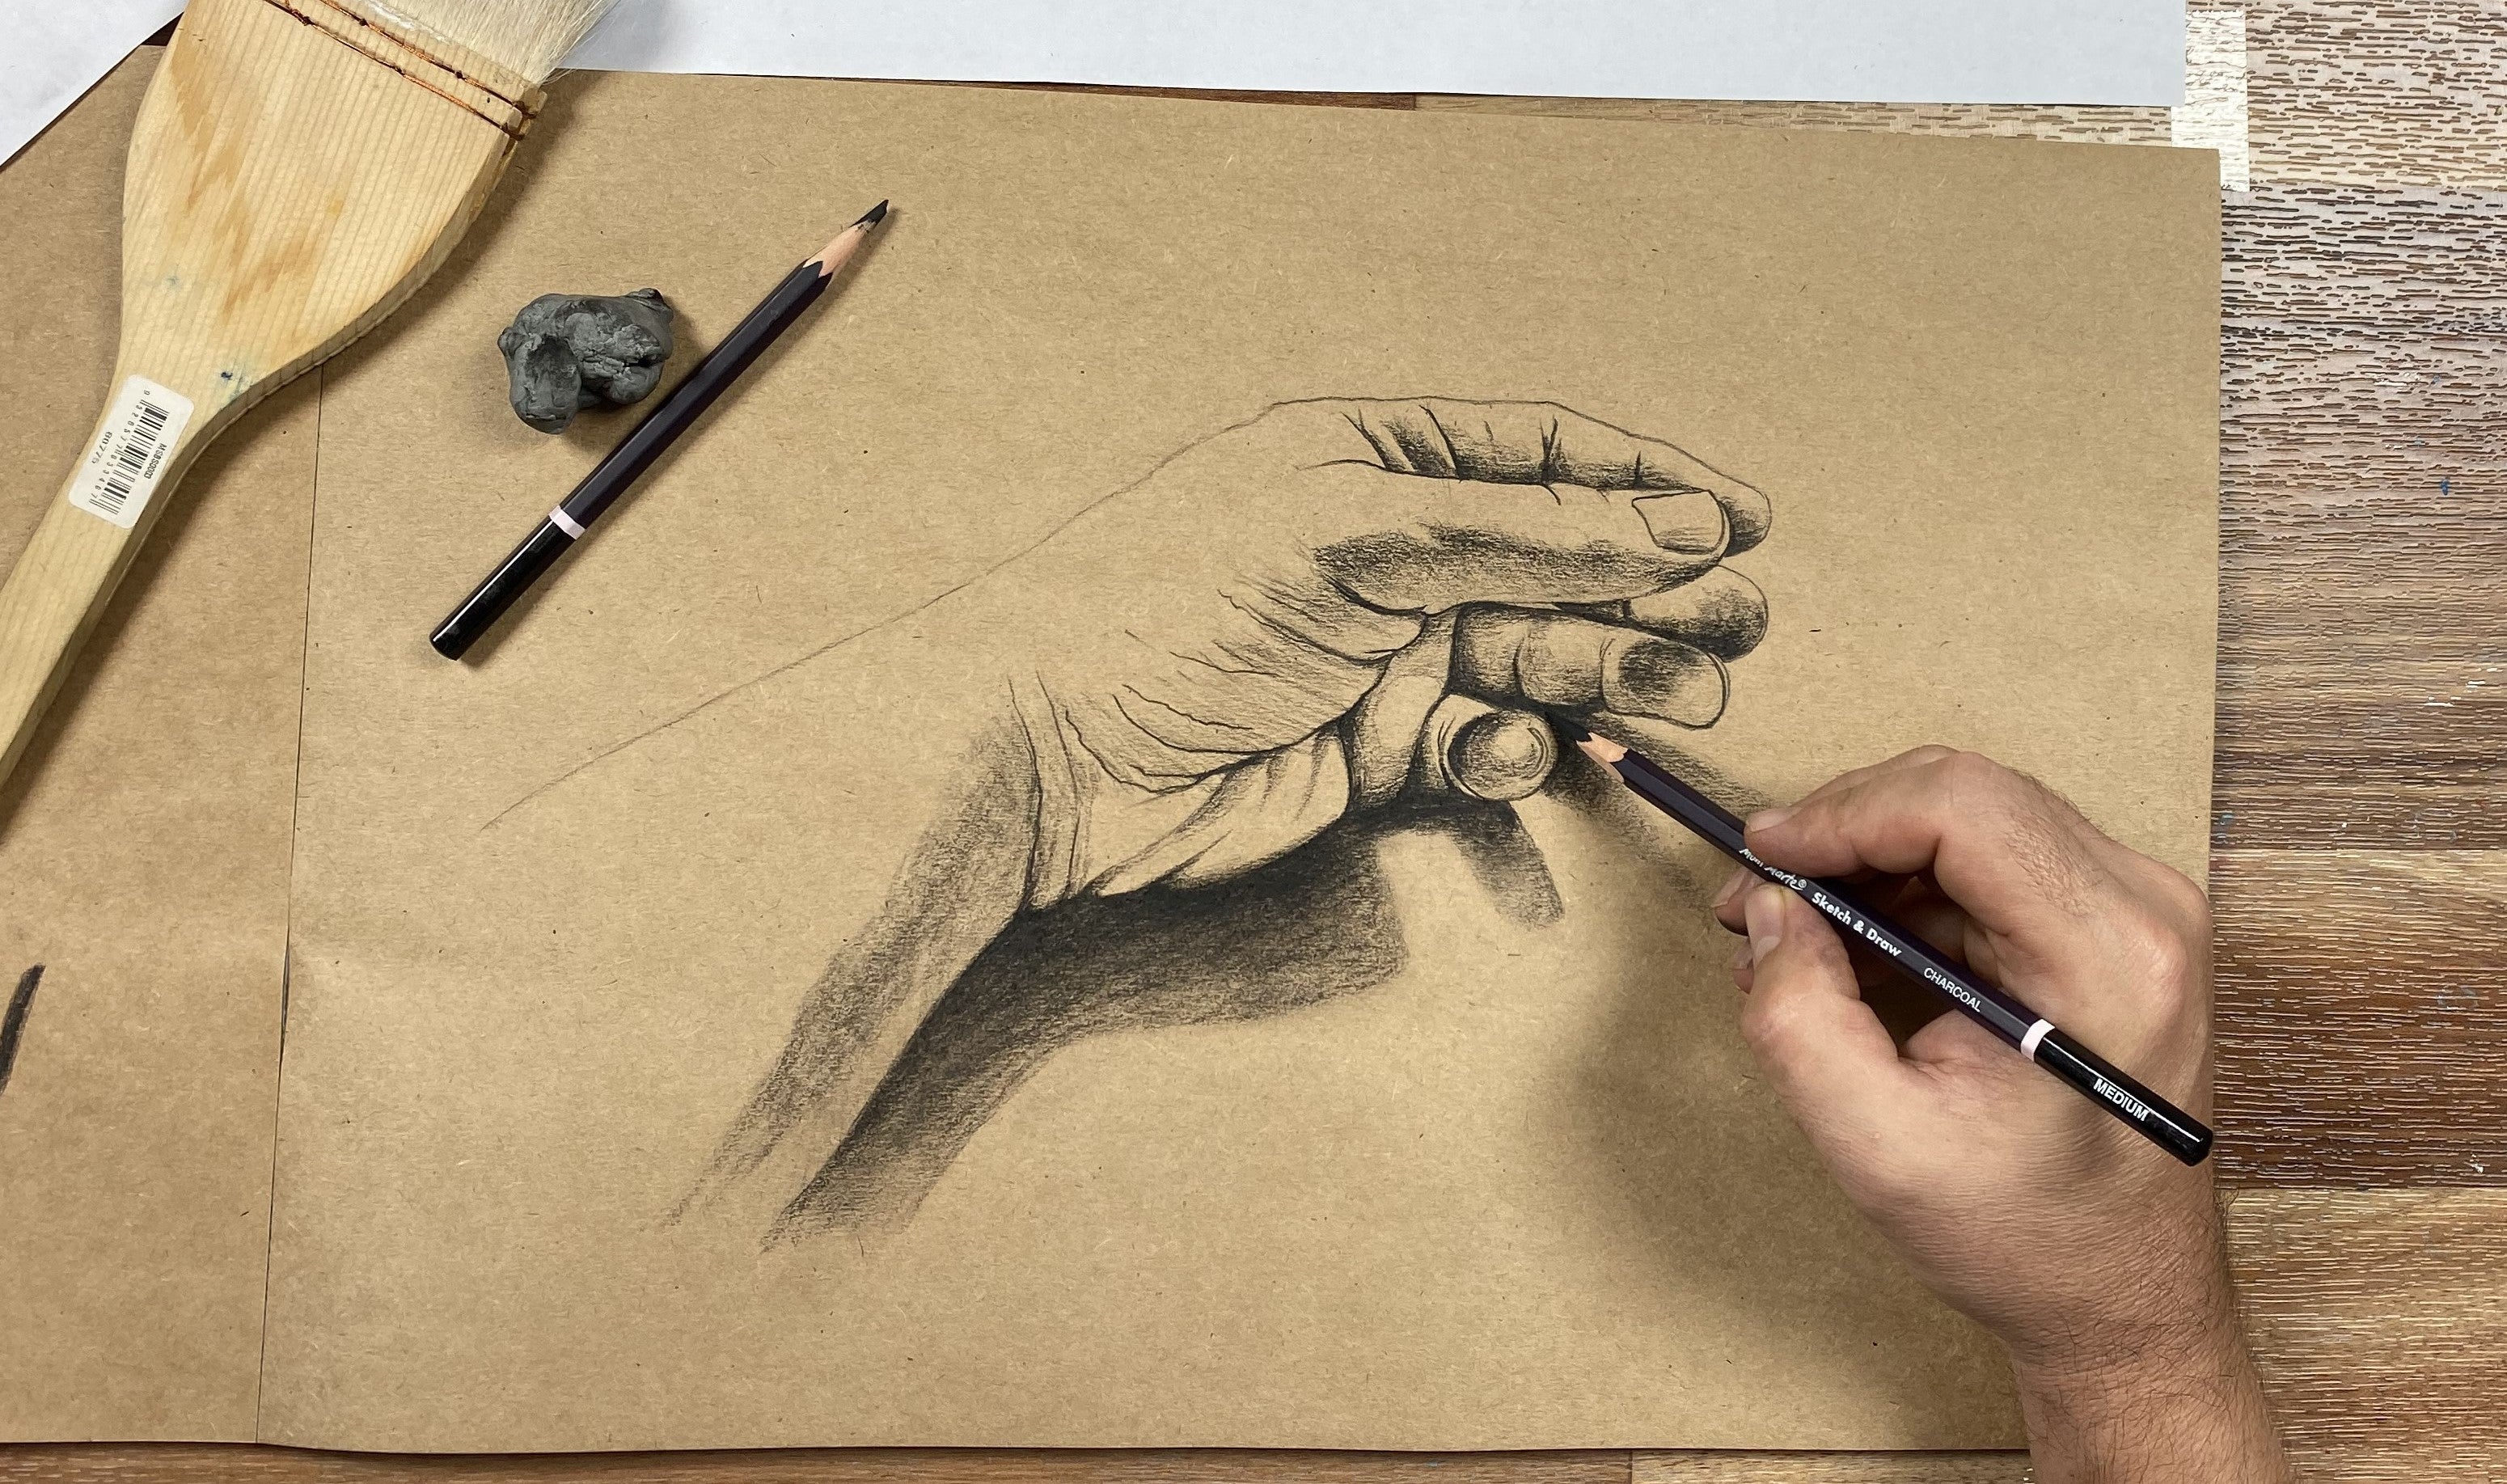
Drawing details

While attention to detail helps build realism, it's important not to overwork your artwork. Pay careful attention to intricate features, making sure your linework is clear and readable. It may help to use a sharp or fine-pointed medium, so your lines are defined and easy to see.
You can create a realistic drawing that doesn’t encapsulate every minor feature in your reference. You may smooth over some of the minute skin details or reduce visible texture in an area you want to draw less attention to. It’s up to your imagination but think about your focus points and decide how you can best capture them in a simple but detailed way.
Use details to draw attention to certain areas, creating a balance between complexity and simplicity. The contrast between fine details and bold lines is engaging, so try not to make every inch of your artwork detailed.
Different art mediums

Your choice of drawing materials has a pretty big impact on the final look of your artwork. Dry drawing media sits quite flat and can be smoothed with blending tools and kneadable rubbers. Experiment with various Pencils, Charcoal, and Soft Pastels to discover which ones work best for your reference and style.
You may also want to try more fluid drawing mediums like Markers, Pens, Inks, Watercolour, and Gouache. You can combine and layer these mediums to create vibrant, dimensional effects that bring depth to your artwork.
Exploring different drawing materials is an ongoing process that you can get creative with. As you experiment, you'll discover the unique qualities of each medium and what they can bring to the overall realism of your drawings.
Practice sketching

You can build your realistic drawing skills with time, info, and practice. Study realistic projects online – we’ve got loads of inspo you can check out! Try attending life drawing classes or following along at home with our virtual (free!) lessons. Embrace the challenges and push yourself to explore new subjects and techniques. The more you practice, the more confident and skilled you’ll become. Any creator will tell you that having patience and avoiding self-judgement is the way to go when exploring new art styles.
Now you know some realistic drawing tips, you’re ready to put them to use! If you do get creating, #montmarteart or tag us @montmarteart on Instagram or Facebook. We’d love to see what you come up with!
Stock up on Sketching Supplies and grab some Pens and Markers so you can start practicing realistic drawing sooner. Find more ideas by checking out our Tips & Techniques blogs on our Create space. We even have a video dedicated to How to Create More Realistic Drawings that you can watch!
Stay updated with our latest tips, tricks, featured artists, projects, and more, and subscribe to Creative Connection by entering your email down below.


