


Painting a rose may seem like a daunting task, but with a few tips and tricks you’ll be well on your way to making a masterpiece. We recently created a rose painting with oil paints and jotted down our top tips along the way. Have a read, get inspired and start painting!
1. Draw from life
Using photographs as a reference point is helpful, but having a real rose in front of you is even better. Drawing or painting from life gives you more freedom and flexibility. You can explore different angles, get the right lighting and create the perfect composition by moving the rose around.
2. Pick a good reference photograph

While drawing from life is great, we confess that we used a reference photograph for our recent rose painting. Why? Well, we found a picture that we really liked and it had all the elements we were looking for – strong contrasts and a beautiful form. The good thing about using a reference photograph is that you can choose the type of rose you’d like to paint, even if it’s not available in your garden or local florist. In short, if you’re working from a photograph, make sure you choose a strong one.
3. Create dramatic lighting
One of our top tips for painting roses is to create dramatic lighting (whether you’re painting from life or a picture). When you have a lot of contrasting tones, dark shadows and bright highlights, it helps to accentuate the natural curves, lines and shape of the rose. If you’re painting from life, light your rose brightly from one side in a low lit room.
4. Choose a style you are comfortable with

There are plenty of ways to paint a rose – you can go abstract, impressionistic, folk or by painting exactly what you see. All of these styles have their merits, but it’s important that you choose a style that appeals to you.
5. Start with a drawing
Rather than jumping straight in with your paints and hoping for the best, plan out your painting with a pencil. While some flowers have petals that are almost identical to each other, each petal of a rose curls in different ways. So don’t fall into the trap of drawing your petals the same – keep glancing up at your reference rose to capture the unique form of each one.
6. Shade to build form

Shading is key when it comes to painting a rose. To create a 3D effect and capture the curves of the petals and shape of the rose as a whole, you will need to do a lot of careful shading. The more a petal arcs, or curves, the more contrast there will be between the tones.
7. Suggest translucence
If you look closely at a rose, you will notice that the petals often have some translucence. A red petal may have yellow-pink areas, and other colours may have lighter tones depending on the lighting. You can paint in lighter colours or use glazing to suggest this translucence.
8. Use a glaze to create rich tones

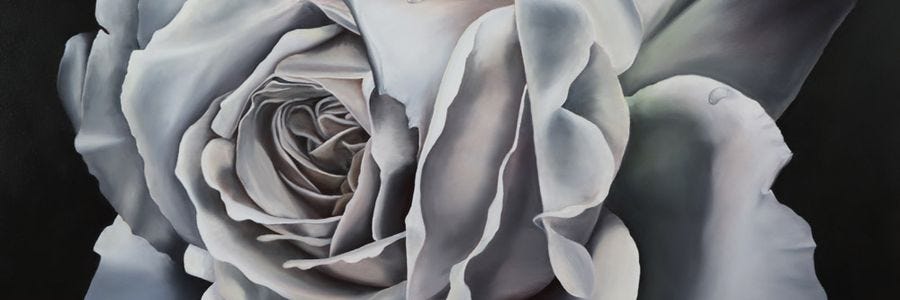
One of the most striking elements of the rose is the colour of its petals. To really bring this colour out, we tapped into a technique that has been used for hundreds of years – glazing. A glaze is a thinned out paint that is added over the top of your existing layers. For our rose painting, we mixed linseed oil with small amounts of paint to create a translucent layer that deepens the tones of the painting. If you look closely, you can see this in the photograph above where there are subtle areas of green, red and blue.
9. Think about the background
The background can make or break your painting. By choosing a colour that complements your rose you can strengthen the colours and make it really stand out. For example, green and red are complimentary colours, so a green background would be a great fit for a red rose, in the same way that a violet background would suit a yellow rose. Creating a simple background is another way you can make your rose stand out.
10. Choose the right frame
Like the setting for a diamond, the frame around a rose is the finishing touch. Framing is an art in itself and, just as a good frame choice can enhance appearance, a poor frame choice can diminish your artwork. Choose a frame that doesn’t compete with your rose in colour or texture.
Need some more tips? Check out our rose painting tutorial where we take you through the entire process. Otherwise, good luck! We’d love to see what you create, so don’t forget to use #montmarteart on Instagram or Facebook to share you work.


