


How to paint a disco ball
Step 1: Background painting
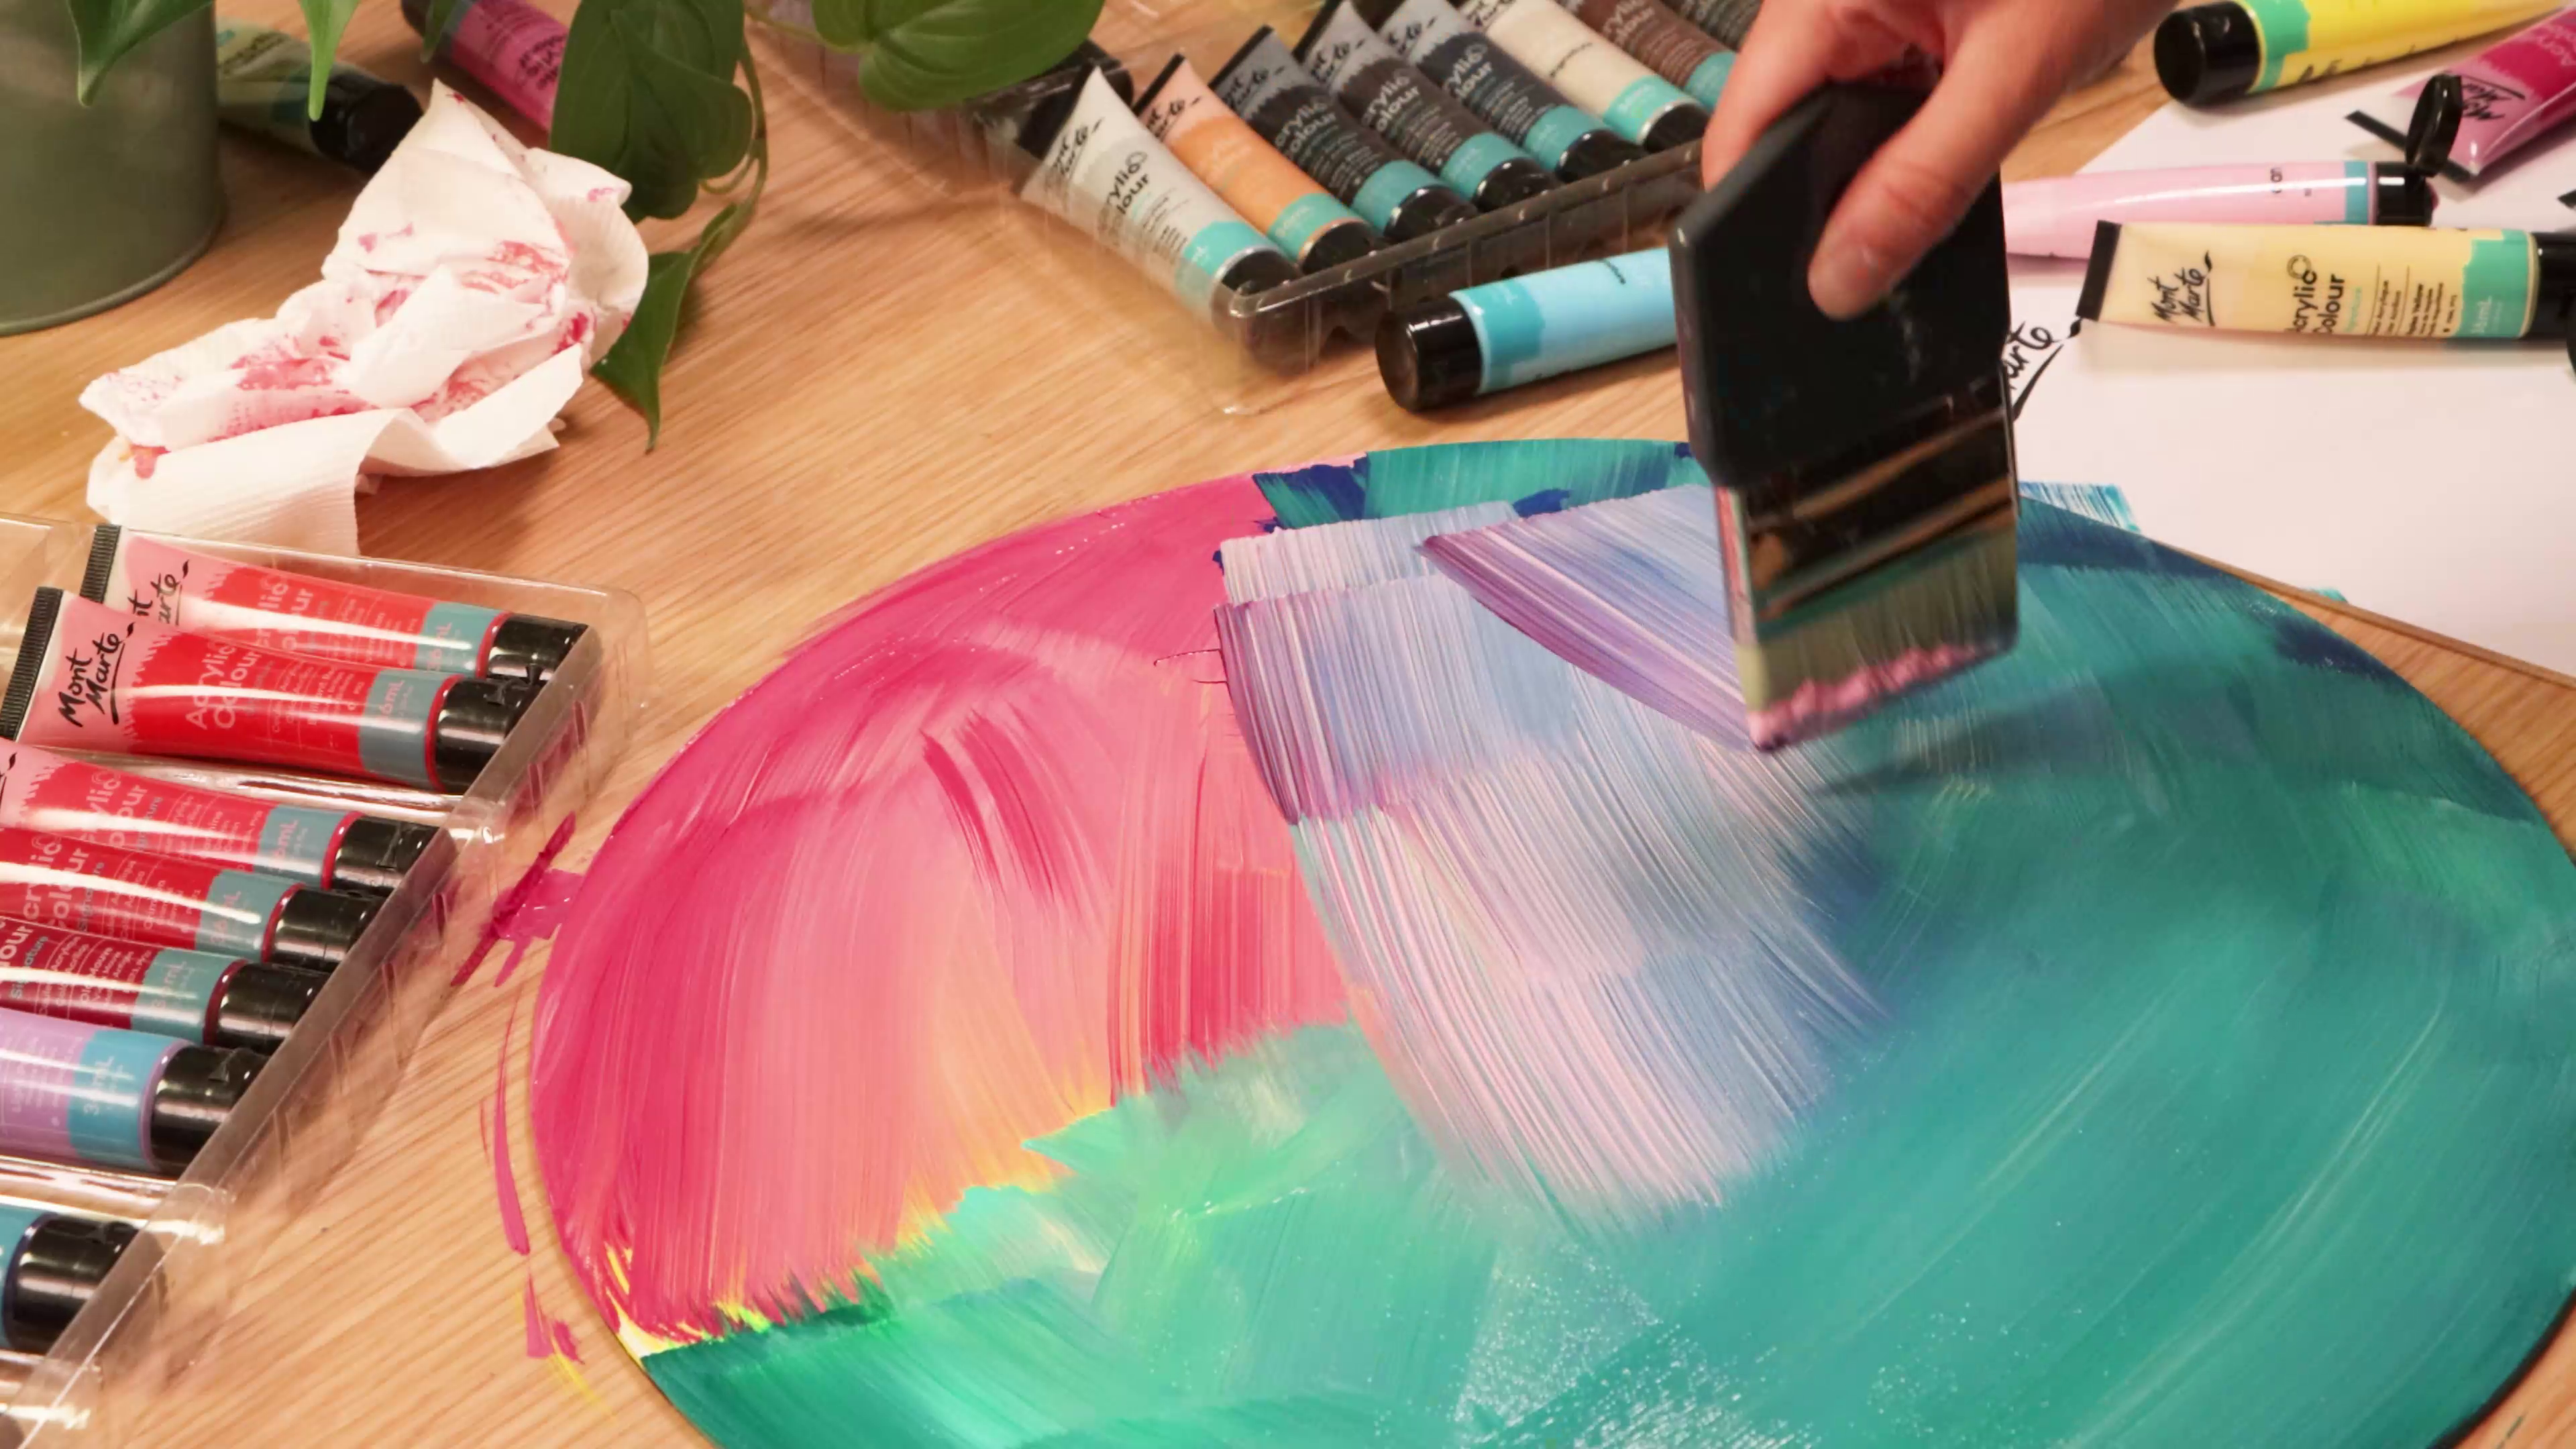
- Choose your colours (we used Phthalo Blue, Turquoise, Naples Yellow, Phthalo Green, Violet, Magenta, and Pink)
- Use the Abstract Expression Brush to blend your colours
- Keep the edges darker and the centre lighter to create a glowing effect
- Let the background dry
Step 2: Charcoal lines
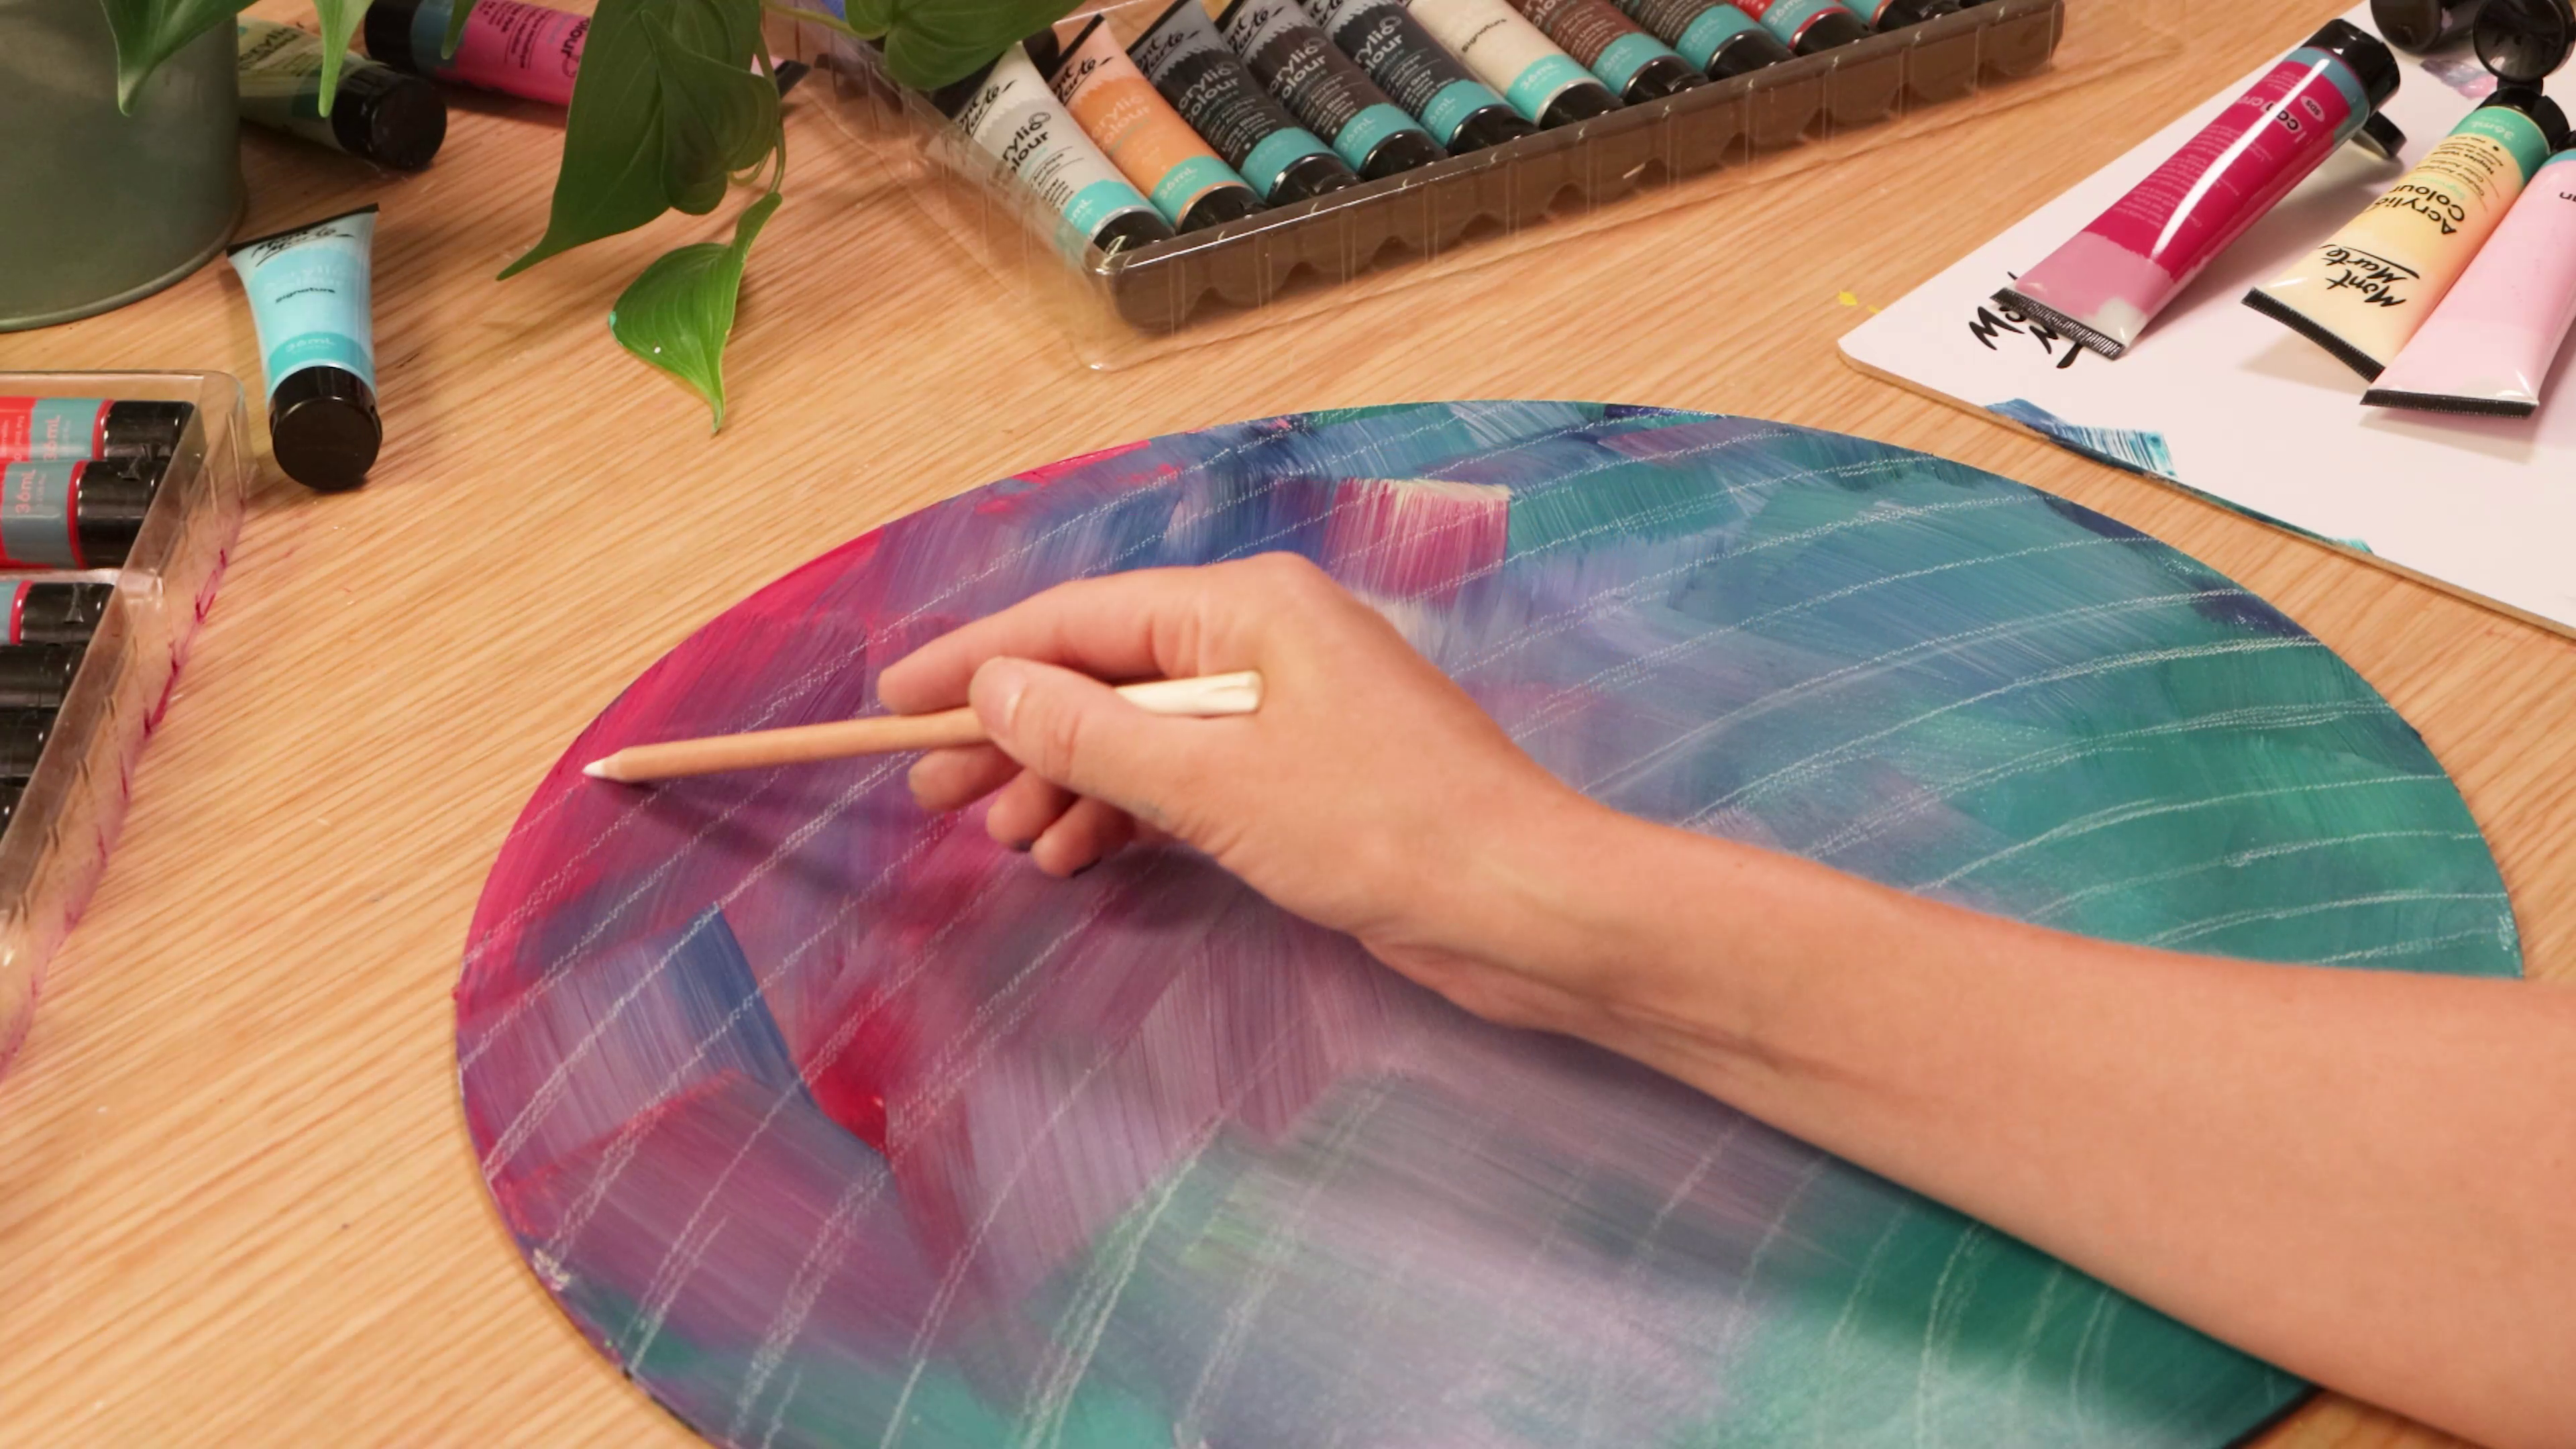
- Lightly draw curved horizontal lines across the canvas with a white charcoal pencil
- Paint over the lines using Naples Yellow to create a base grid for the tiles
Step 3: Painting disco ball
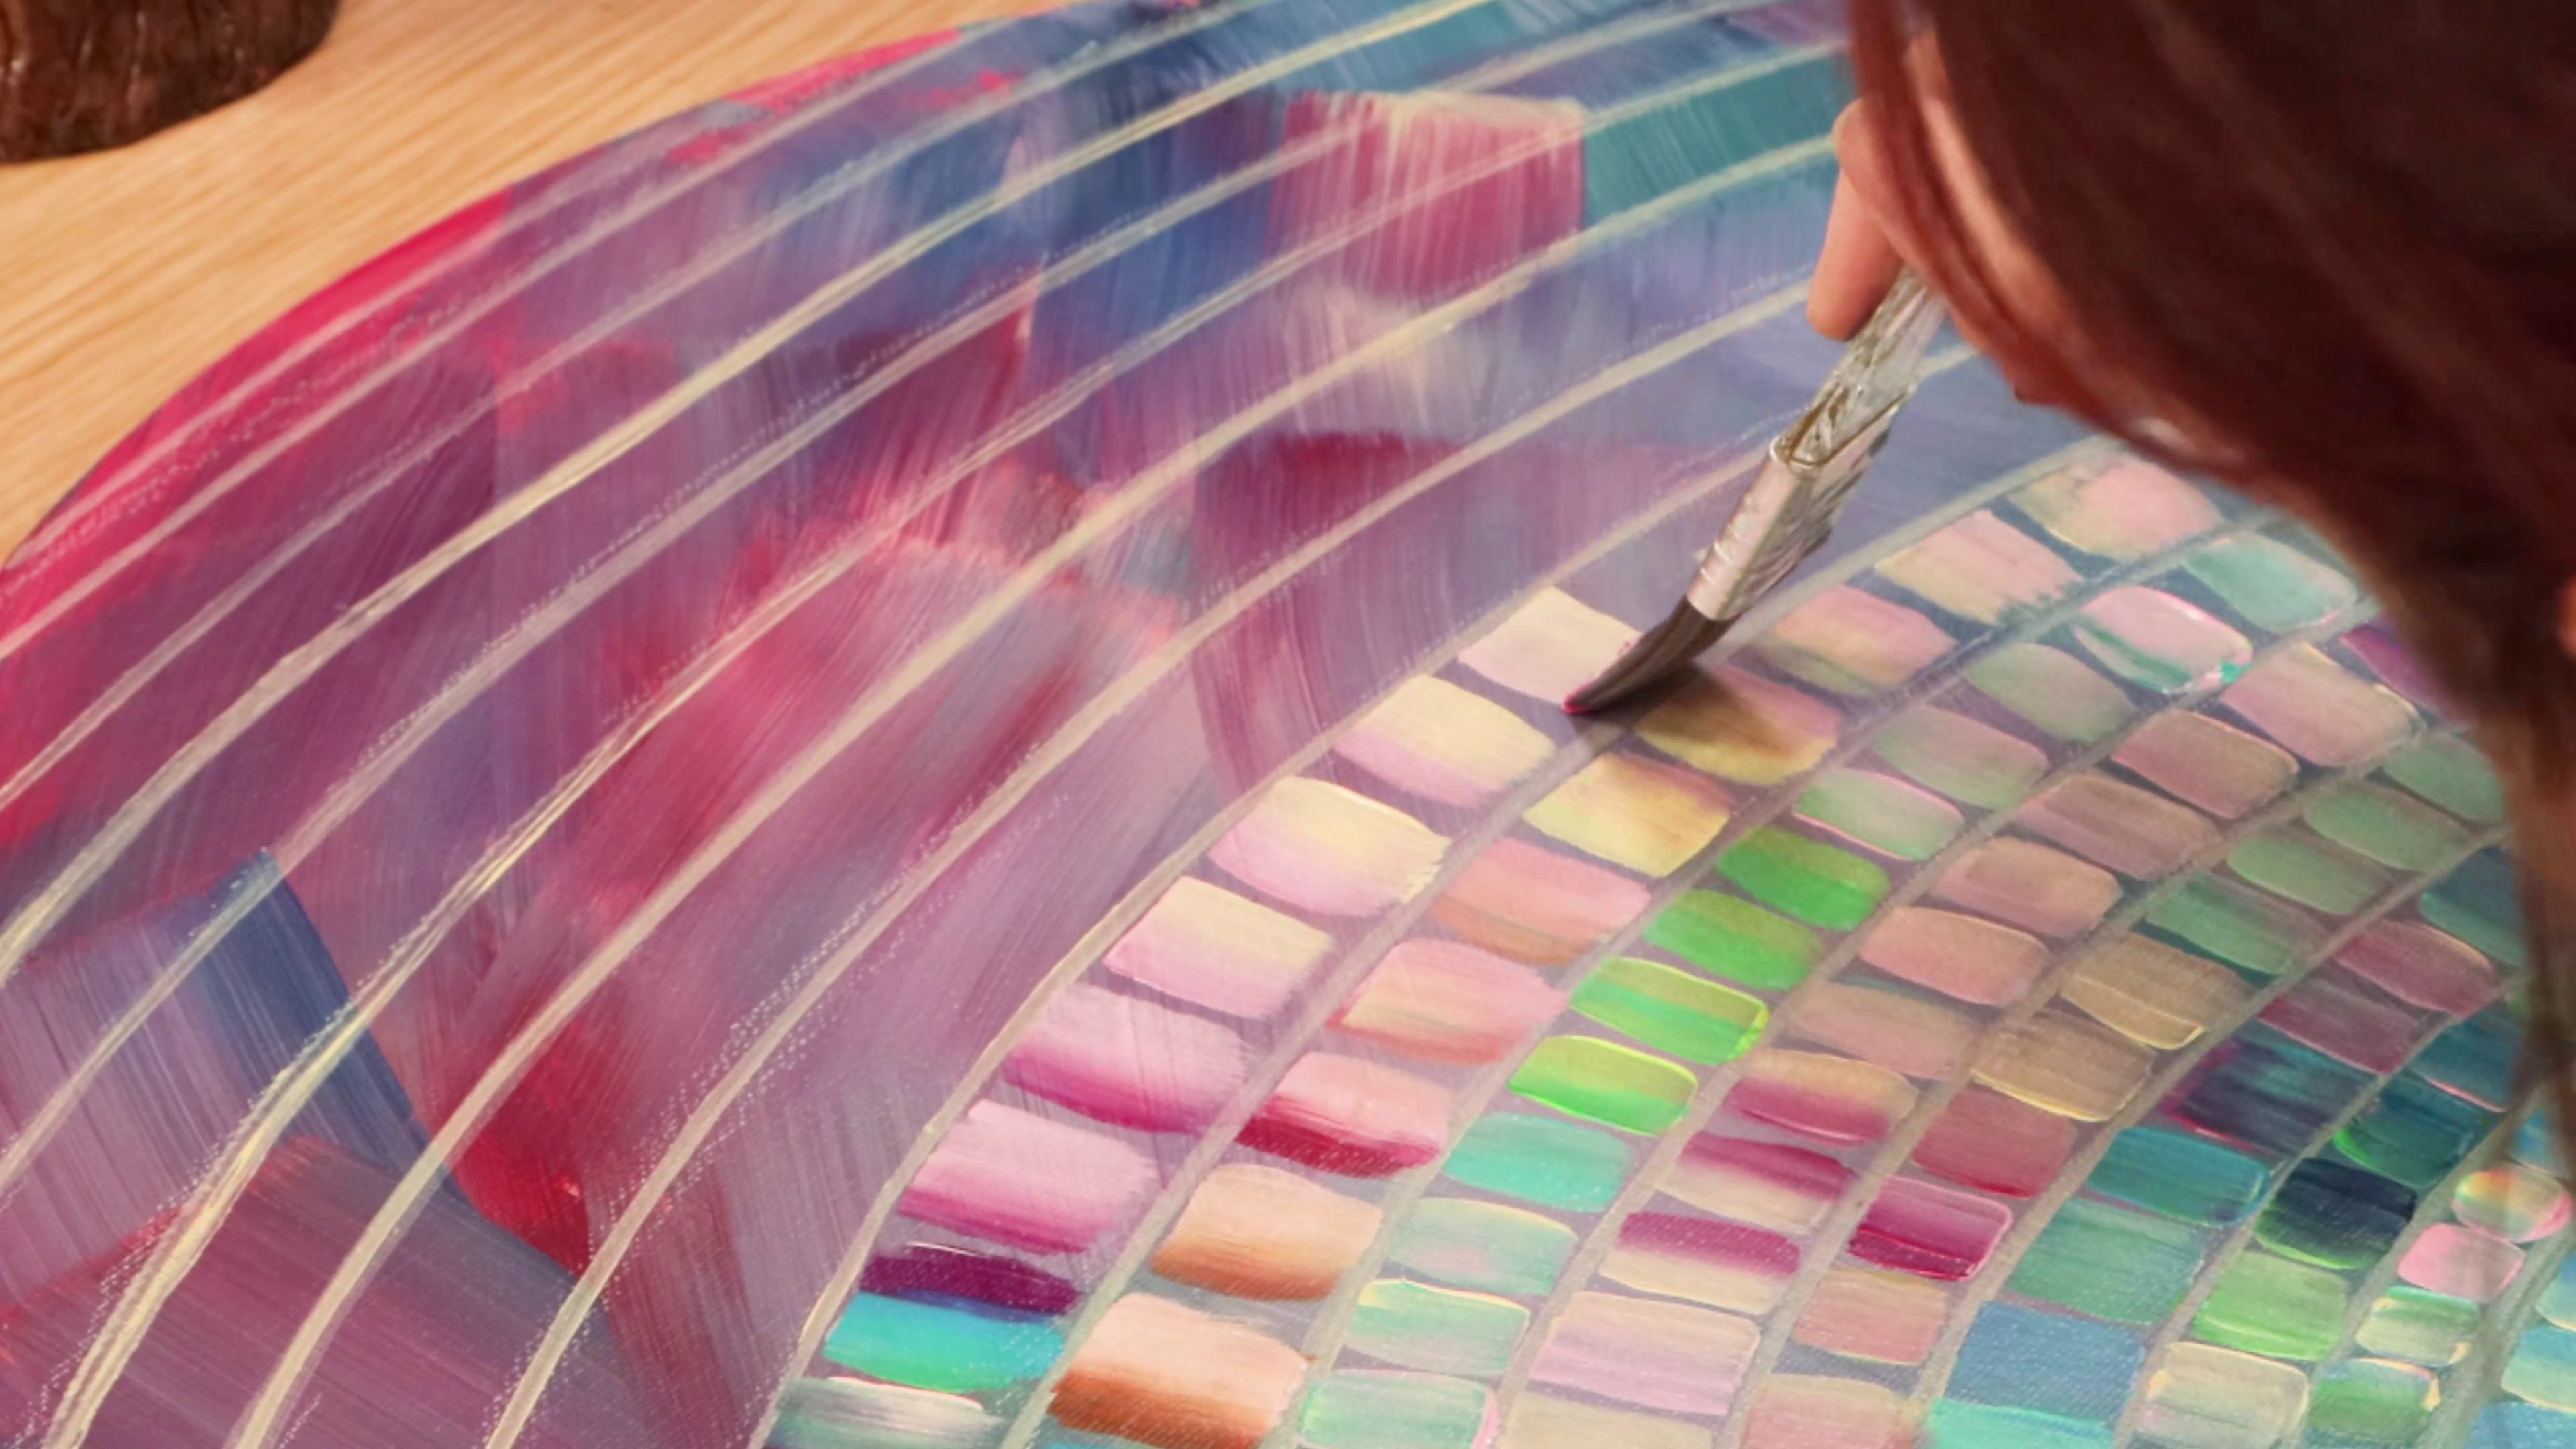
- Use a small flat brush to dab in colour between the lines
- Mix colours on the brush as you go to create a reflective look
- Use darker colours (like violet, phthalo blue, phthalo green) near the edges
- Use lighter colours (like yellow, pink, turquoise) in the centre
- Keep the brush strokes small near the edges and larger near the middle
- Follow the curve of the ball with your dabs
Step 4: Linework painting

- Add vertical lines between the tiles using phthalo blue
- Touch up the horizontal lines if needed
- Let some of the Naples Yellow show through for extra dimension
Step 5: Acrylic painting highlights
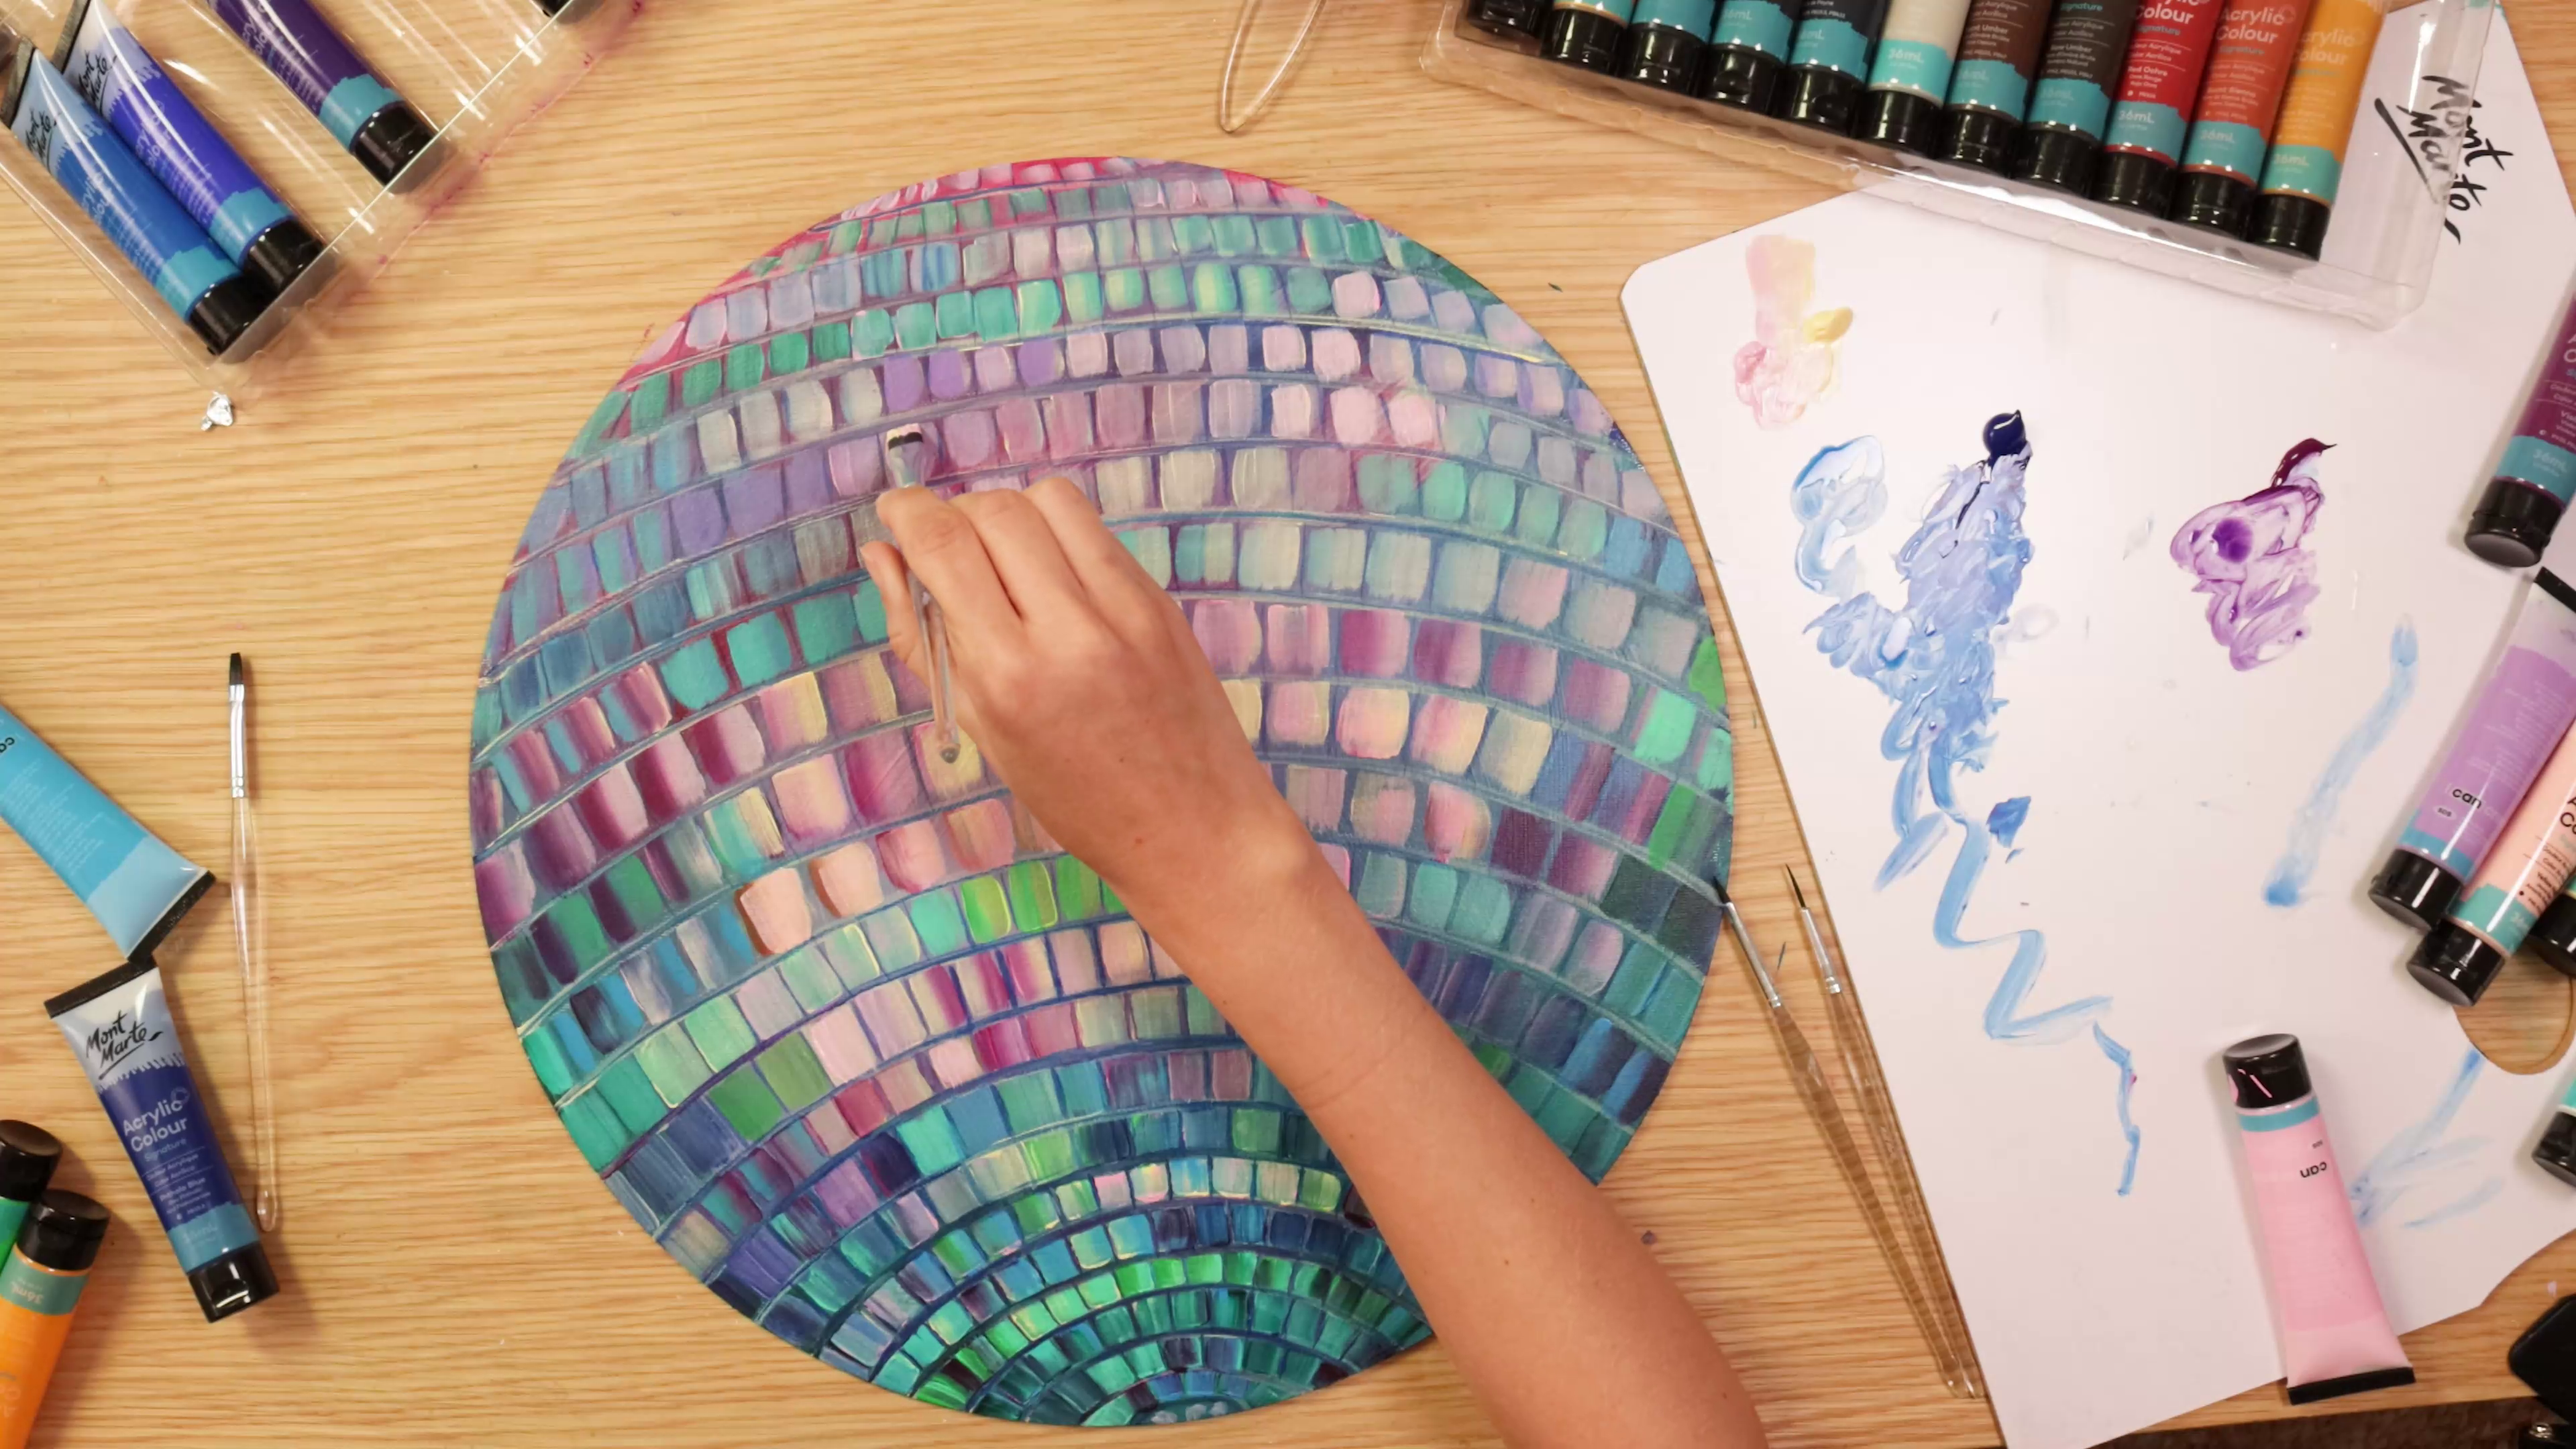
- Use white paint to add bright reflections in the centre of some of the tiles
- Add small dots of white around the disco ball to suggest sparkle
Step 6: Varnish painting
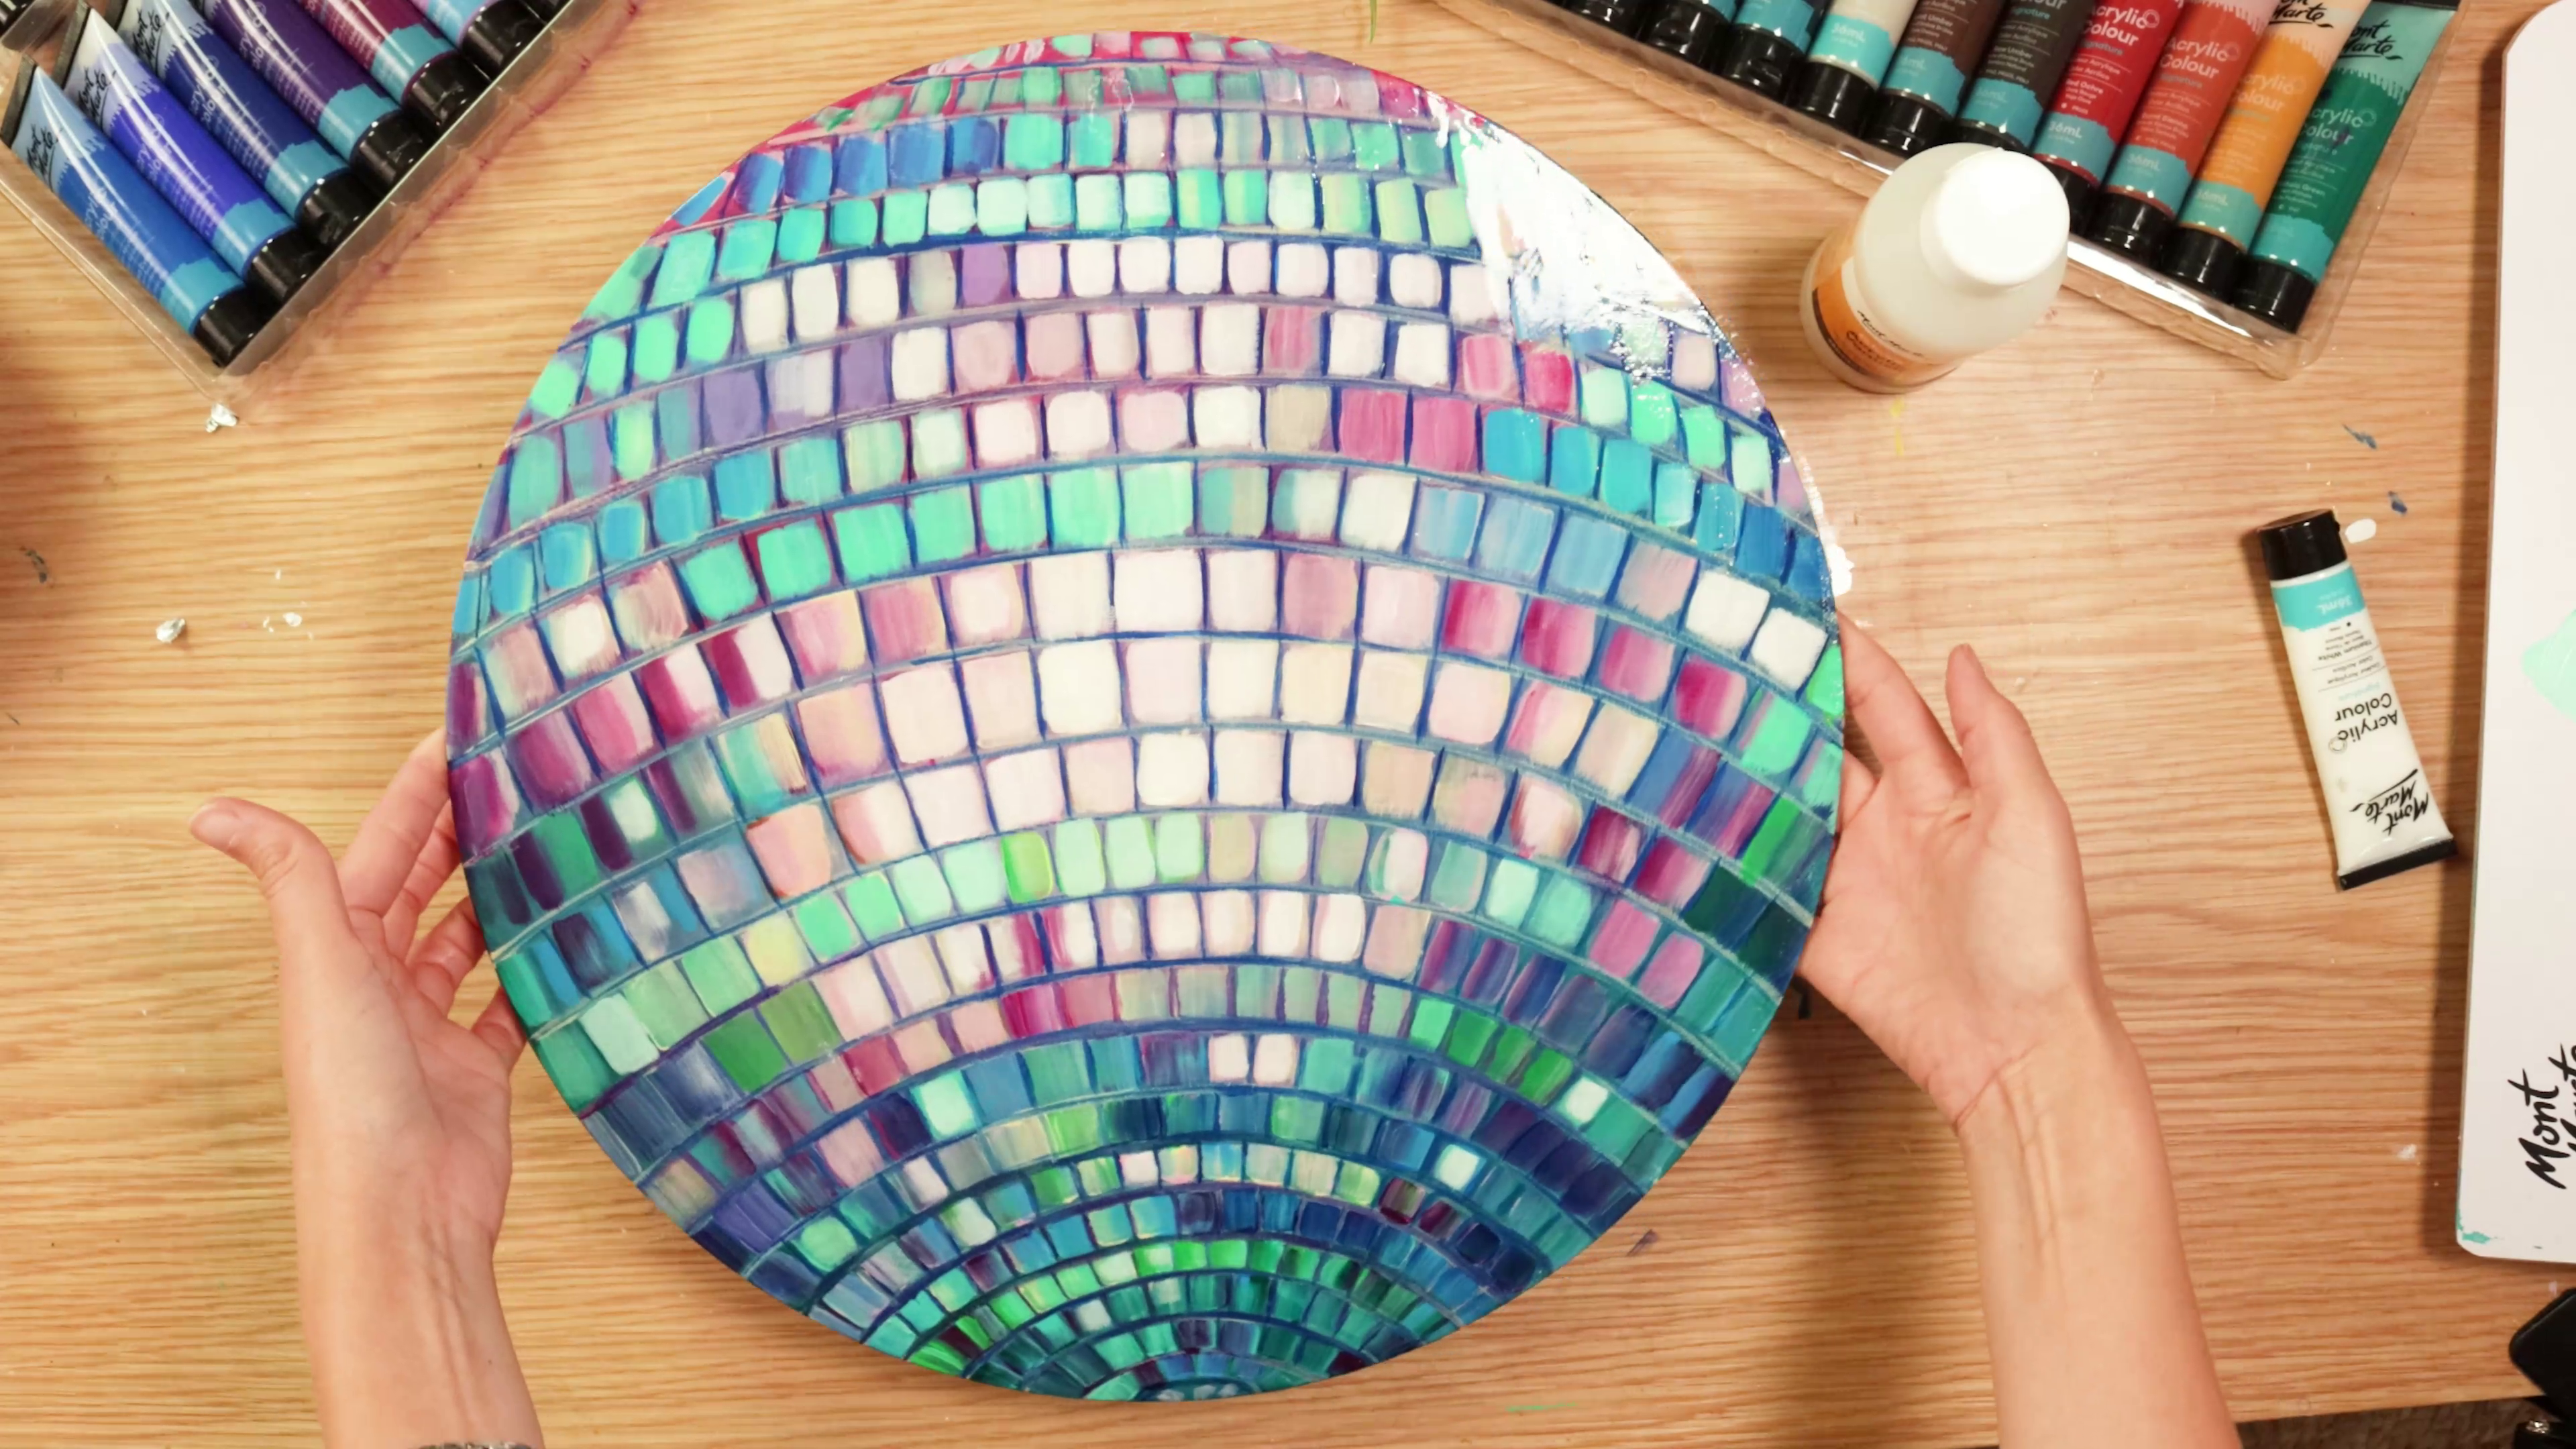
- Once dry, pour Gloss Acrylic Varnish onto the canvas
- Spread evenly with a flat Taklon brush or the Abstract Expression Brush
- Apply a generous coat for a glossy finish
All finished! Display your handmade disco ball wherever you need groovy vibes.
- Canvas Panel Round Signature 1pc 40cm (15.7in)
- Acrylic Colour Paint Set Signature 48pc (or any set with blues, greens, violet, turquoise, yellow, pink, and white)
- Abstract Expression Brush
- Flat Taklon Brushes (we used Clear Handle Acrylic Paint Brush Set Signature 11pc)
- Easy Clean Palette Signature 30 x 40cm (11.8x15.7in)
- Gloss Acrylic Varnish Signature
- White Charcoal Pencil or graphite pencil
You may also like

Cat drawing in pastel pencils


How to make stickers
