


Clay Spinosaurus: Part 1 (Sculpting)
Making the armature
Firstly, pop over to the project webpage and print the reference images on A3 paper.
Lay the outline centred on the painting board. Press the point of the scissors on the spot where the main support rod enters the board. Drill a 3/16 hole through the front panel.
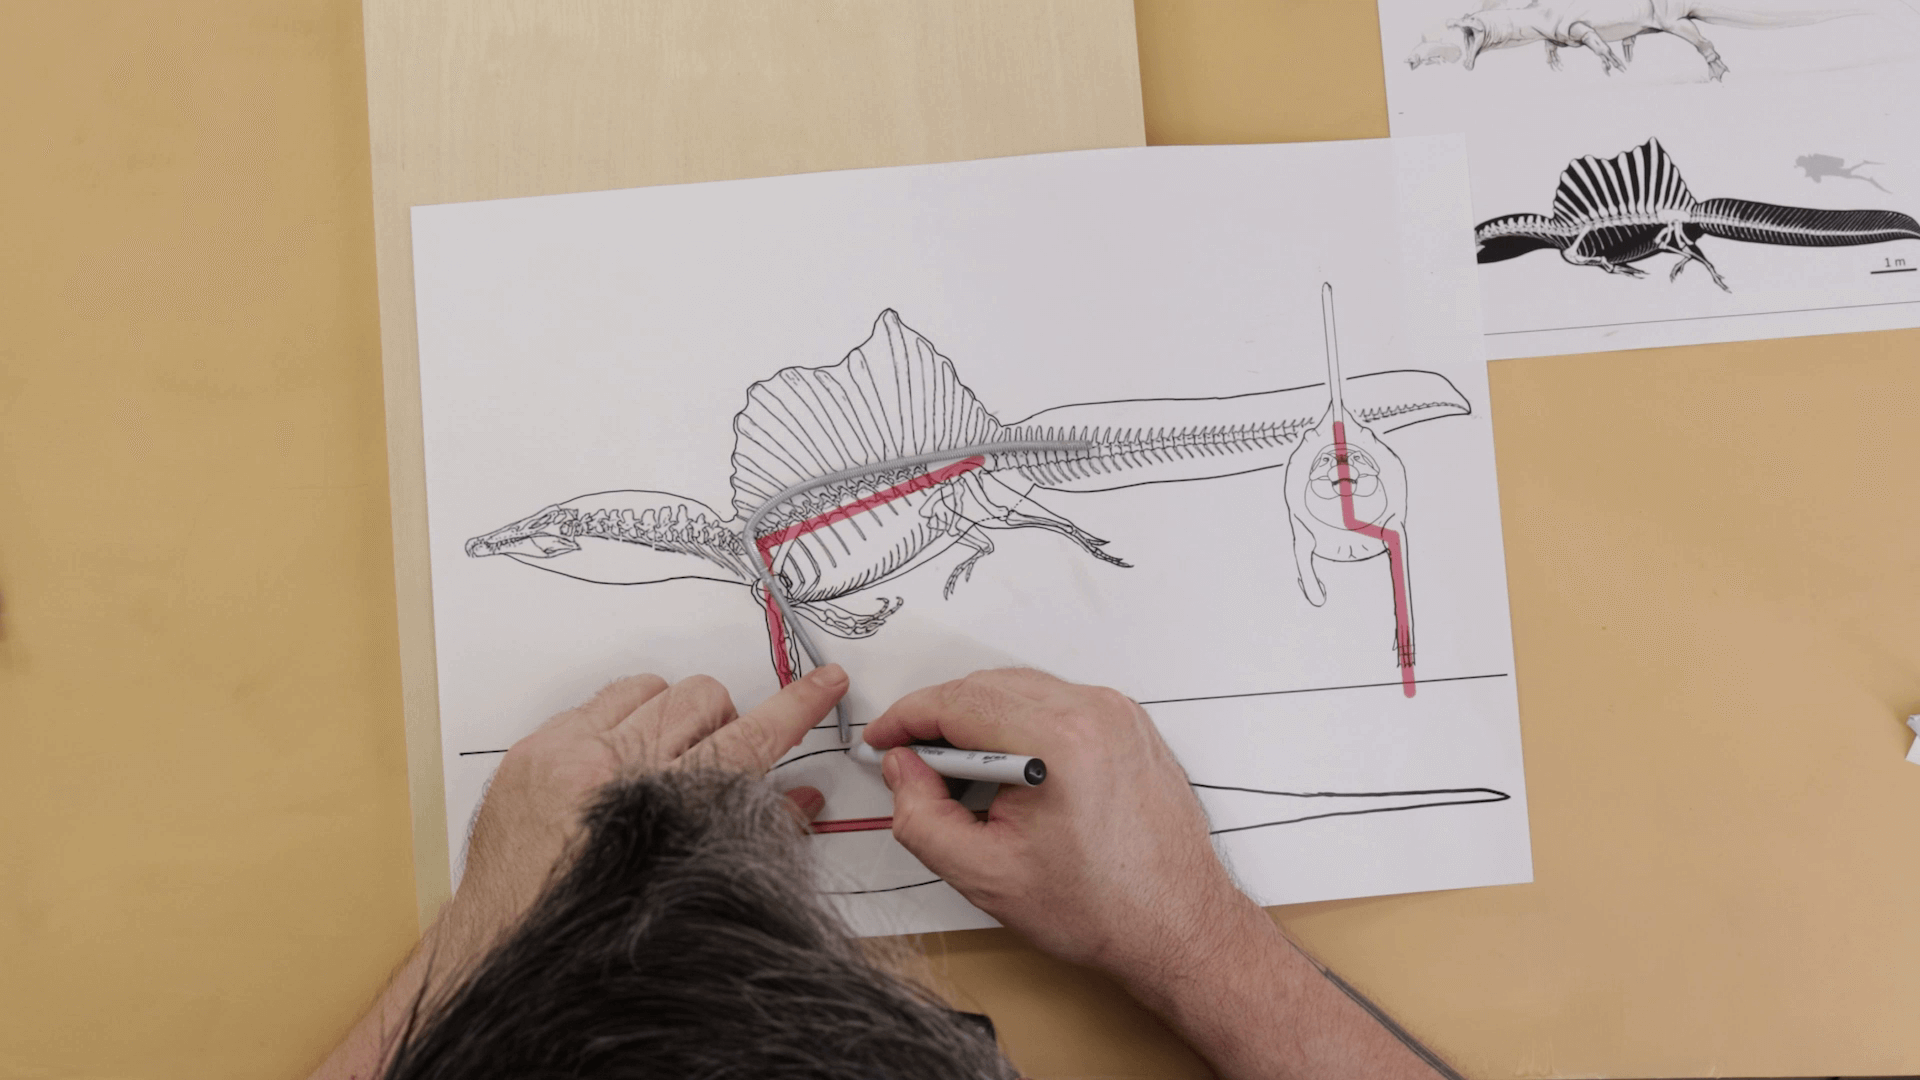
Refer to the reference image and bend the booker's rod to follow the outline of the dinosaur. The rod can be cut around the pelvis area.
Once done, fasten the rod to the board using the 3/16 nuts and washers.

Straighten out a coat hanger and bend it to form the shape of the head right down to the tip of the tail. Cut it to size and bind it onto the booker's rod with the extra coat hanger wire. Make a soft bend in the tail.
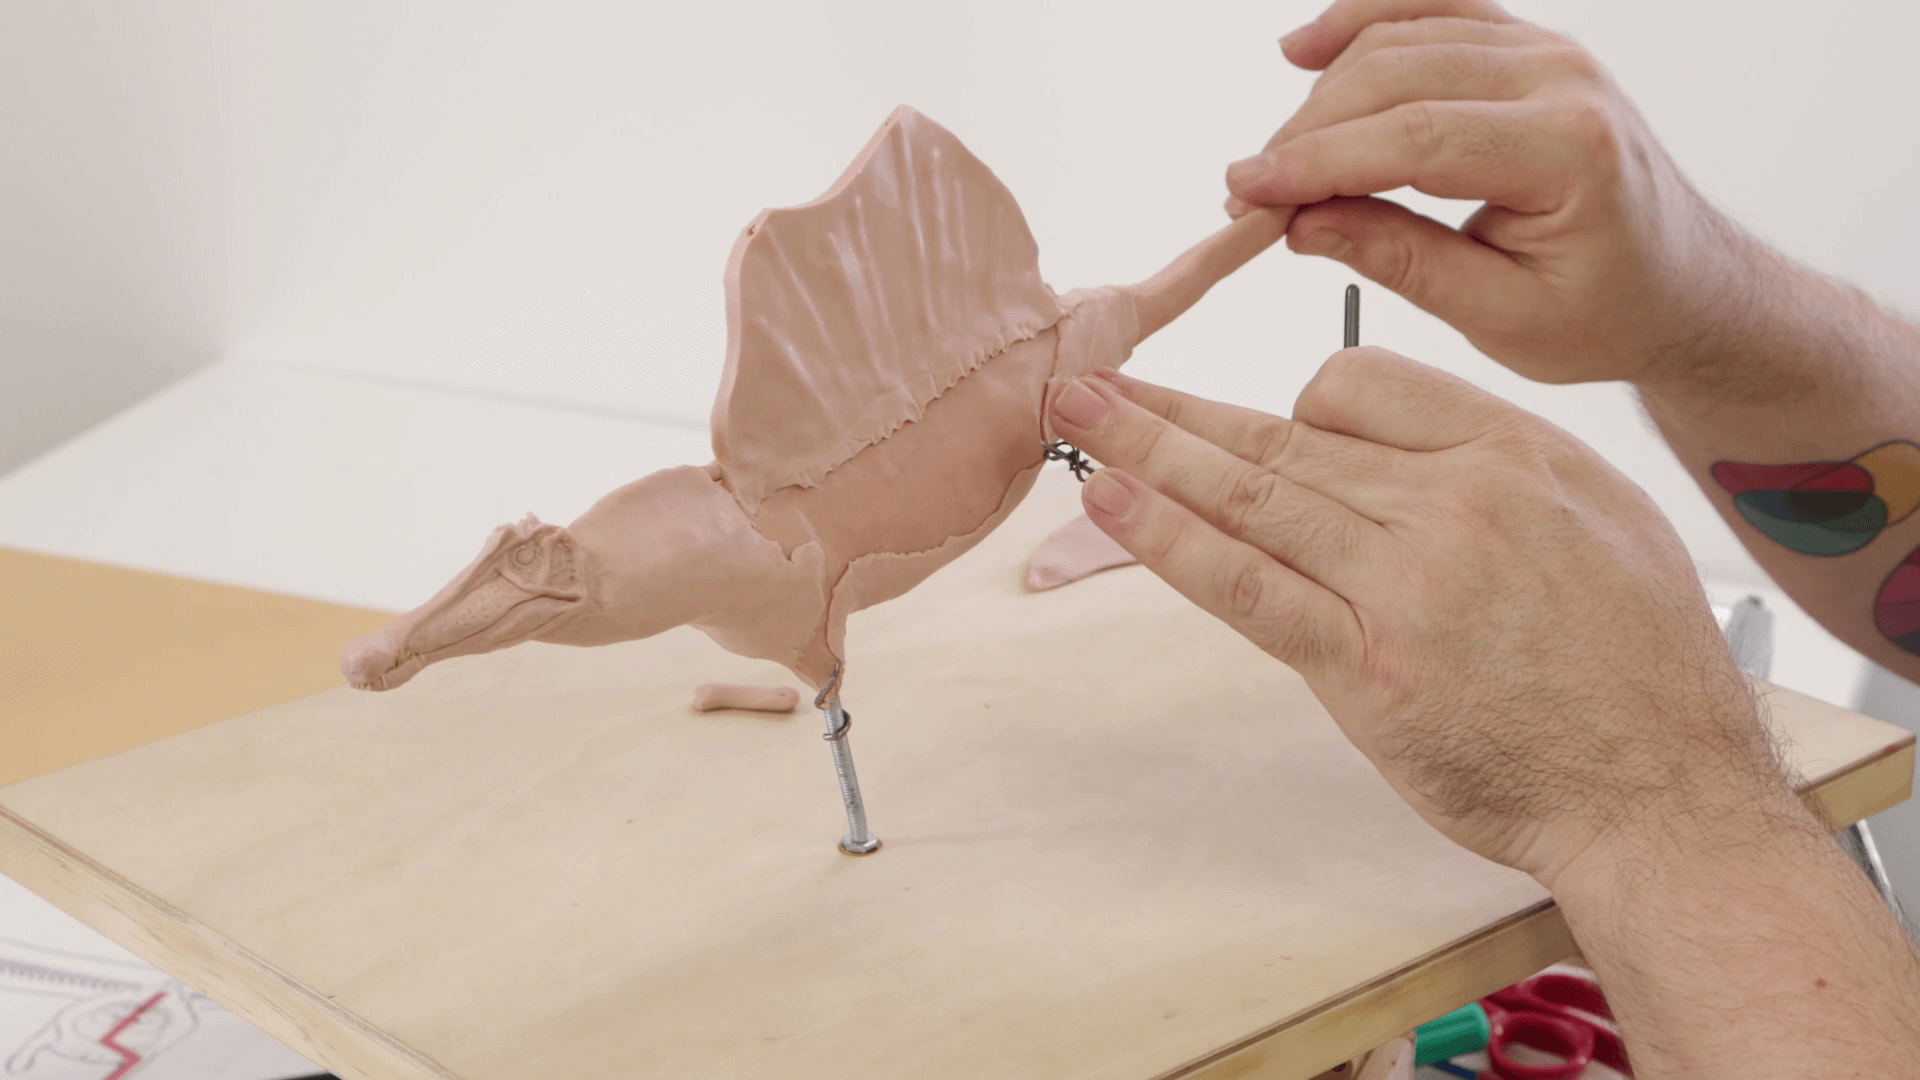
The two back legs and one forelimb have been positioned to suggest the animal is swimming. So, use the extra coat hanger wire and twist it onto the existing armature to create the limbs. Bend to shape, and then cut to size.

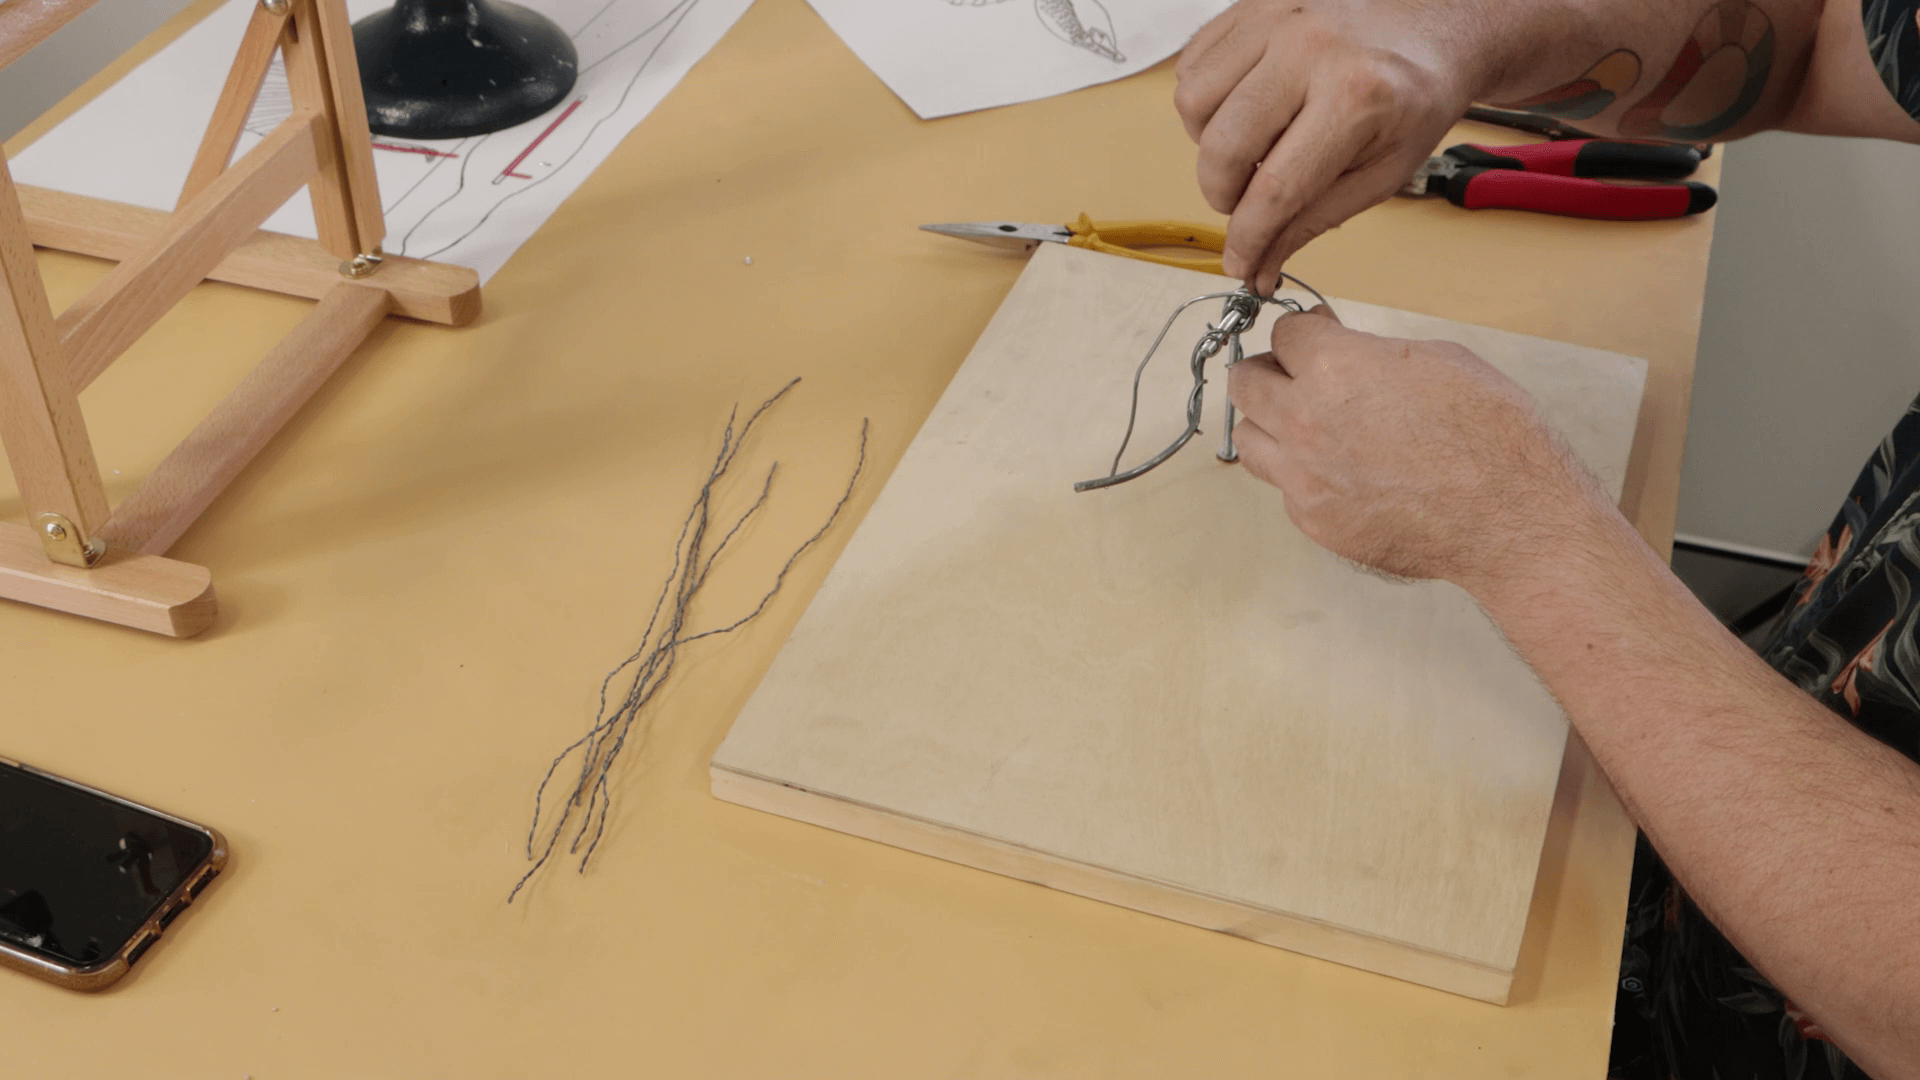
Then, twist some tie wire back on itself, and then create five more of these shapes. Twist these shapes onto the forelimb and legs. Bend the tie wire to the edge of each side of the central wire, as there will be a left and right toe on each limb.
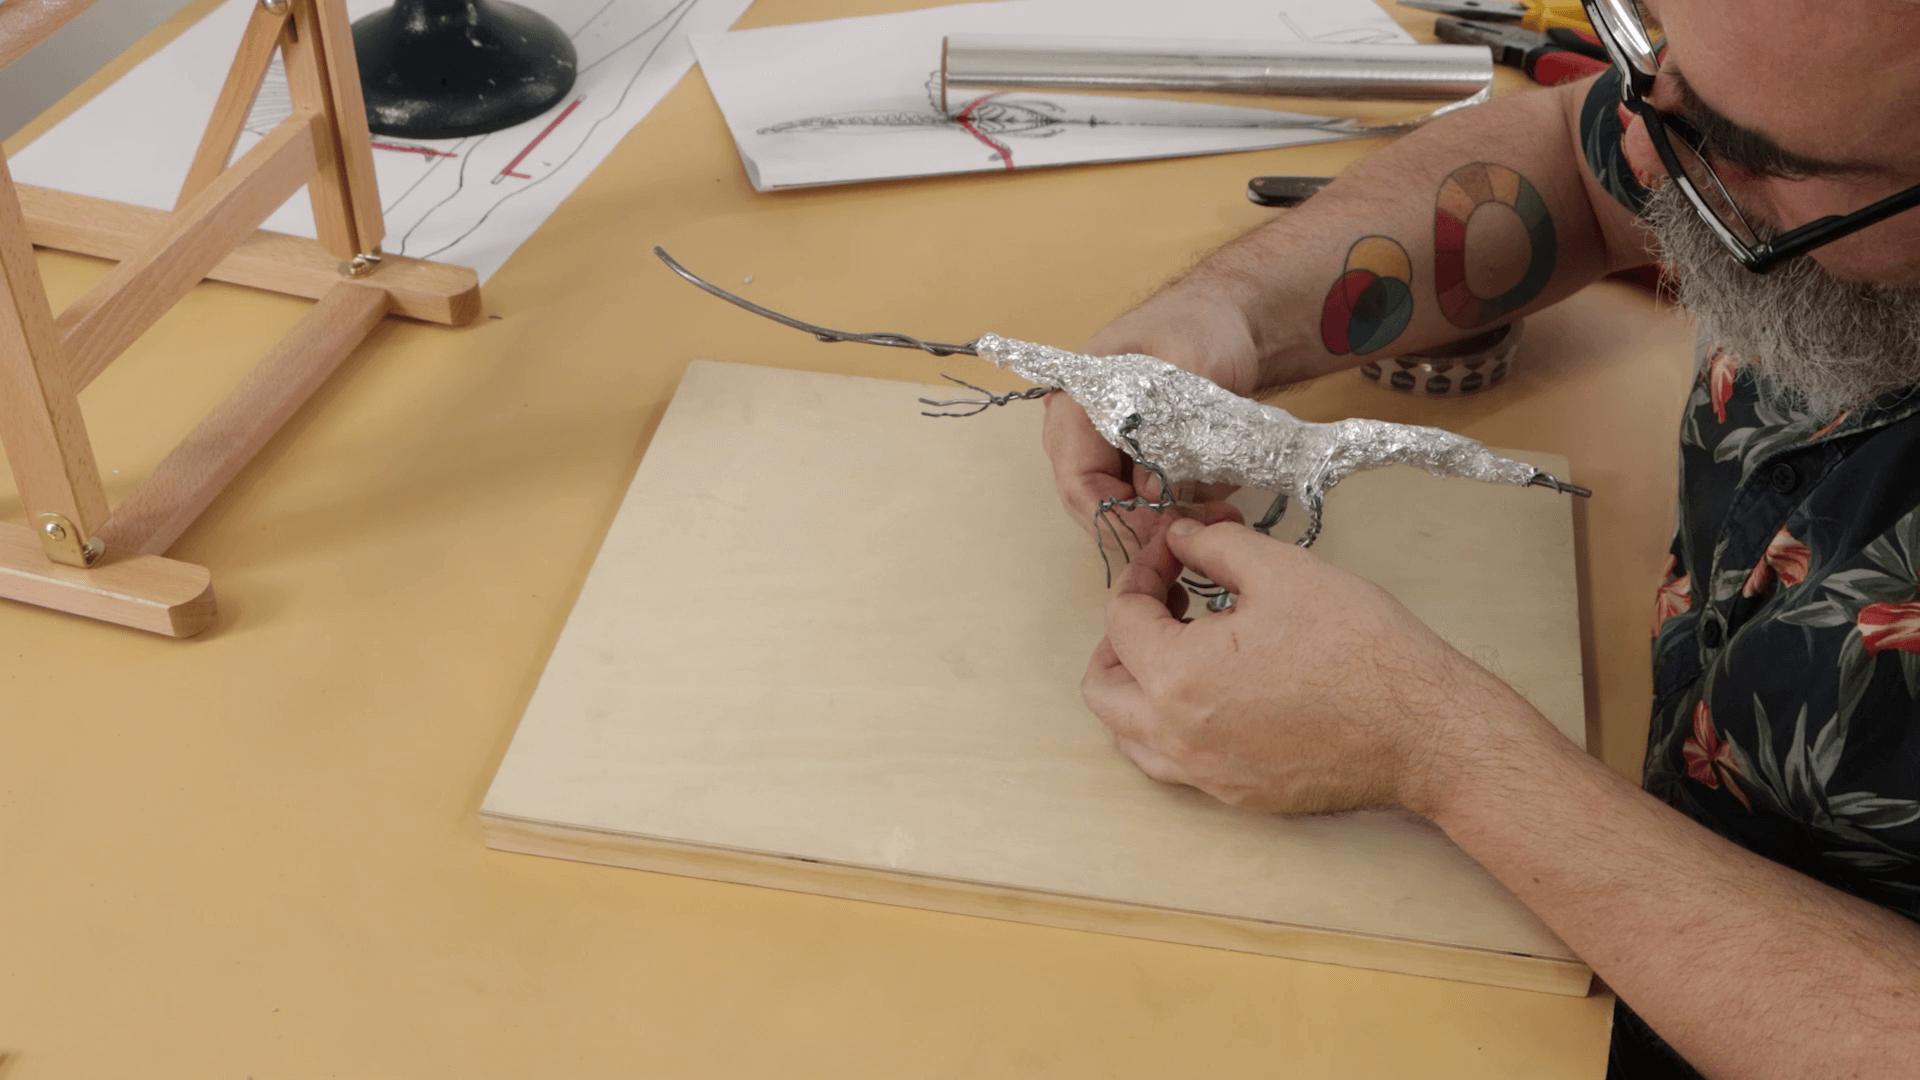
Roll some aluminium foil into a ball and press it onto the underside of the armature. Refer to the reference images and ensure the aluminium foil is shaped within the outline. Use some adhesive tape to secure the foil to the armature.
Applying and baking the polymer clay
Firstly, preheat the oven to 130 degrees Celsius.
Unwrap the polymer clay and condition it by rolling it out to a thickness of 5mm.
Wrap the polymer clay over the armature, ensuring that there are no air pockets between the clay and the armature. Blend any joints to create a smooth surface.

Cover the tail and head with a very thin layer of clay. If the clay is too thick in these areas, you can use the hobby knife to carefully cut it back.
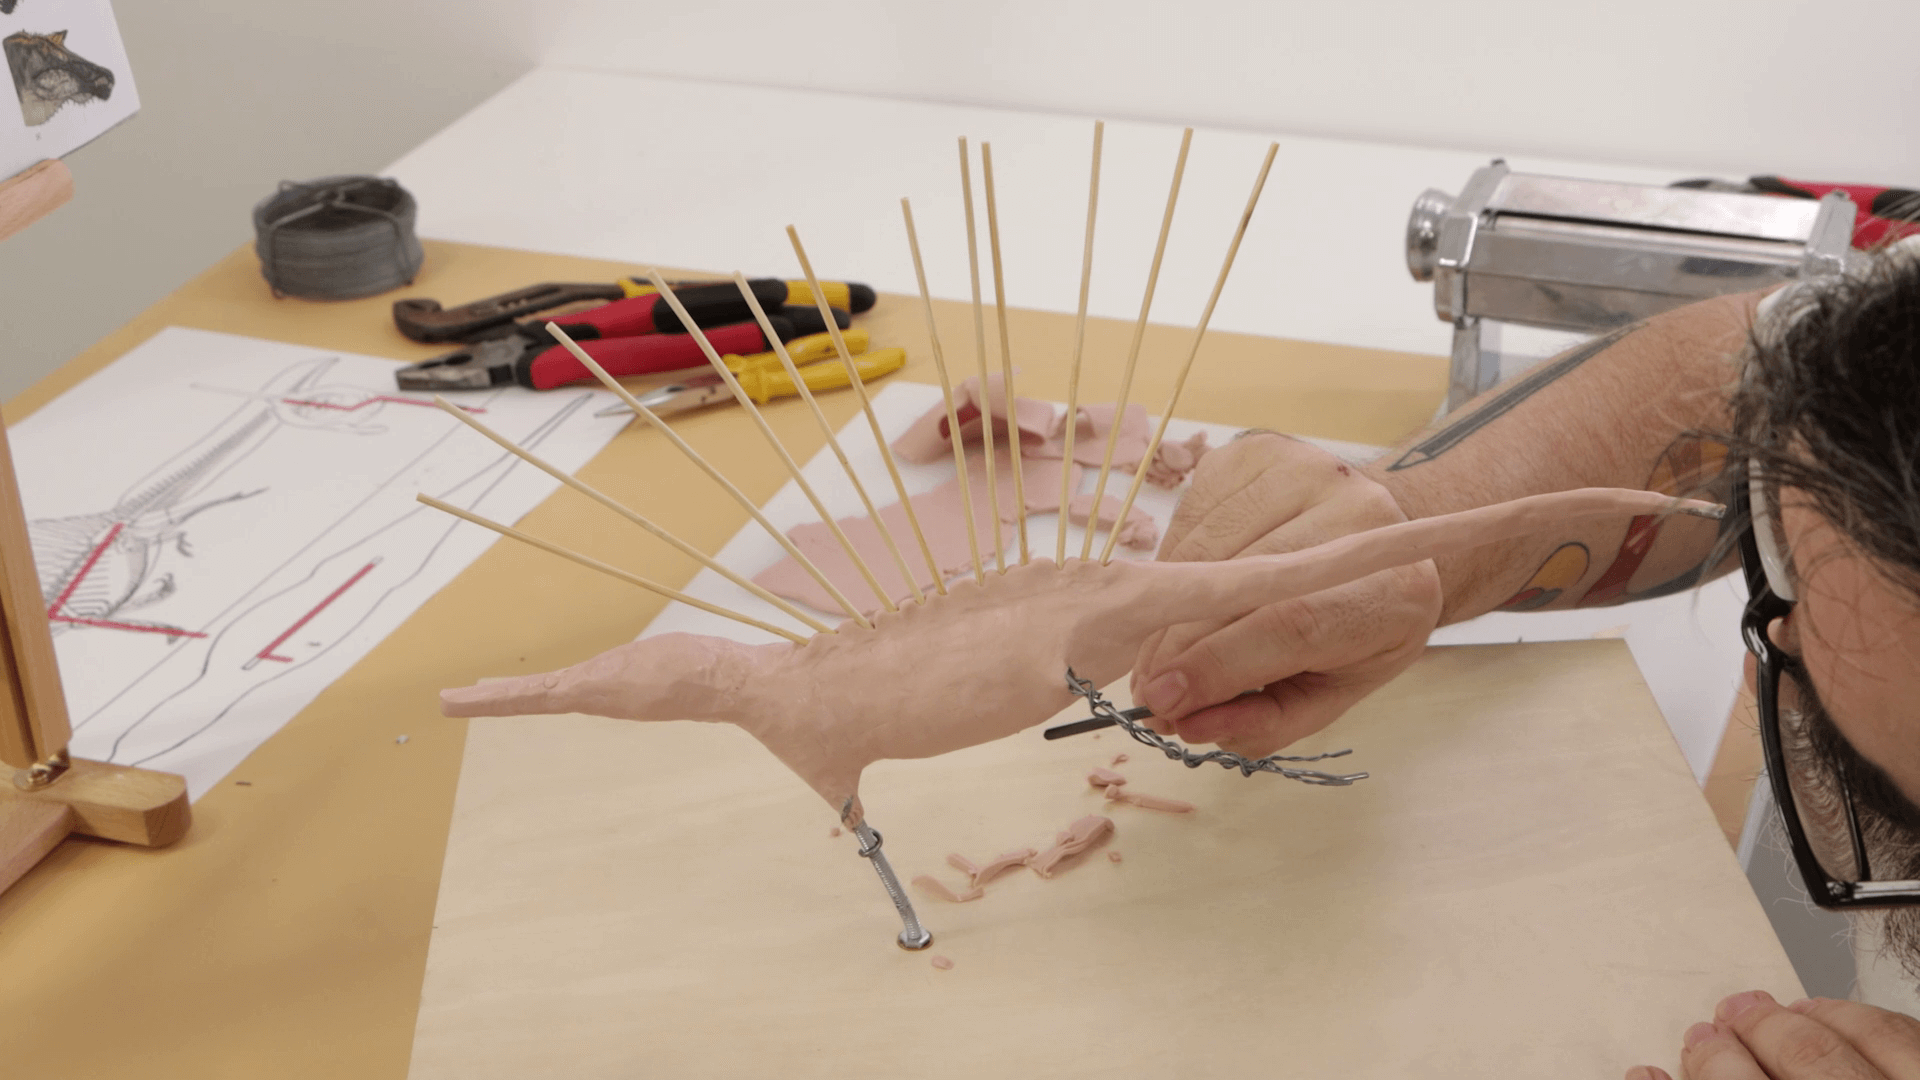
Lay a thin roll across the back and blend it into the body. This extra clay will help hold the spines in place. Shape the webbing between the toes and phalanges, as it will make detailing the feet and forelimb easier in the next stage.
Then, use the kebab skewers to create the spines. Refer to the reference images, paying close attention to how the spines are positioned on the skeleton. Push the skewers through the top of the armature and into the aluminium foil, ensuring they are central and inserted at the right angle. Don’t cut the skewers at this stage; it's best to let them set while the clay bakes and trim them once they've cured.
At a later stage in the project, we added texture using a handmade stamping tool. But you can make the tool now and bake it along with the sculpture. Roll a small tube and create a convex shape at the end. Use a ball tool to create a series of indentations on the convex end.

Now that the foundation stage of the sculpture is done, you can bake the armature and texture tool for around 45 minutes.
Adding the details
Once the sculpture is baked, turn the heat off and open the oven door to let the sculpture cool.
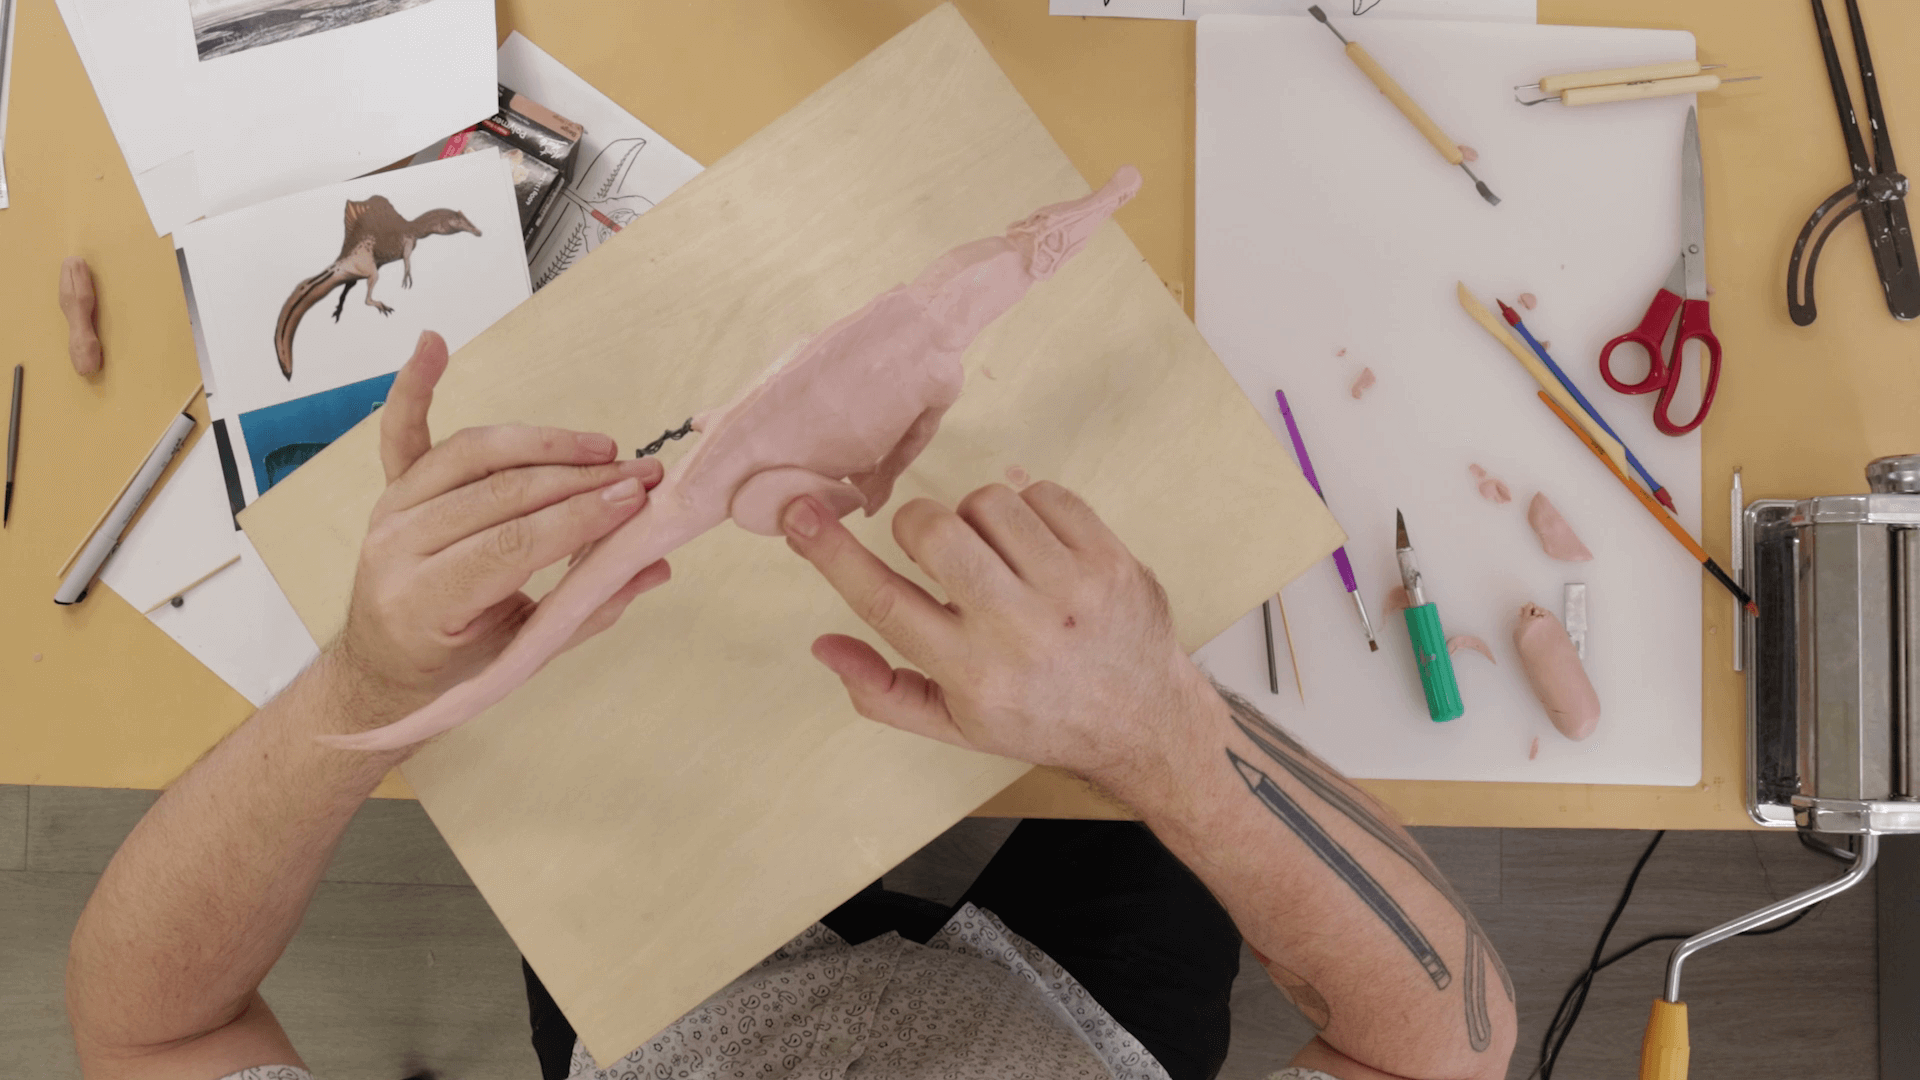
Once cool, measure each spine according to the reference image, mark it, and then snip to length.
Press some clay into the head area, the snout, the orbital part of the skull, and any crests. You can use the hobby knife to carefully carve the excess clay away while shaping the head. Create the eyes by pressing a ball tool into the eye areas and then pressing a small ball into each hollow.
To create the teeth, snip the sharp end off the extra skewers and embed them in the correct positions. This step can be fiddly, but you can straighten and refine the teeth after they’re in position.

Move onto adding a second coat of clay over the body, making sure the clay is 5-6mm thick.
For the sail, create two thin clay sheets and sandwich the spines between them. Press the sheets together and blend the clay at the bottom of the spines so it transitions onto the body.
To create the limbs, pack clay onto the armature and then carve the clay away until you’re happy with the shape. For the large muscles on the back legs, it's best to roughly create the shapes and press them onto the body. Blend them onto the lower portion of the legs. Any areas where the skeleton would show on the surface of the skin can be added to the clay after the initial shaping has been done.
For the feet and forelimb, create a thin sausage of clay and press it over each phalange. The pads can be created with little balls flattened onto the underside of the feet and the front forelimb.
Press some clay over the tail and carve it away so that it tapers out to nothing at the tip. If you refer to the top view of the image, you can see that the tail is quite slender from the top. Roll out two more sheets of clay and sandwich them together to create the tail. Then, make a profile cut around the shape.

Take the texture tool that we made earlier in the tutorial and use it to stamp over the entire body. Applying the scale texture will add realism to the sculpture.
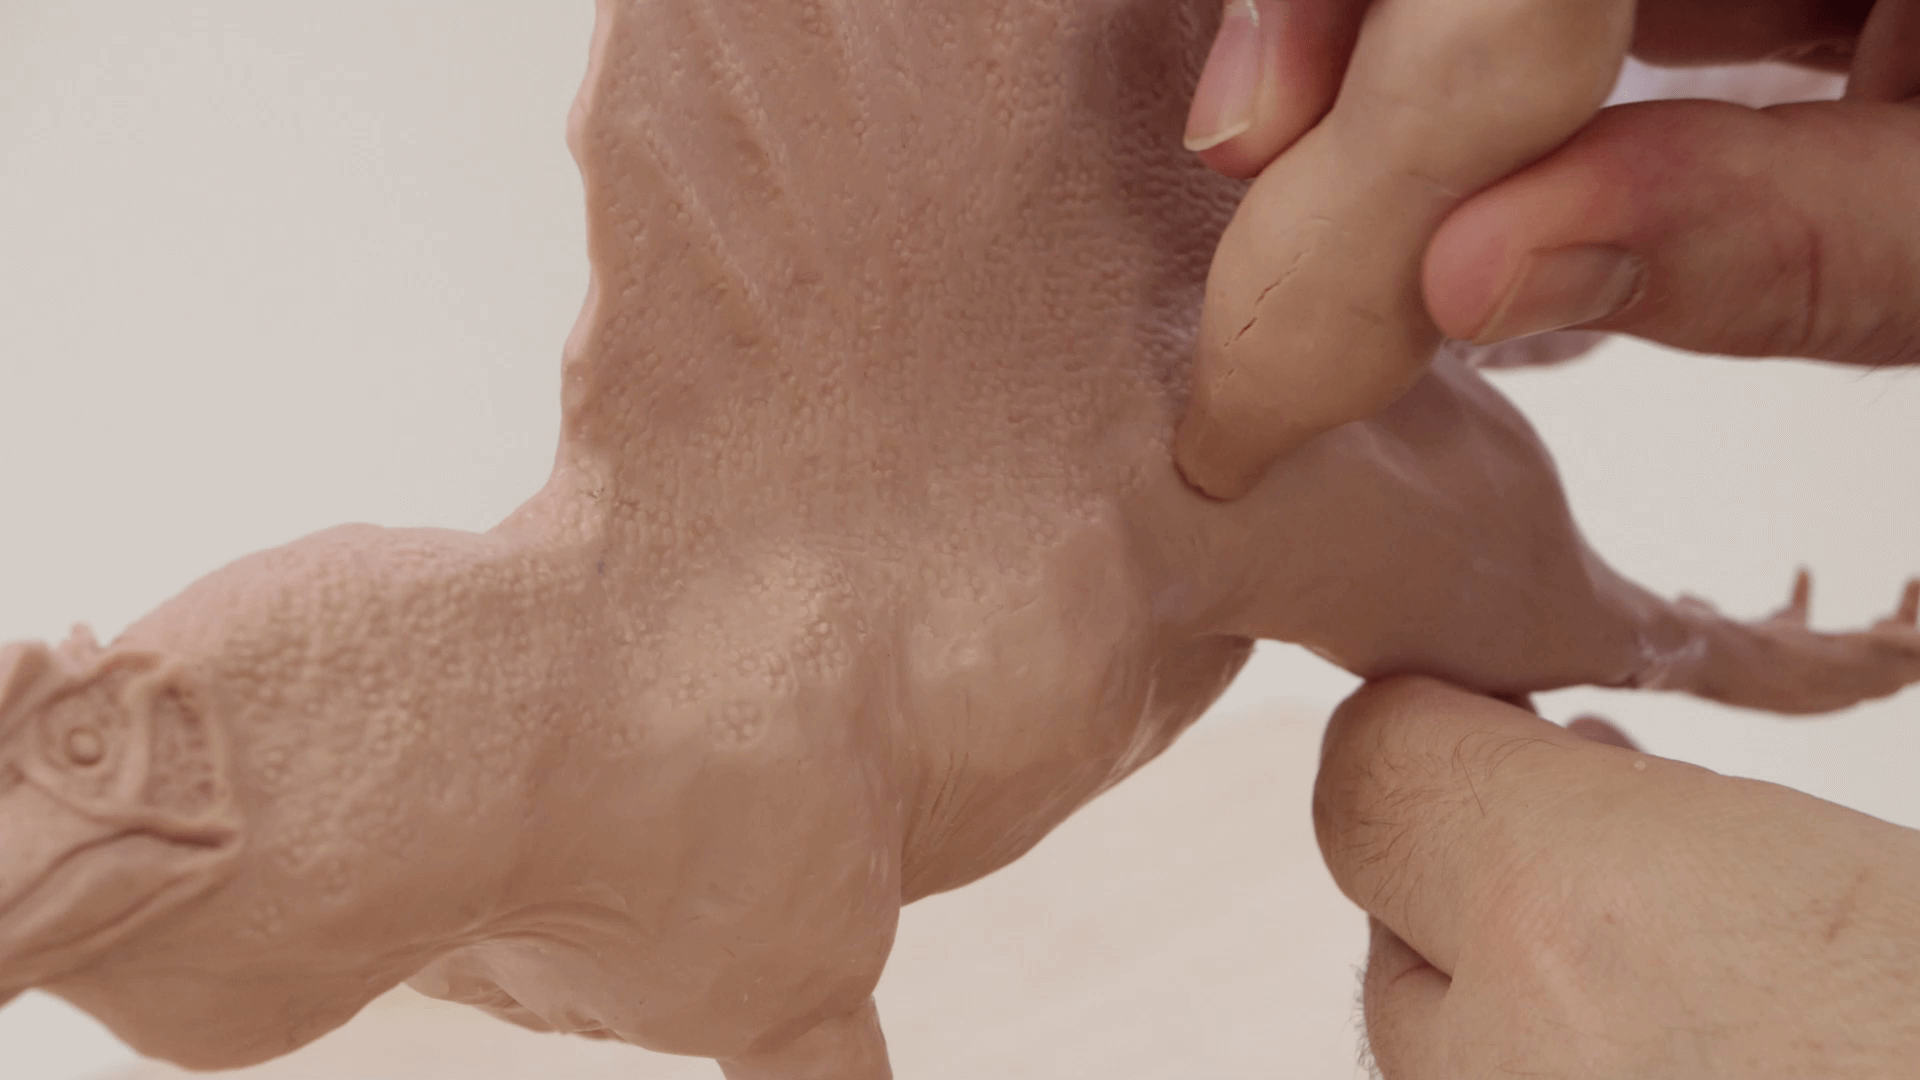
To create the spikes around the head, roll little tubes of clay and press them onto the sculpture, then blend them in. We then added some under the chin area to create balance.
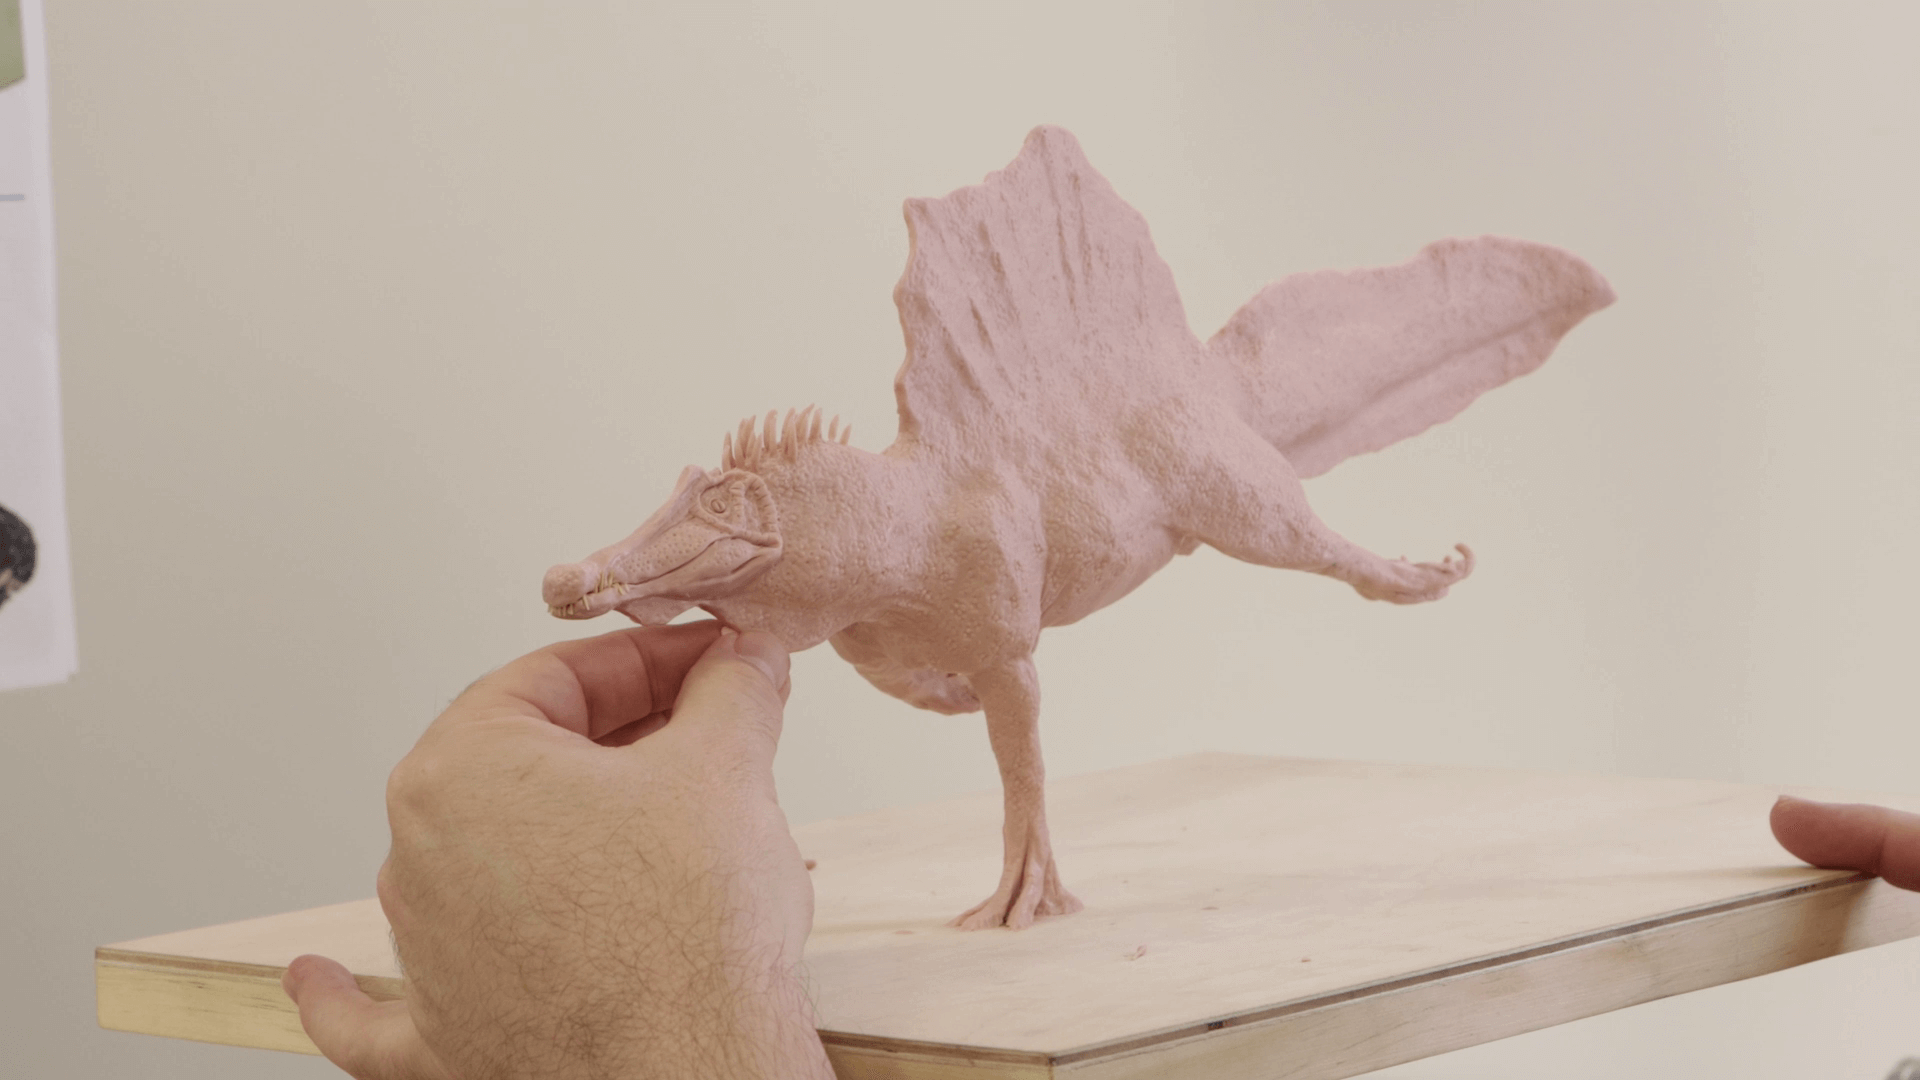
Then, you’re all done!

Materials:
- 2 x MMSP6401 Make n Bake Polymer Clay 400g – Beige
- MMSP0028 Sculpture Tool Set 39pc
Extra Materials:
- Large dinner plate or Banding Wheel
- Rolling pin or Clay Press
- 30cm ruler
- 30 x40 cm Timber Painting Board
- Aluminium foil
- Roll of tie wire
- Adhesive tape
- 2 wire coat hangers
- 3/16 threaded rod (booker rod)
- 2x 3/16 nuts and matching washers
- 3/16 drill bit and a drill.
- Pair of multi grips
- Flat nose pliers
- Scissors
- Small kebab skewers
- Hobby knife
You may also like

Peacock drawing in watersoluble oil pastels


How to use ceramic paint on a thrifted plate
