


Trying your hand at drawing inks? It can be tricky knowing where to start. So, have some fun, learn a thing or two and practice your penmanship with these 10 drawing ink techniques.
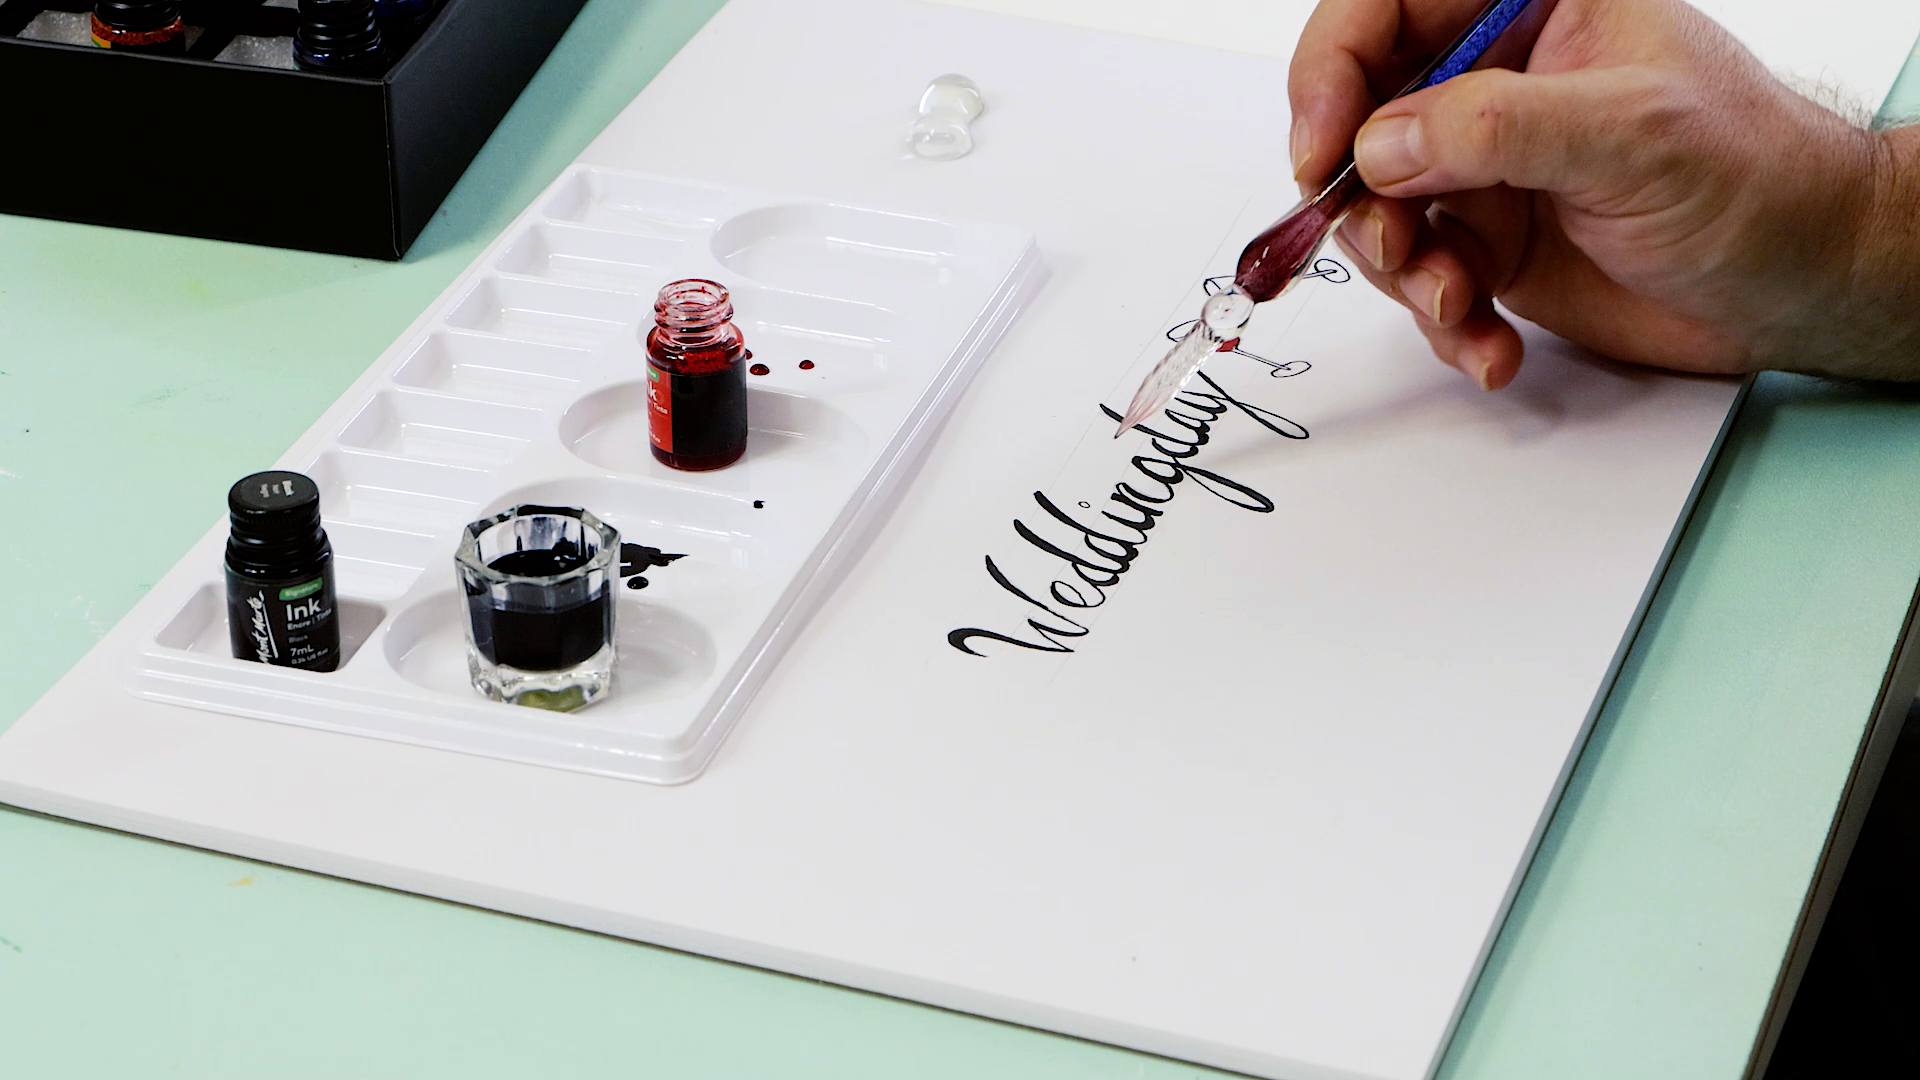
1. Calligraphy
Try your hand at calligraphy, hand lettering or step up your journalling game by writing with a glass dip pen. For this technique, start by pouring ink into a well, then dip the pen into the ink. Hold the glass dip pen like you would a regular pen or pencil and begin cursive writing with the pen. This technique can take a bit of practice first, so keep a piece of scrap paper nearby or have a test run before starting your project. Best of all, dip pens don’t have an internal ink reservoir, you simply dip the pen into the ink and get to it. Without the small reservoir, you can write or draw with these for much longer than an ink or fountain pen.
2. Pen and ink technique
Did you know, you can re-create a pen and ink technique using drawing inks too?! Because drawing inks dry quickly, you’ll need to work light to dark and because they’re water-based, you’ll need to wait until each coat has dried first. For a pen and ink effect, first lay a light wash in with a mop brush. Once this has dried, use the dip pen and draw on top with a darker colour. Looking to correct an ink pen mistake? We’ve got your back, check out this handy how-to video.
3. Gradient wash drawing
Create a gradient wash drawing using drawing inks and working light to dark. This technique looks great for skies or oceans in landscape works. Use broad, horizontal brush strokes and work down the paper with a fully loaded brush. Dip into more water to dilute the colour as you work down the page.
4. Dry brush technique:
The dry brush technique is great for both watercolour and drawing inks, especially when you’re looking for ways to add texture to your artwork. Apply a wet wash first, then grab a dry brush and press the brush to the paper. This will lift the colour, leaving areas of the paper exposed. Experiment with this technique or use it for adding extra highlights to your drawings.
5. Wet on wet technique:
Wet on wet technique might sound familiar because it’s also a watercolour technique. You’ll want to try this for blending your inks and it’s pretty simple too. Add water to the paper first, then apply ink to the wet area. Add more water before adding in a second colour. The colours will then meld together to form a blend. Because this is also a watercolour technique, once you’ve mastered the drawing inks, have a go with watercolours.
6. Blooms:
If you’ve got a small area of colour that you’re looking to blend, why not try a bloom? For this drawing ink technique, use a primary colour, then apply another primary colour on top with a wet wash. Leave this to dry slightly, and watch the two colours blend together, creating a cloud-like bloom shape. You won’t need too much colour for this, so start small and see how you go.
7. Splatter:
If you’re looking for texture or just wanting to jazz up your art with a bit more visual interest, try the splatter technique. Dip a brush into the ink, then use paper towel to remove most of the ink from the brush (you can skip this step if you’re looking for a larger, dramatic effect). Then, using a pen as a rest, tap the brush onto the pen. This will splatter the ink onto the page and leave you with a random splatter or drip look.
8. Feathering:
If you’ve noticed some harsh lines creeping in or you’re wanting to blend out a tricky colour, try feathering. For this drawing ink technique, just reach for a clean, soft brush. Wet the brush to soften solid colours before they dry, or use the brush to smooth harsh lines, it’s that easy!
9. Paper towel:
If you’re wanting to lift areas for highlights, add some texture or just wanting to remove colour, we’ve got a technique! Create a wet wash, then using paper towel or kitchen roll. Dab the excess ink up to remove the wash. Keep in mind, paper towel absorbs ink quickly so it’s best to use smaller pieces or work in smaller areas.
10. Pushing puddles use a straw:
If you’re working on a landscape or just looking for more colour and texture to your drawing inks, try pushing puddles with a straw. For this, create a small ink puddle. Then using a straw, blow the puddle around to push or pull the ink. Keep the puddle moving as the ink will dry if it’s left in the same spot. Most importantly, remember to blow the air out of the straw, not in!
Ready to try drawing inks? Grab a set for yourself here or check out our demo where we put the Drawing Ink Set Signature 16pc to the test.
We hope that you feel inspired to try your hand at these drawing ink techniques yourself. Don’t forget to #montmarteart or tag us @montmarteart on Instagram or Facebook, we’d love to see what you create.


