


How to paint cherry blossoms using watercolour
Firstly, pop over to the project webpage and print the reference image and outline.
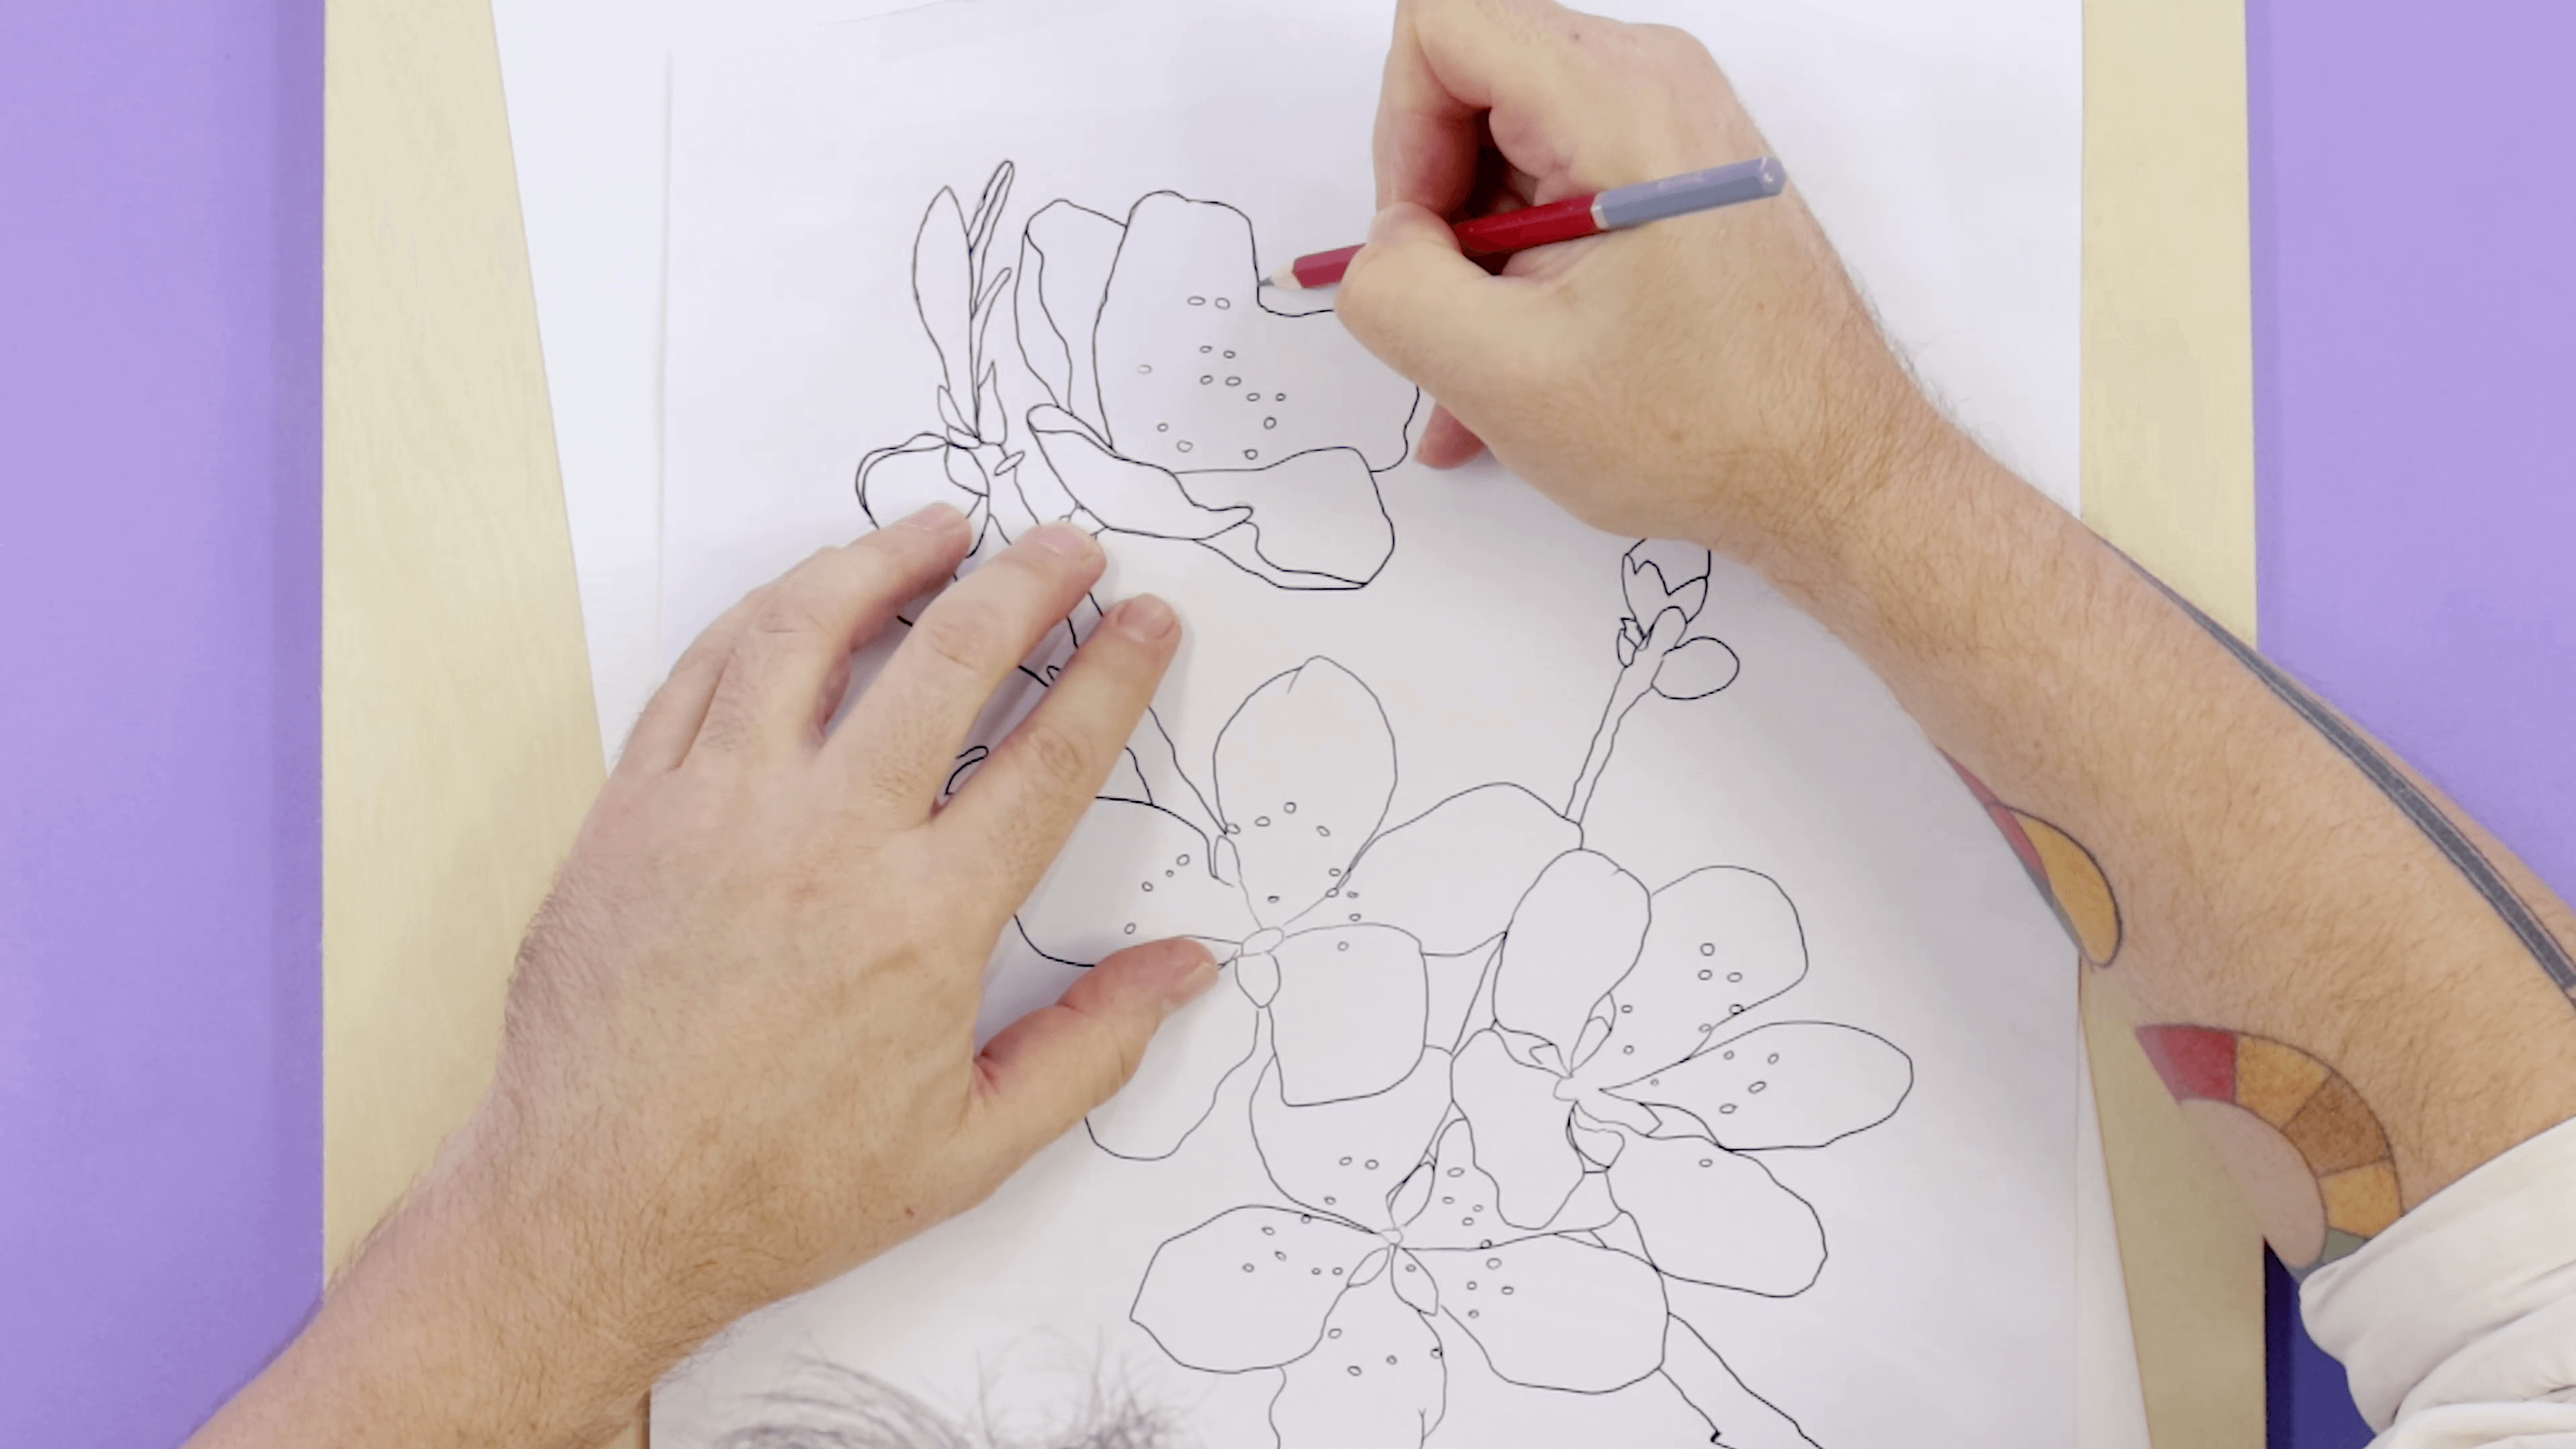
Shade the backside of the outline with the 8B pencil, flip it over place it into position. Retrace the outline on the watercolour paper.
It’s a good idea to have an old sheet of watercolour paper beside you to test any colours on first before you commit to the artwork.
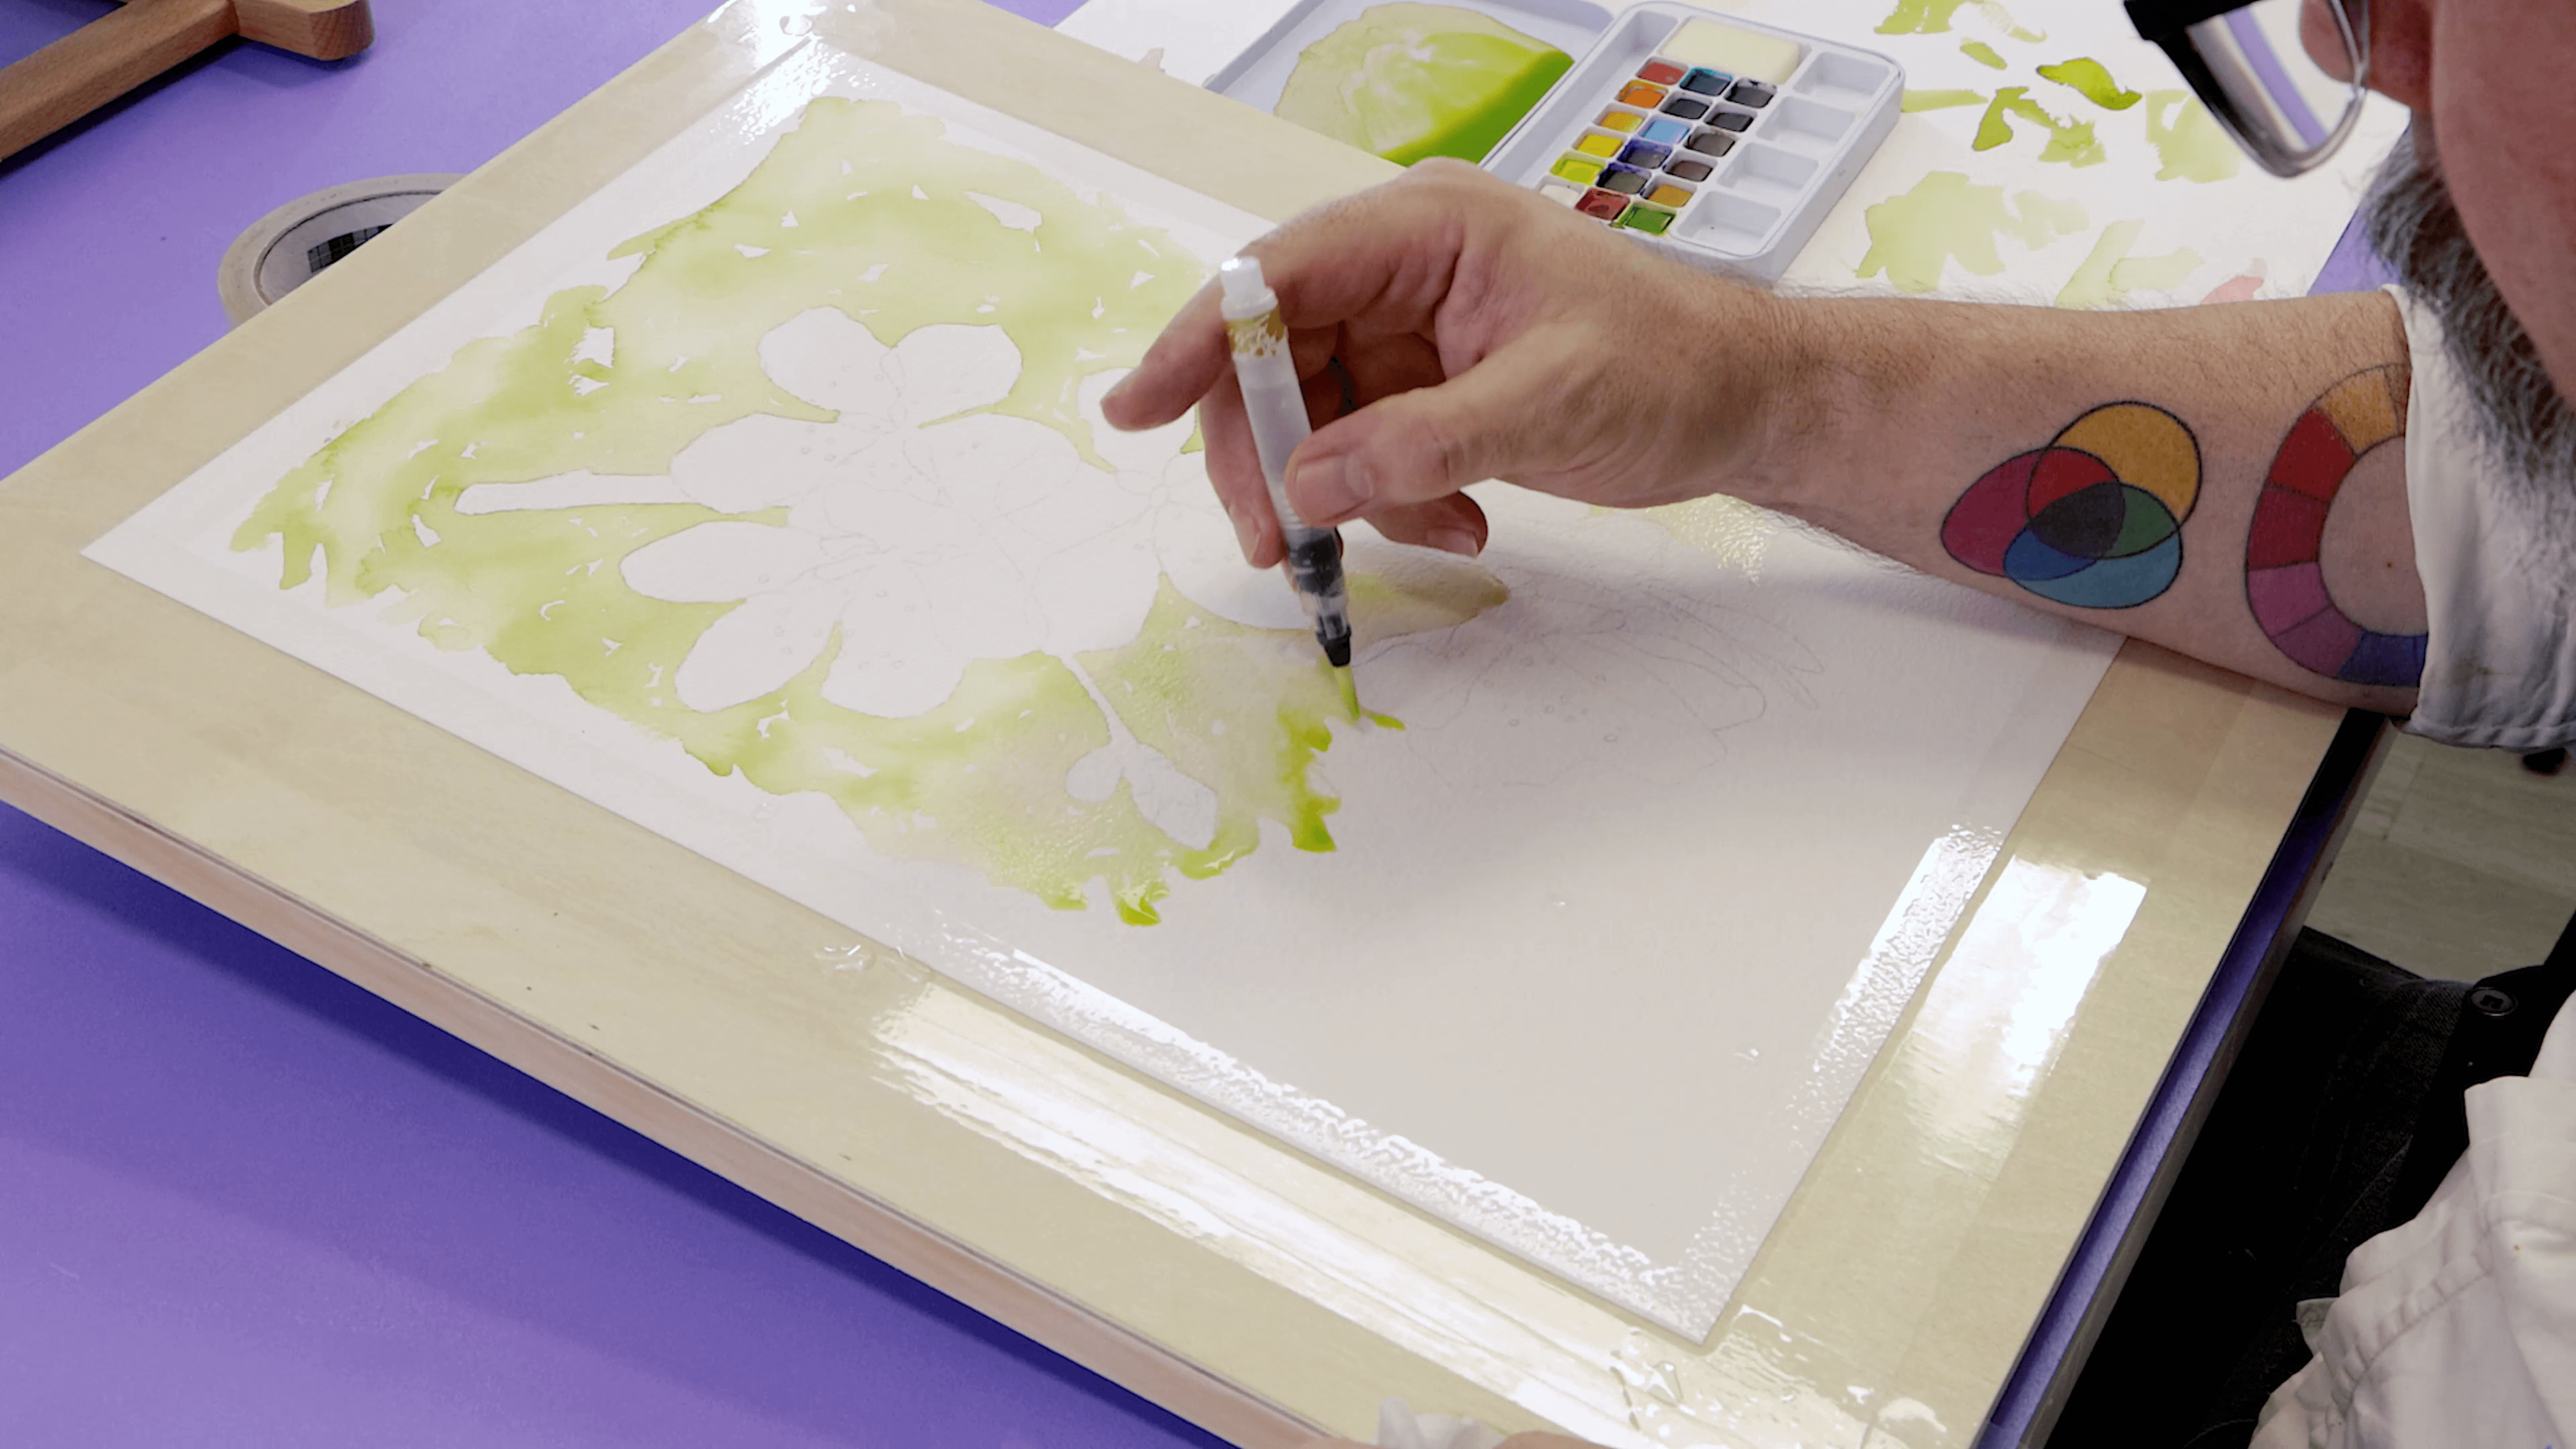
Once the outline is traced, fill up the water brush and create a watery mix of Sap Green with a little bit of Yellow Ochre and a very small touch of Scarlet.
Paint this colour around the cherry blossoms. We have roughly applied the paint to create a more textured background and have transitioned the colour so that it lightens closer to the top. This just adds a little more interest than if it were a flat colour.
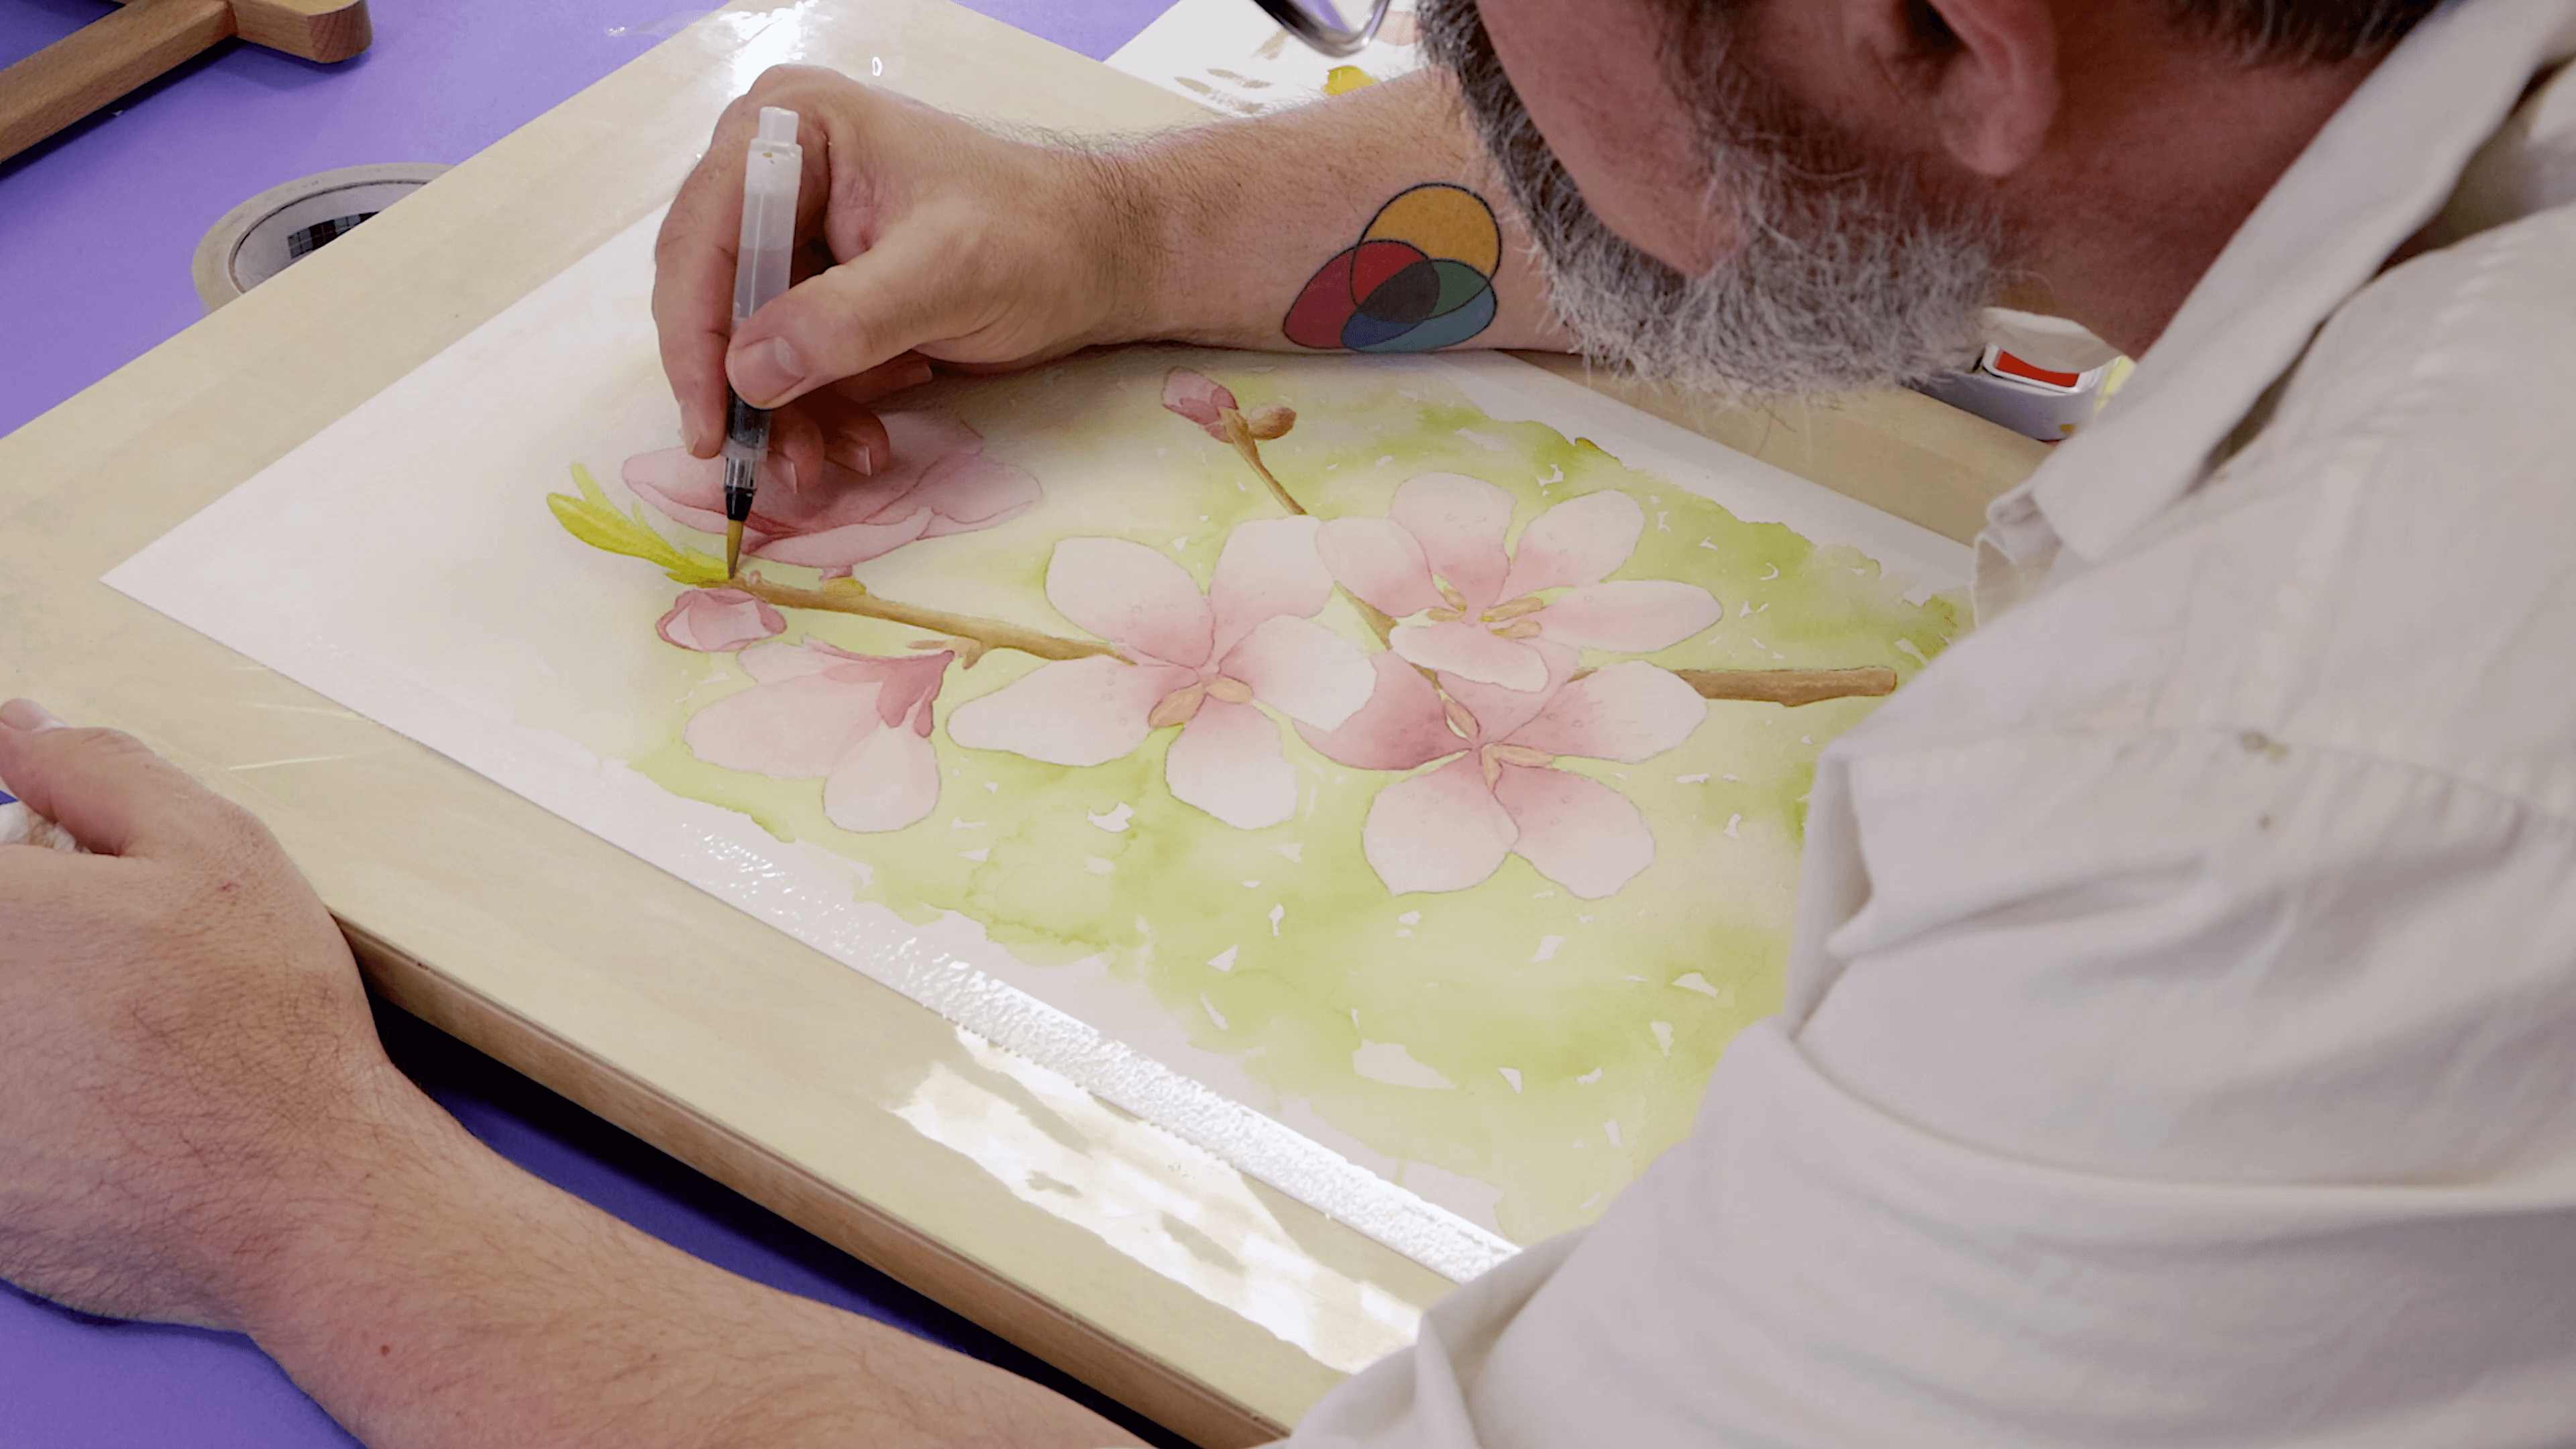
Allow the background to dry, and then create a very light pink from Scarlet and paint this tone into all of the blossoms. You can use tissue paper to dab colour out on the edge of each petal to further lighten them.
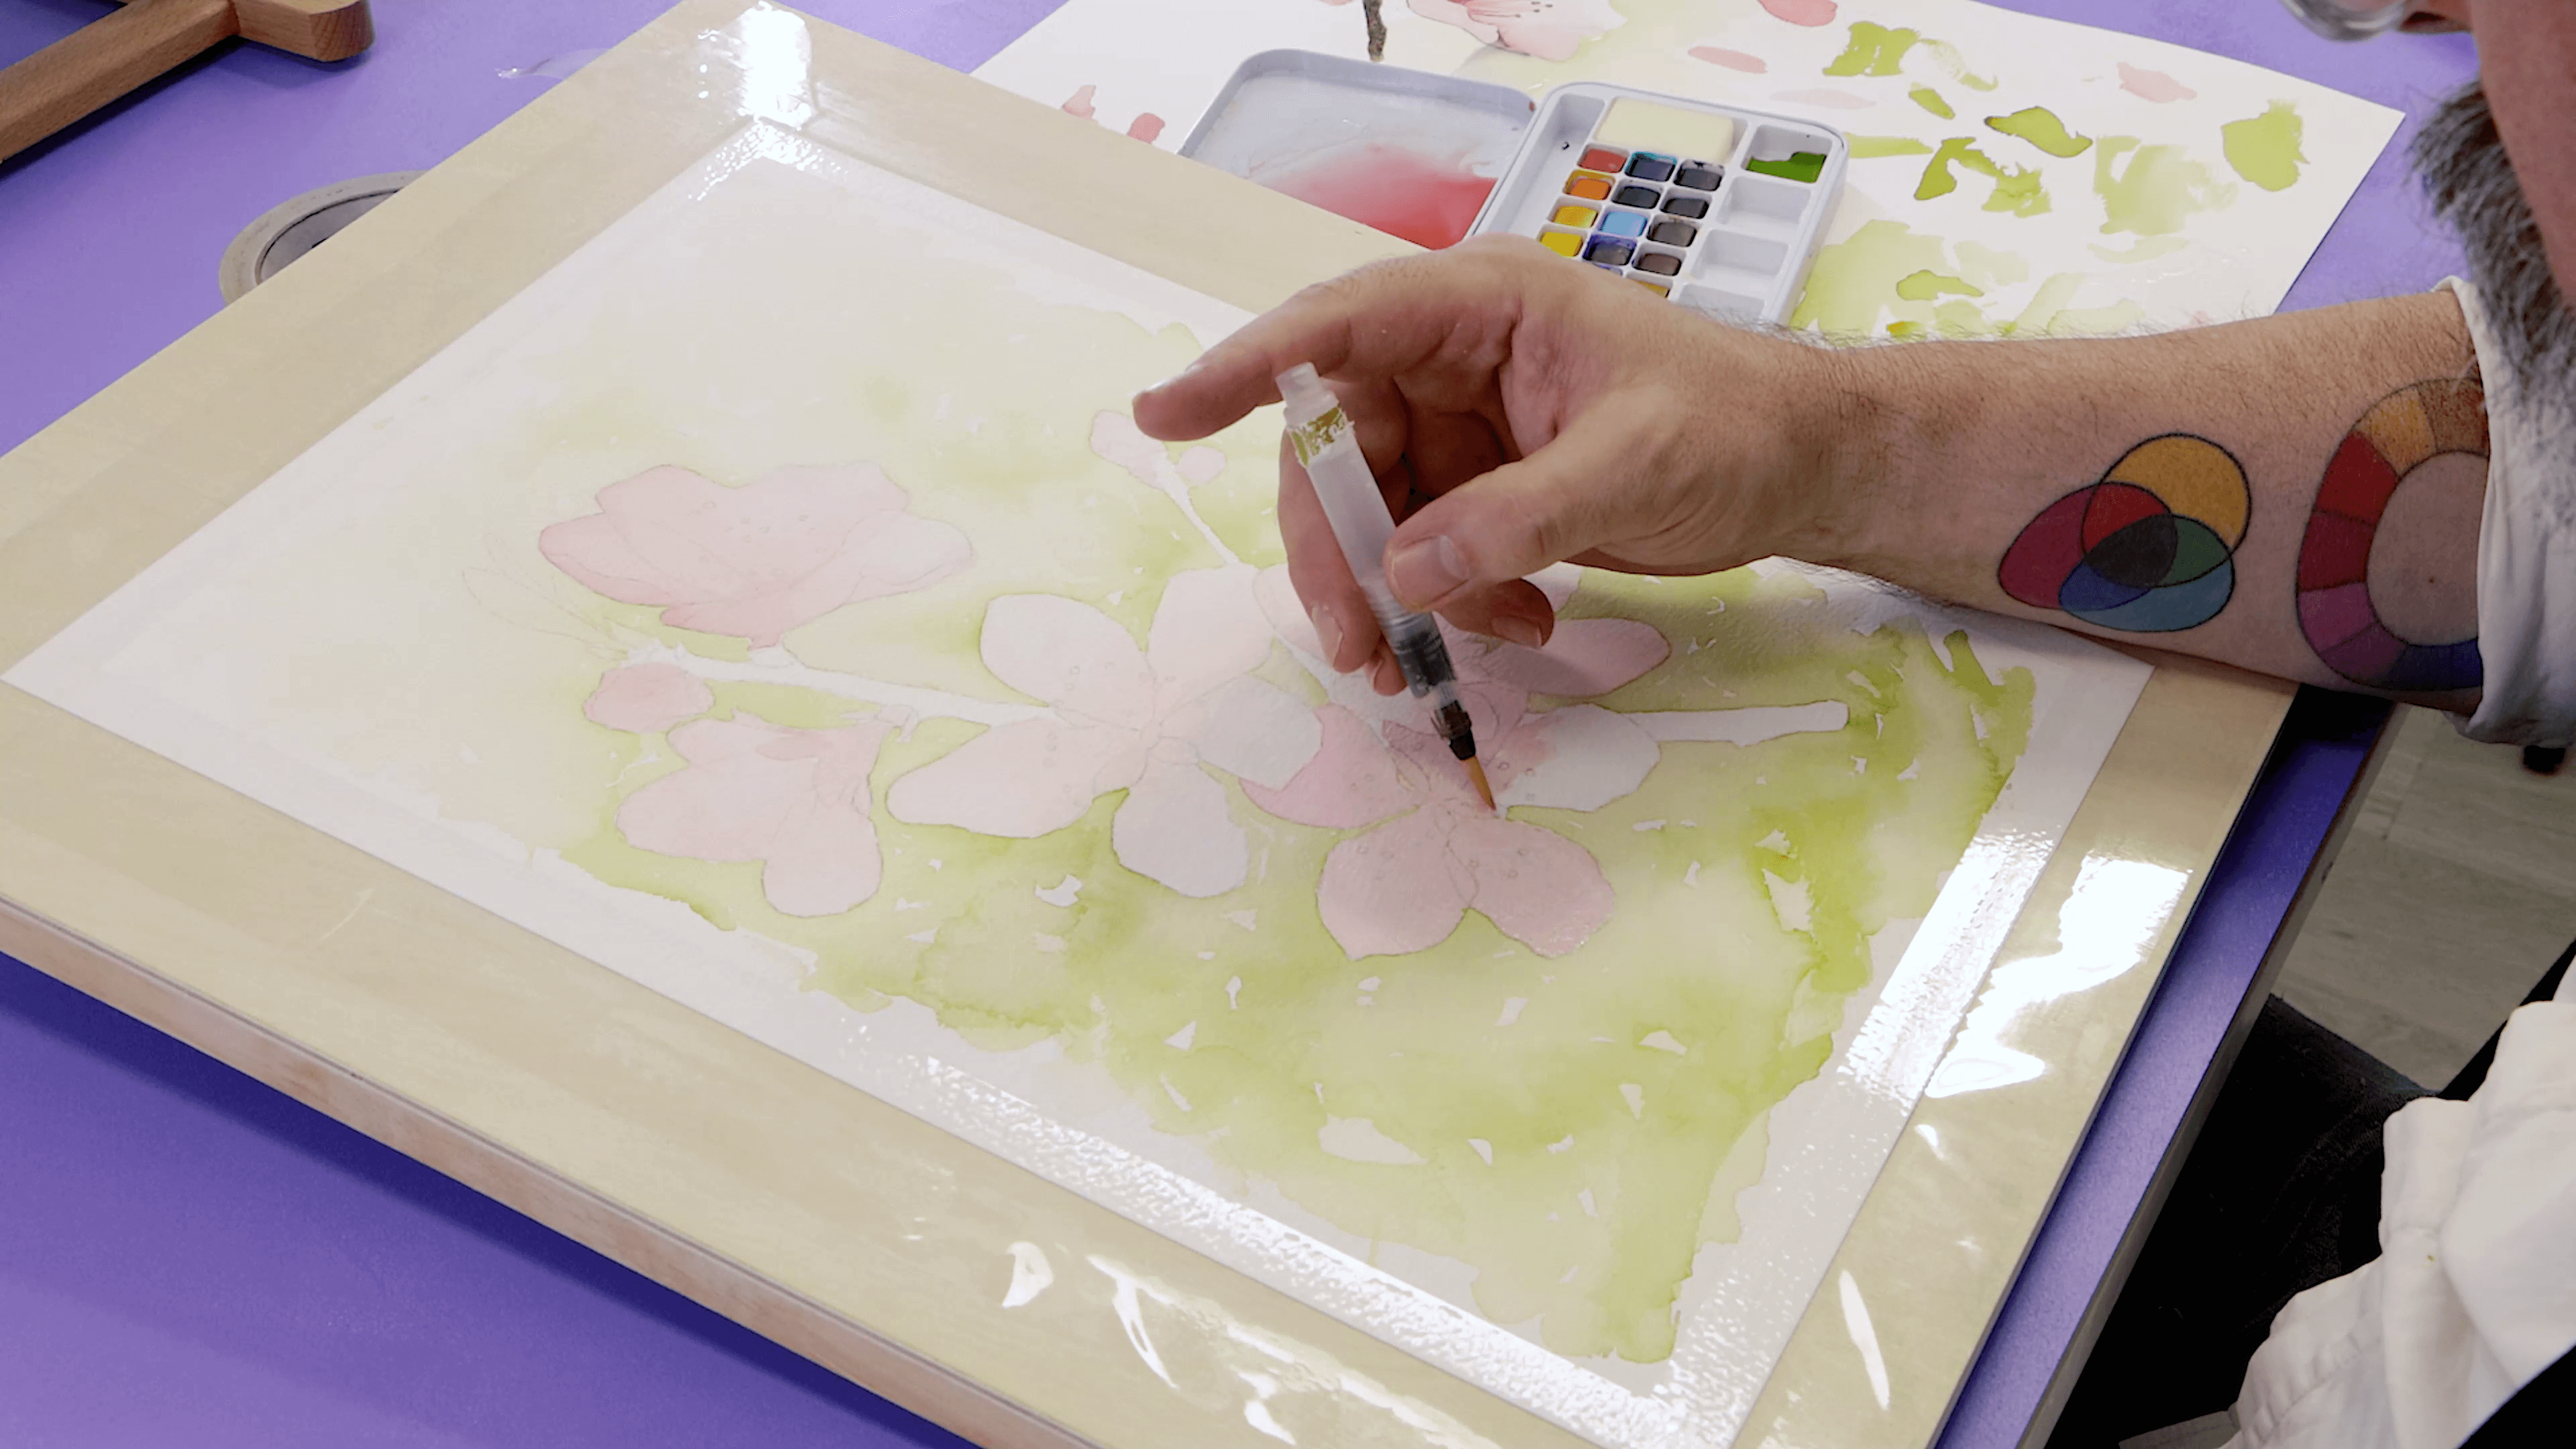
Allow the first coat to dry, and then add more red watercolour paint over the top to darken the flowers in certain areas. You can refer to that colour guide to apply the colour to the appropriate areas.
While the second coat is drying create another red, but slightly darker, with the addition of a touch of Purple. This colour is mainly applied in the centre of the flowers and blended out on each petal.
You can work up tones, allowing each layer to dry before laying on the next, until you’re happy with how dark the shadows are.

To create the branch colour, apply a layer of Yellow Ochre and allow it to dry. Then, dry brush over the top with some Burnt Umber. To dry brush with a water brush, charge the brush with paint and then wipe the excess paint onto a tissue and lightly drag the paint over the paper surface, allowing a little of the underlying colour to show through.
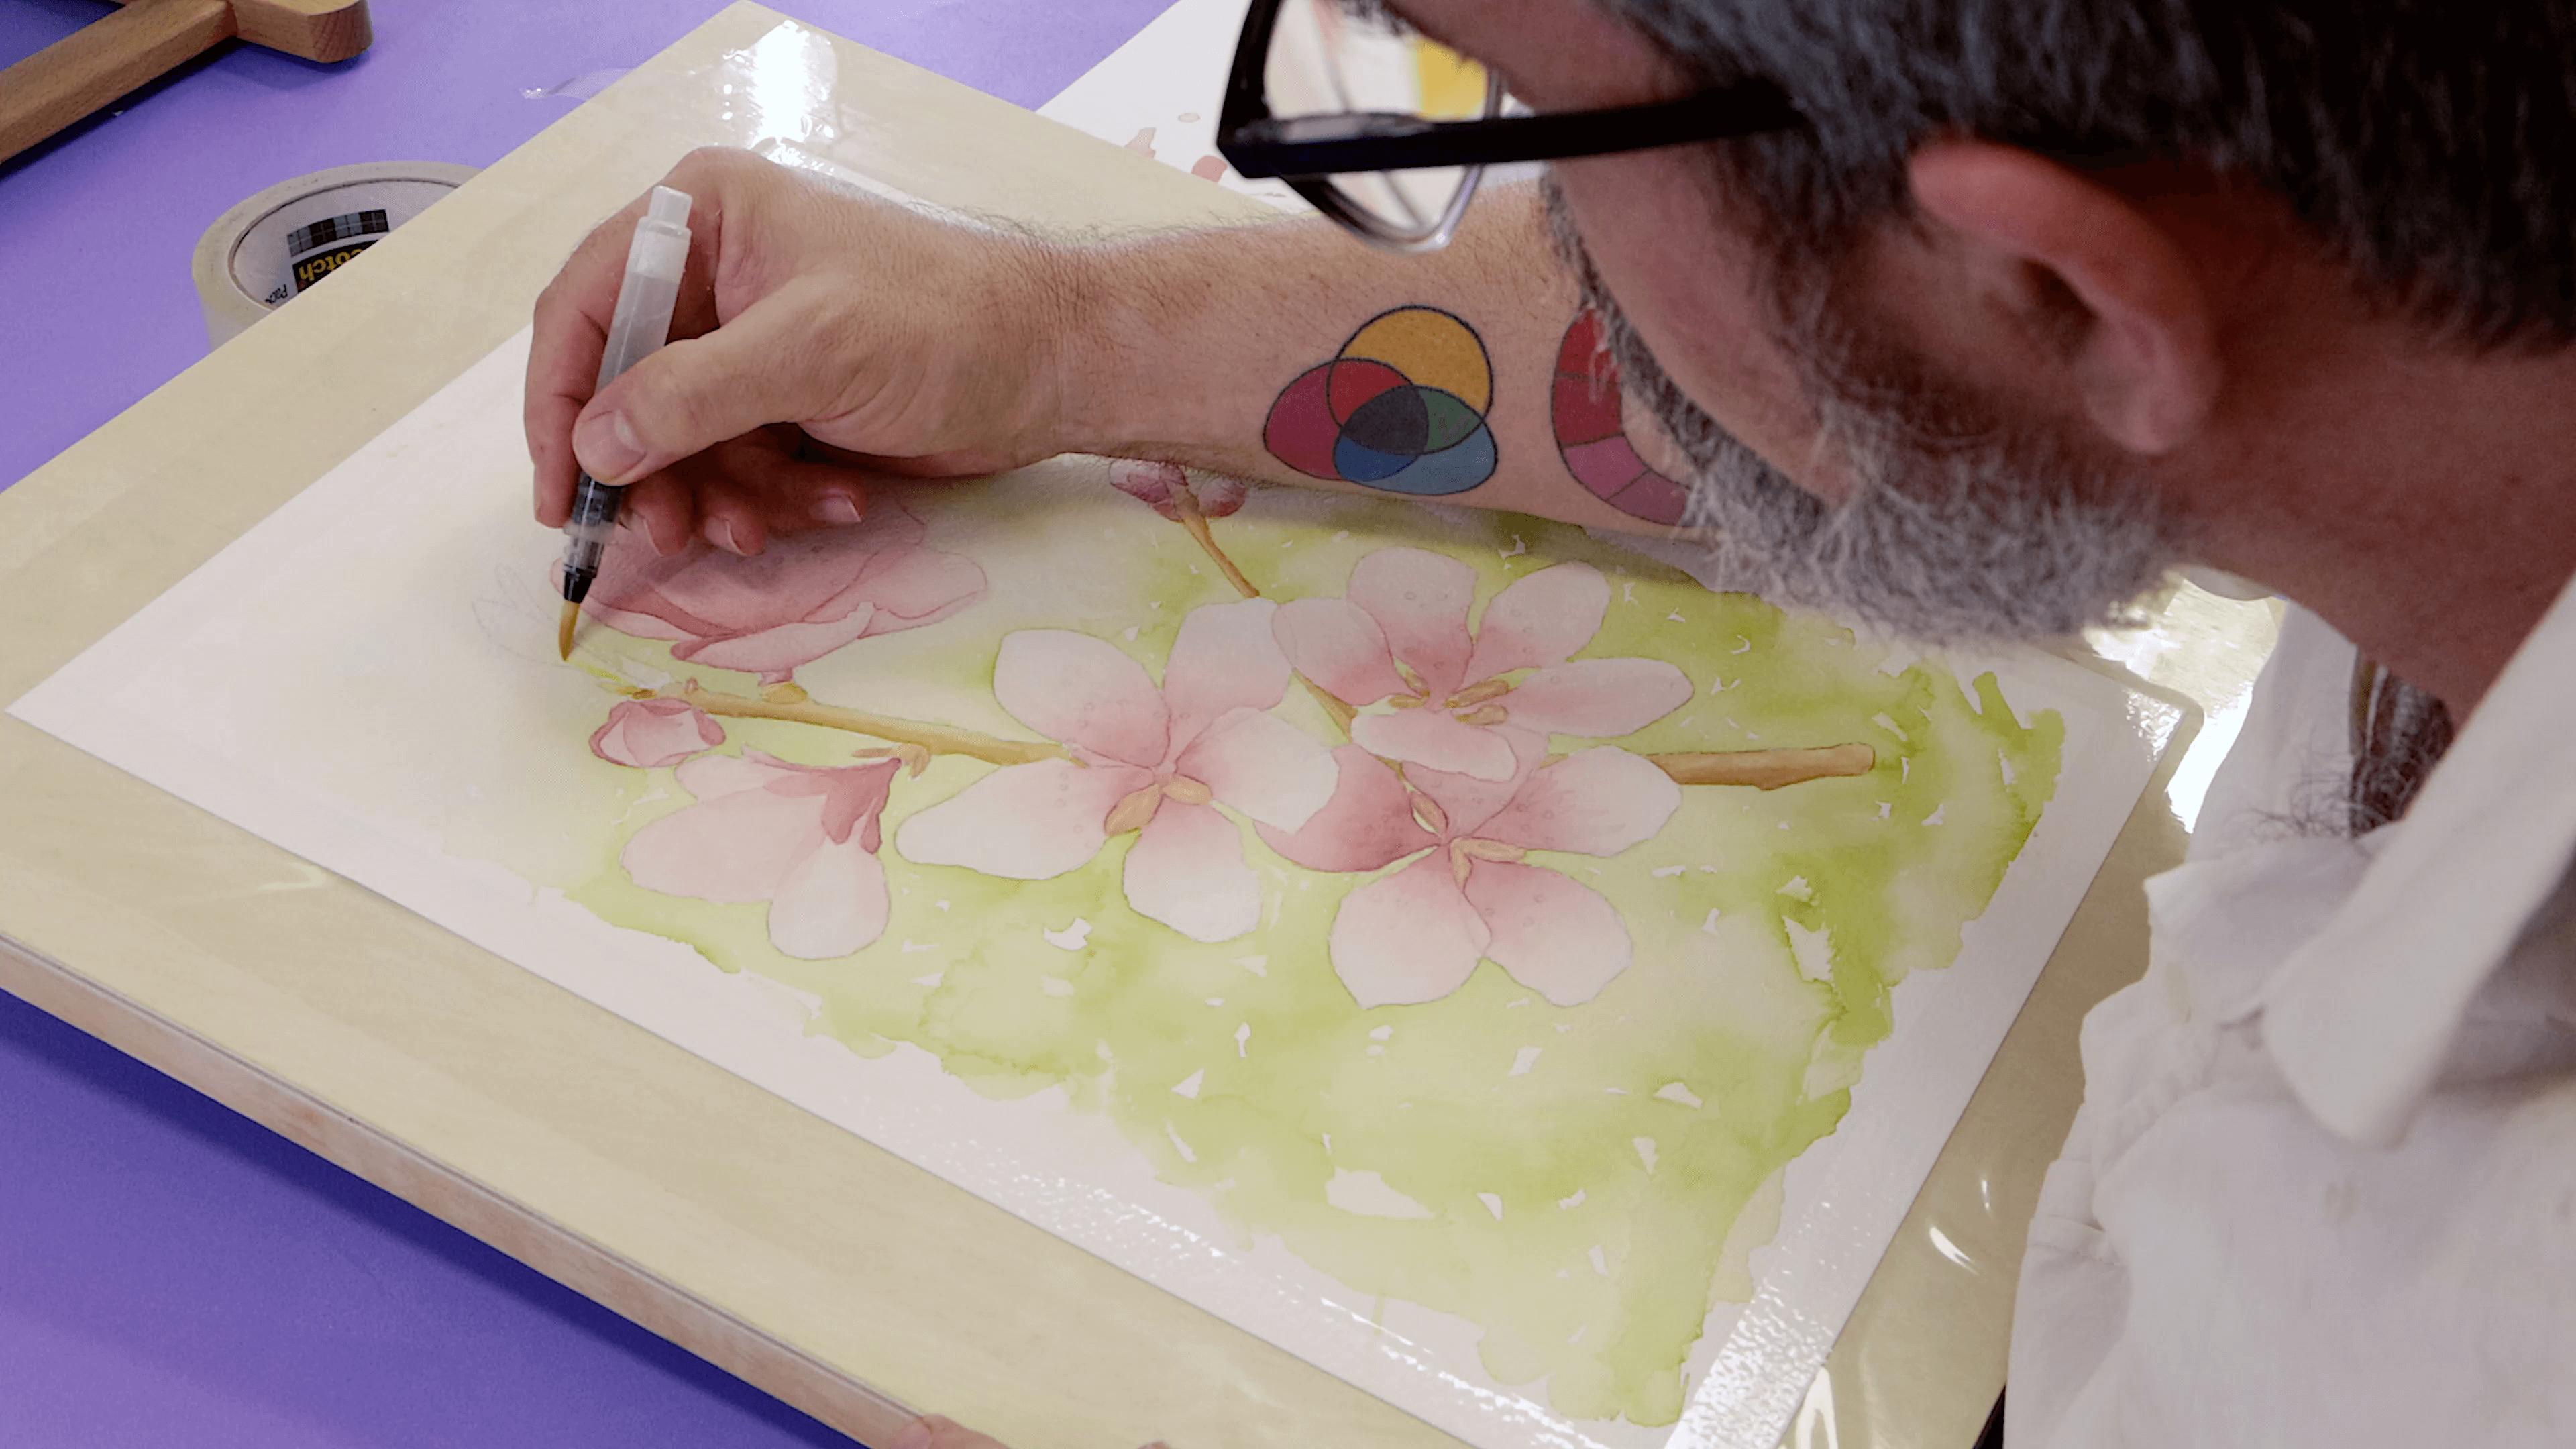
To create a vibrant green for the leaves, paint them with a Medium Yellow first. Once that layer is dry, paint some Sap Green with a touch of Yellow Ochre over the top.
You can water down the green mix and place it over the brand to create a very light green tint.
To suggest stamens in the centre of each flower, create a watery mix of Scarlet. Then, starting from the centre, paint thin lines. To make the flowers look more realistic, paint the stamen at different angles rather than making them all straight.
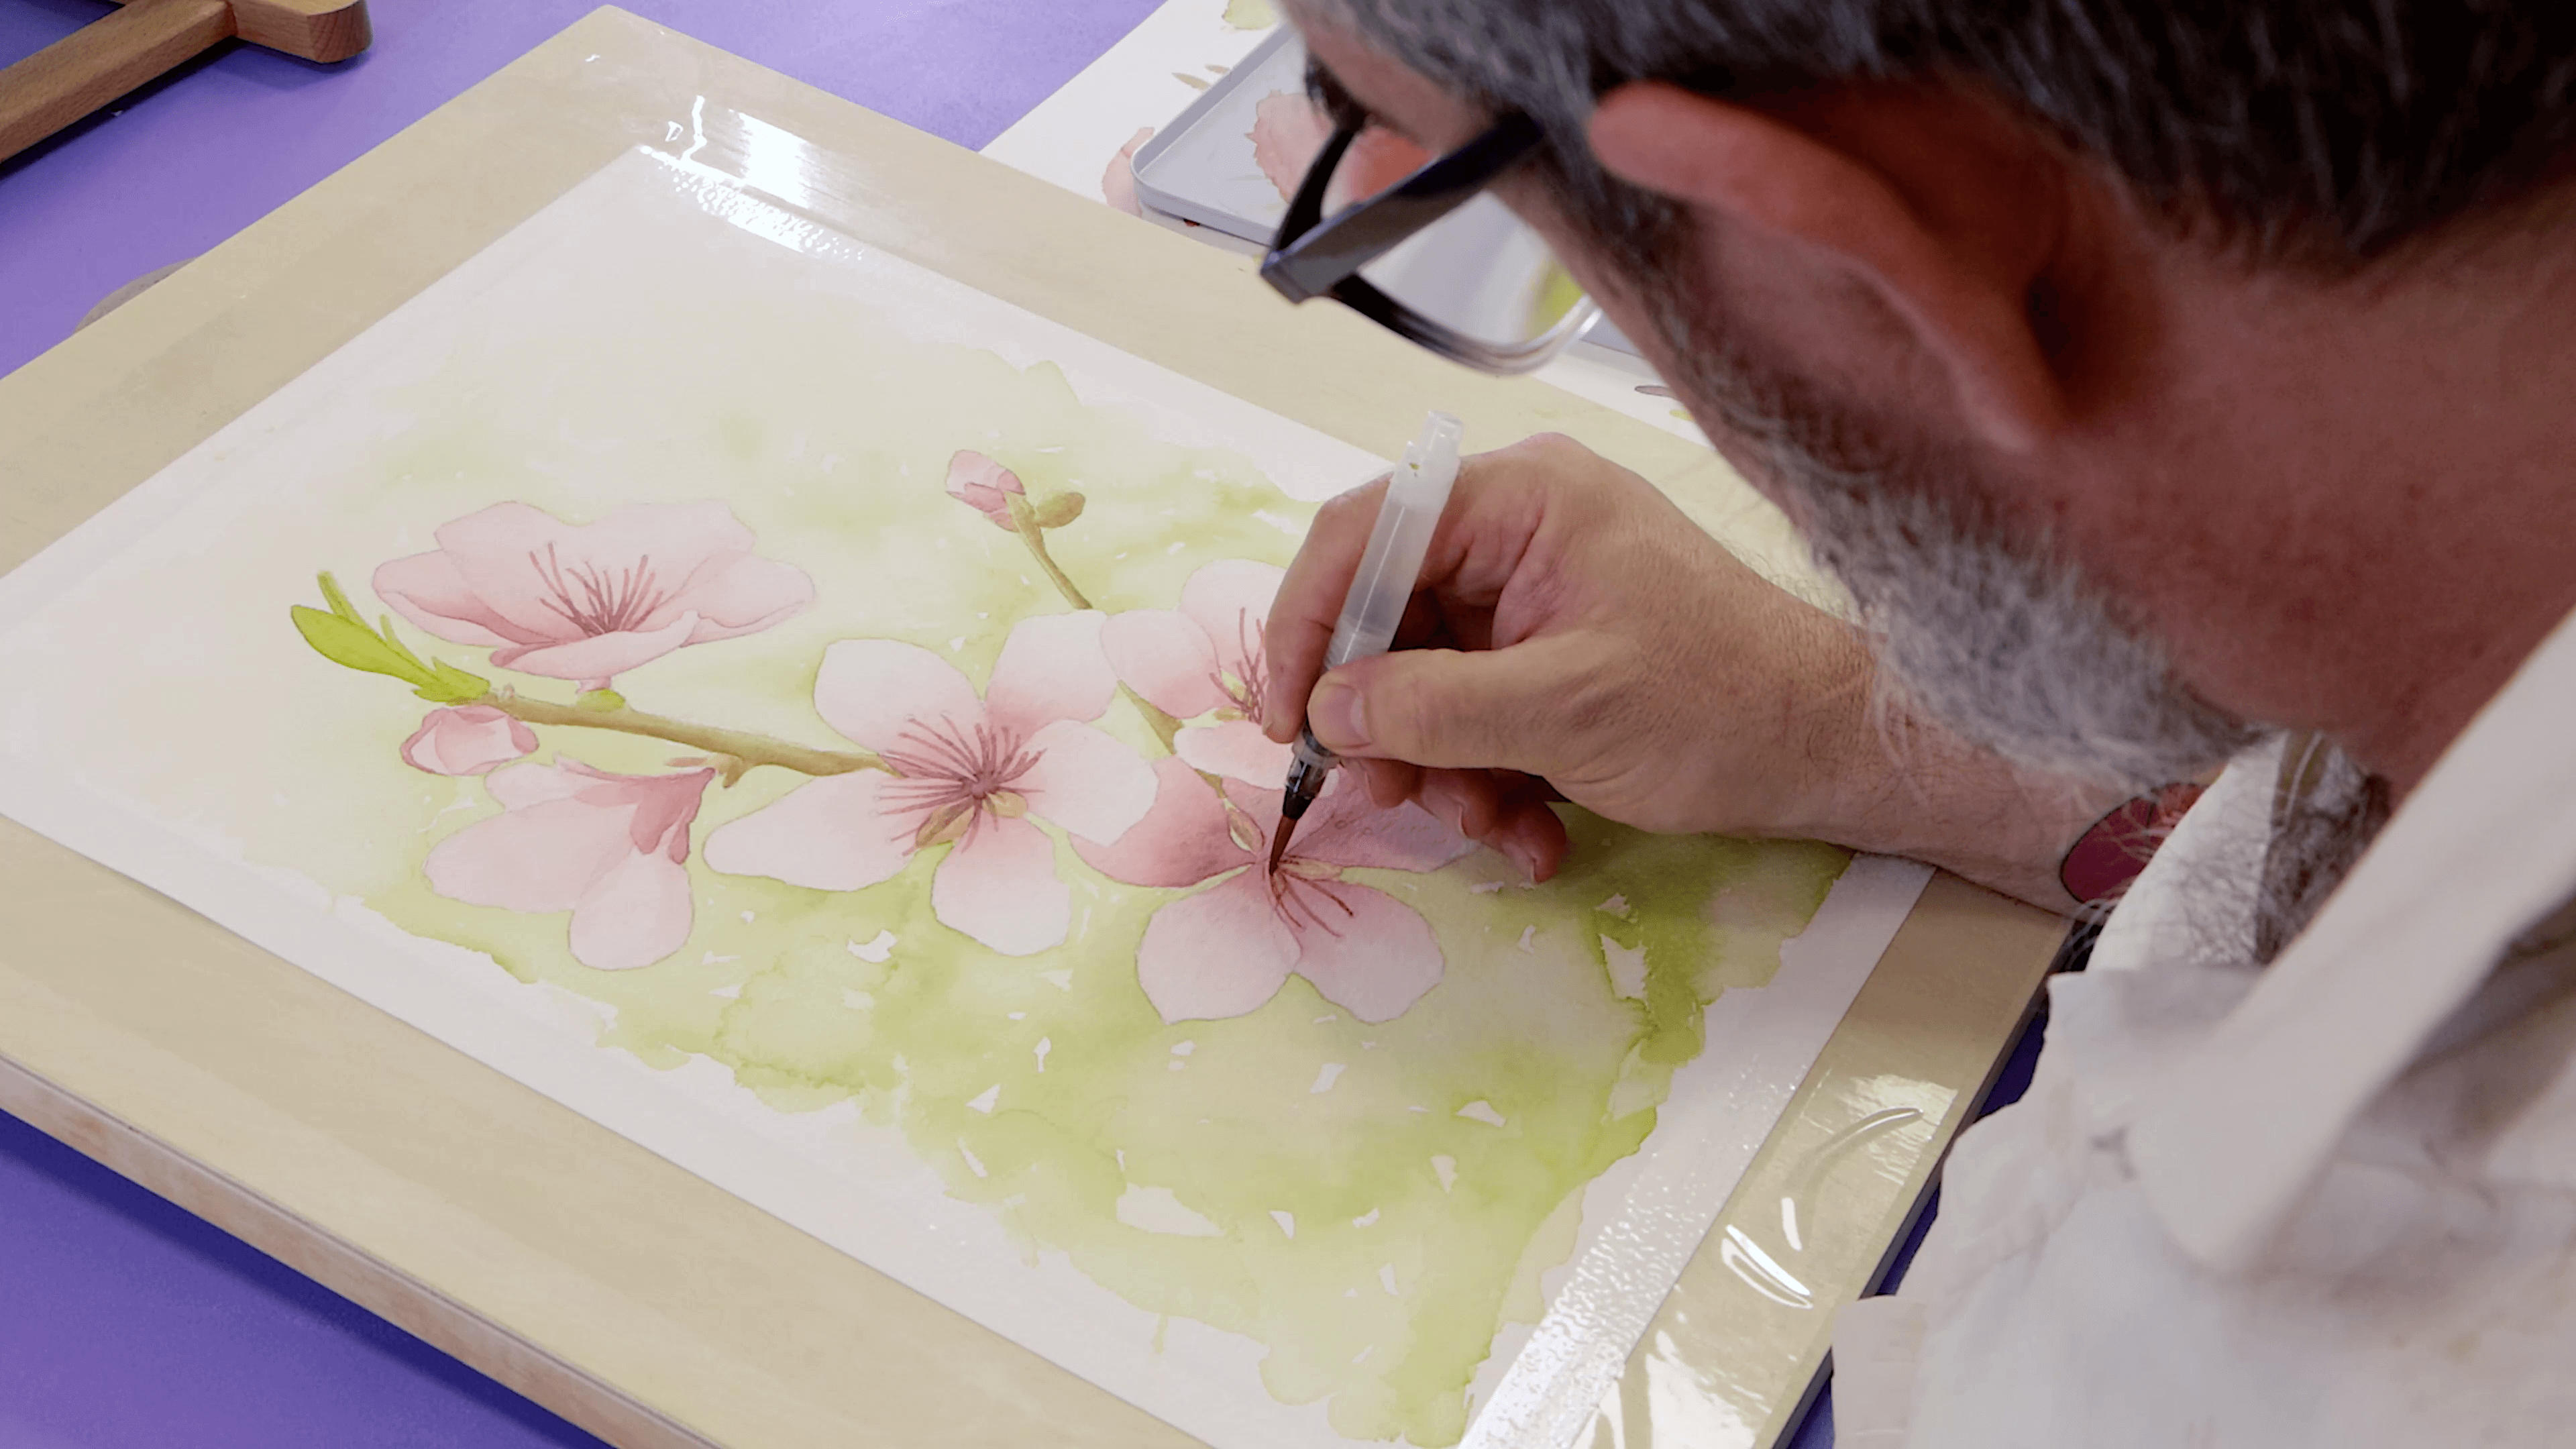
Add some Purple to the Scarlet mix and lay this along the line close to the centre of the flower.
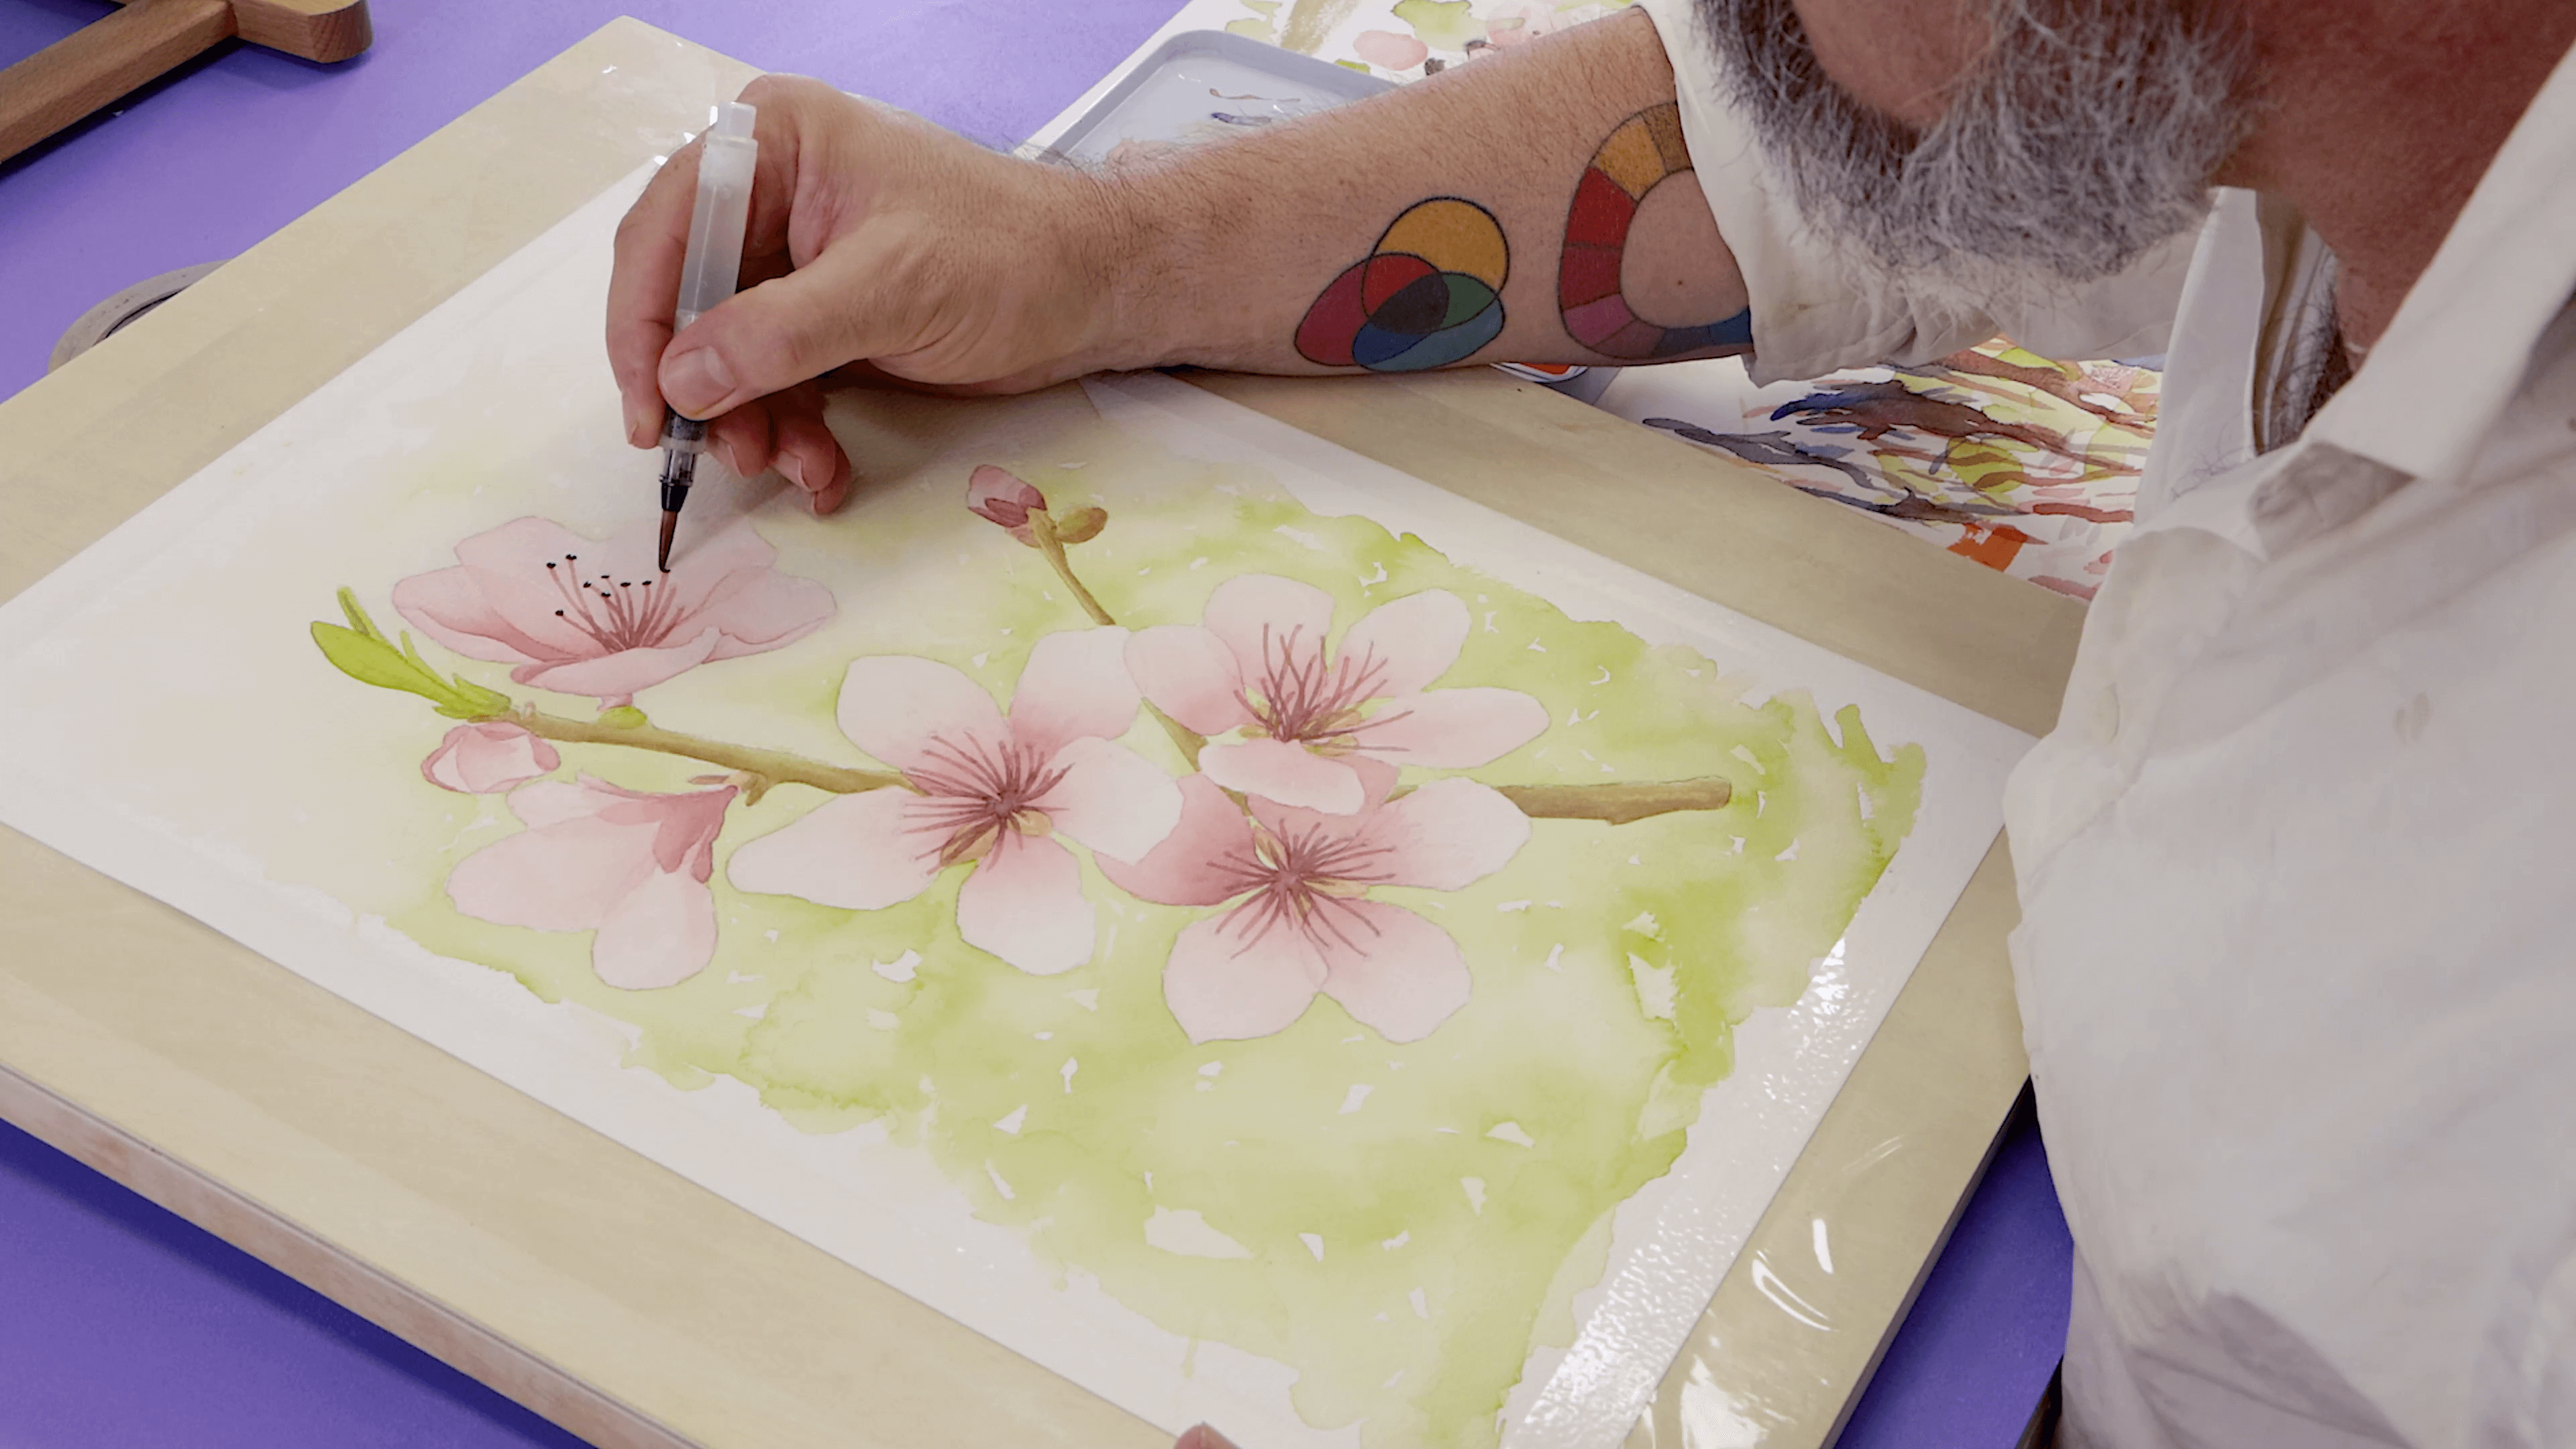
The anthers are small, round pollen-producing shapes found at the end of each stamen. To suggest these, dab a small amount of the Burnt Umber mix on the end of each stamen. Allow them flowers to dry.

Finally, pop a small amount of the Scarlet mix into the middles of the brown spots you just painted on the anthers.
And you’re all done!
Materials:
- MSB0126 Cotton Watercolour Paper 300gsm A3
- PMHS0066 Watercolour Set Premium 21pc
- MPN0026 Drawing Set Signature 8pc
Extra materials:
- Tissue paper
You may also like


How to use ceramic paint on a thrifted plate

