How to make a fairy house out of airy dry clay
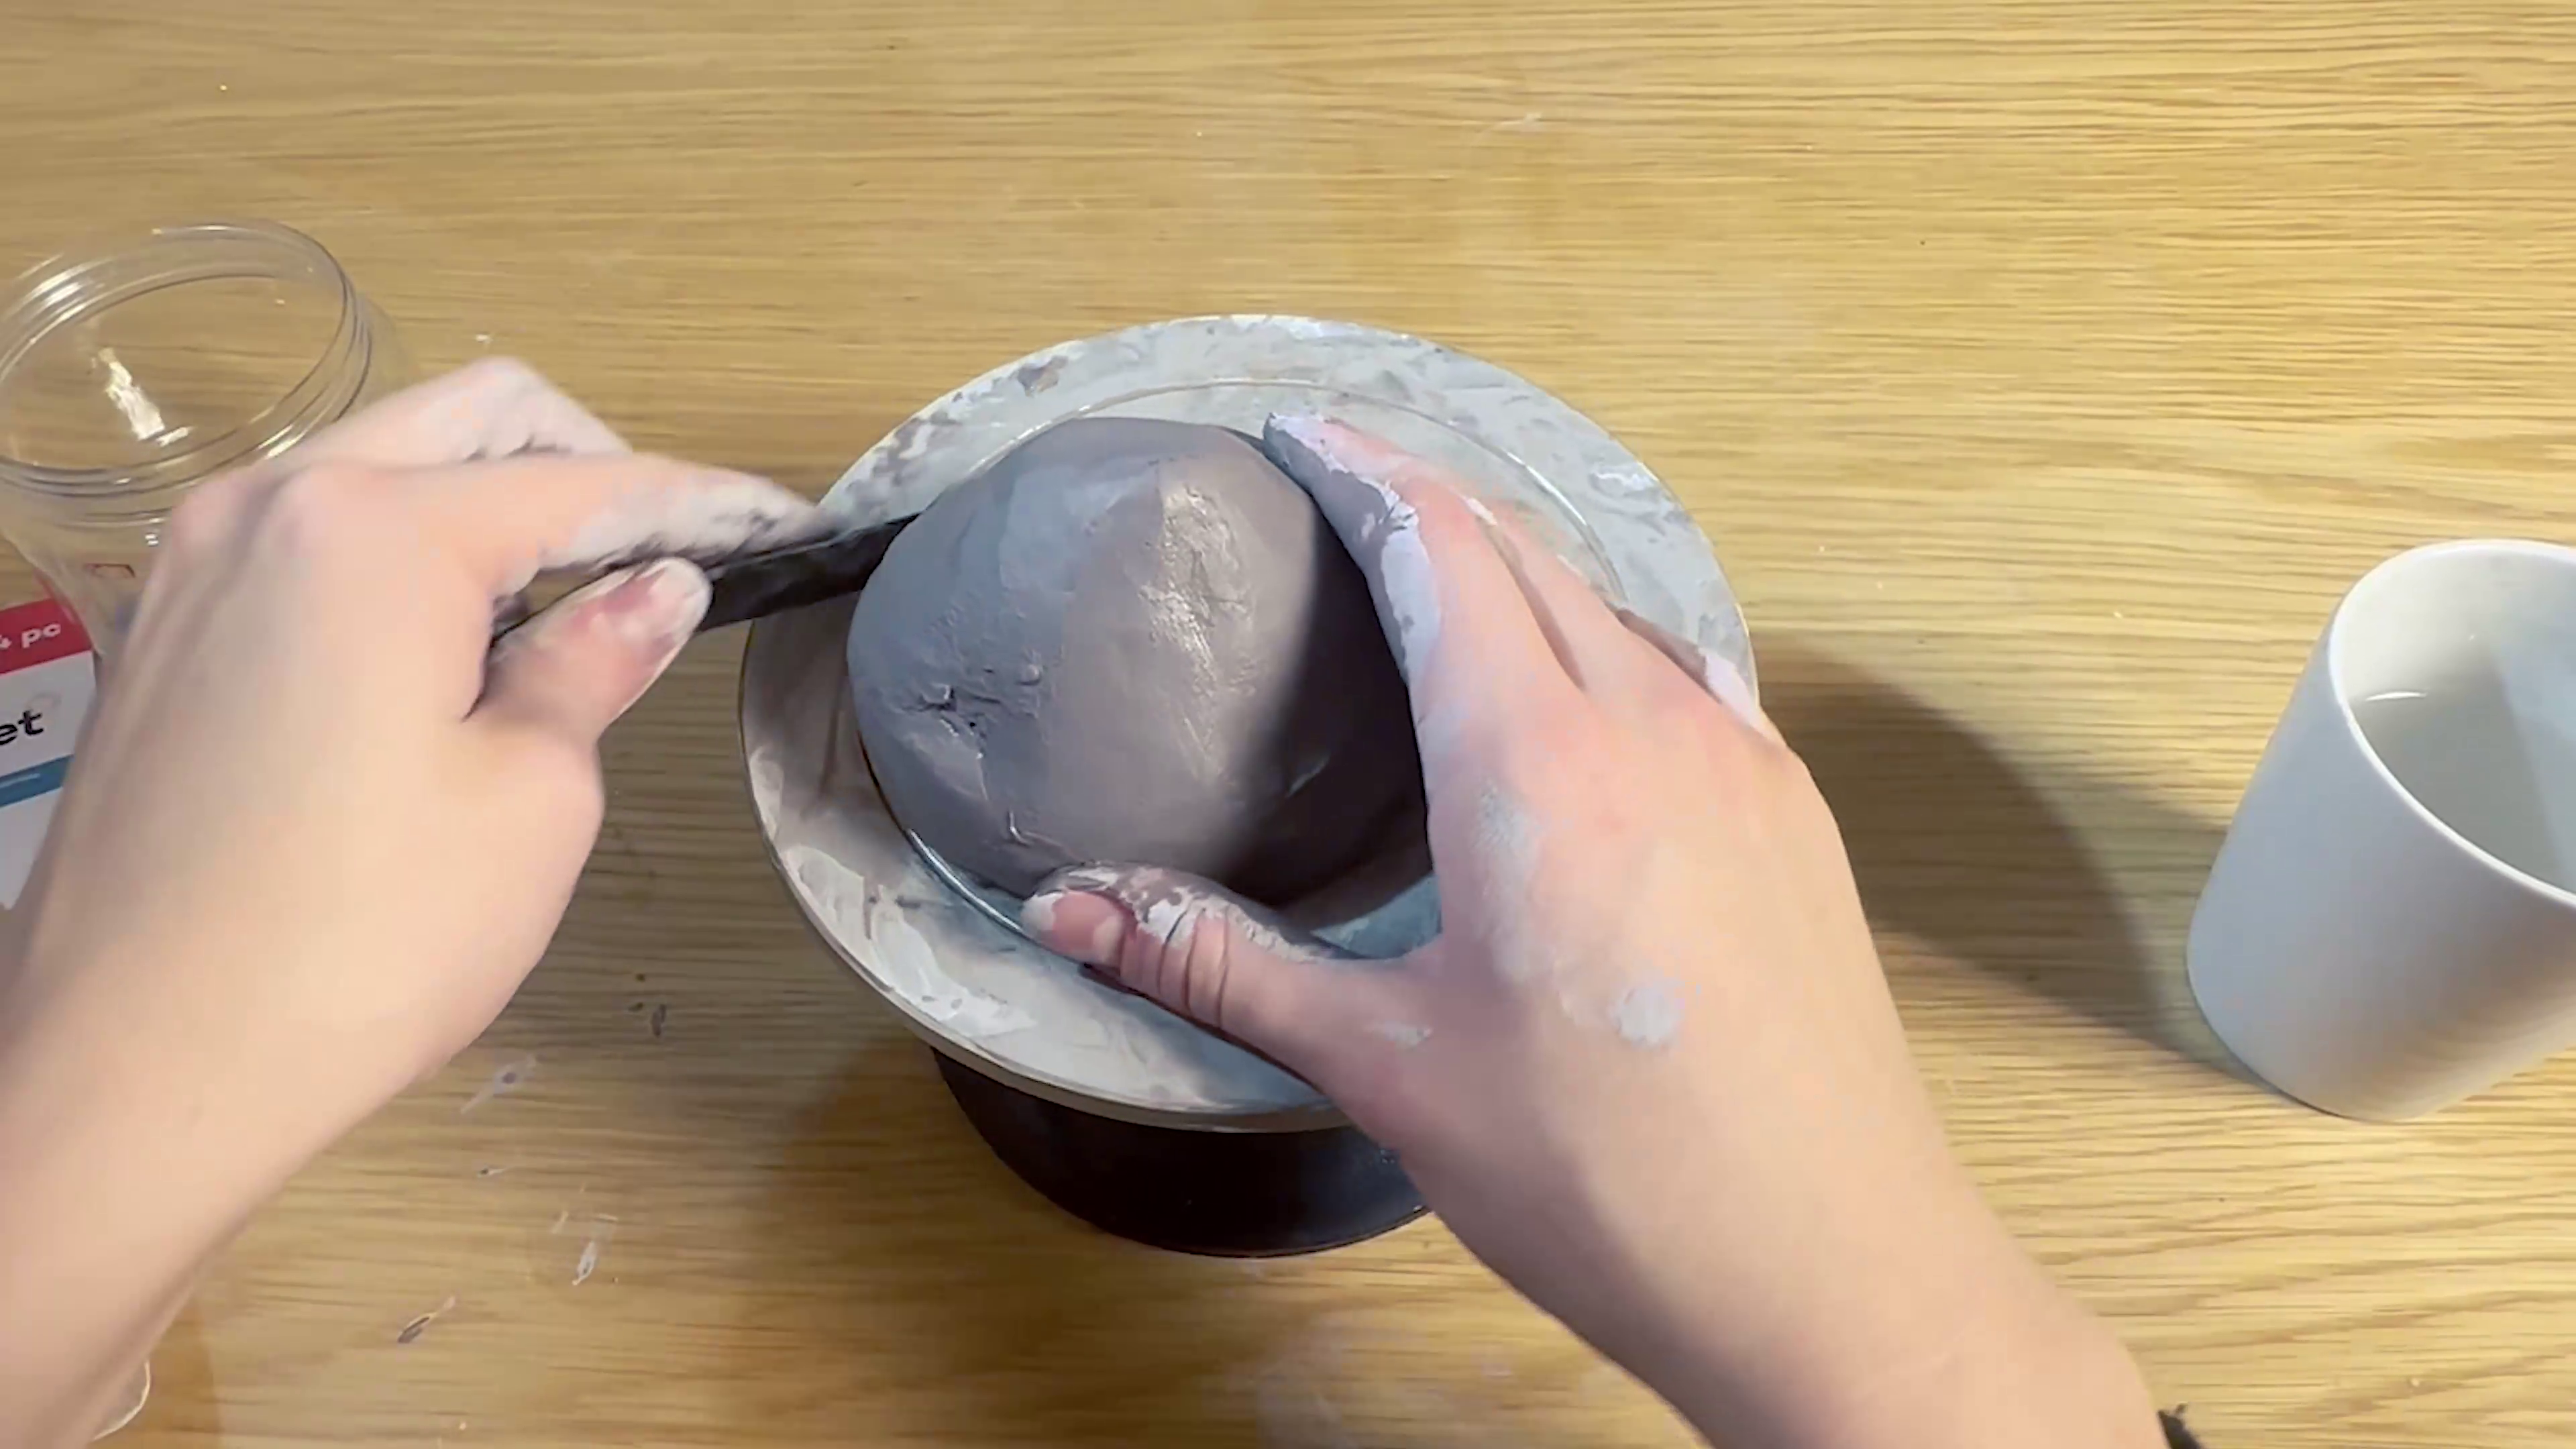
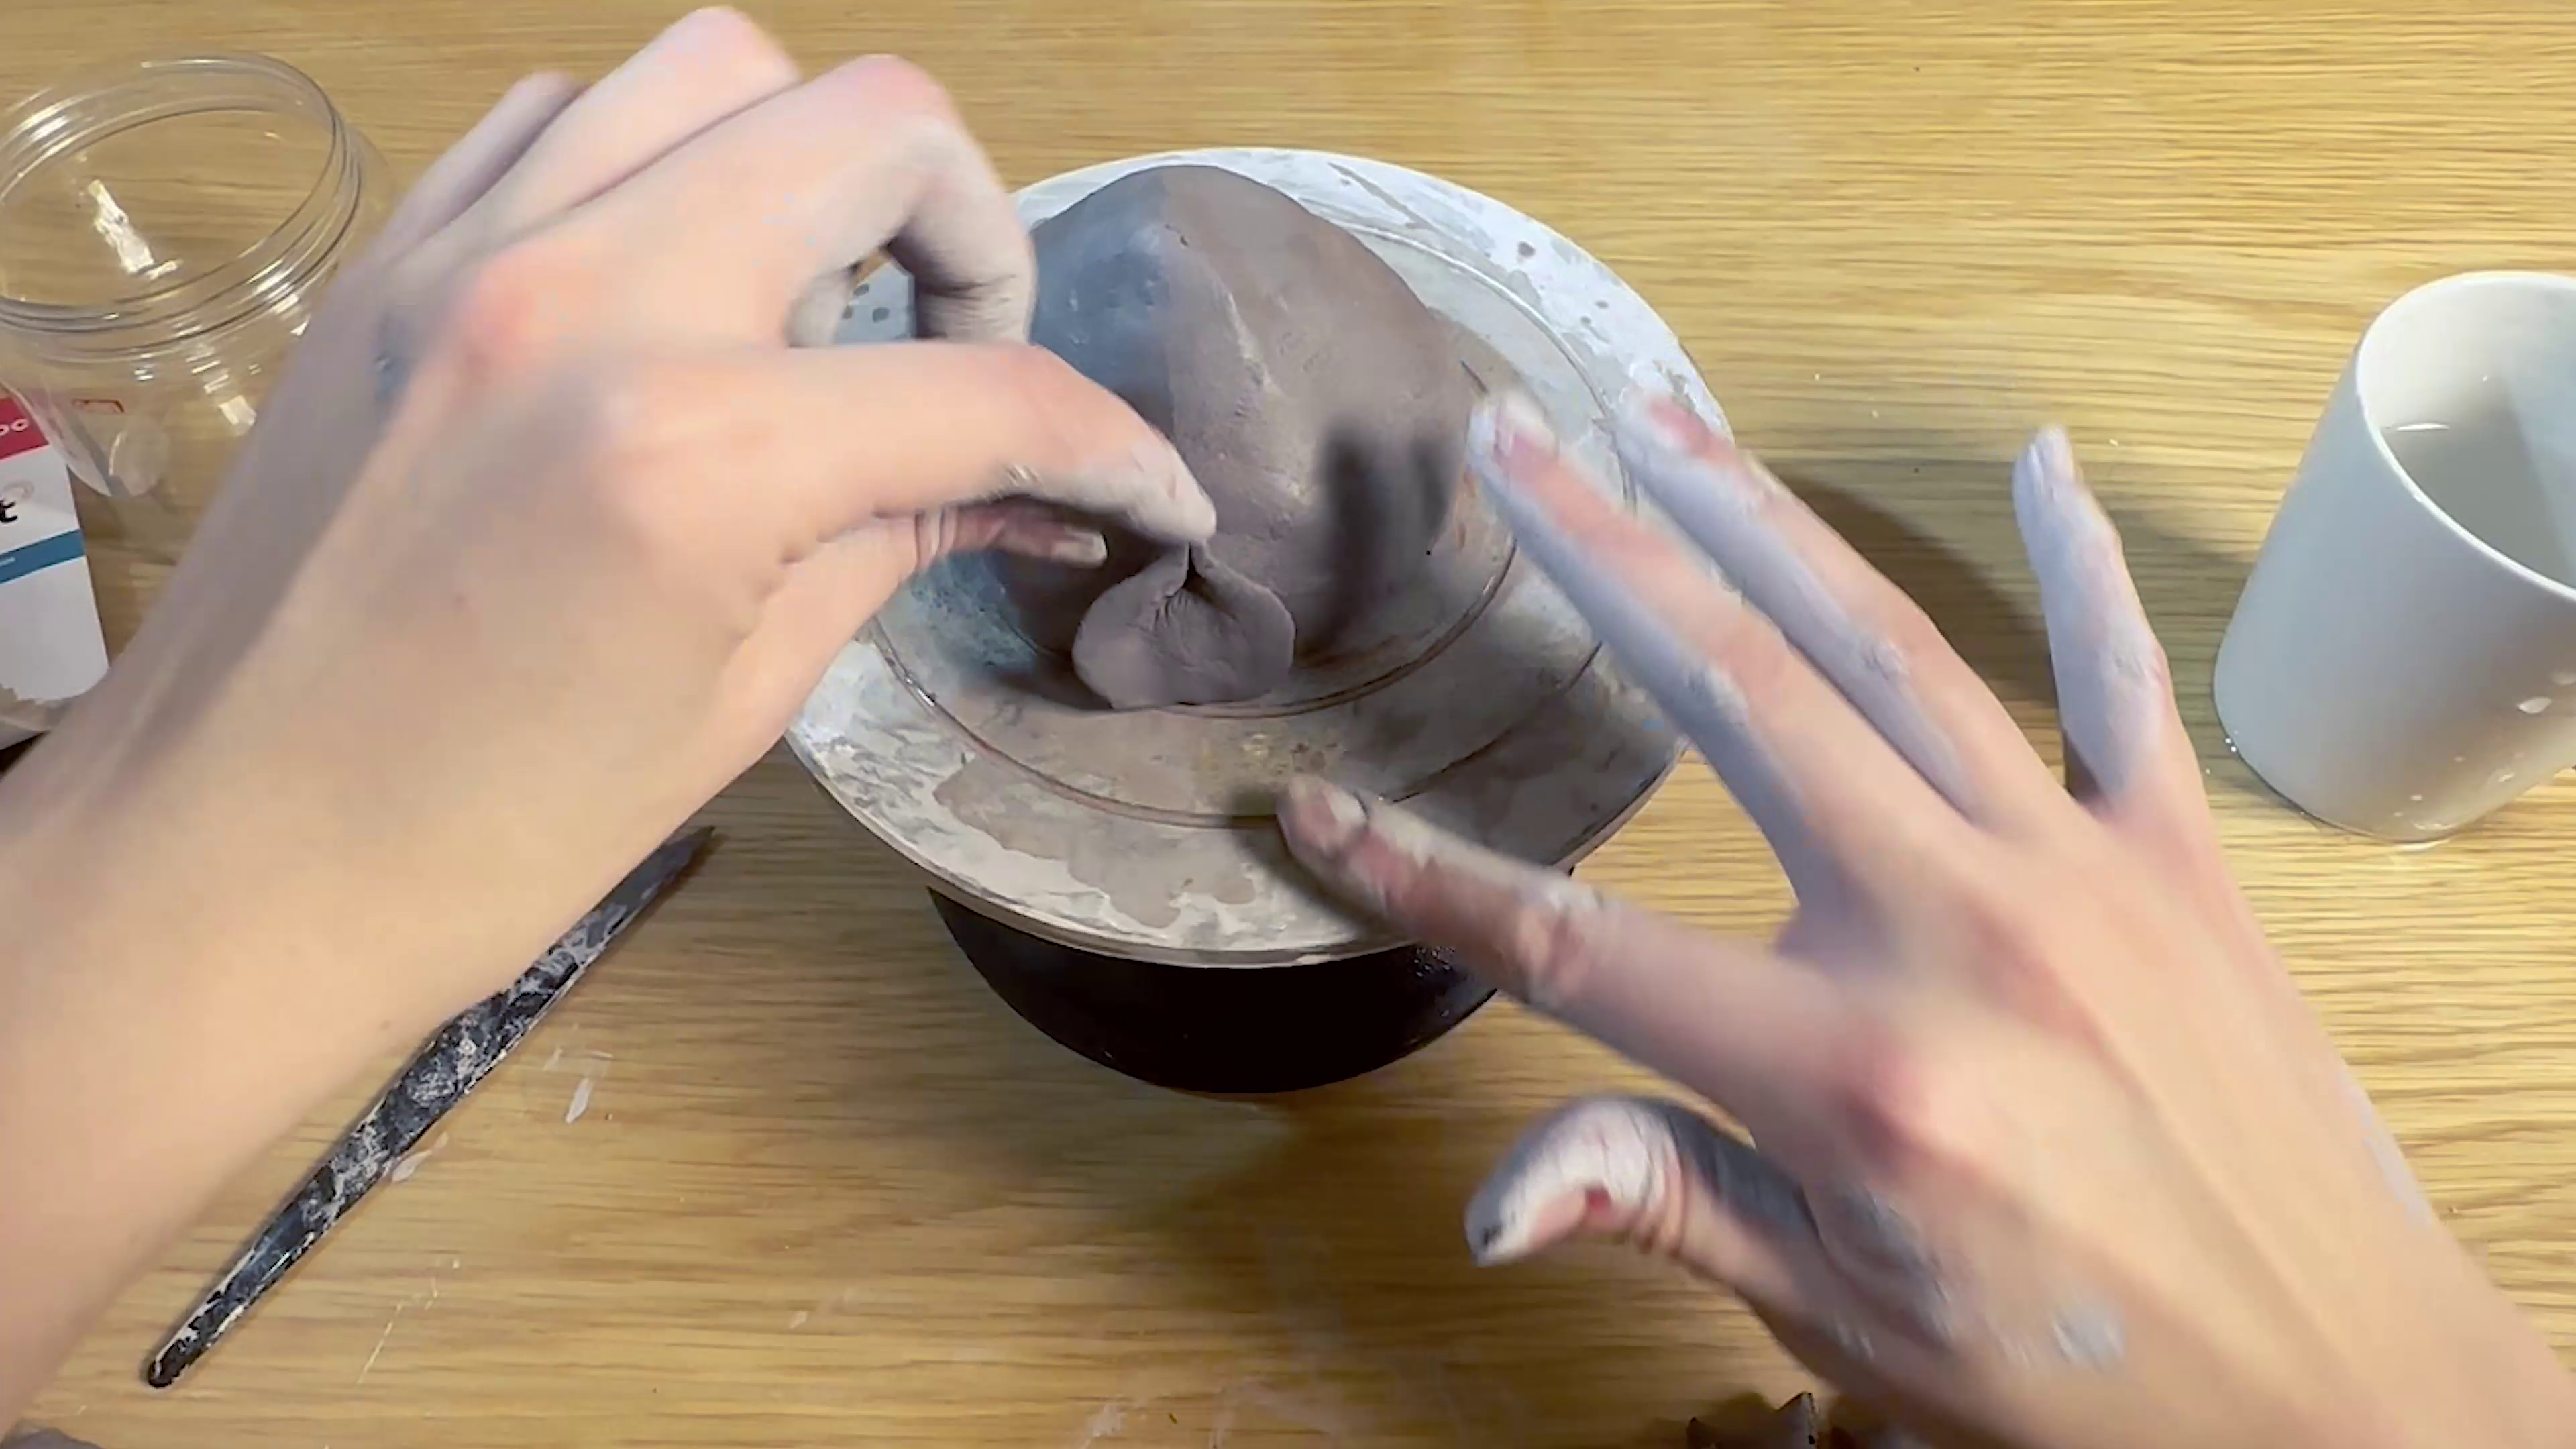
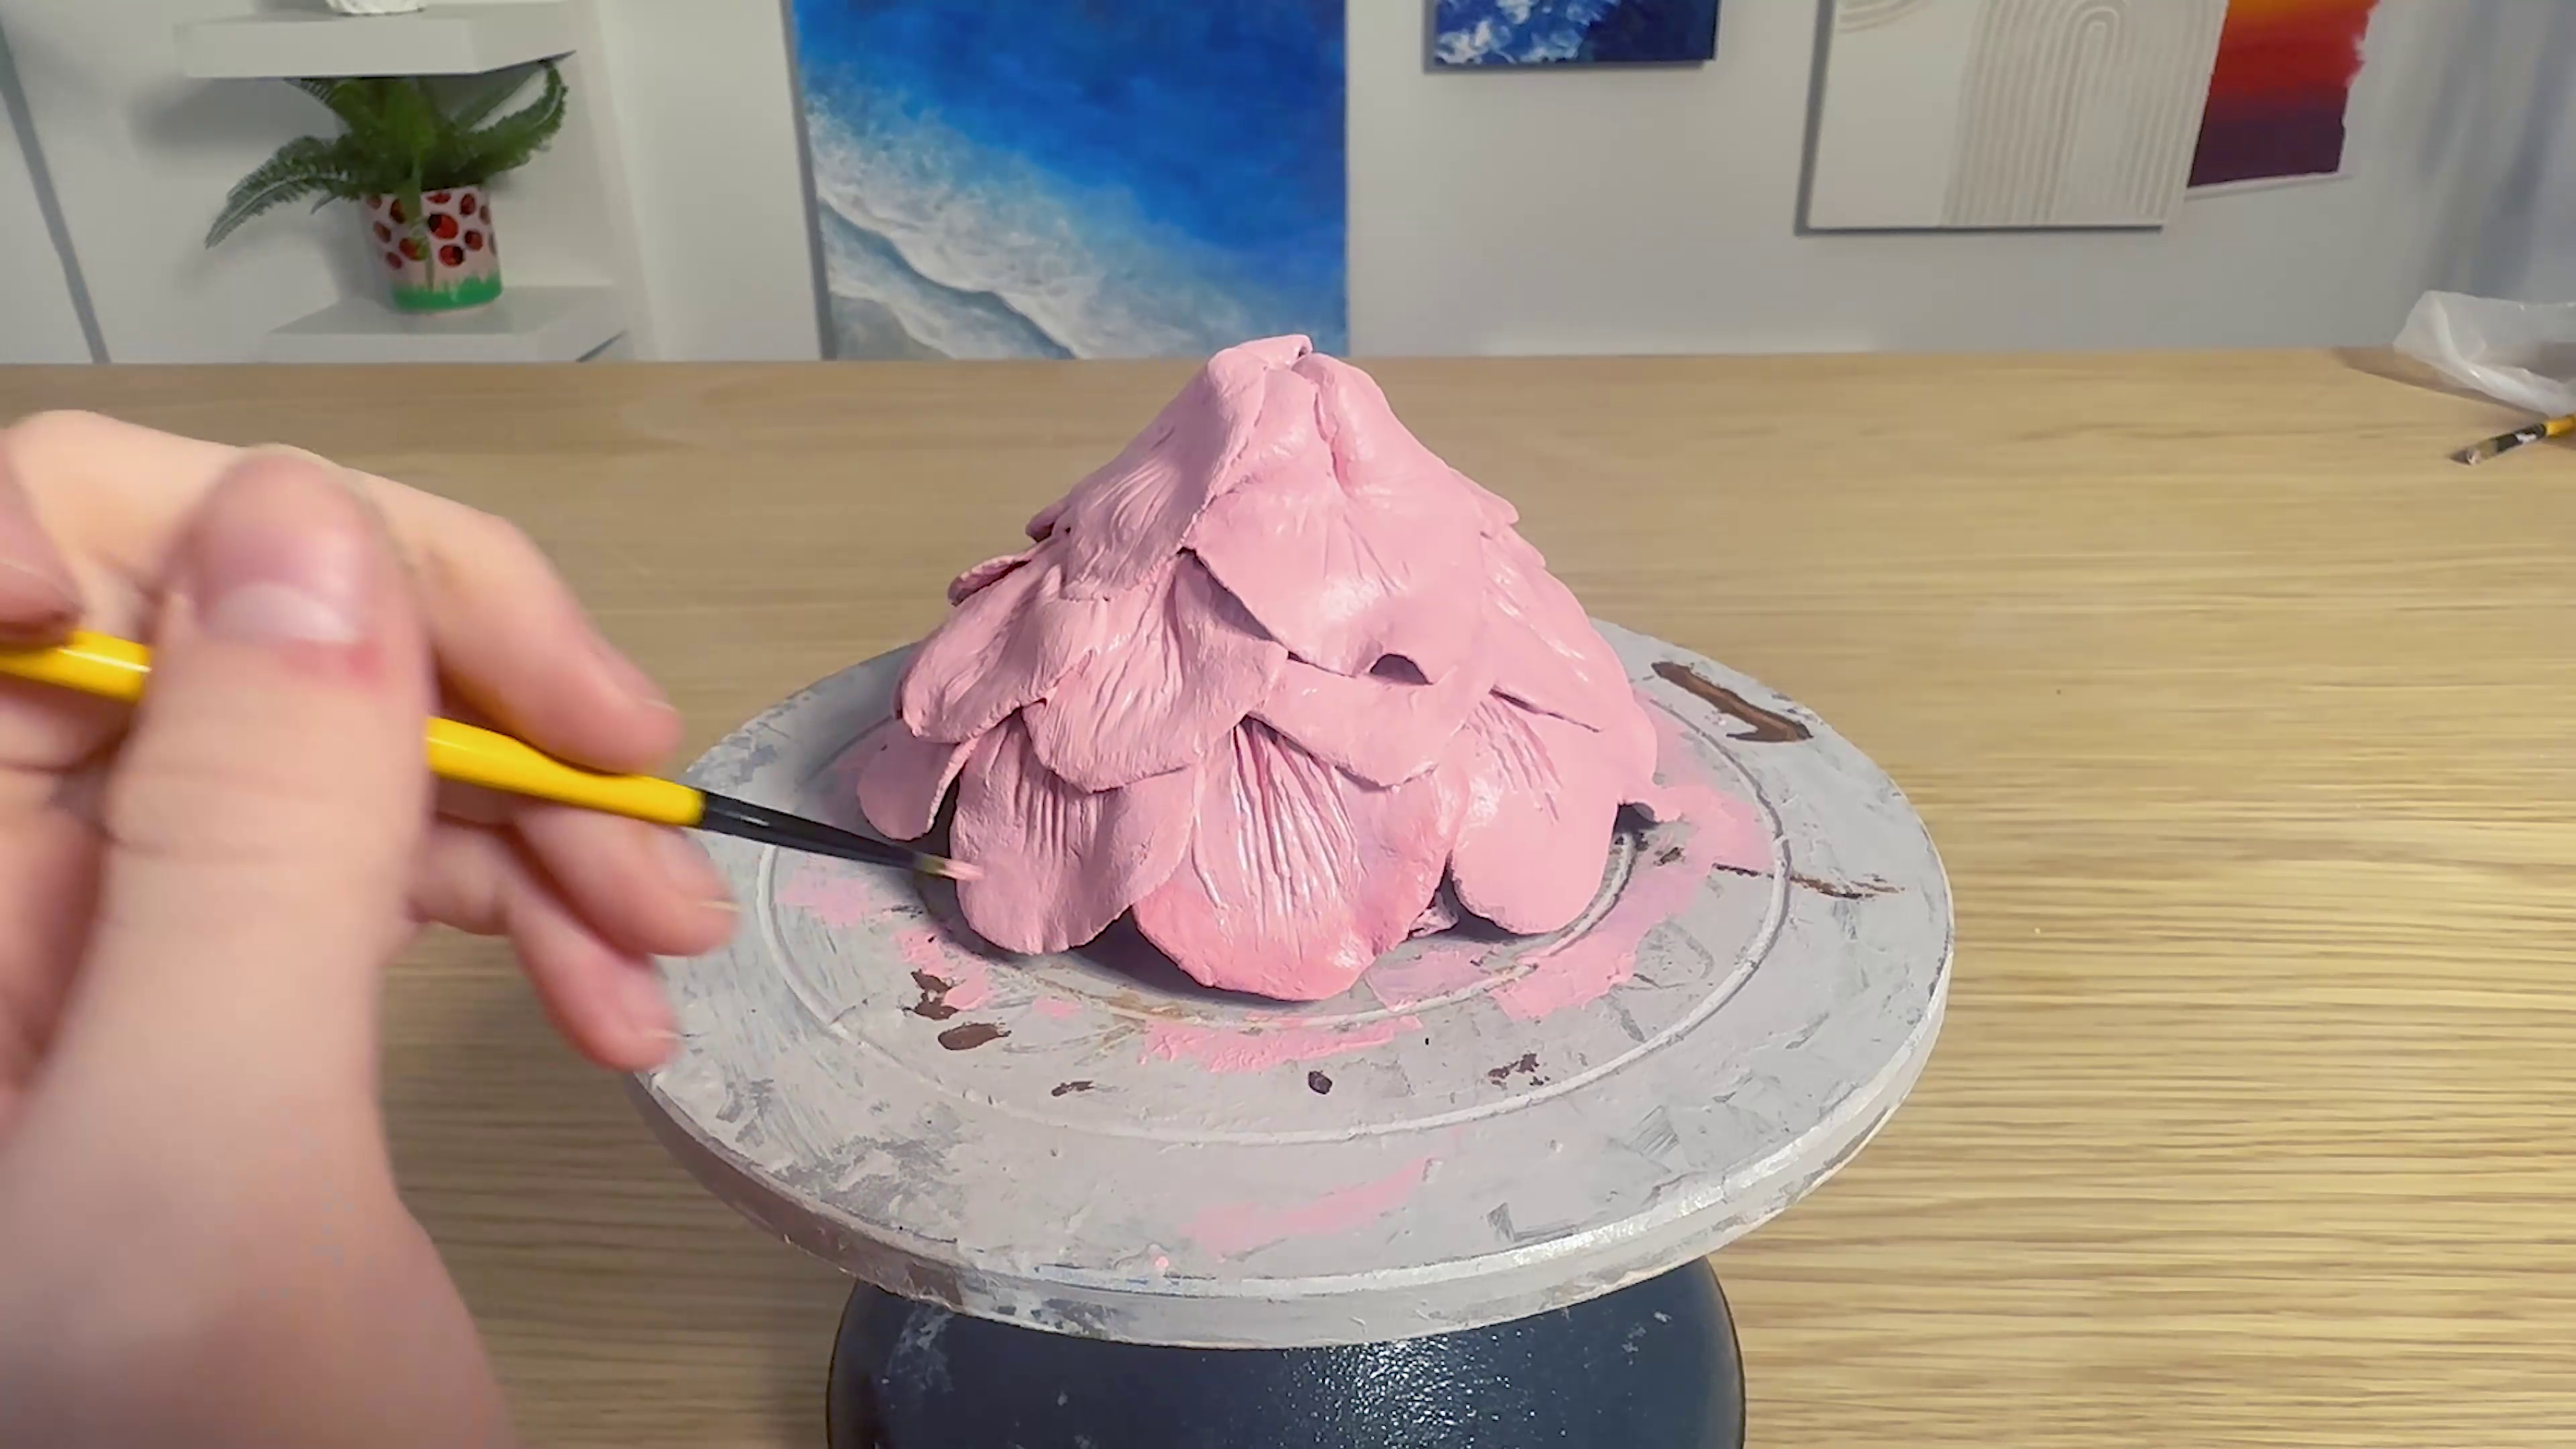
First, we’ll be building the roof out of our Air Hardening Modelling Clay Premium 500g. To do this, we want to bit by bit, build up the clay into a rounded cone shape. Once you are happy with the size, grab your clay tools and blend all the layers together. Tip: using a bit of water will make the clay easier to manipulate.
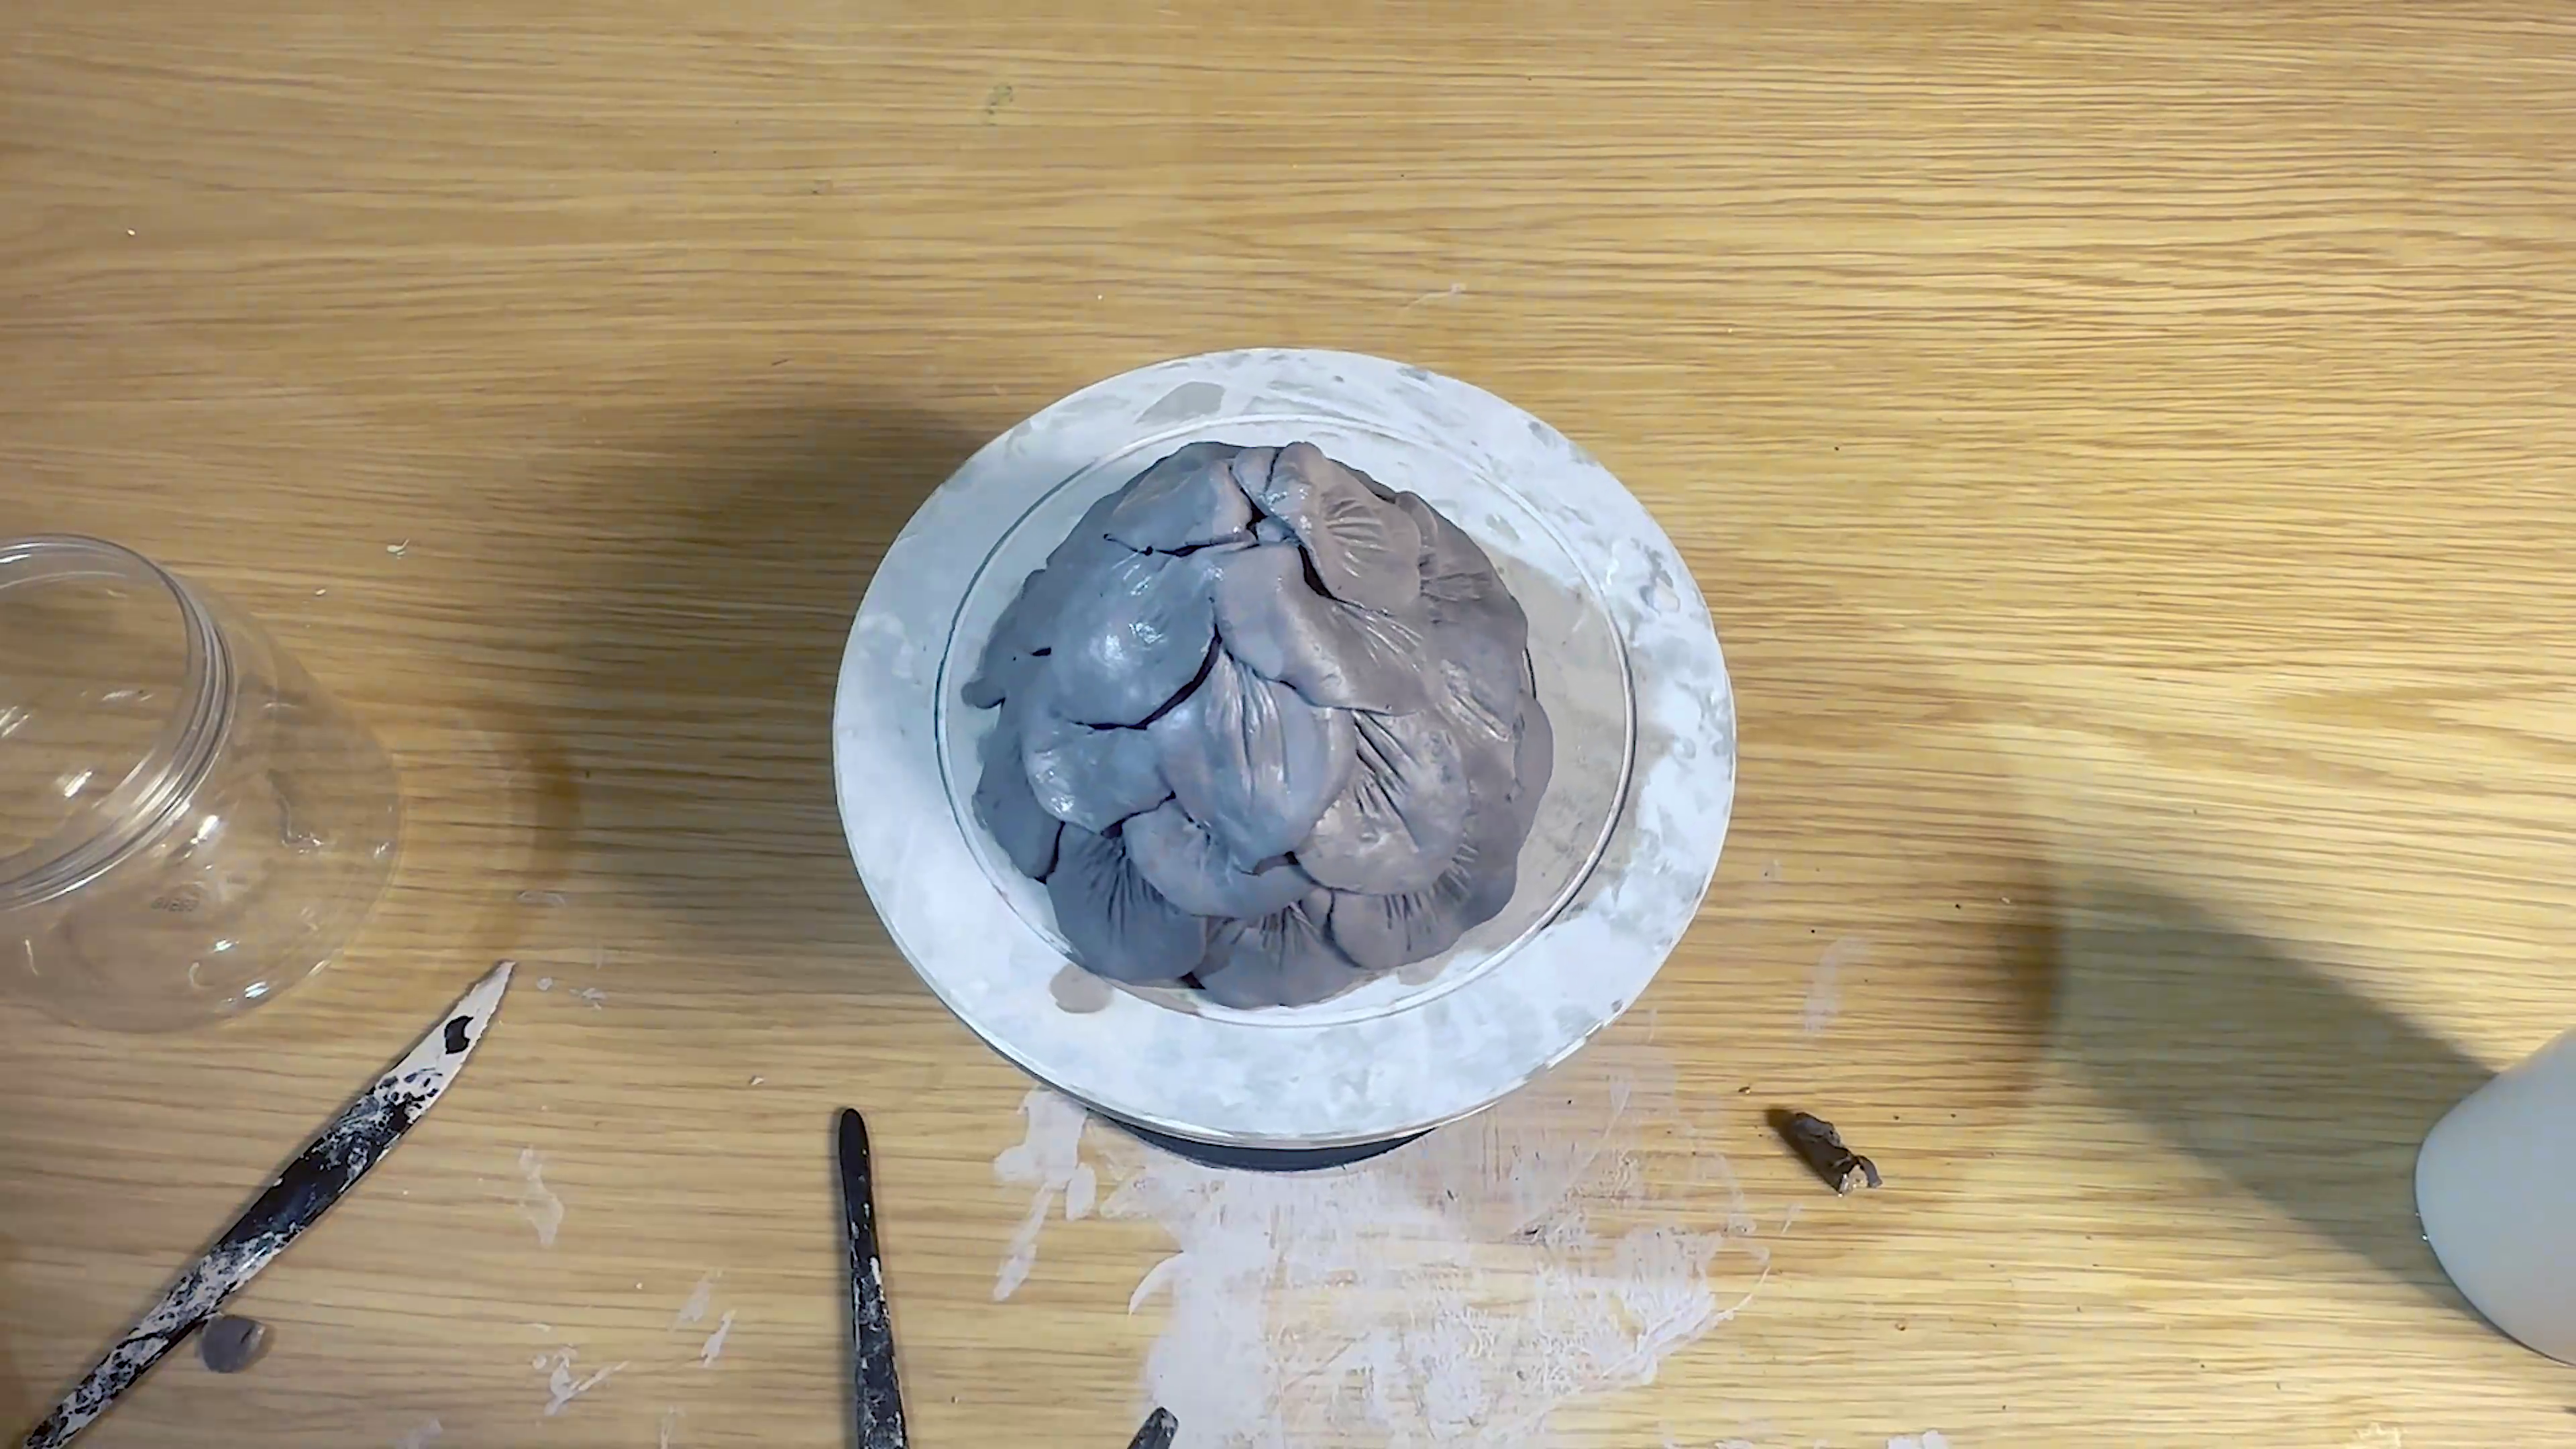
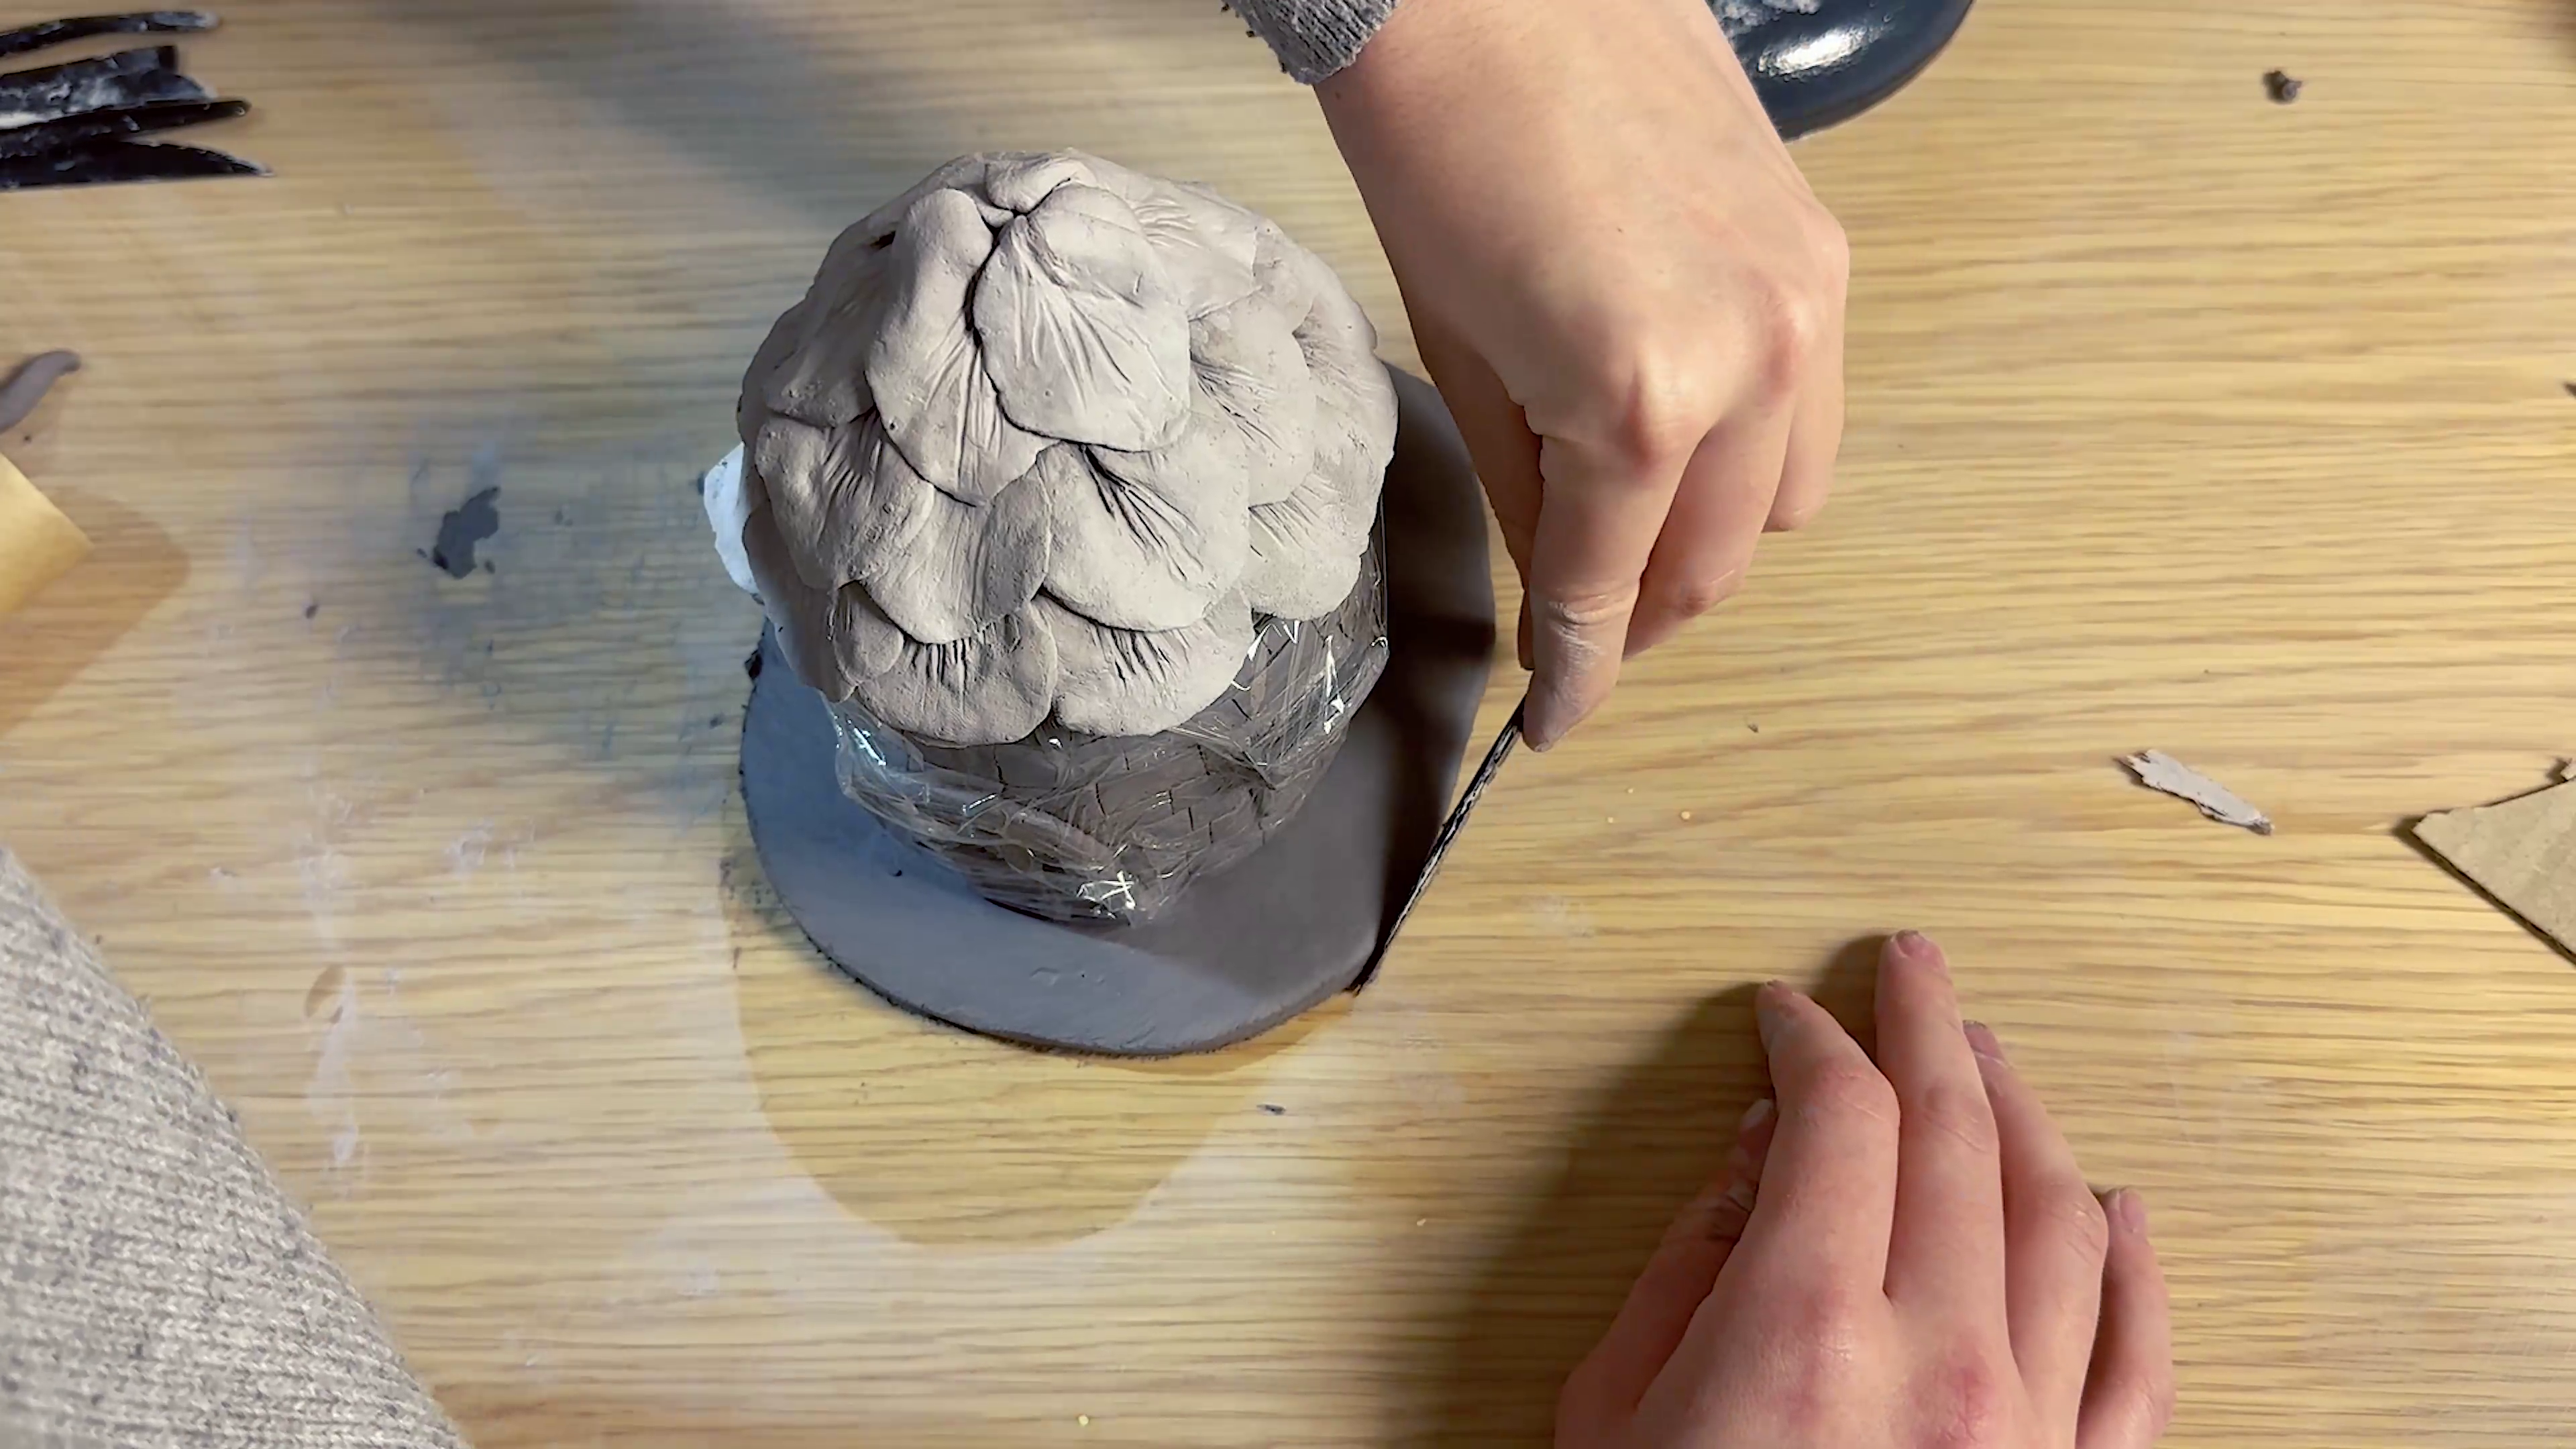
Once you are happy with the rough shape of the roof, we are going to start molding flower petals to lay over the roof.
To mold the petals, grab a pinch of clay, roll it into a ball and then using your thumb and index finger, flatten it out. The end of the petal should be thinner than the base. Pinch the base of the petal to fold it inward. Then position it at the bottom of the roof. Note: the bottom of the petal should align with the bottom of the roof.
Grab a small clay tool and mold the base of the flower into the roof so that it is firmly attached.
Score some lines from the base to the near end of the petal.

Repeat these steps to cover the roof in these petals. Hint: using water will help.
Once you are happy, set the roof aside to dry and grab the base of the modelling paste tub.
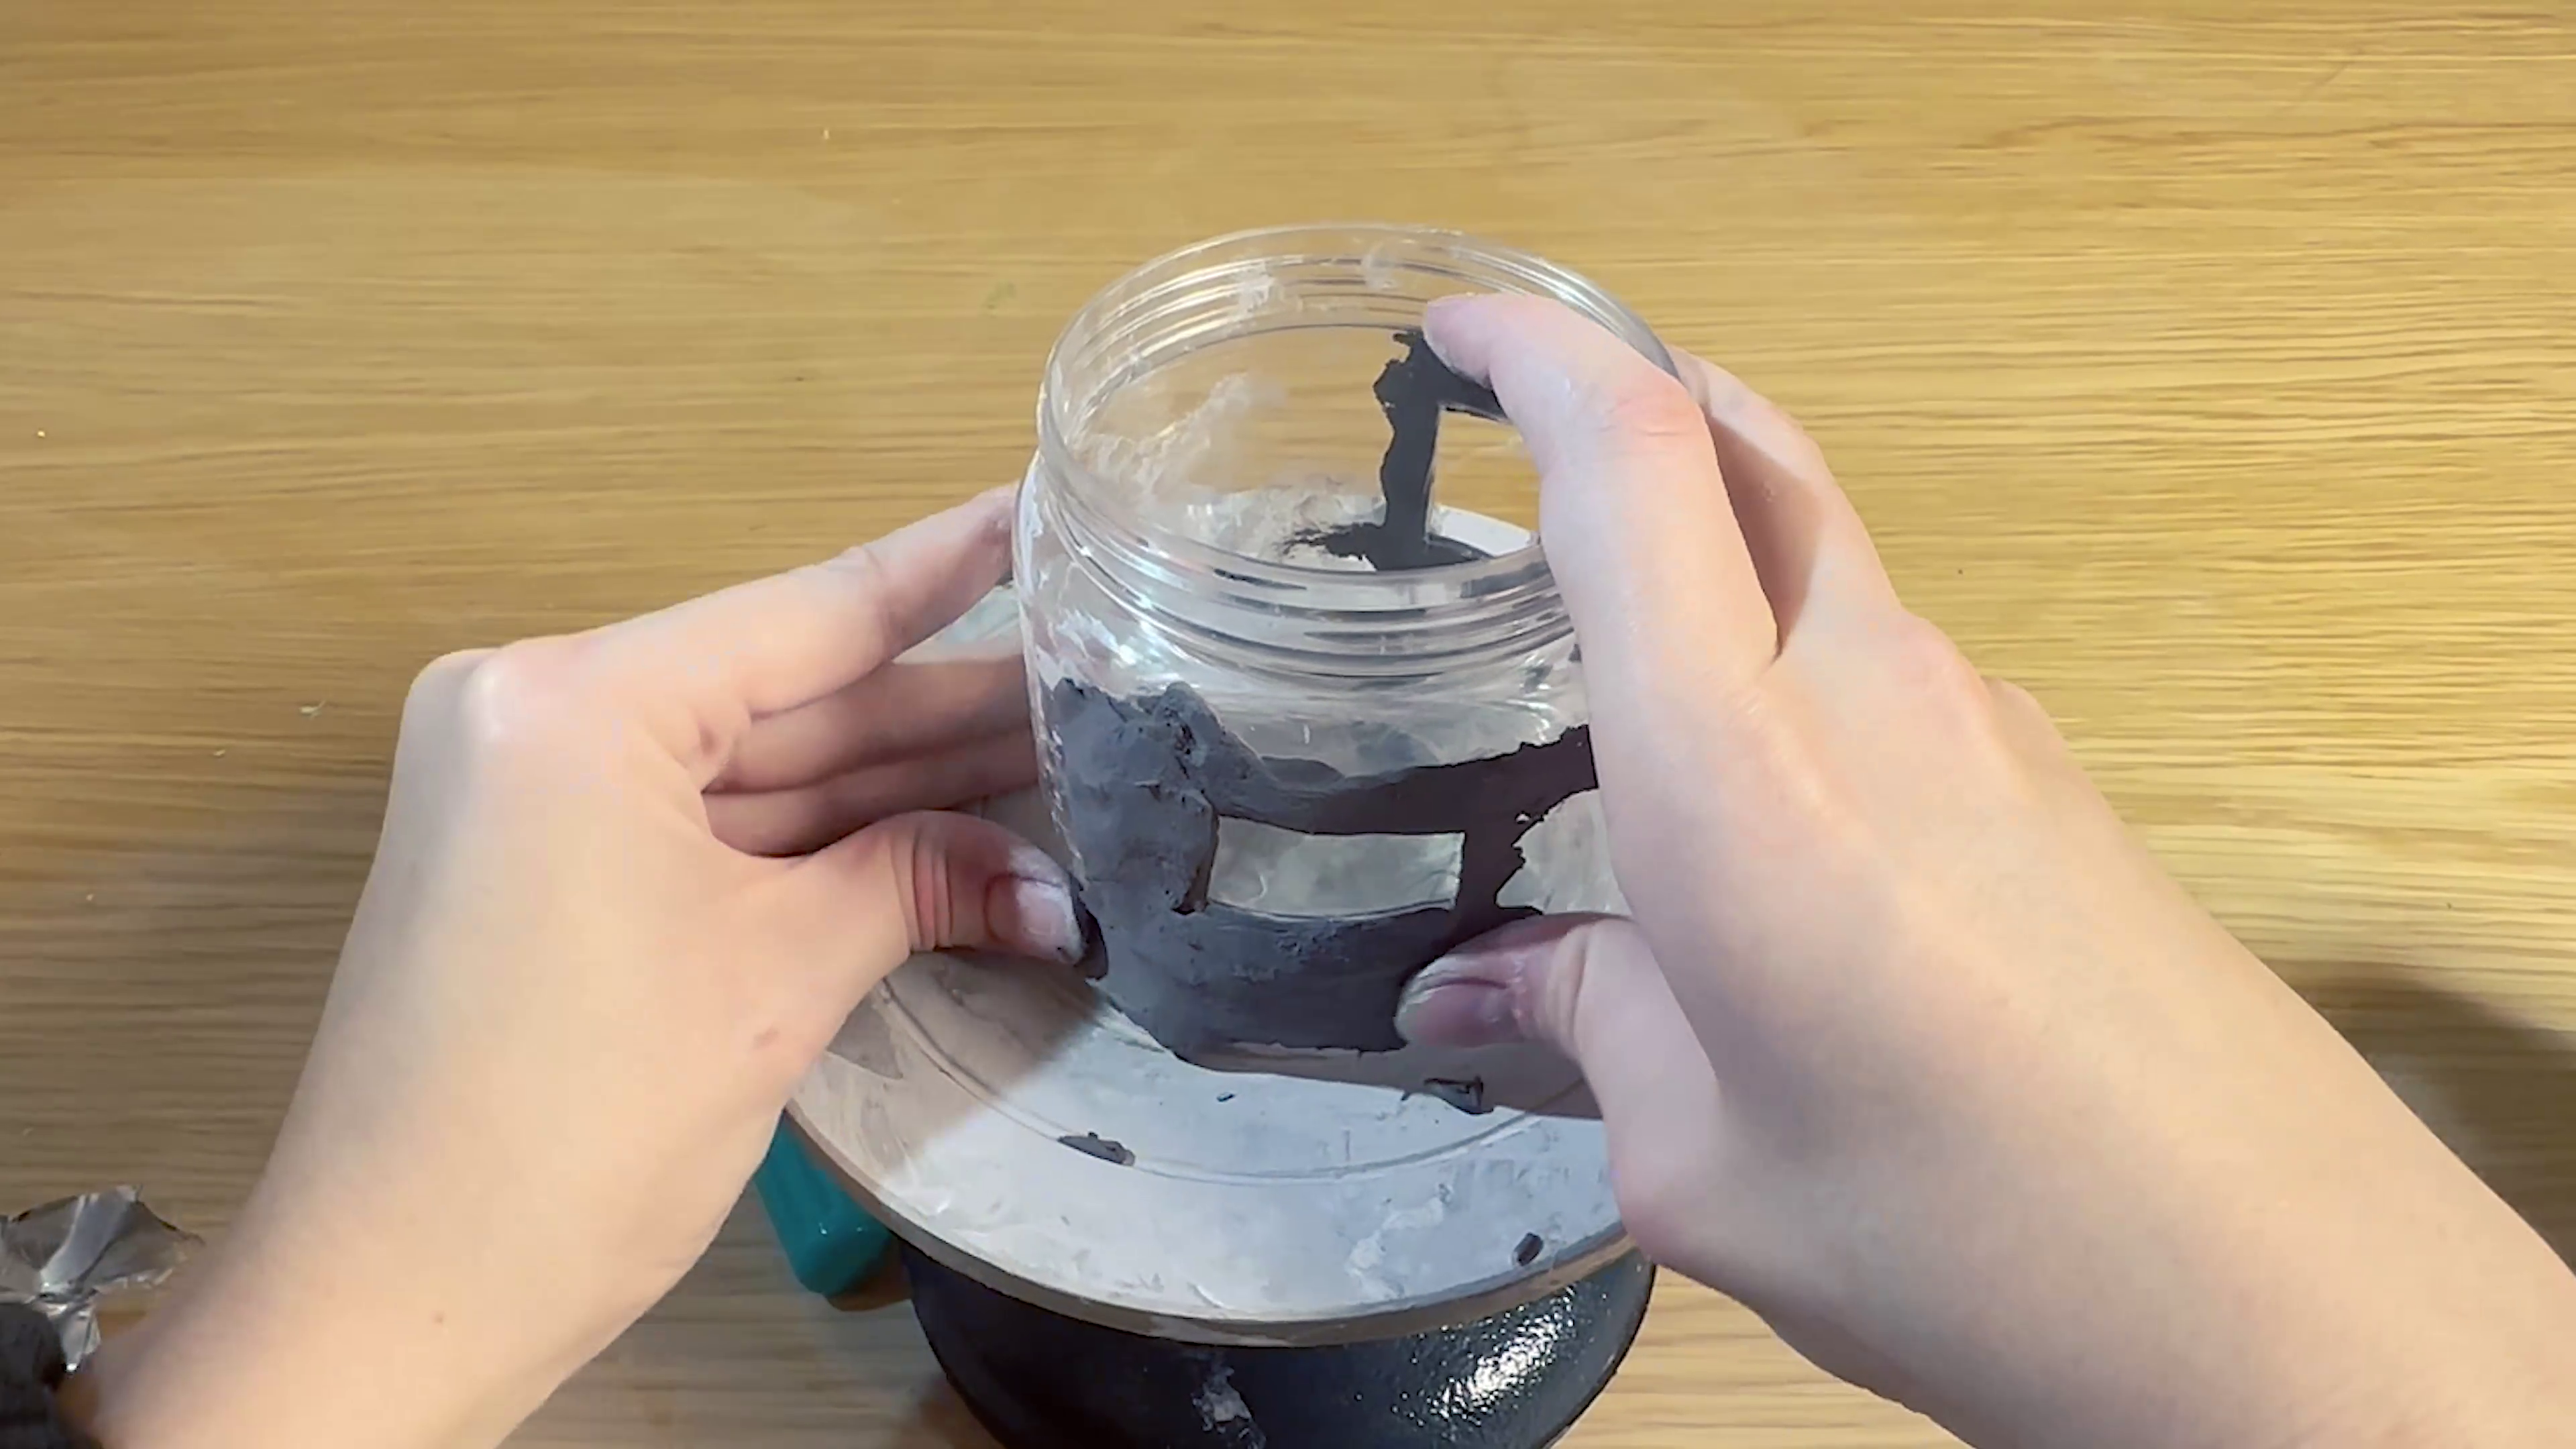
Cut out 2 windows with a craft knife – we recommend an adult do this step.
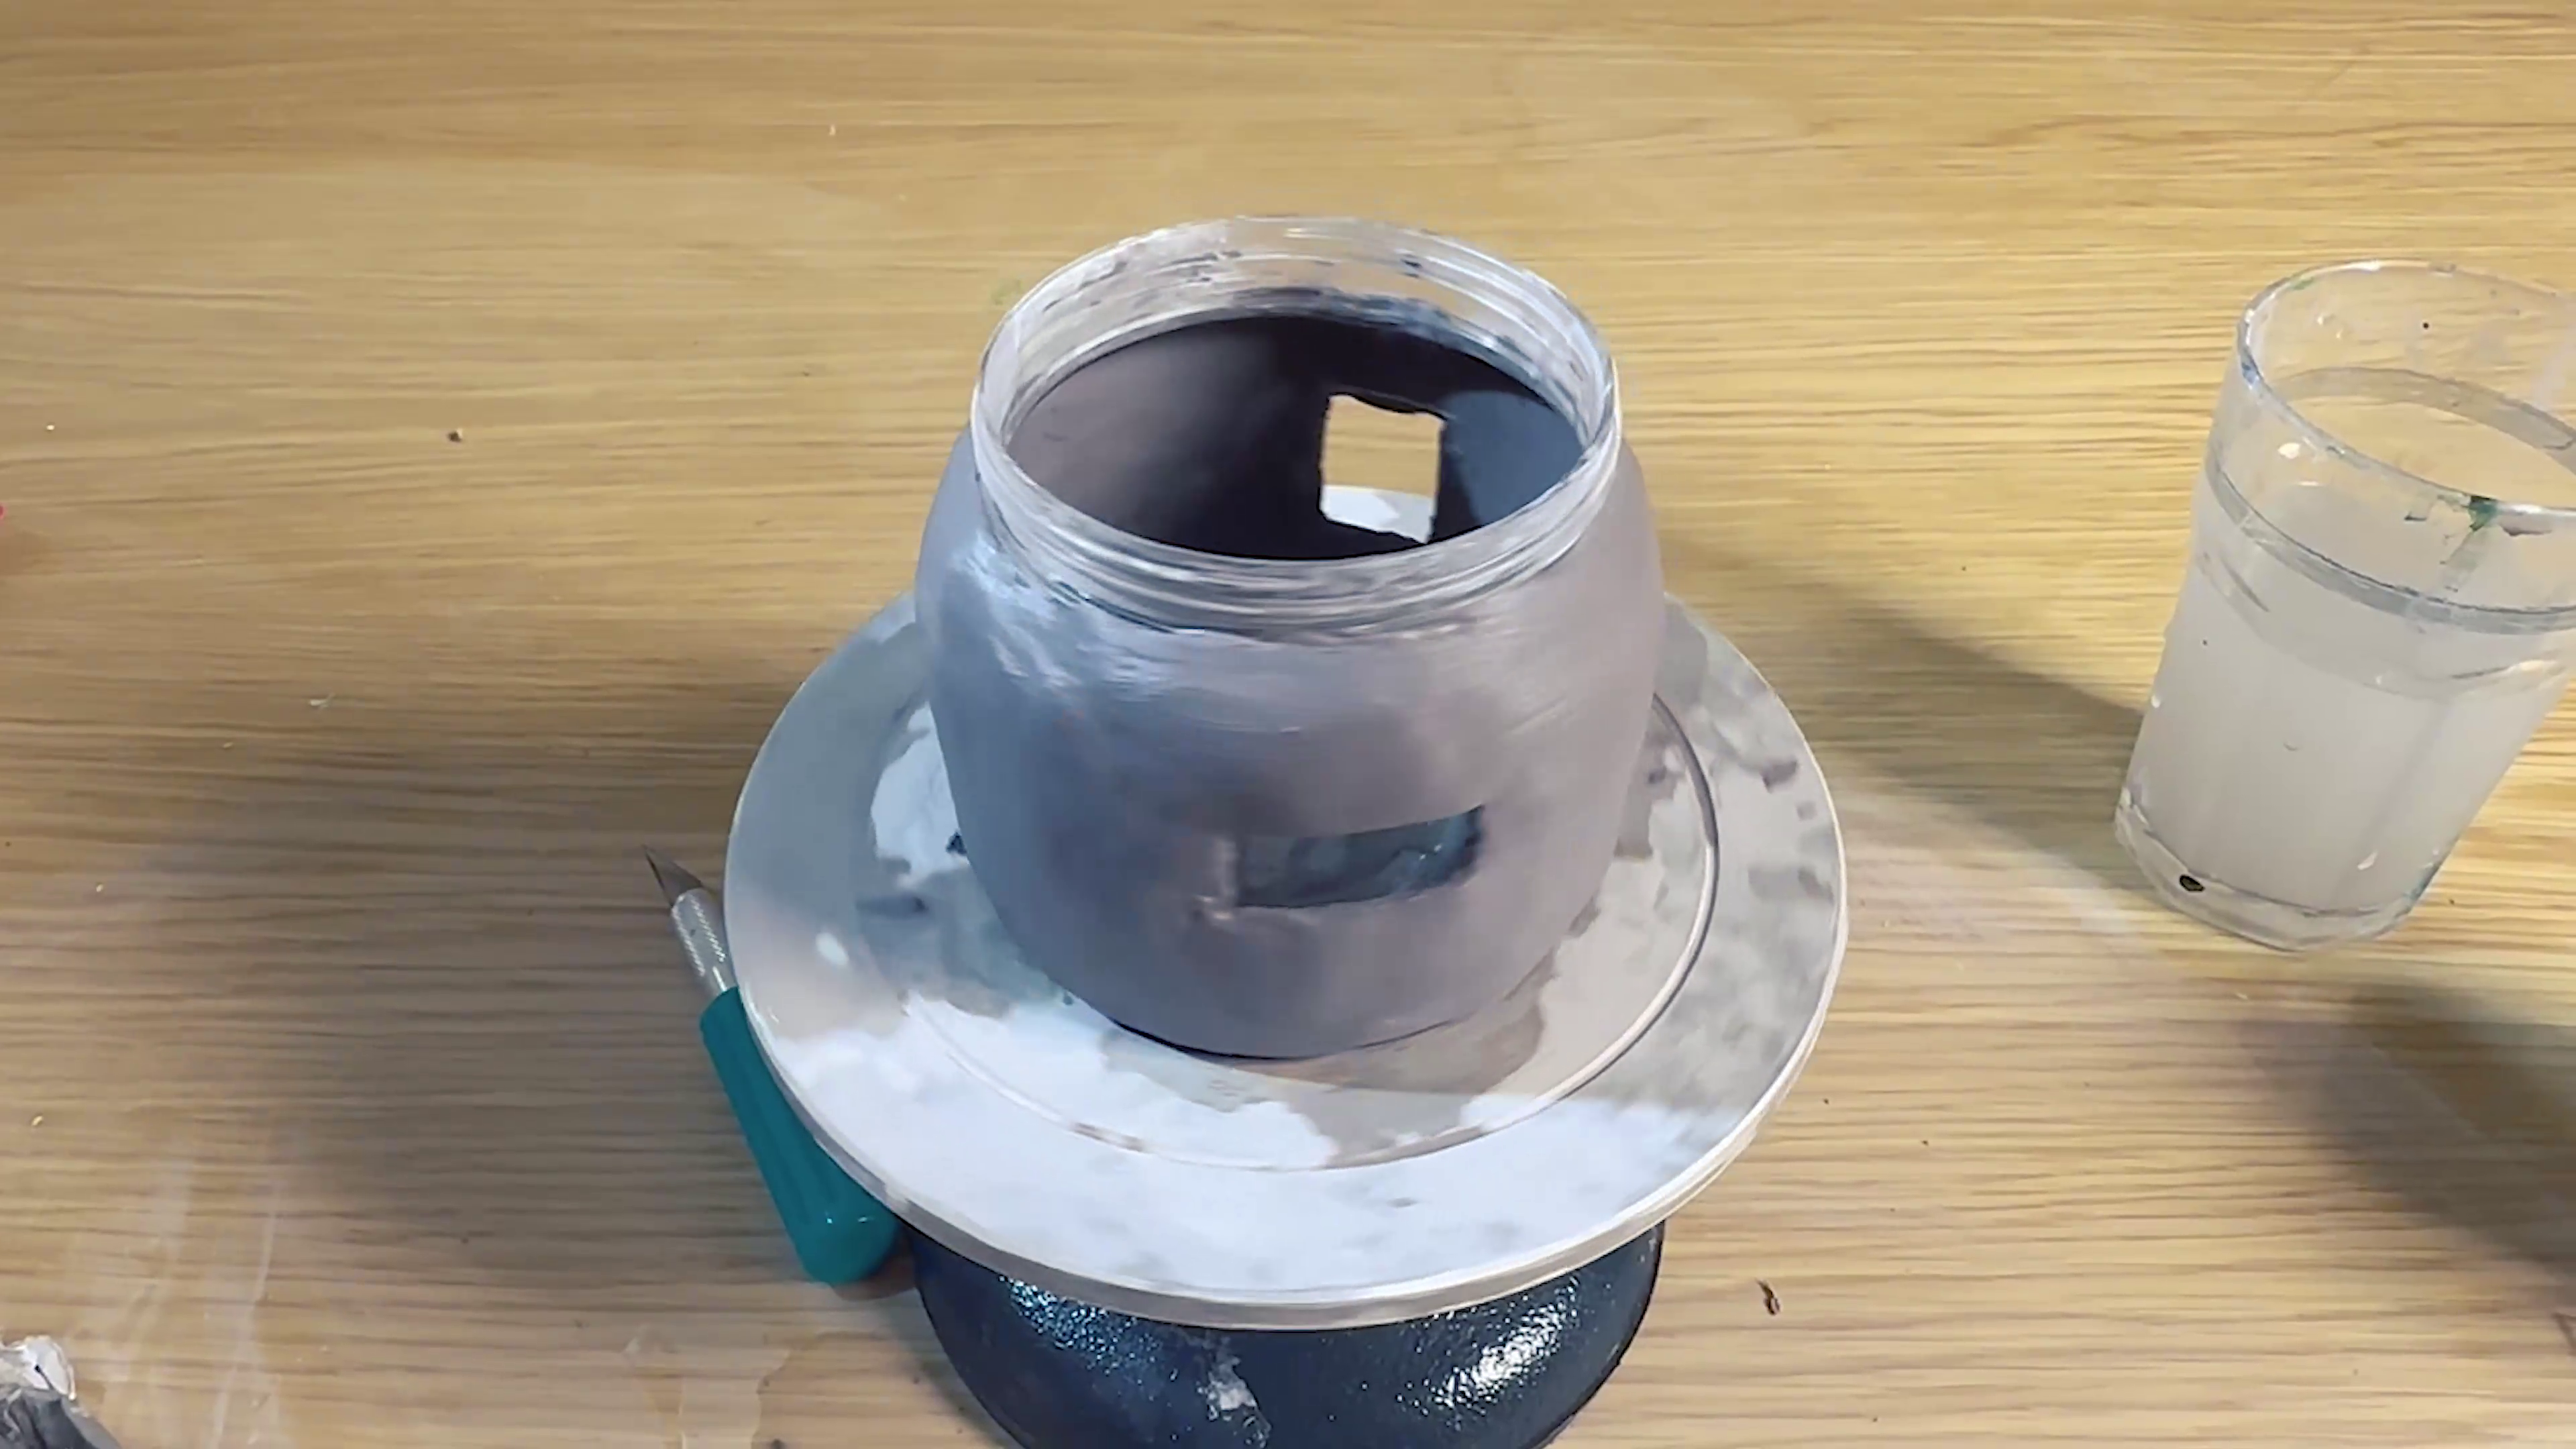
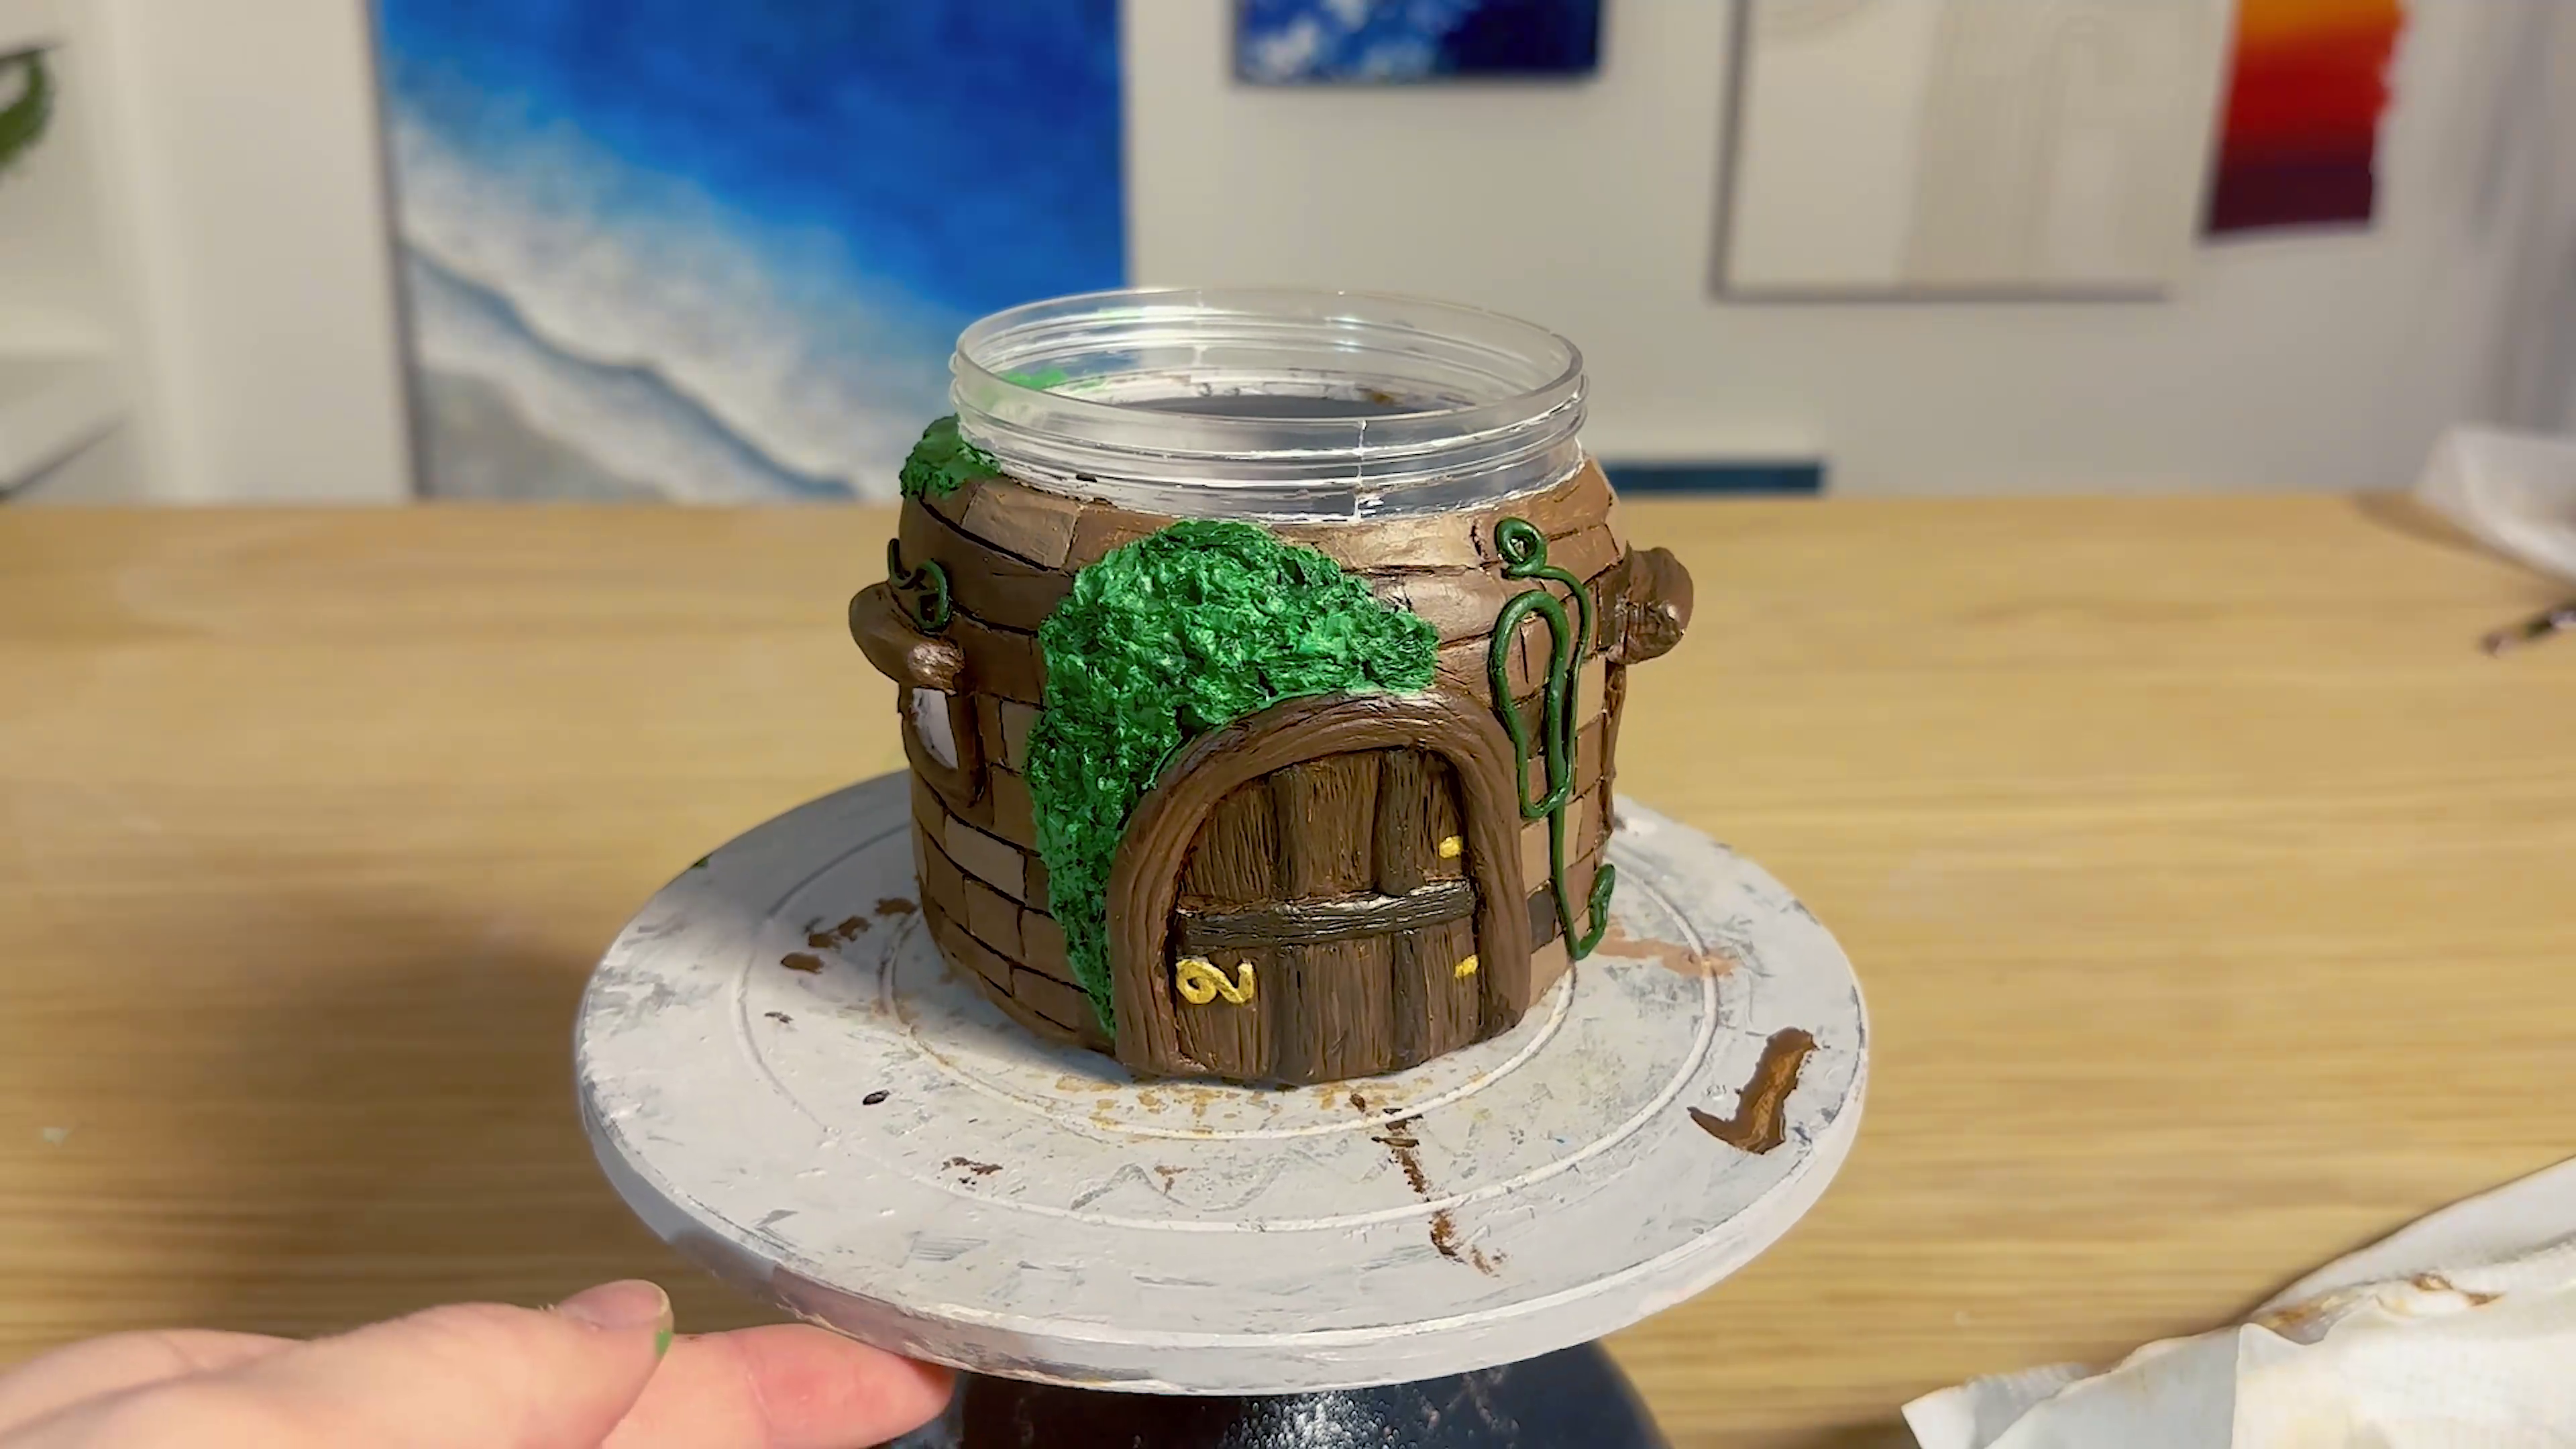
Start building up clay around the tub, ensuring the top of the tub is left alone so the roof can still be attached.
Using water and your clay tools, blend and smooth the clay.
The next step is to build up some windowsills. You can do this by rolling up some clay and cutting it to sizes. Attach these around the border. Blend these into the base so they are firmly attached.
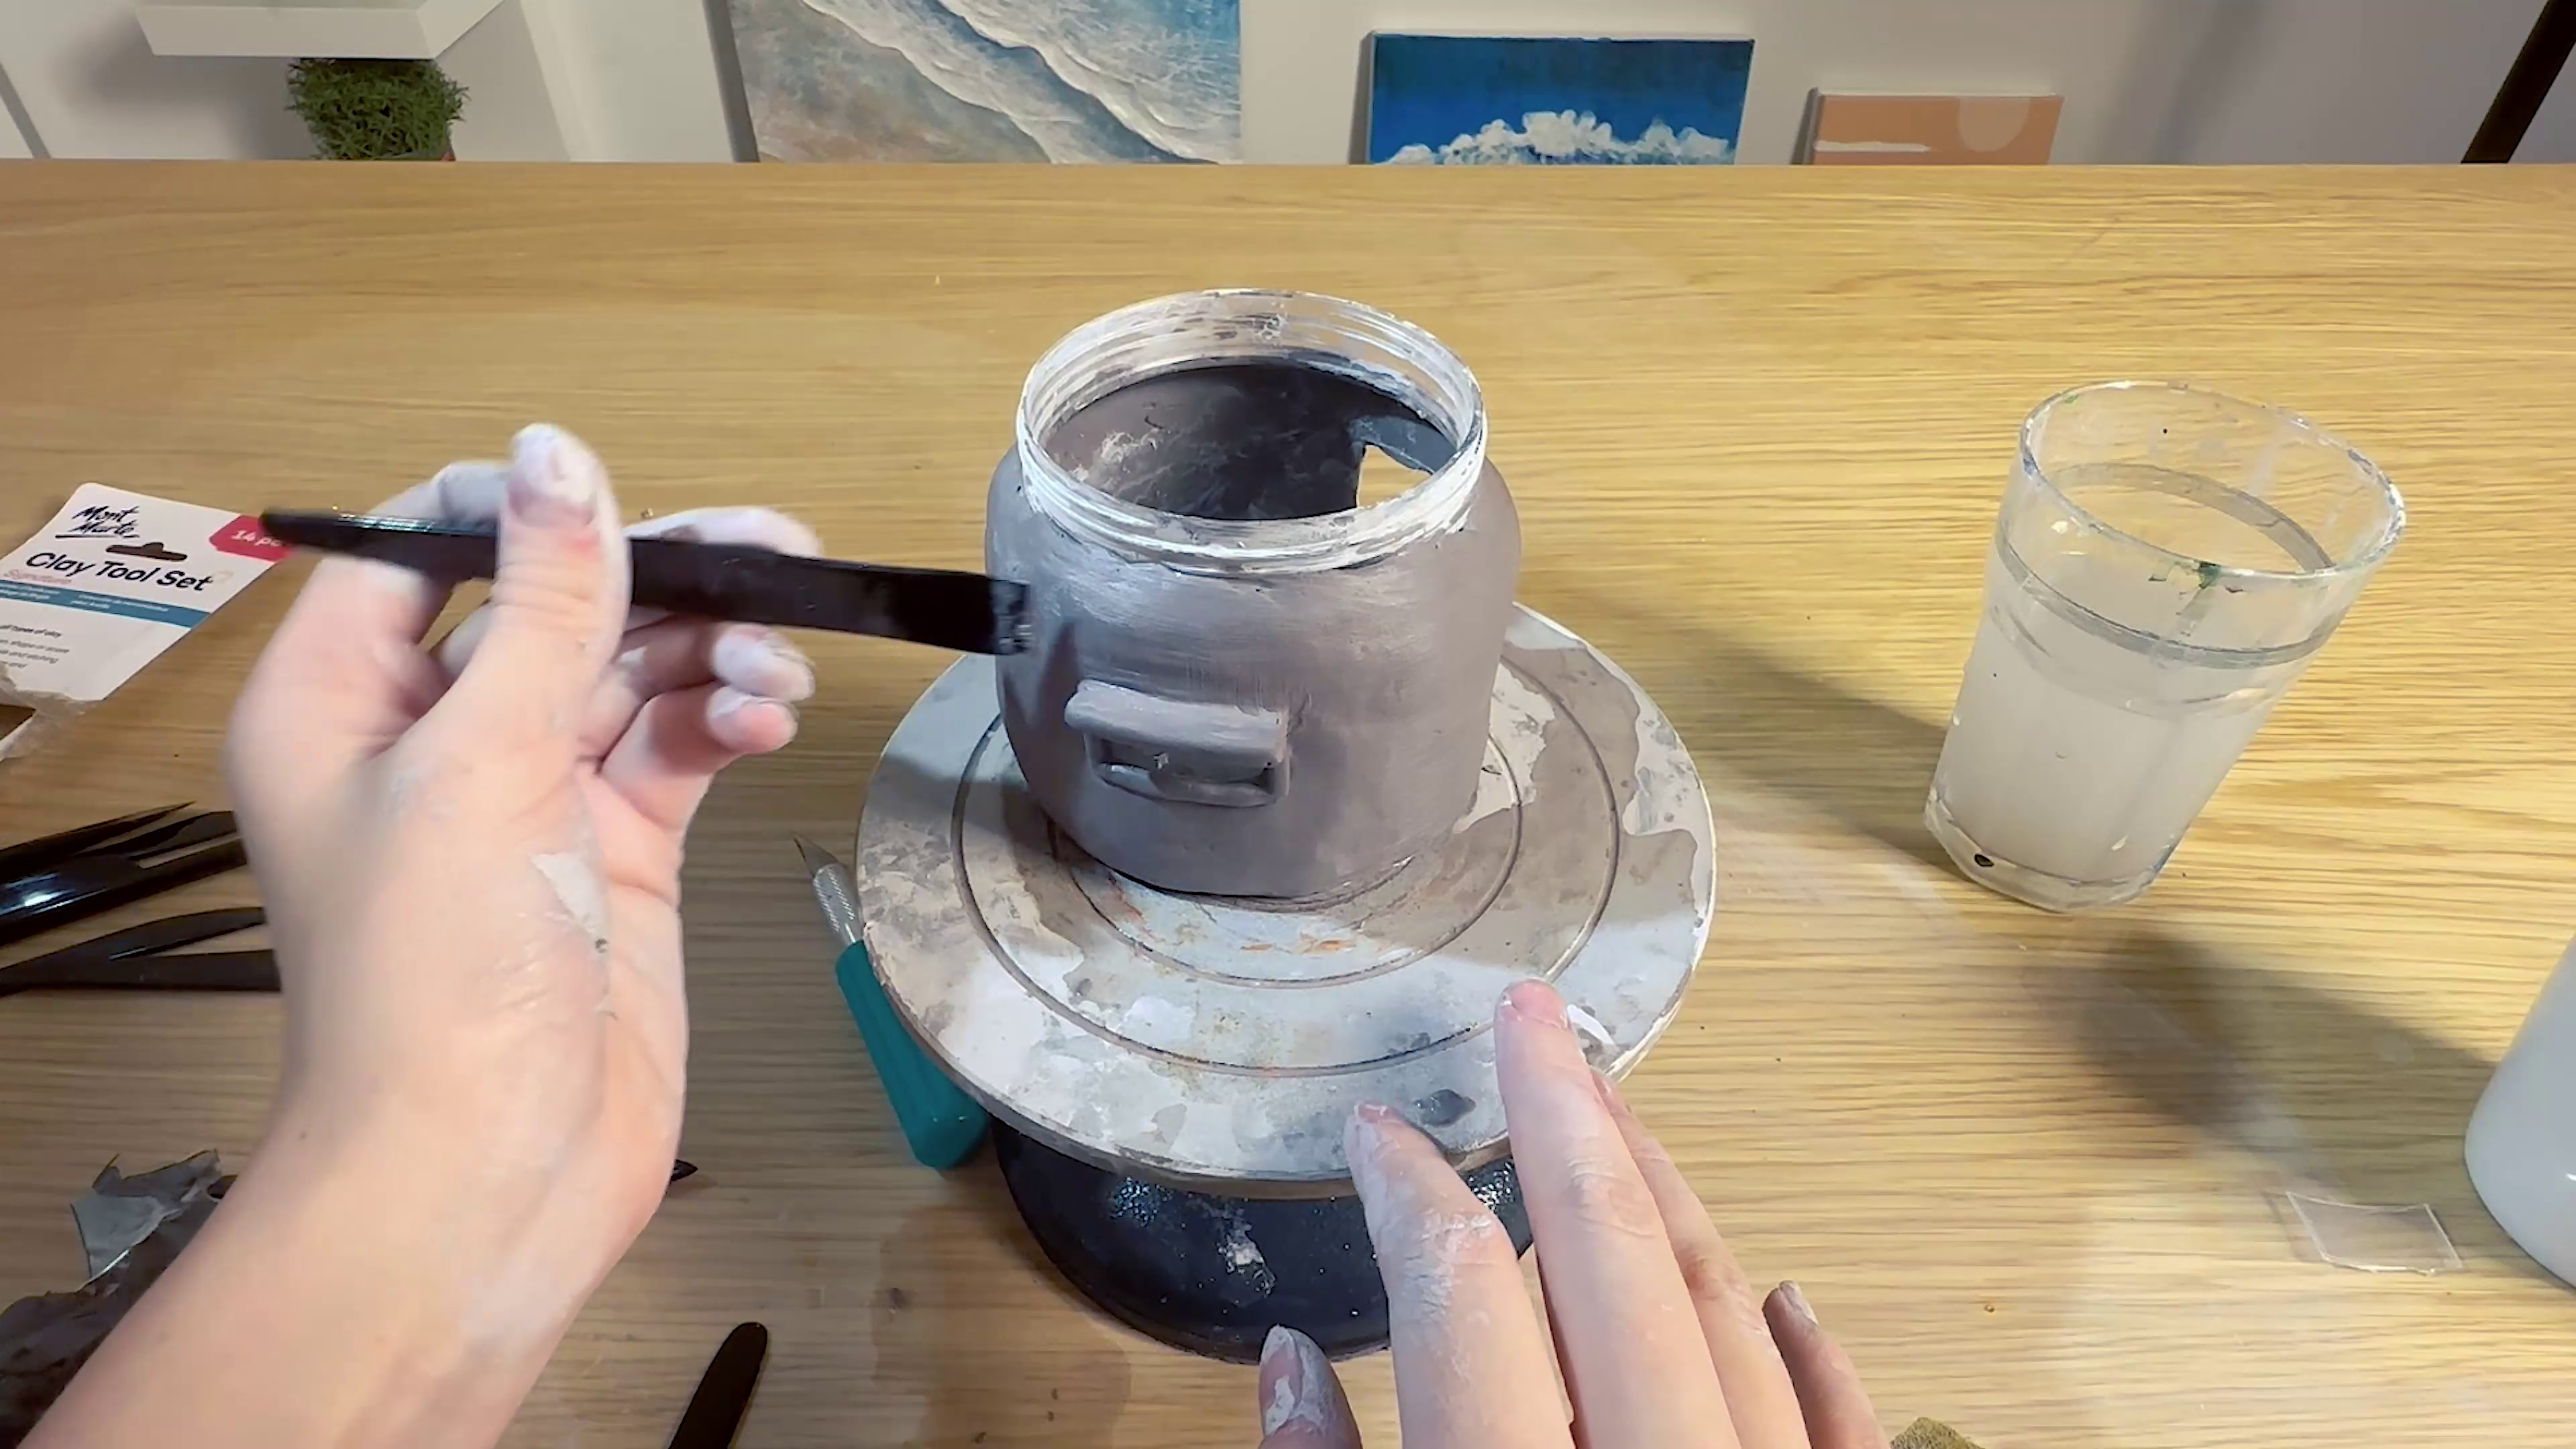
The next step is to create a brick effect. Grab a thin clay tool and create horizontal lines all the way around the tub. Once that is done, create vertical lines between the horizontal lines. For a more realistic, rustic look, place these vertical lines randomly so they do not align with each other.

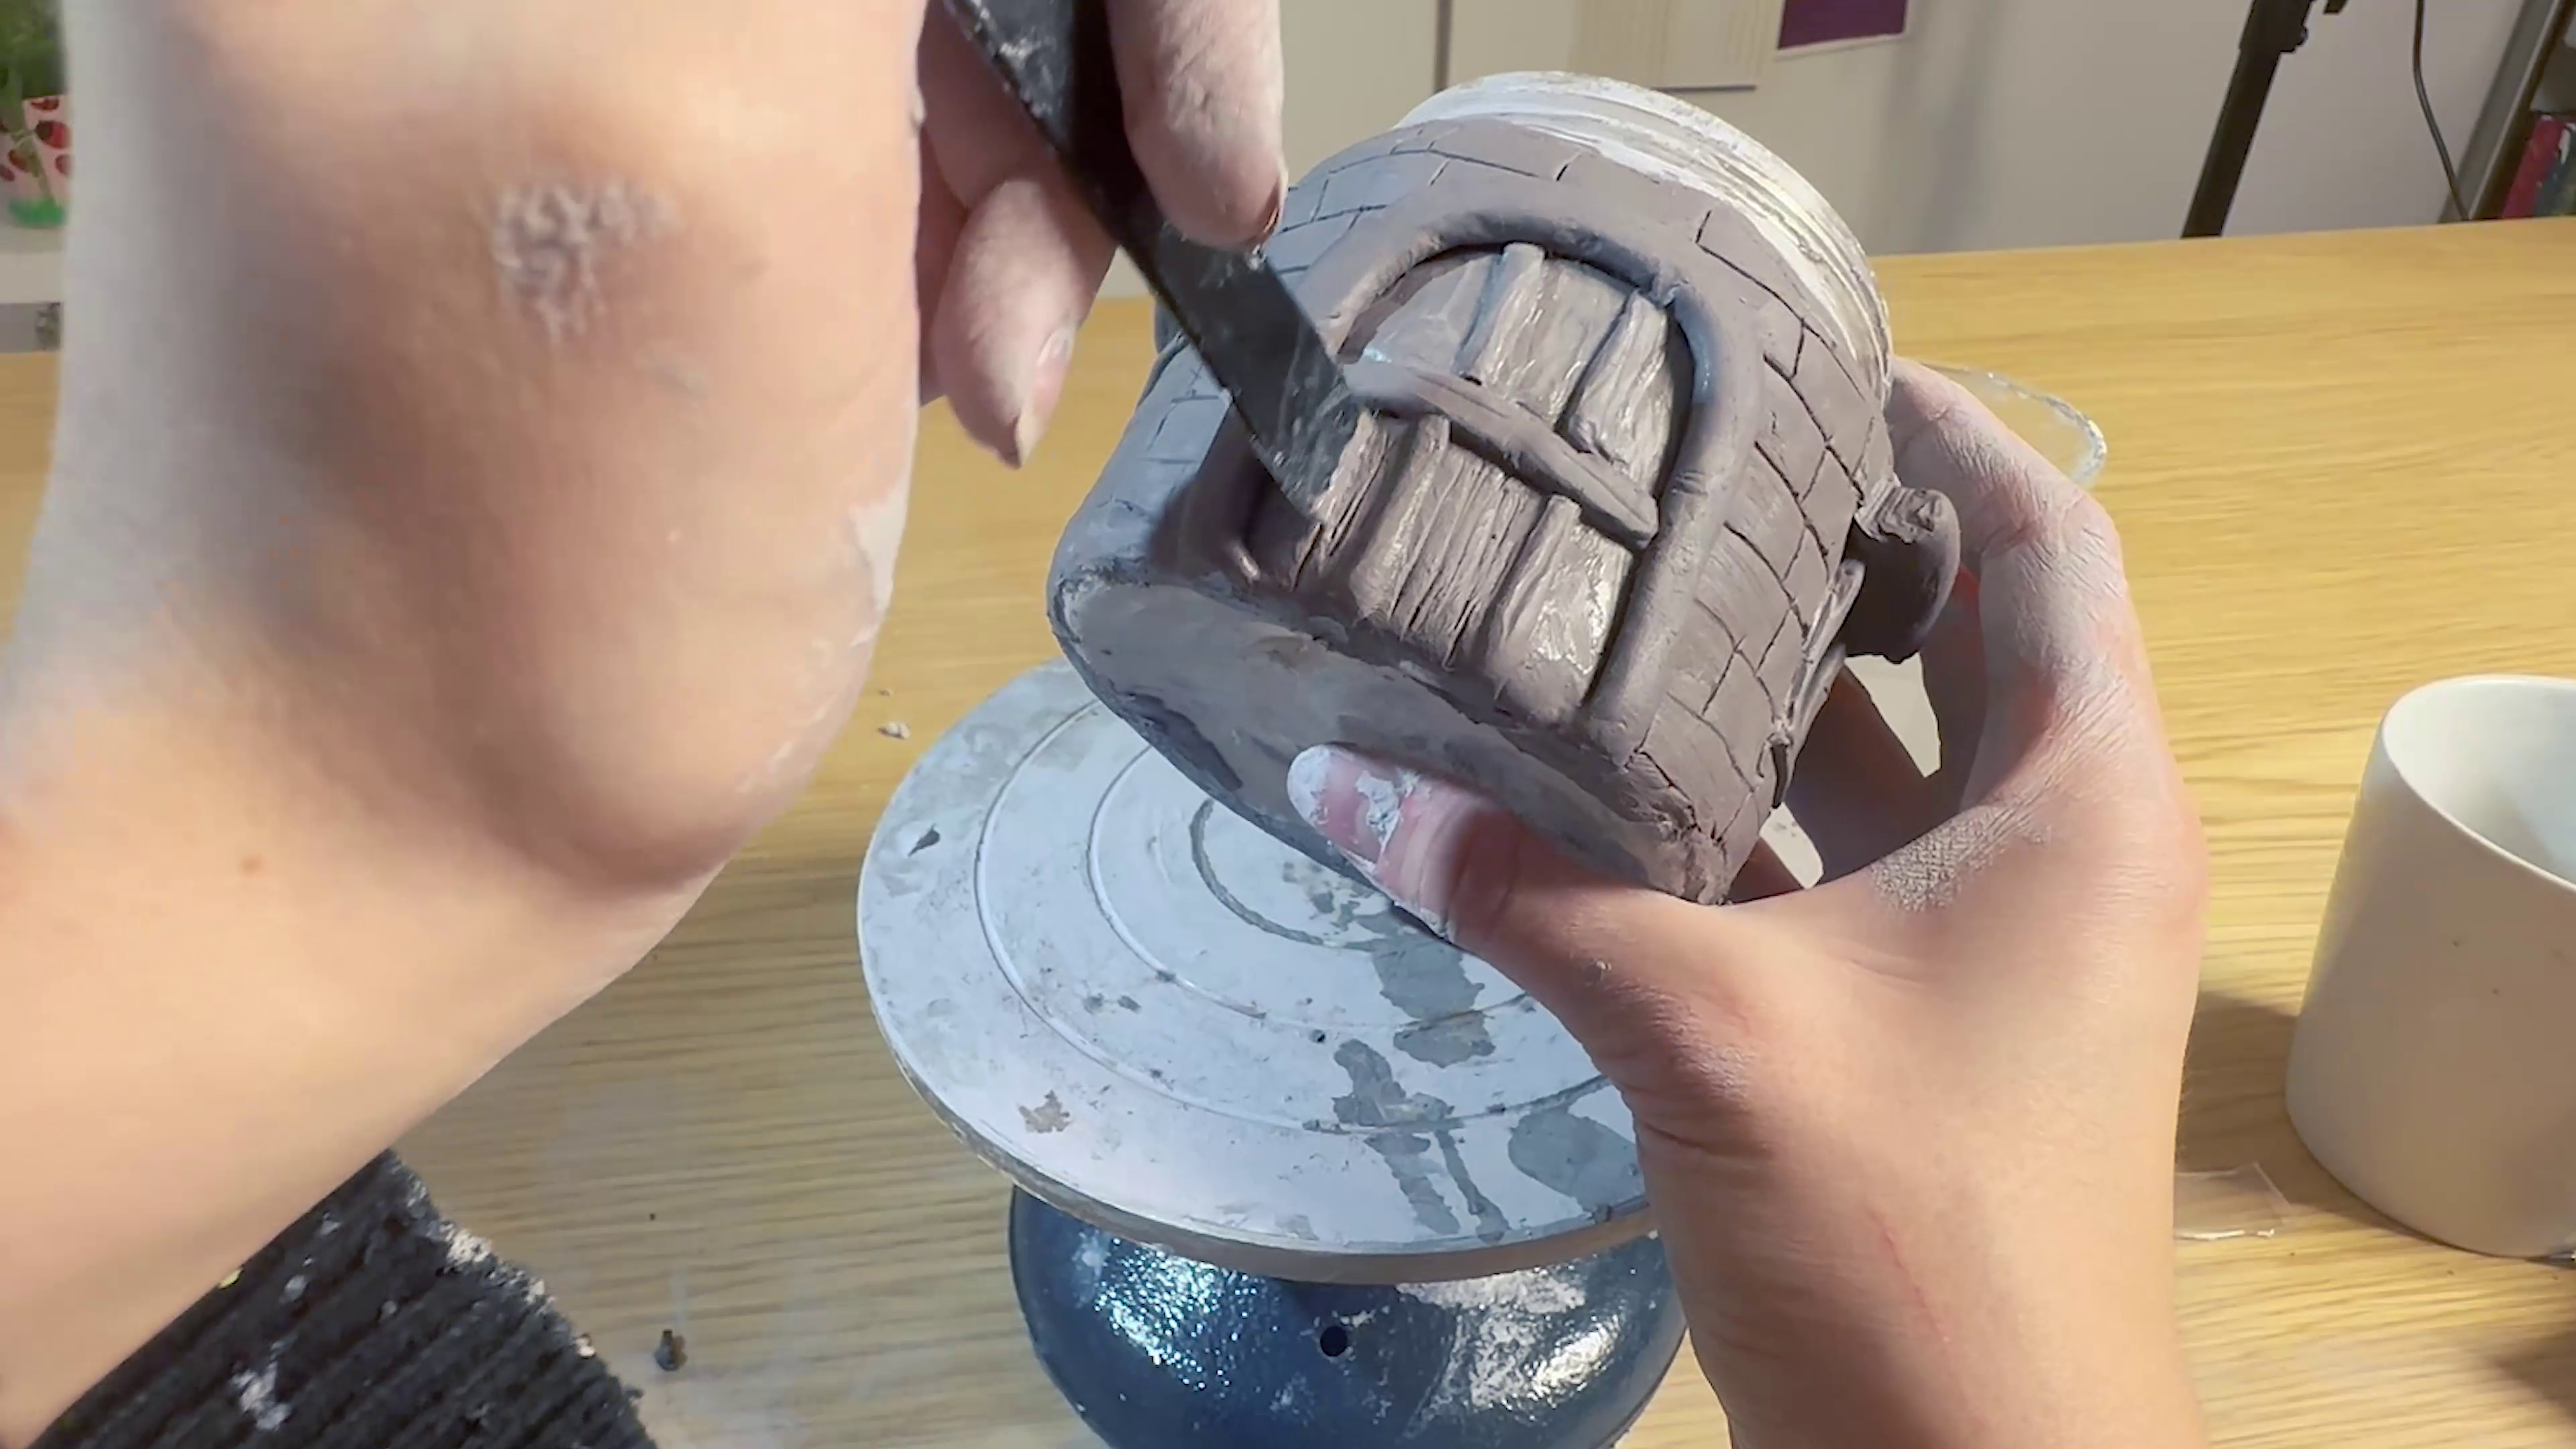
Now we are going to build the door. Outline an arch where you want this placed and smooth out the brick lines, so they are not visible anymore. Using a toothed clay tool, score a rough 1cm border outside the arch. Roll some clay so that it is approximately 1cm thick. Score one side of this roll and dampen it with some water. Place the scored side of the roll to the scored border of the arch. Use water and clay tool to blend and attach this firmly, then cut the excess off.
Now you can add some details to your door and windows. I went with a wooden look.
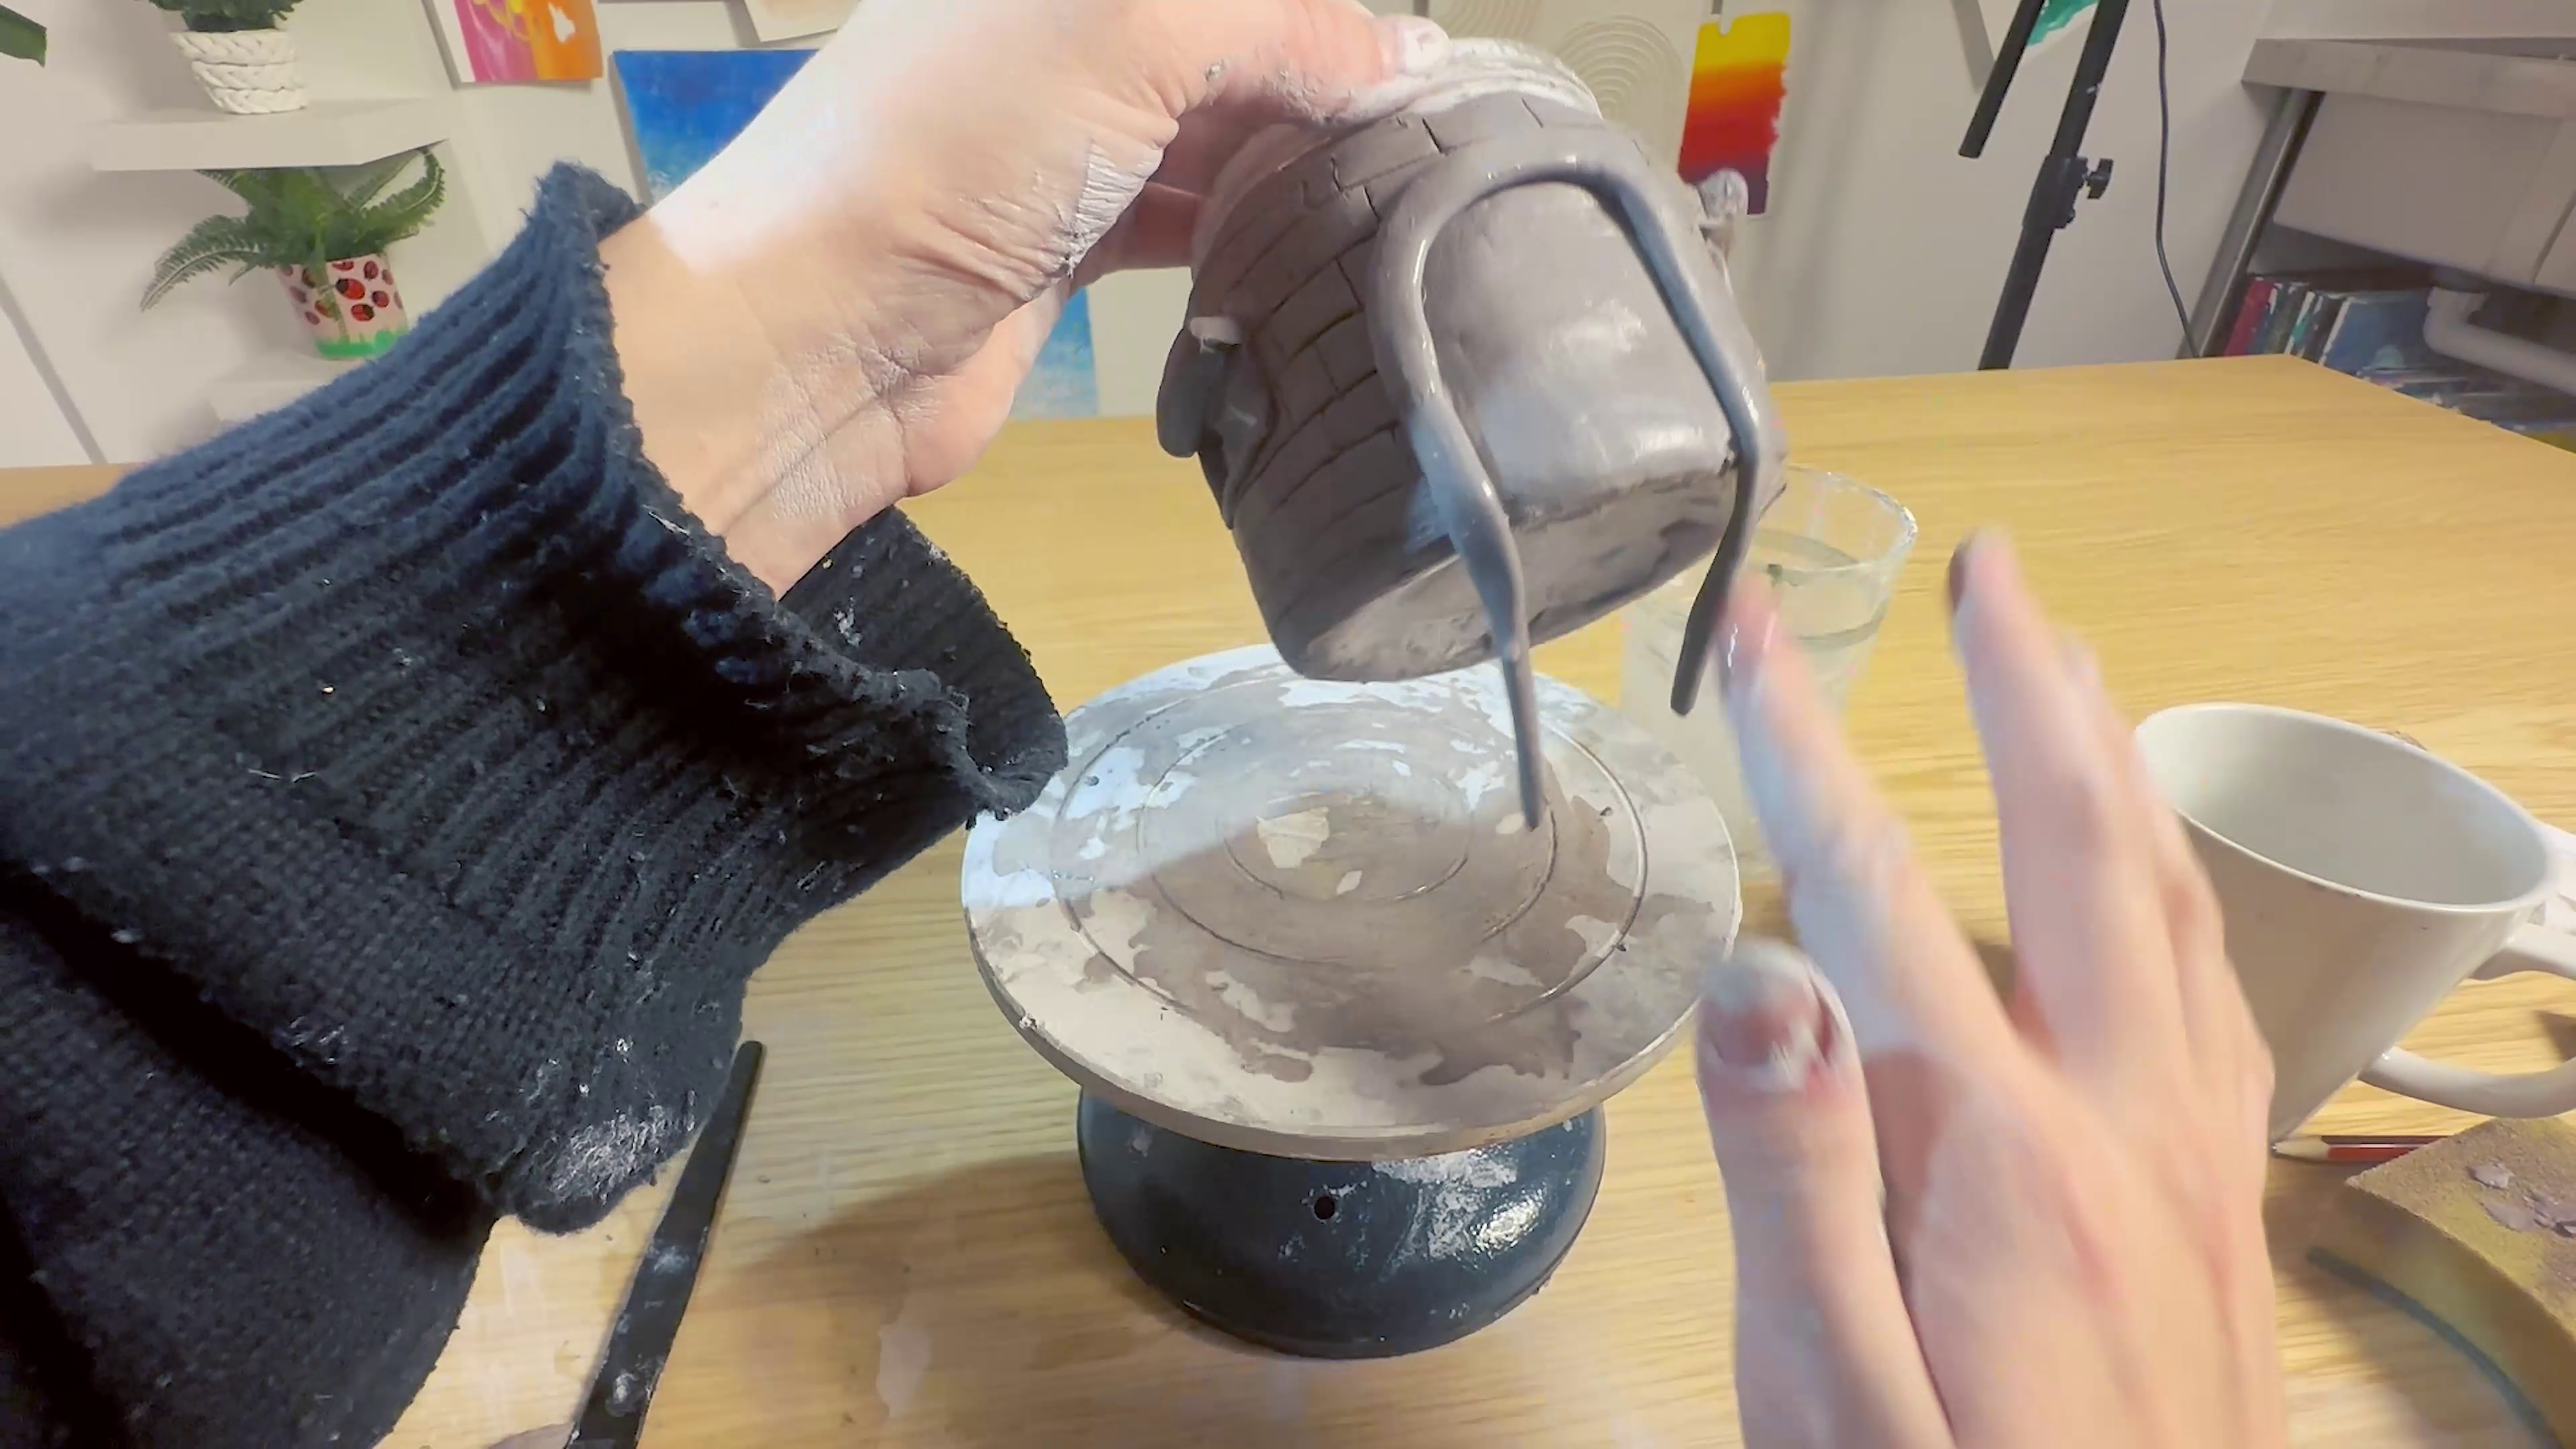
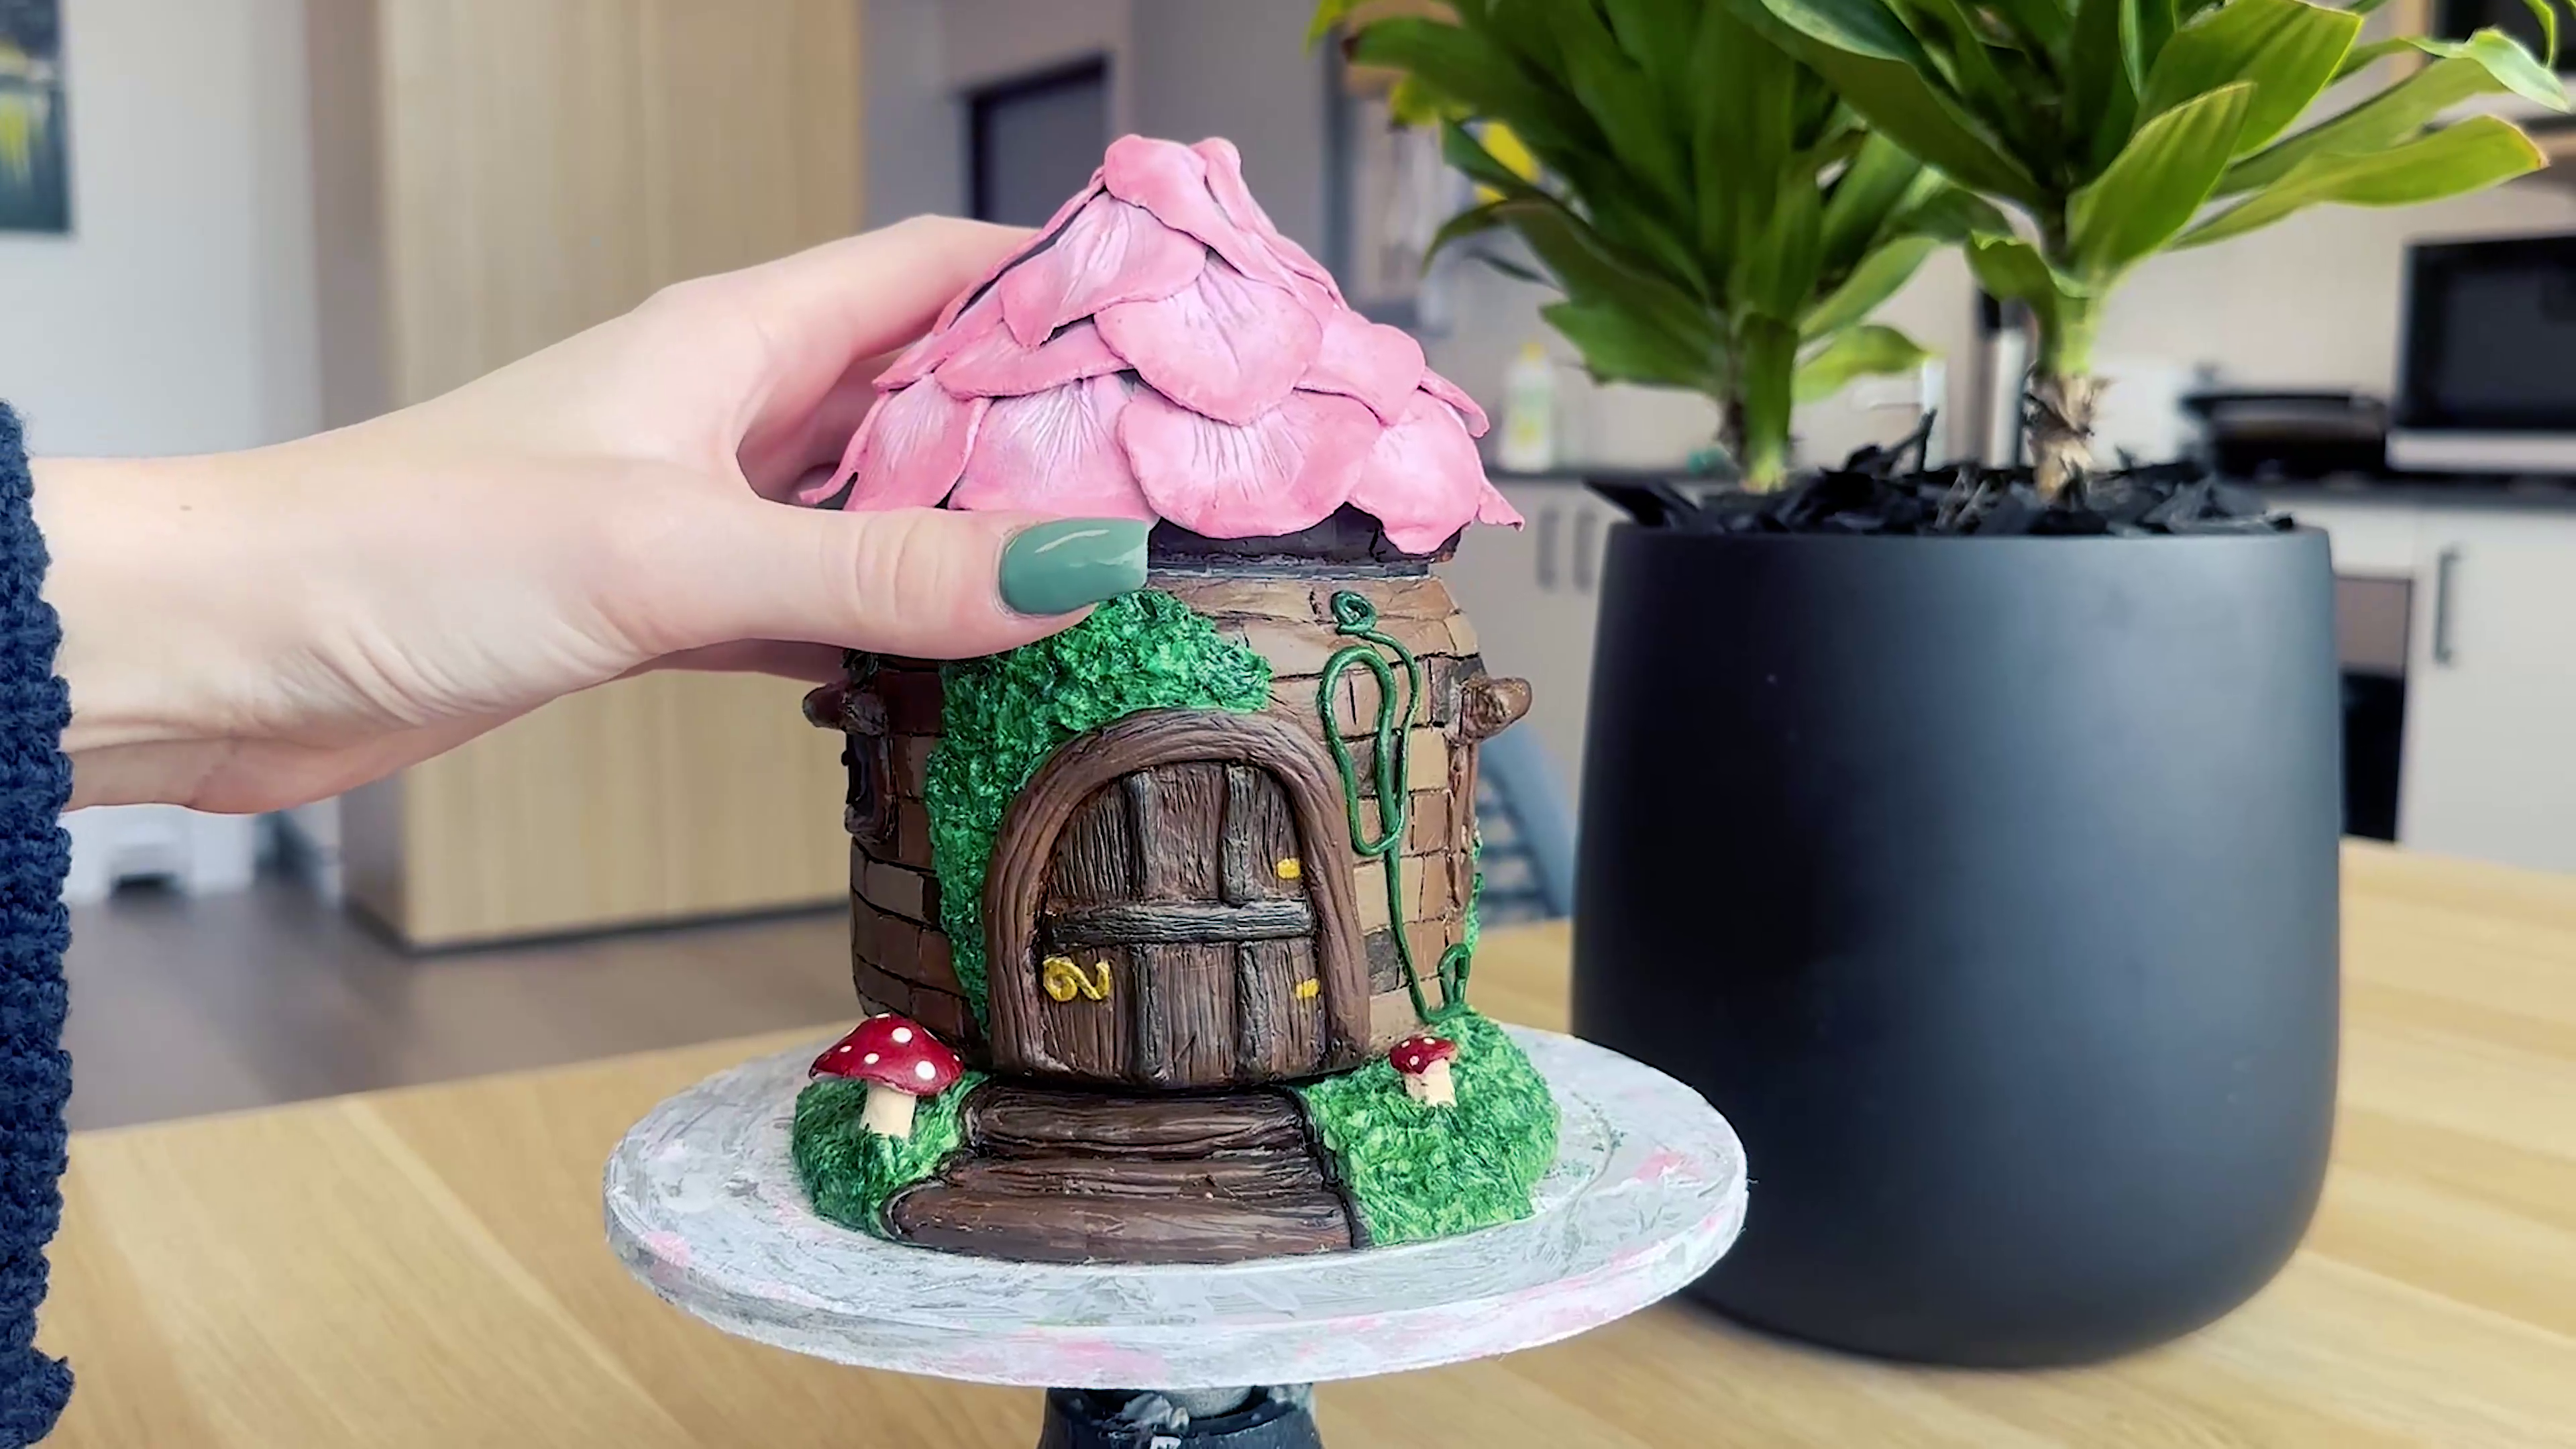
The next step is to create the base. Flatten out some clay outline the size and shape you want it. Then cut off the excess.
Add some texture where you want it. I used a toothed clay tool to create some grass and added some slabs for a staircase. I also thought it would be fun to add in some little mushroom friends.
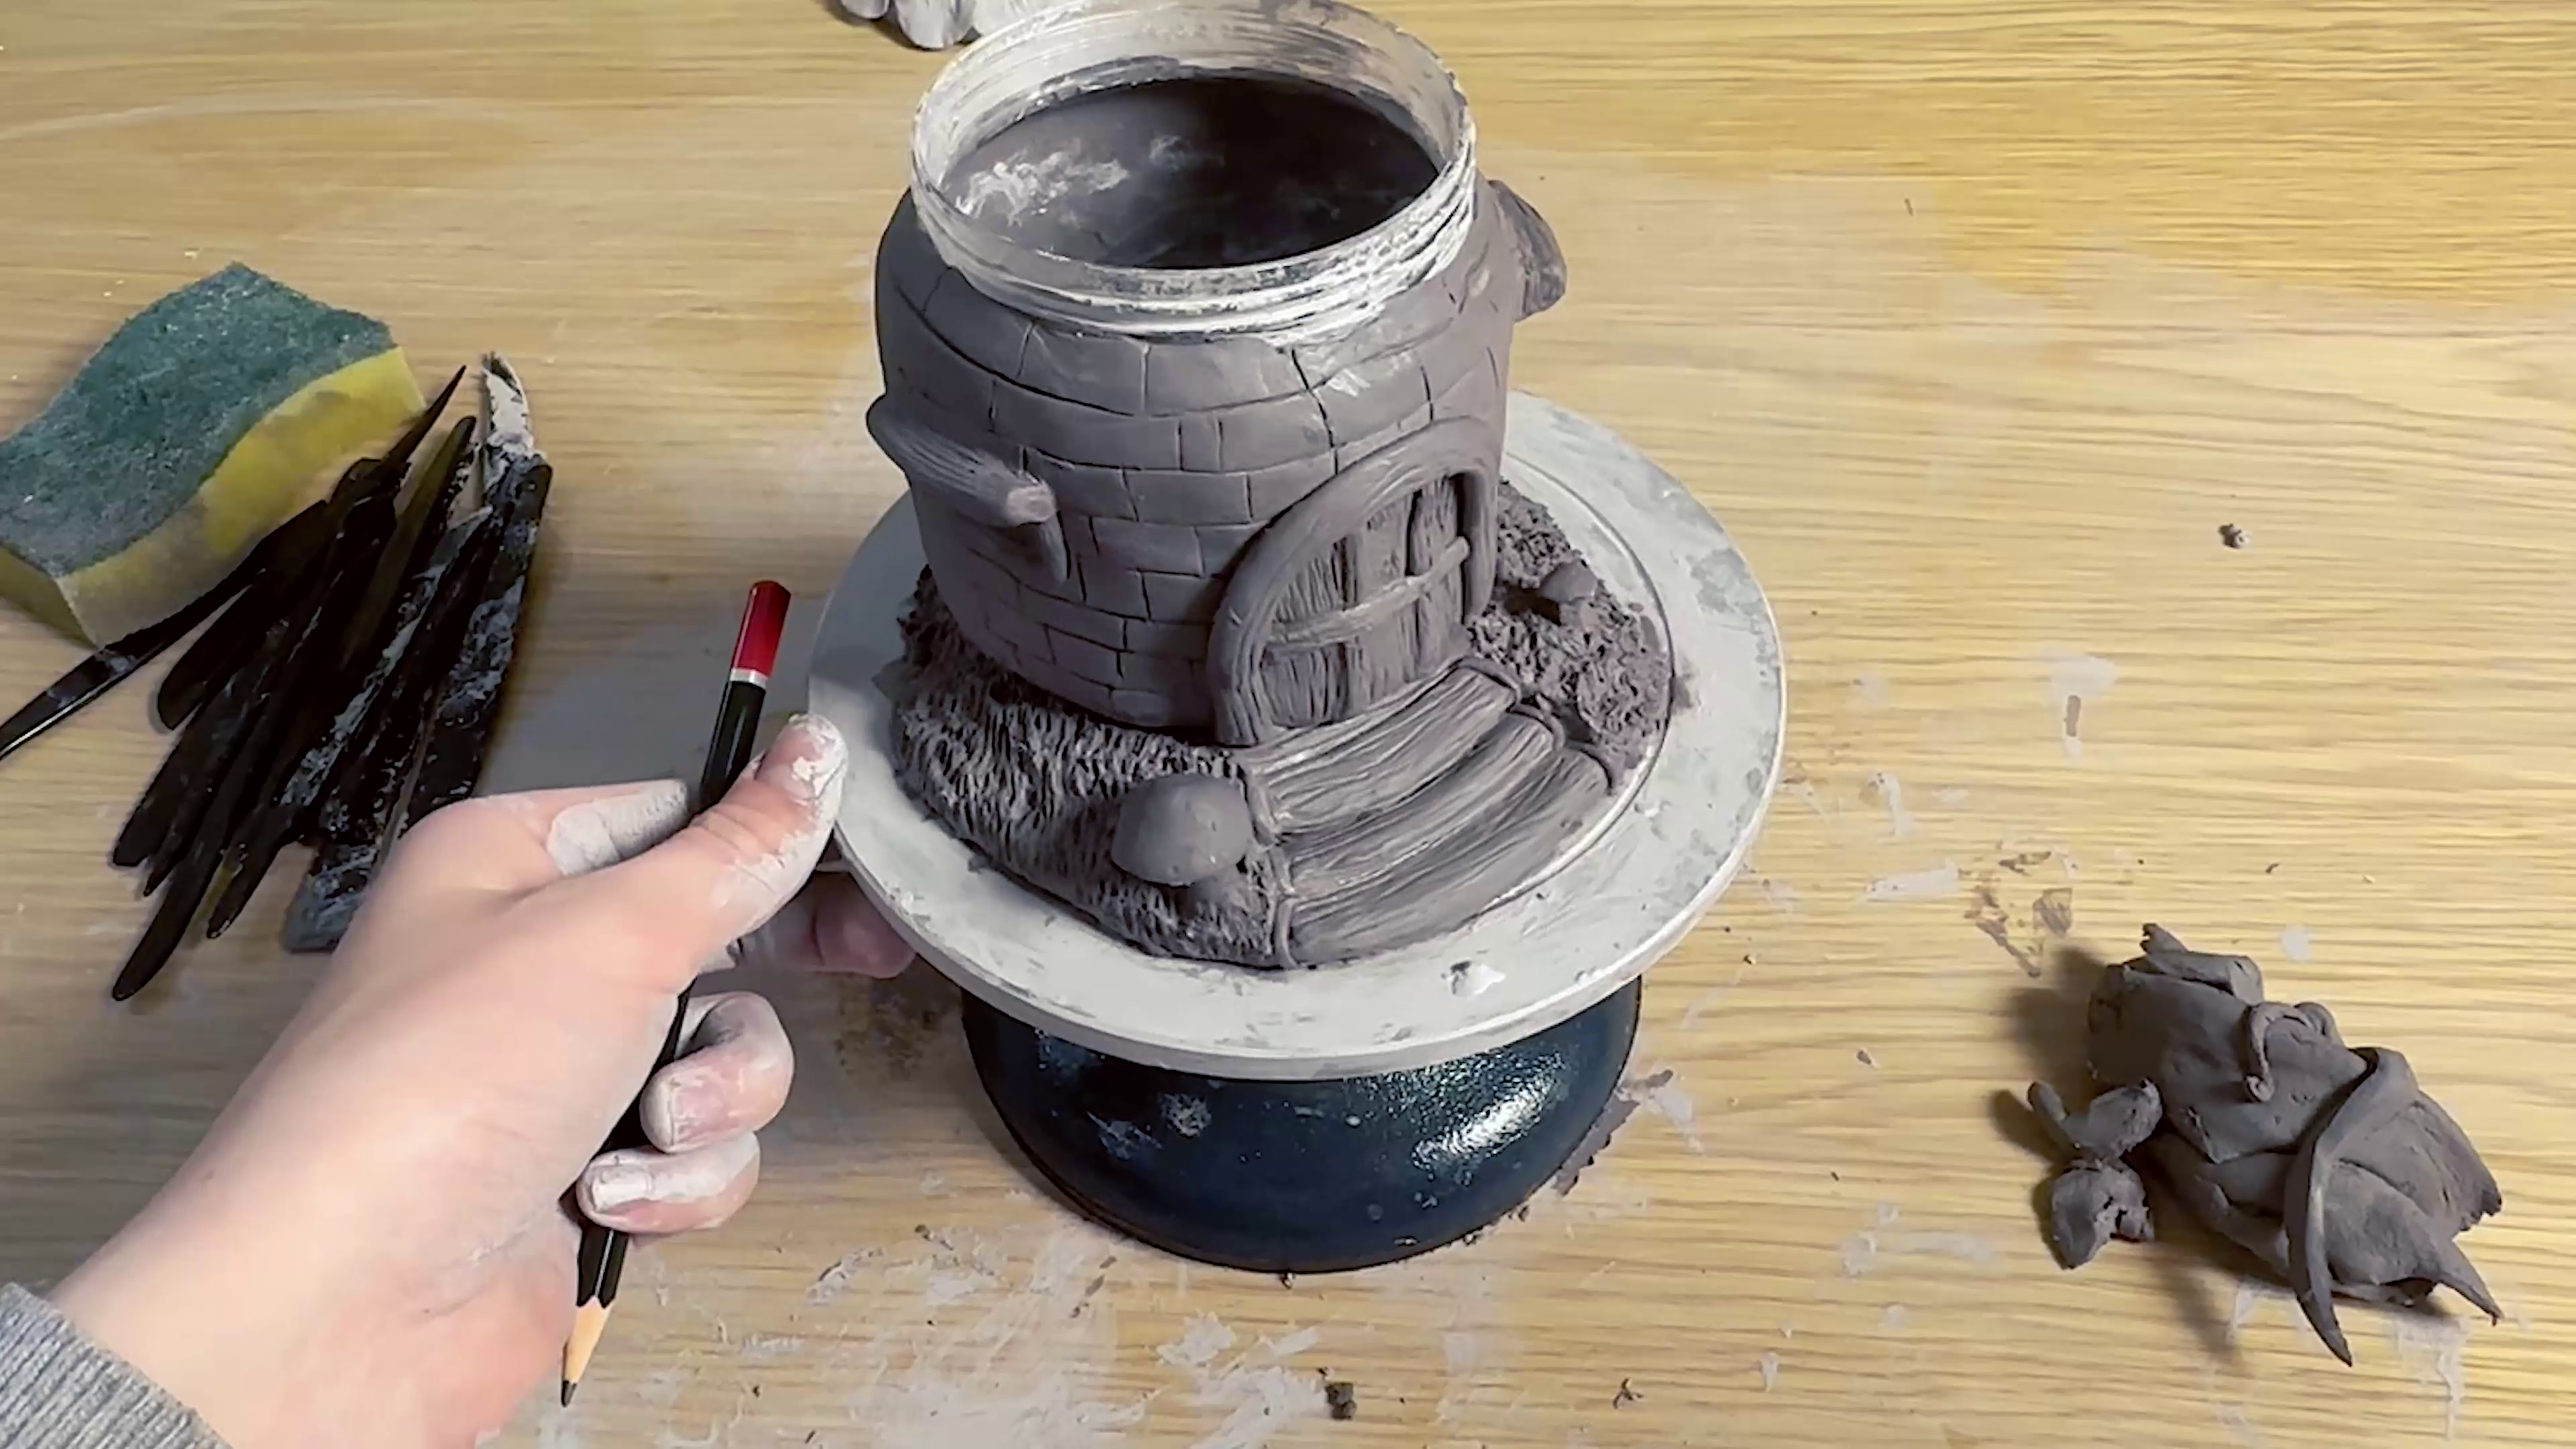
Now I’m just going in and adding some details to our house where I want. I added some moss, a door handle, and some spirally vines.
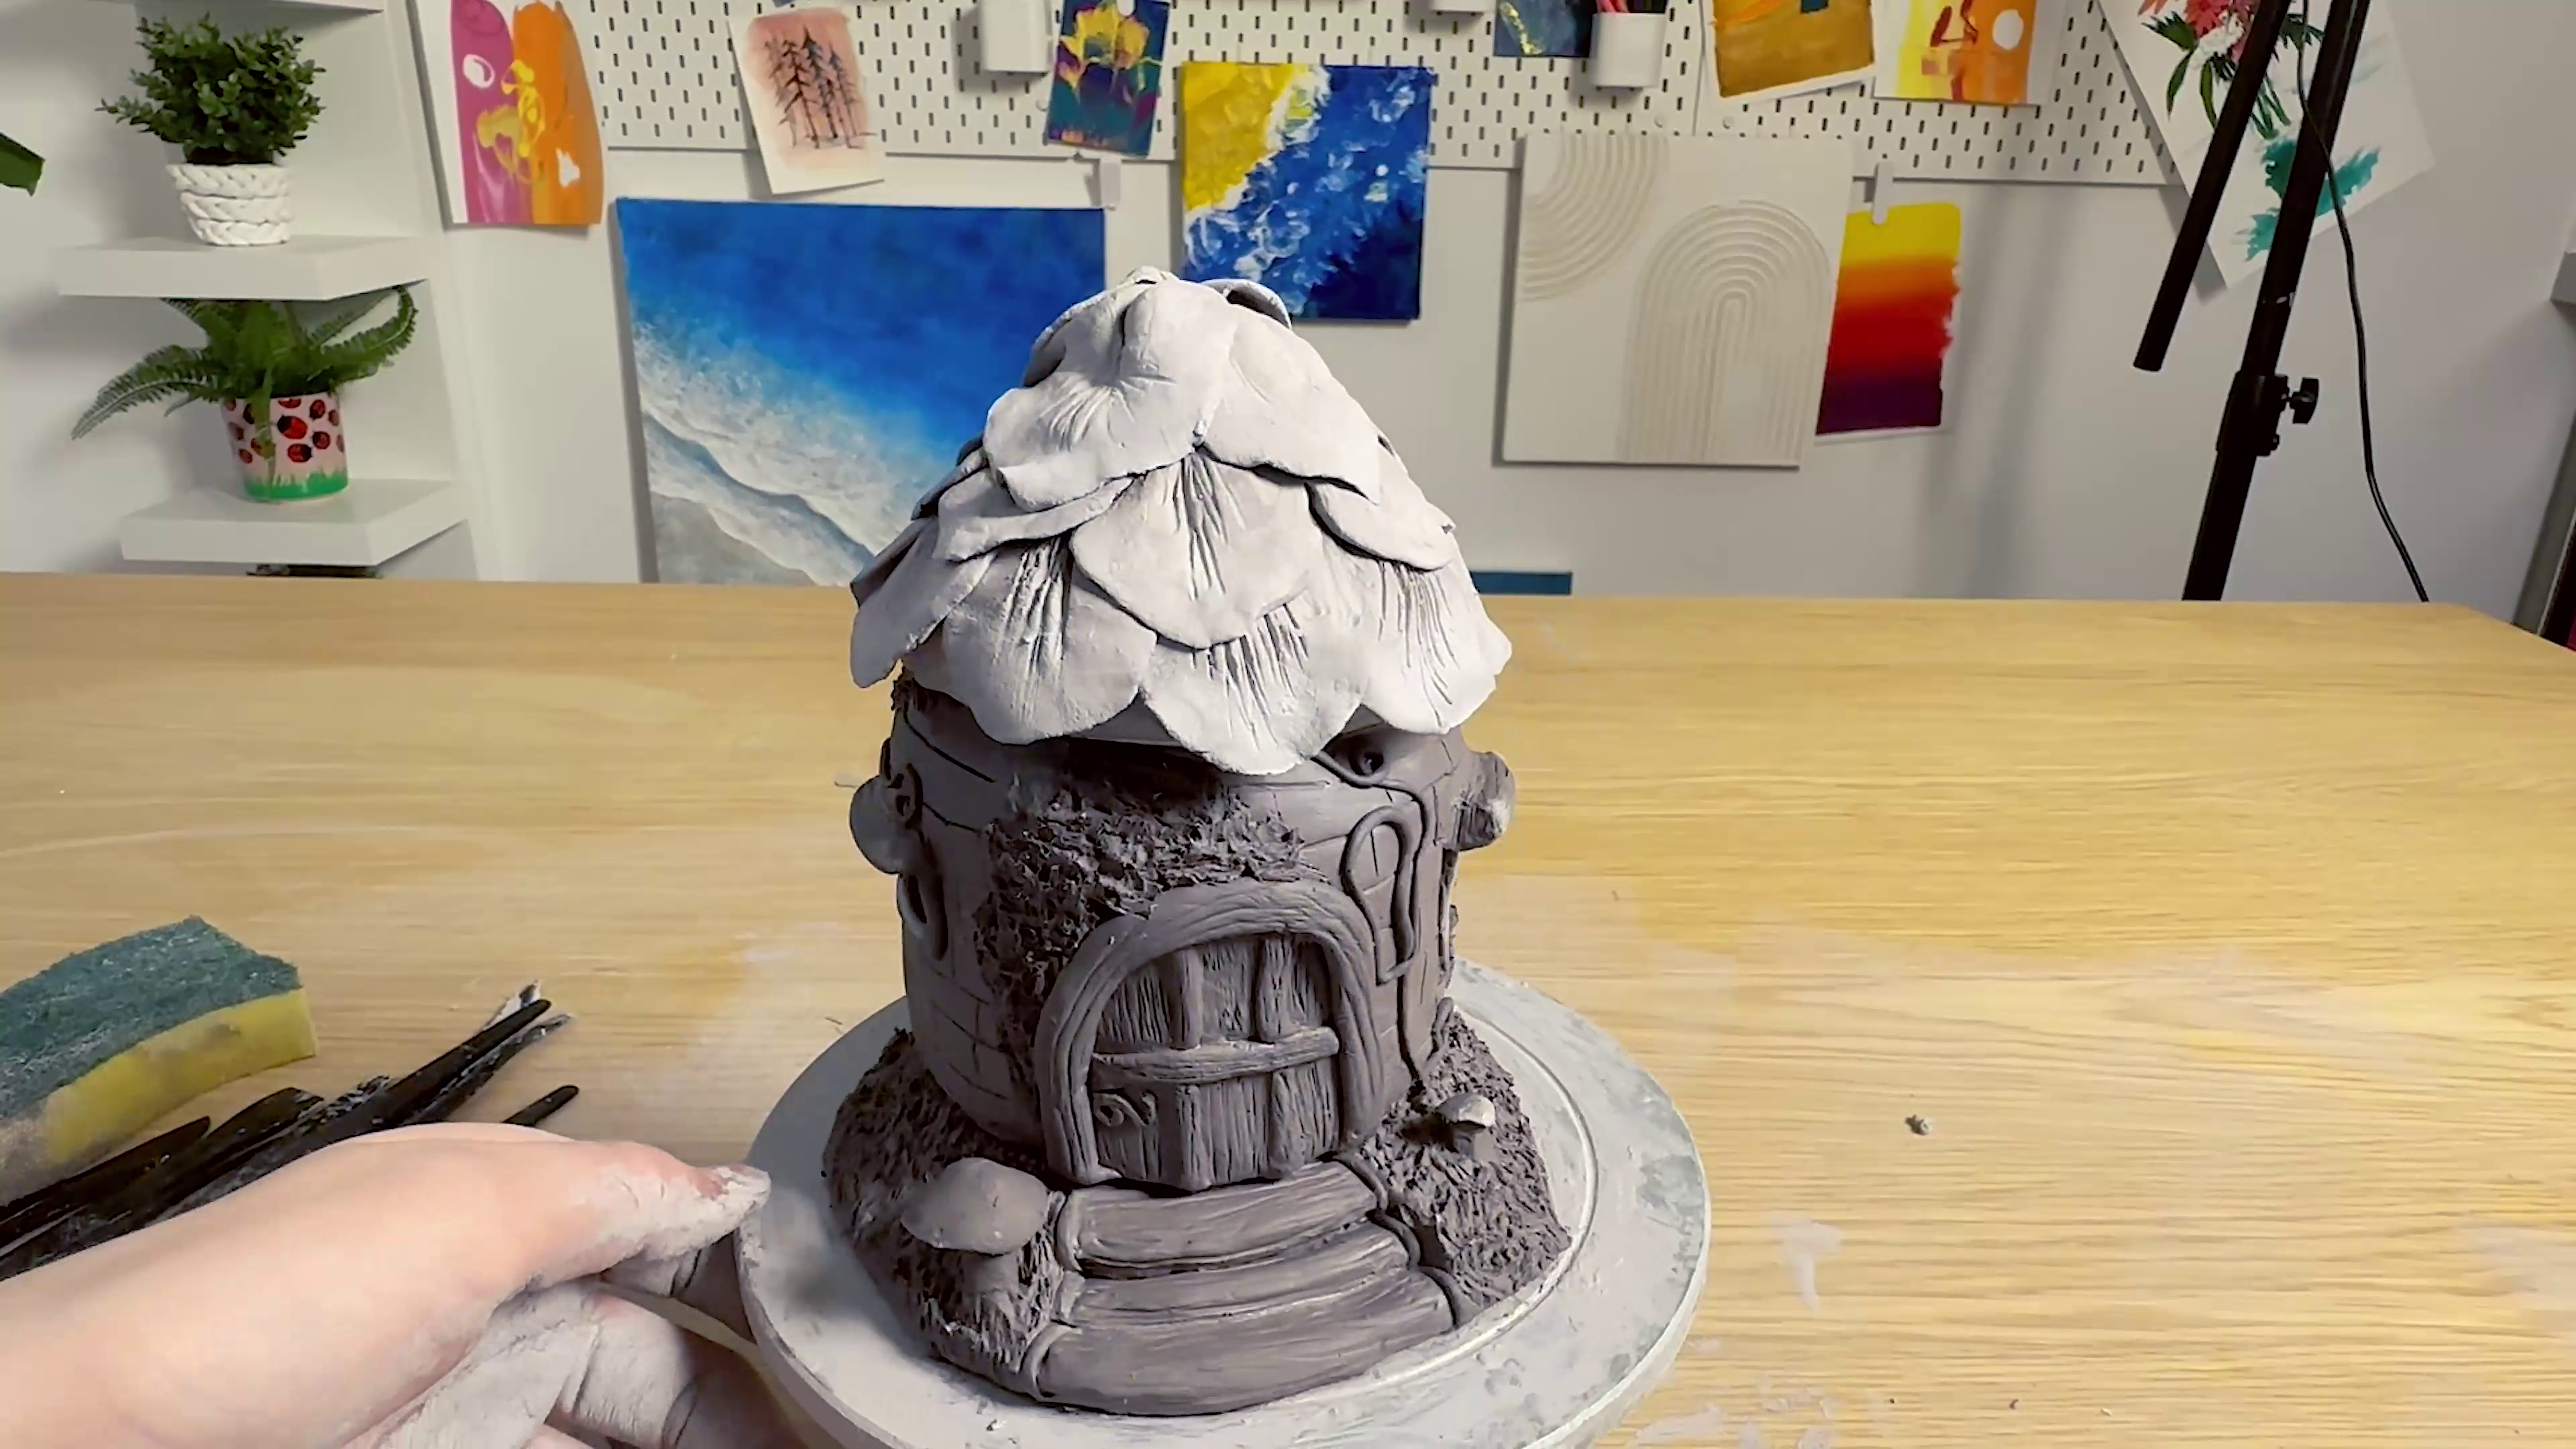
And your build is finish! It’s finally time to paint it. I decided to do a dark brown brick, some dark wood, gold door details, and vibrant greenery.
I matched the base to the house by keeping the staircase the same colour as the door and the grass the same colour as the moss.
The roof is where I encourage you to be as creative as possible! I went with pink petals, but if you want to do rainbow petals, do it, if you want to do green leafy petals, go for it.
Once you’re finished painting, let it dry, and you’re done! You’re welcome to use our clay varnish to add some shine like I did, but that is up to you.
- MMSP2001 Gloss Clay Varnish Signature 120ml (4.06 US fl.oz): https://www.montmarte.com/products/gloss-clay-varnish-signature-120ml-4-06-us-fl-oz
- MMSP0005 Air Hardening Modelling Clay Premium 500g (1.1lb) - White: https://www.montmarte.com/products/air-hardening-modelling-clay-premium-white-500gms
- MMSP0033 Clay Tool Set Signature 14pc: https://www.montmarte.com/products/clay-tool-set-signature-14pc
- MSCP4836 Acrylic Colour Pastel Paint Set Signature 48pc x 36ml (1.2 US fl.oz): https://www.montmarte.com/products/acrylic-colour-pastel-paint-set-signature-48pc-x-36ml-1-2-us-fl-oz
- BMHS0008 Acrylic Brushes Signature 6pc: https://www.montmarte.com/products/acrylic-brushes-signature-6pc-1
- MACR0004 Hobby Knife Set Signature 13pc: https://www.montmarte.com/products/hobby-knife-set-signature-13pc
- Empty tub
- Scissors
- Something to use as a paint palette
Find what was used
You may also like

12 DIY air dry clay projects