


3 Supercell pours to try
The first pour we’ll be doing is the humble old flip cup. To do this we lay each layer up slowly into the cup, in this case we are using Light Aqua, Turquoise, Teal and Gold. You can already see the cells forming in the cup already. Multiple layers tend to yield better results.
Gold pigment has the highest density and as such will sink to the bottom so it’s a good idea to use more of this when laying up the cup.
Another thing to bear in mind with all pours is that you should pour in less of the stronger the colours.
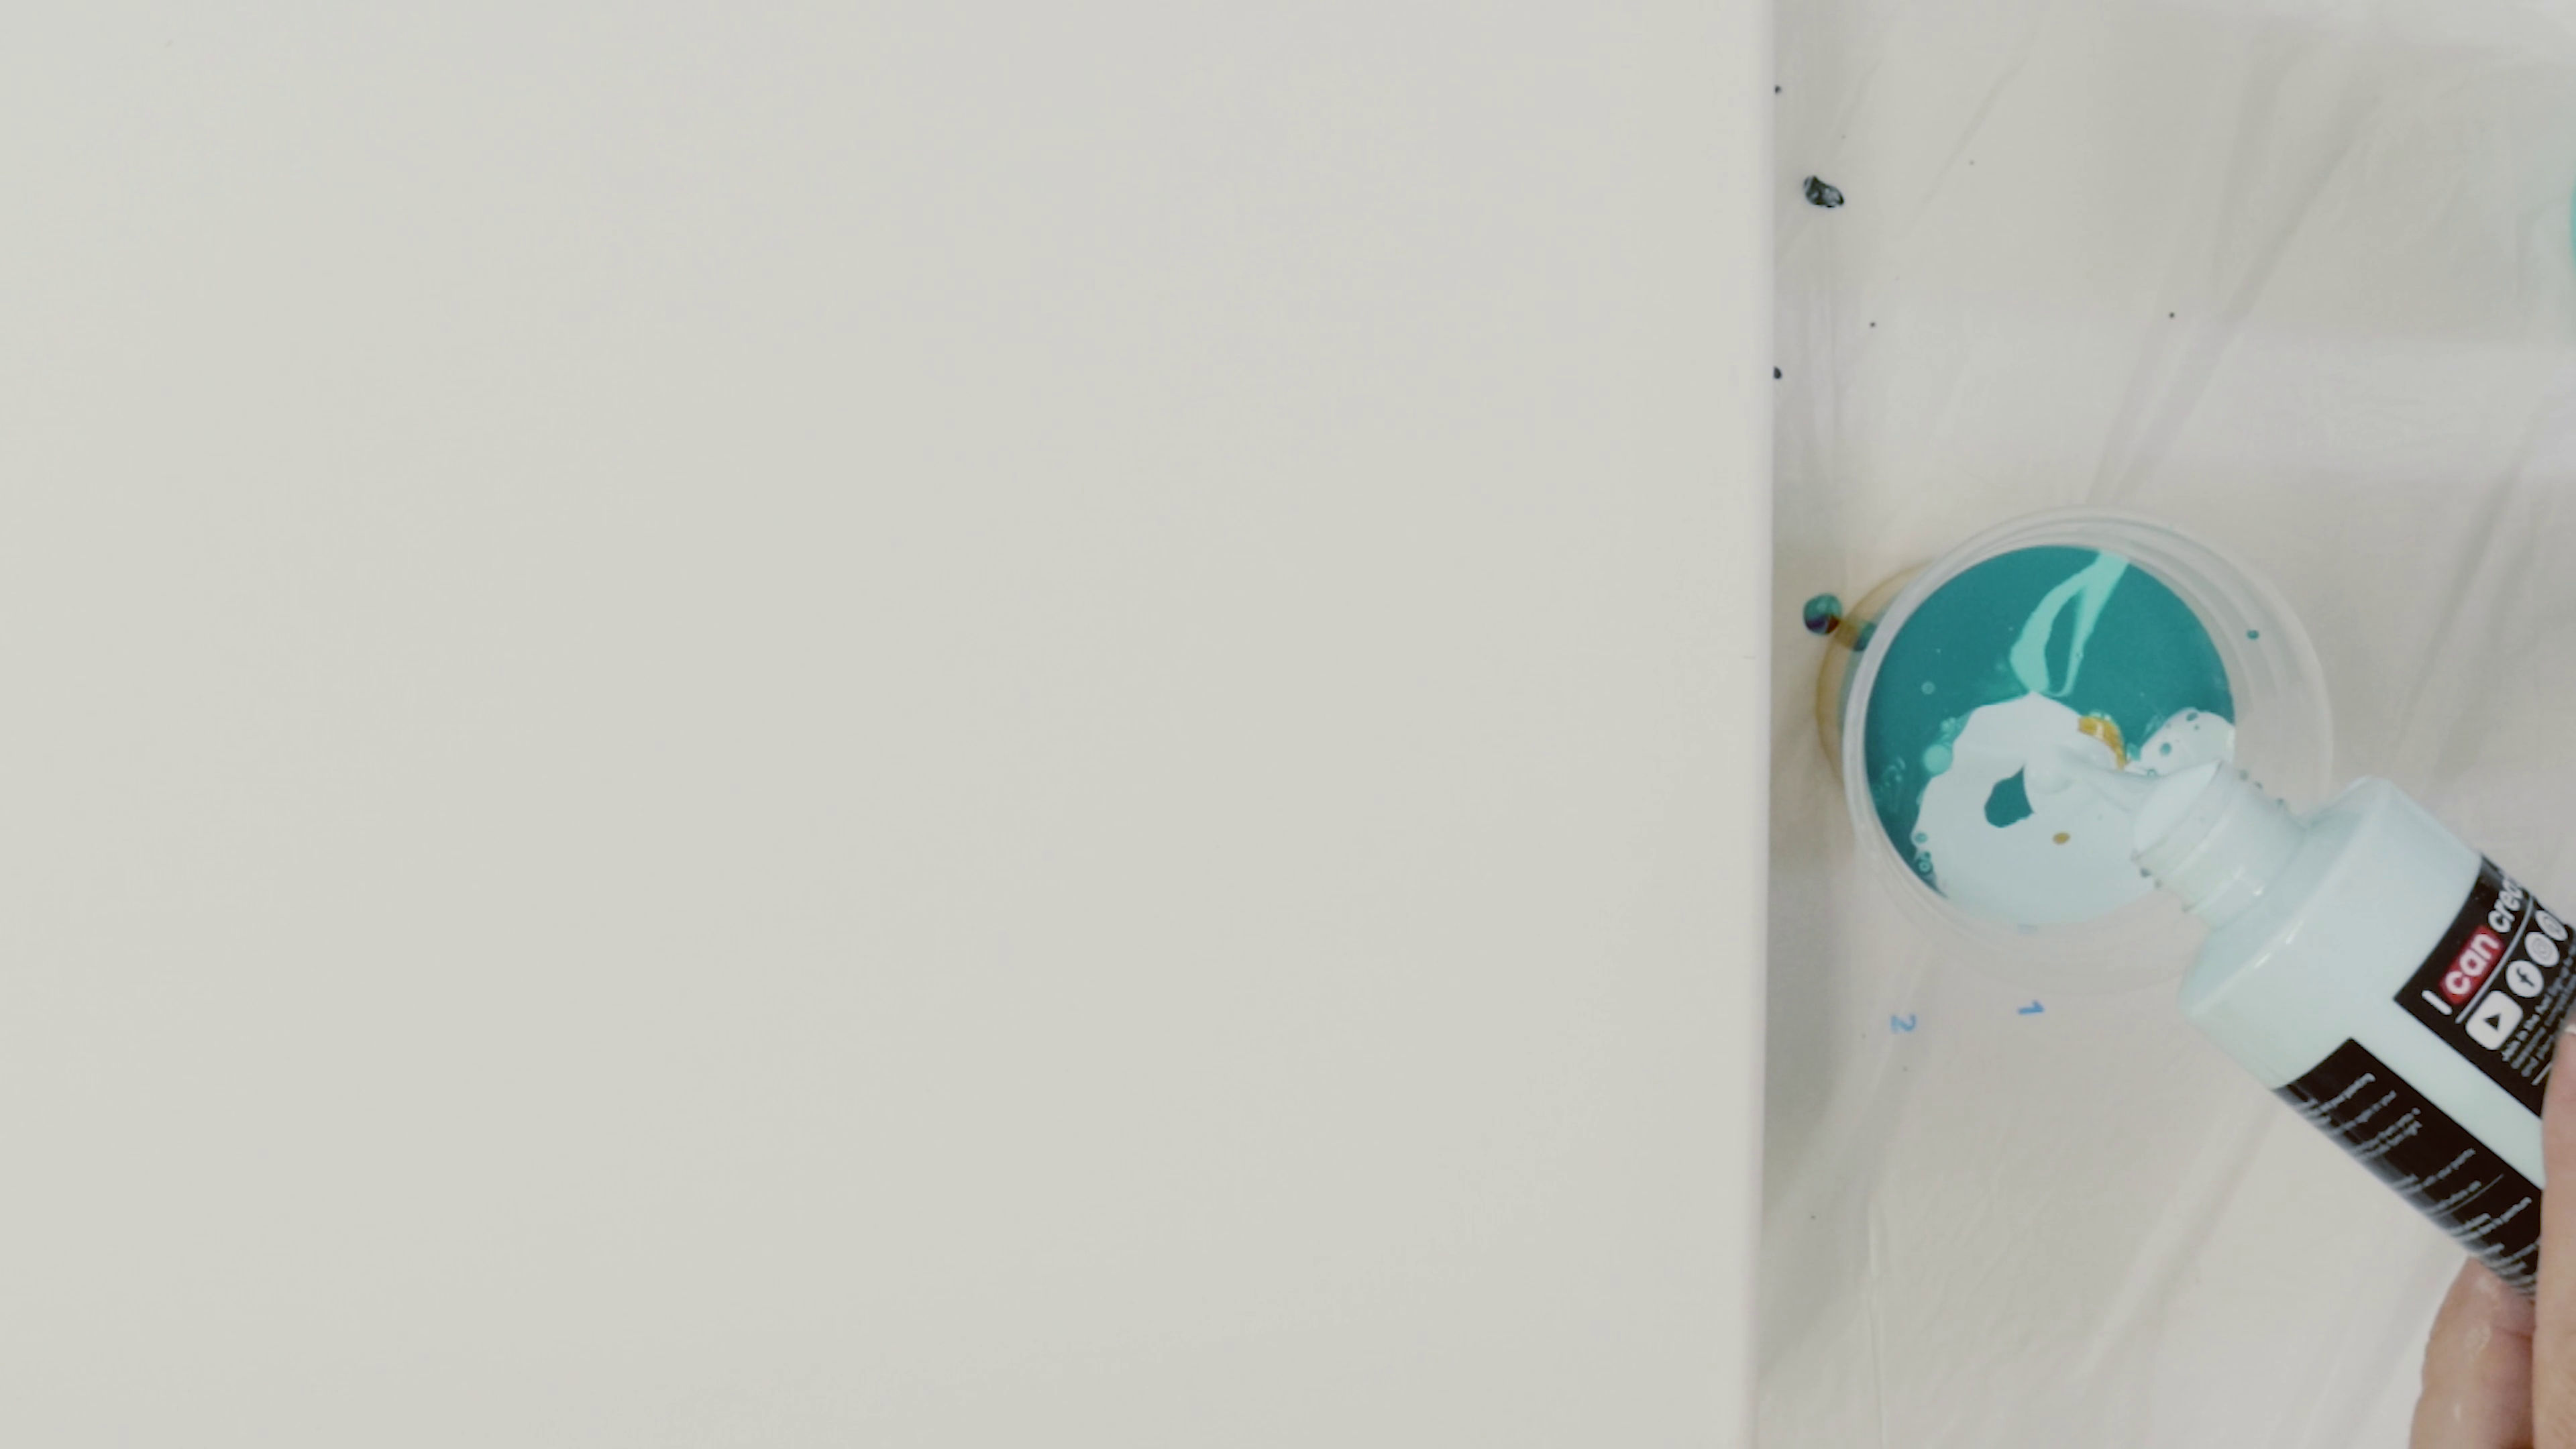
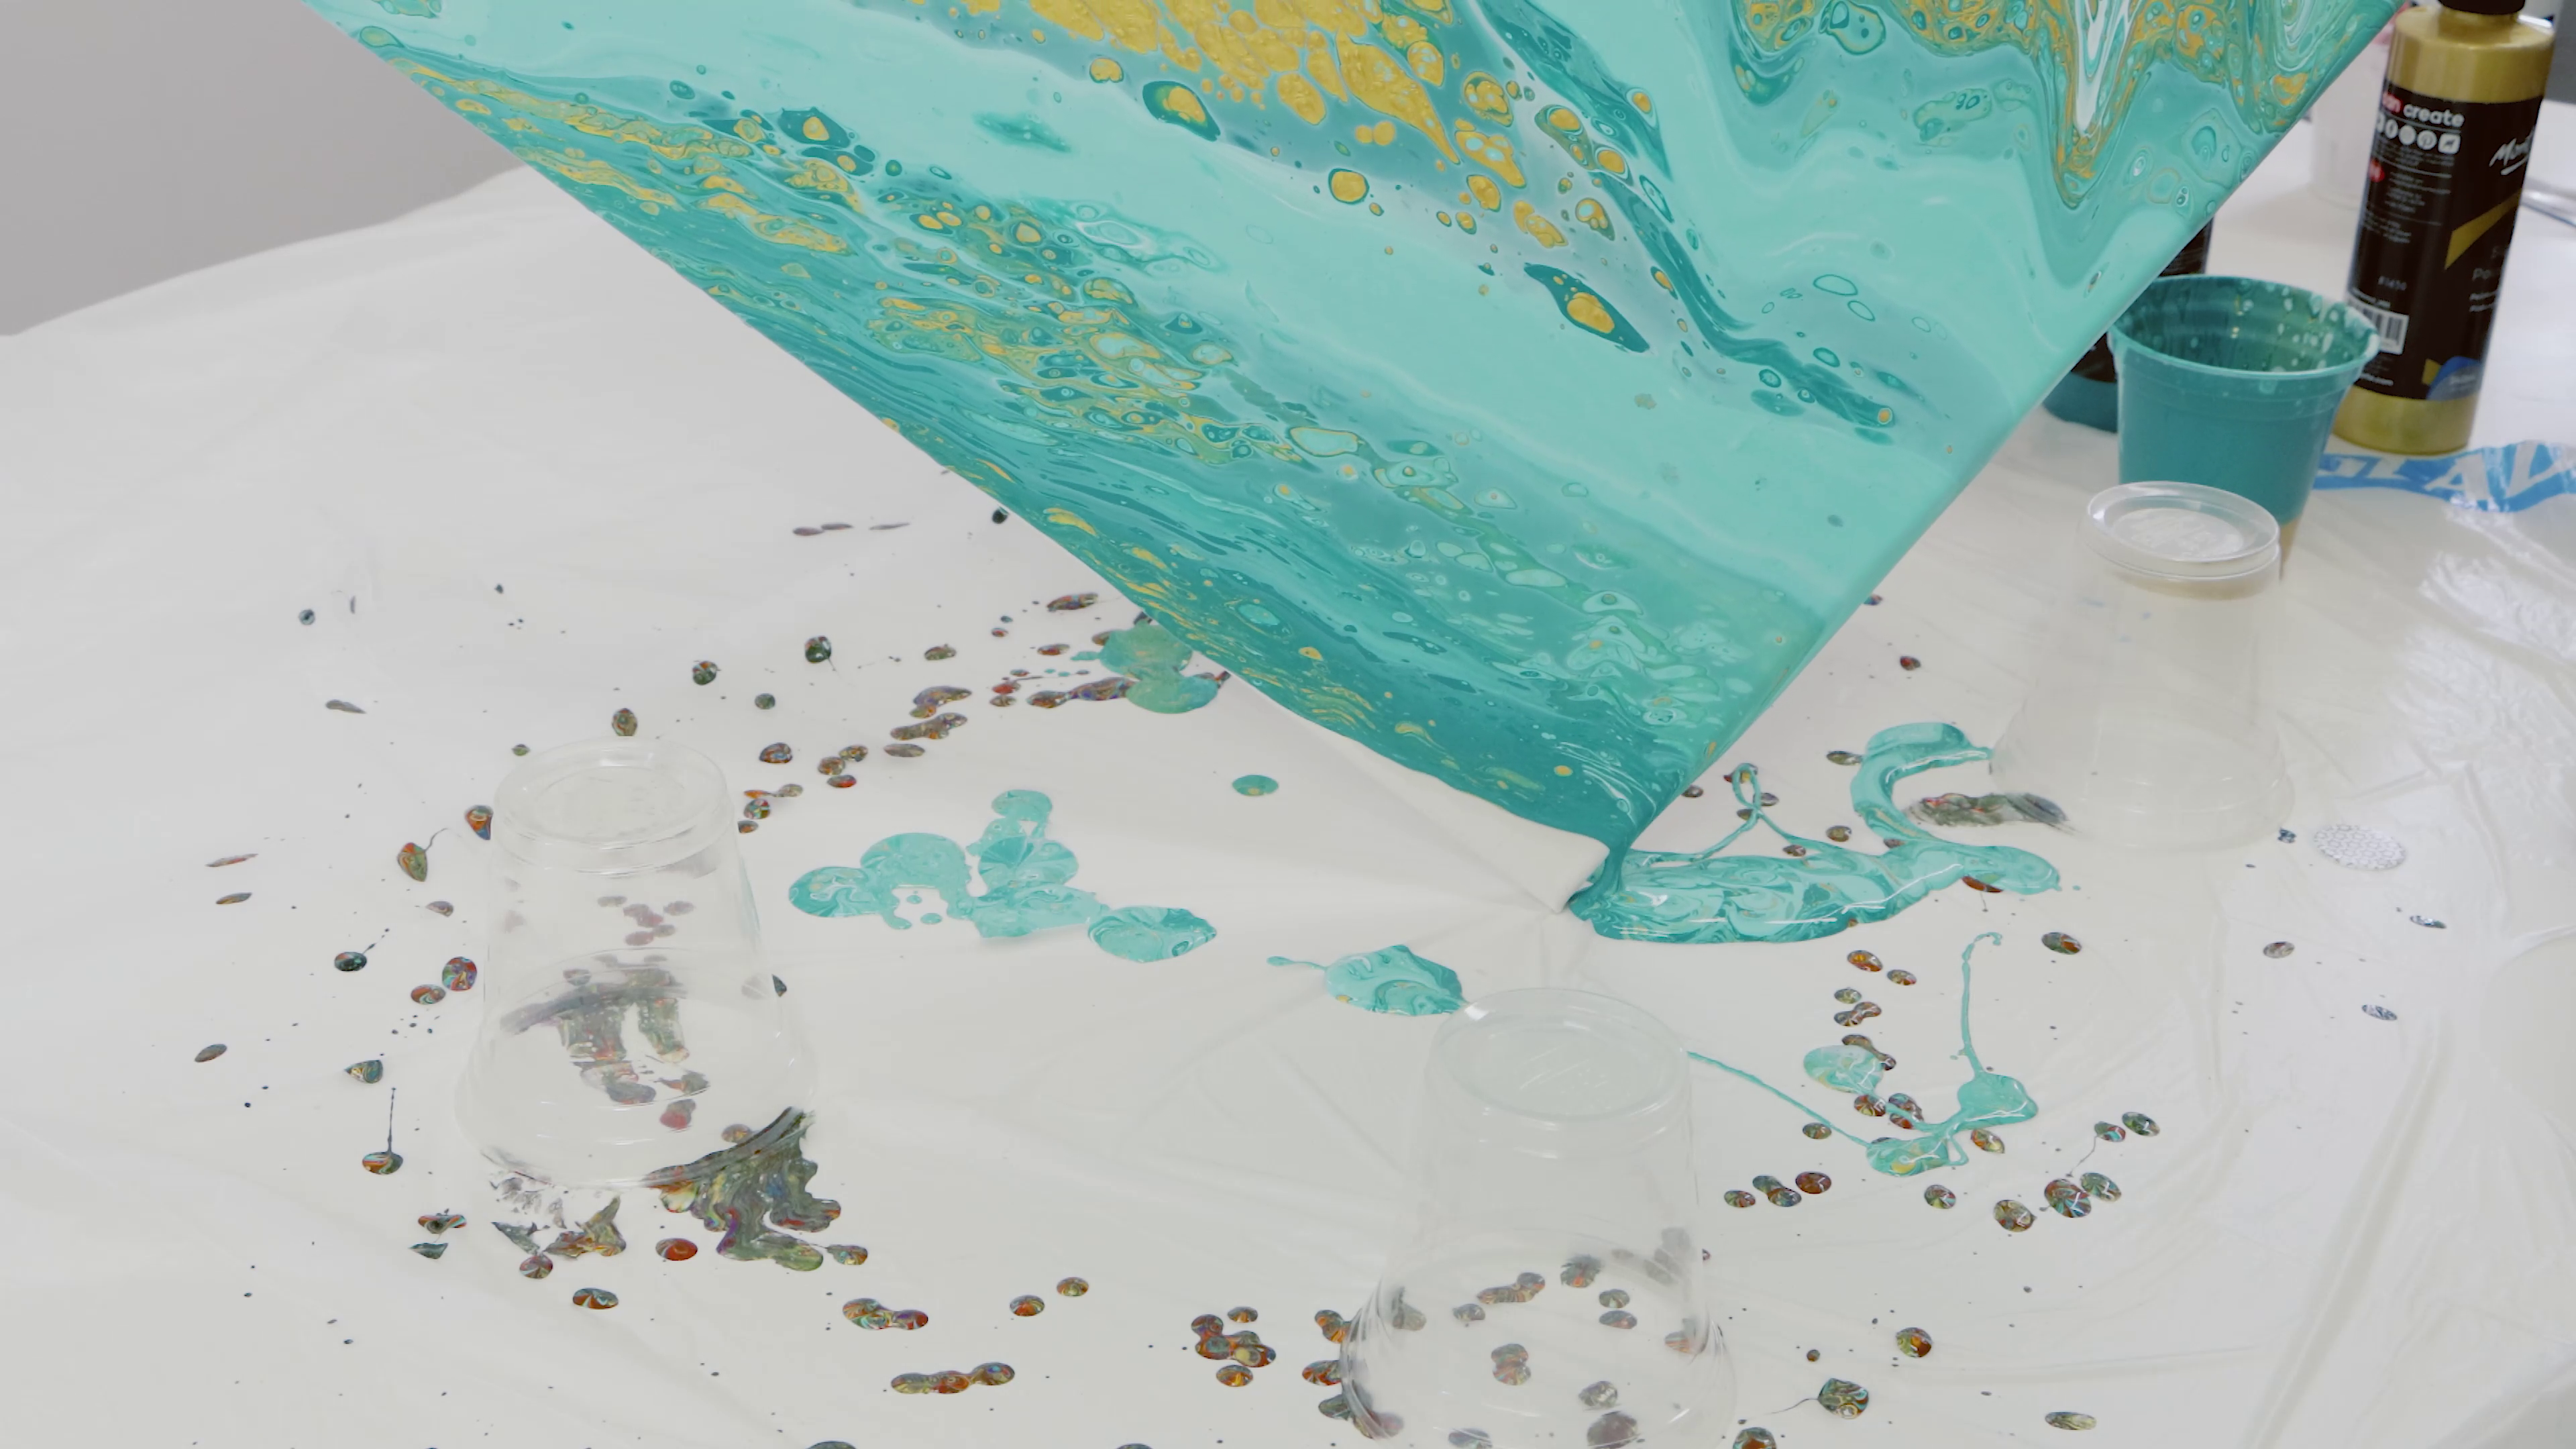
Once the cup has been layered up flip the cup and gently tilt the canvas from side to side.
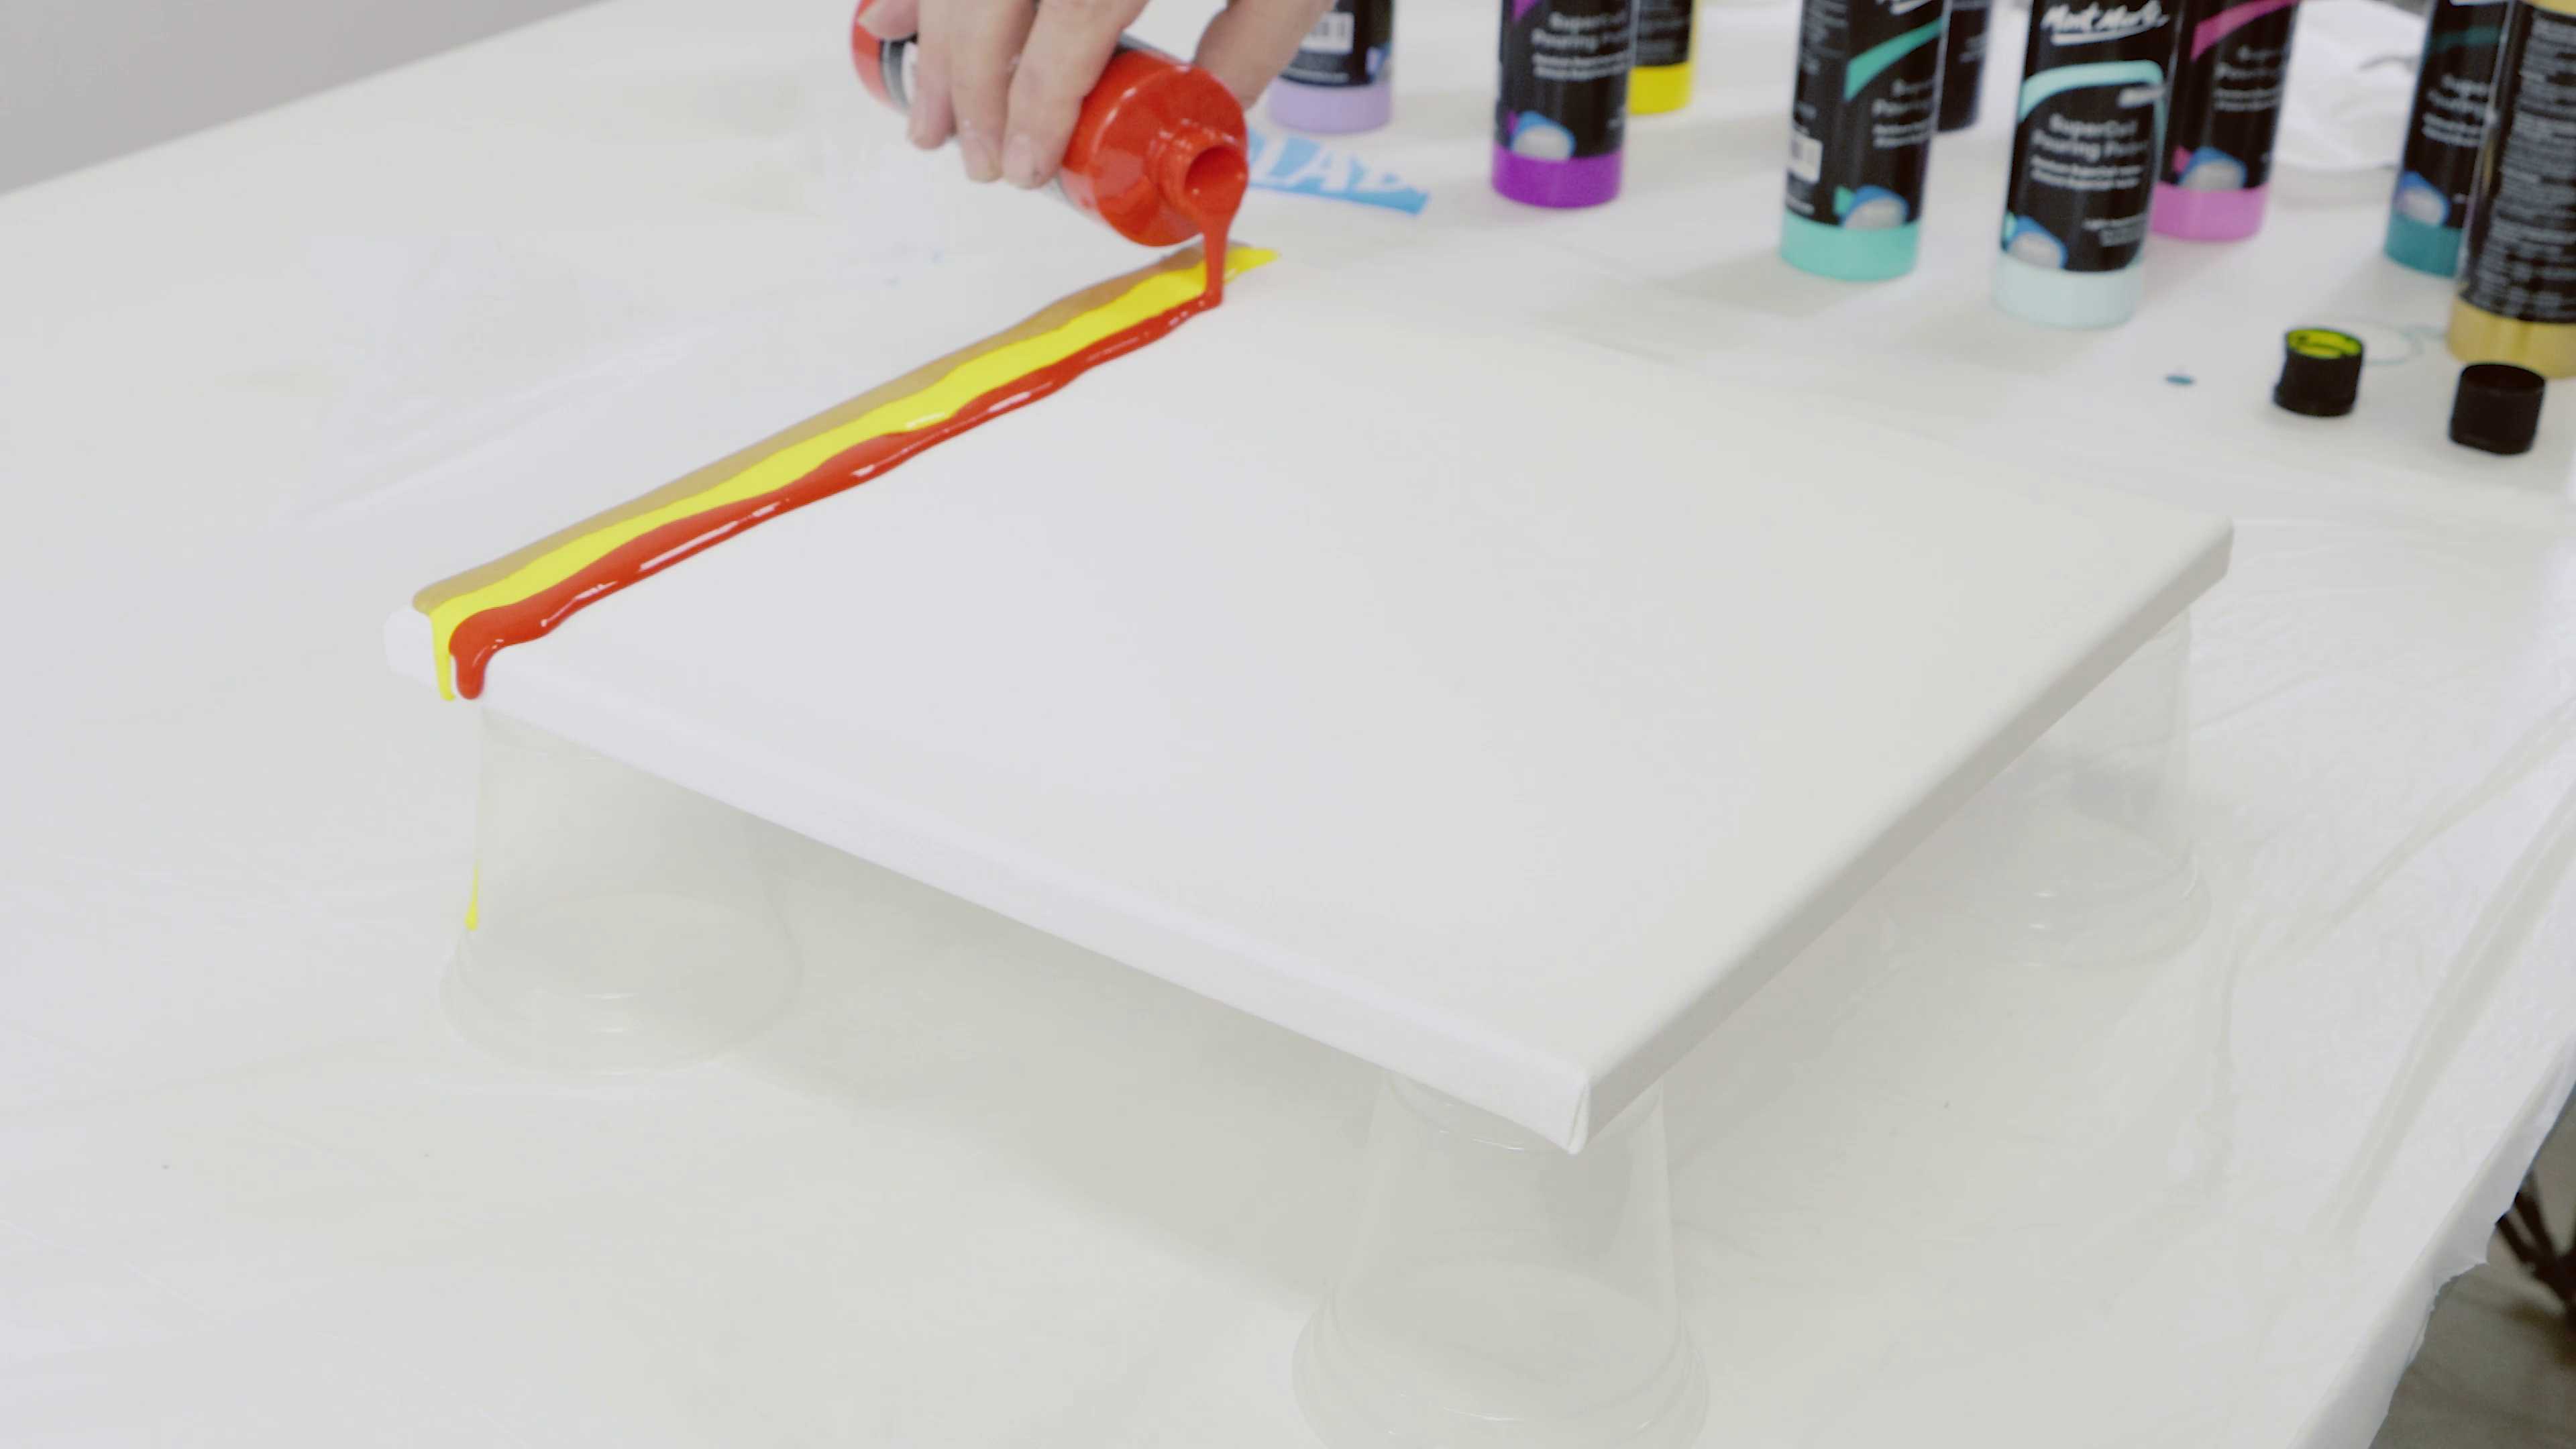
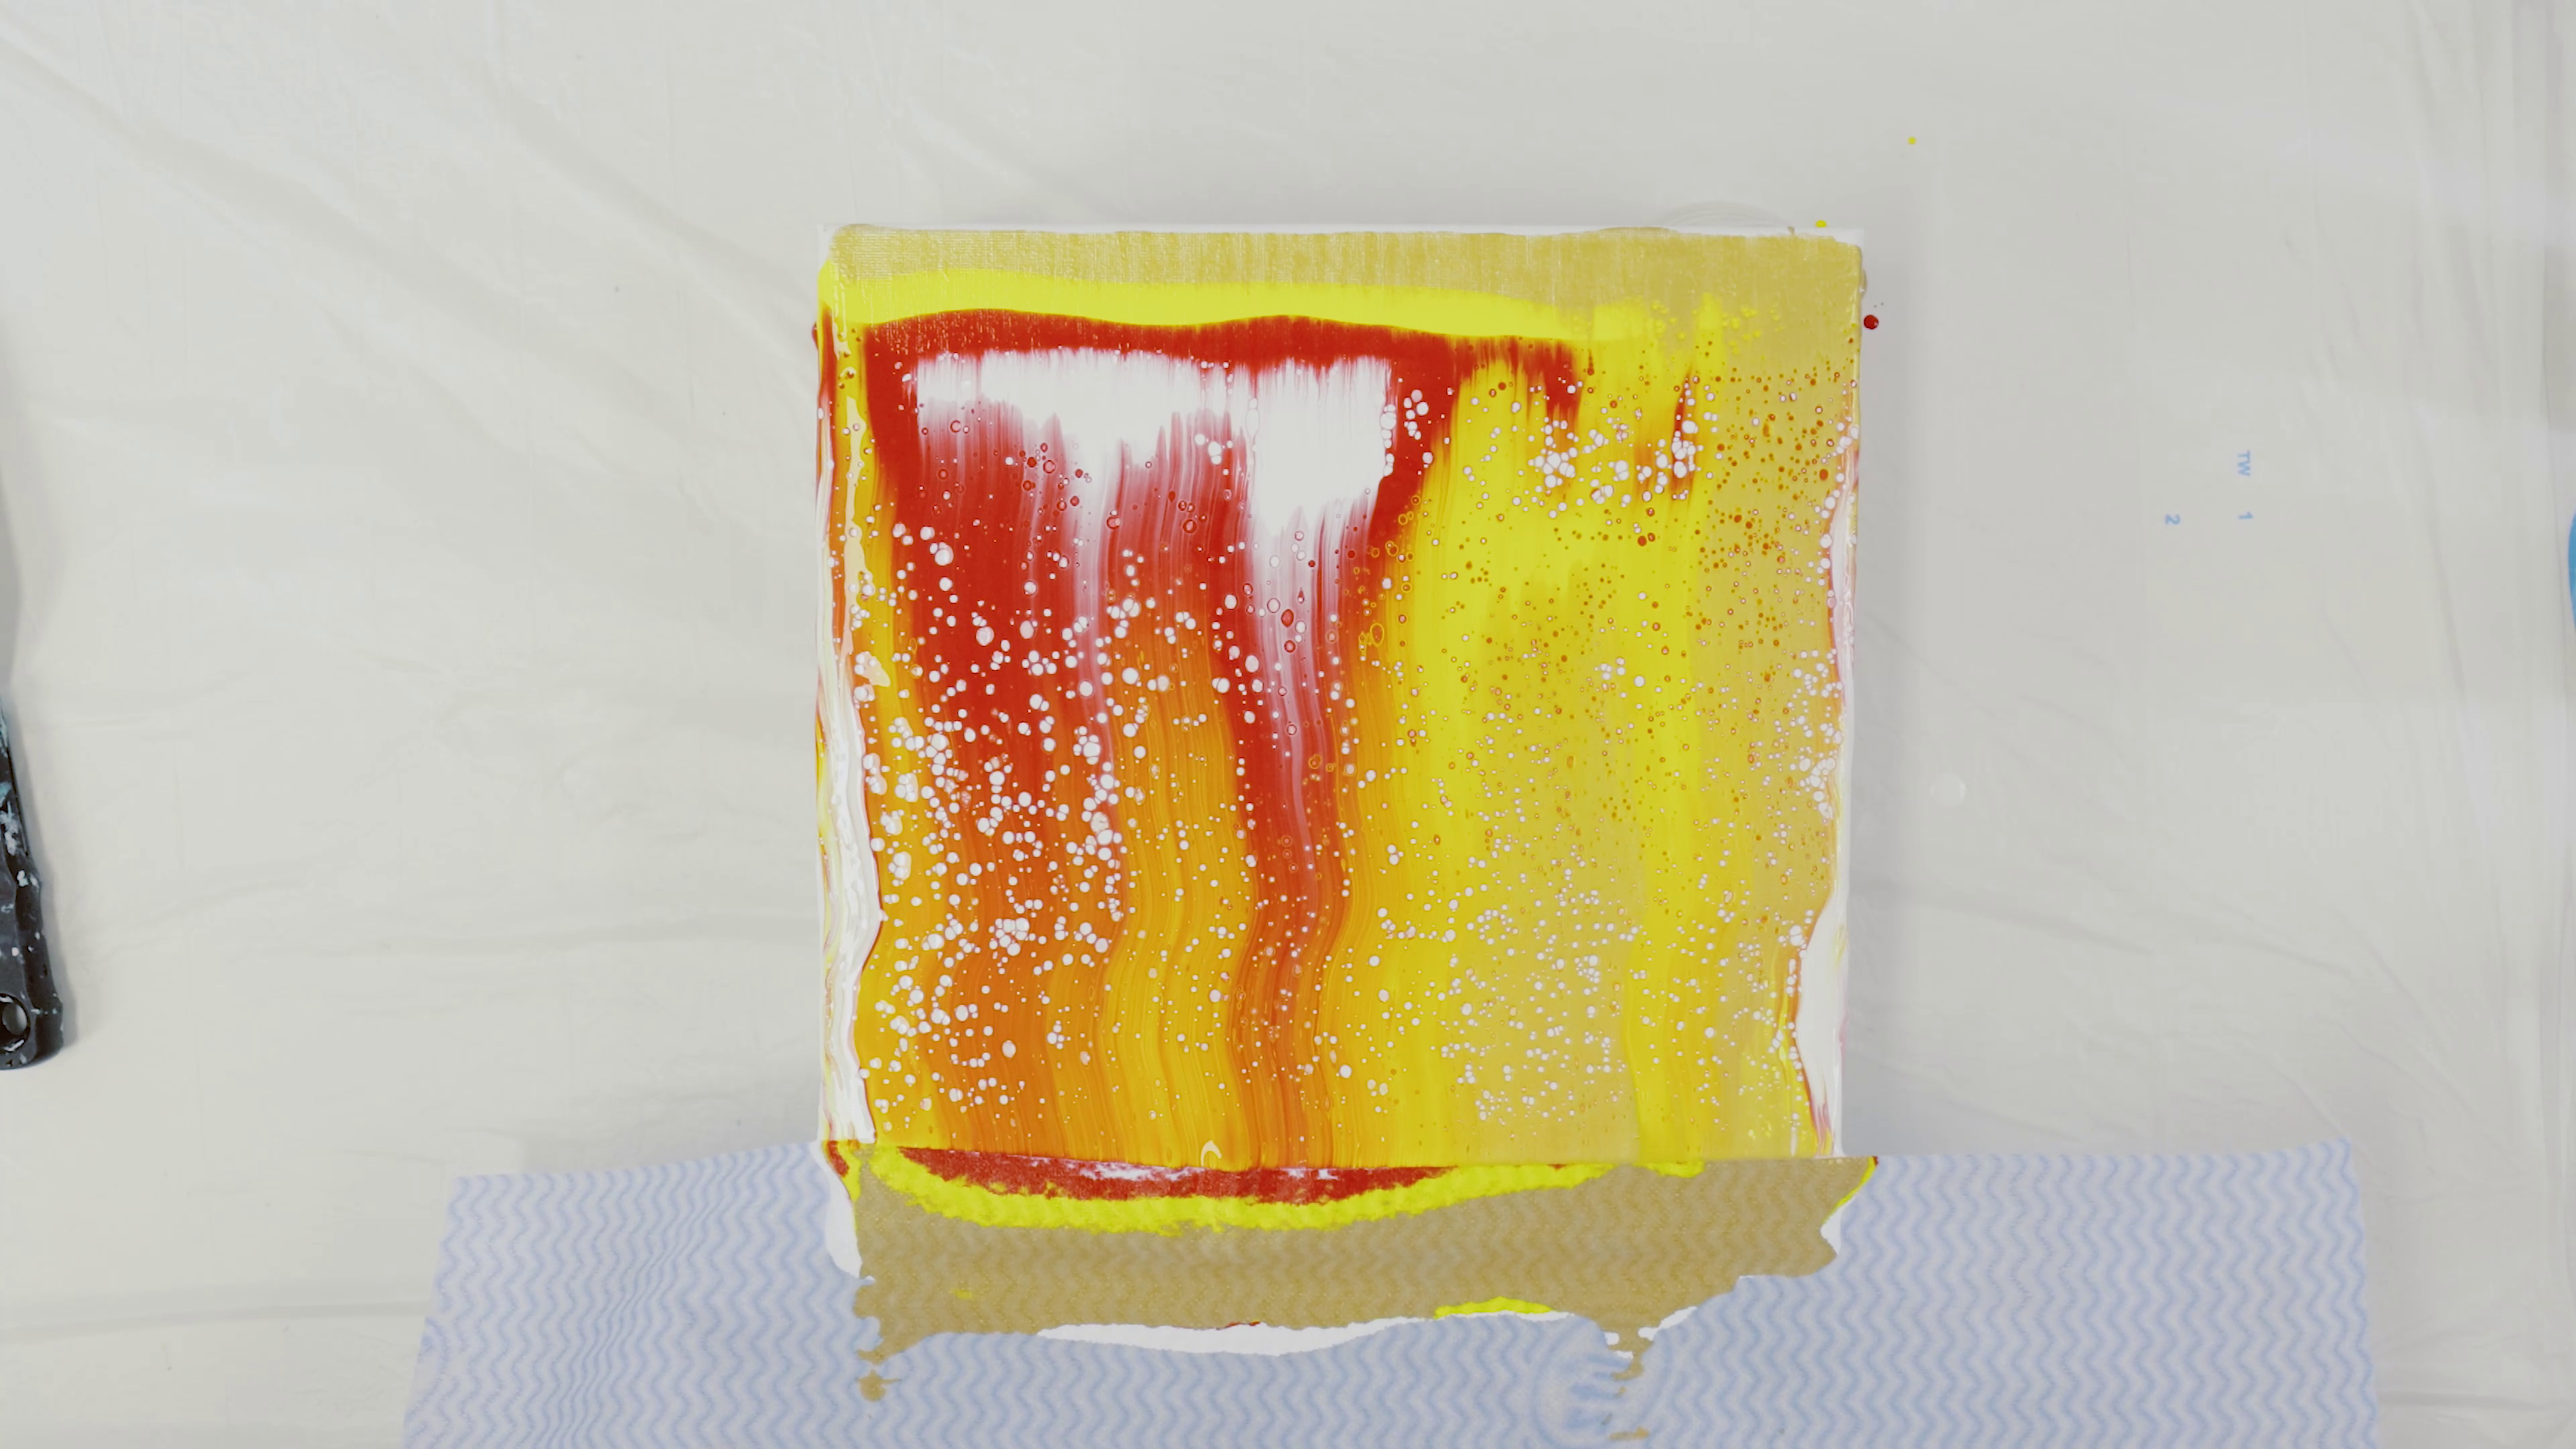
This next pour is an edge pour. We begin by laying a bead of gold across the edge of the canvas. Next Yellow is laid down followed by Cadmium Red.
Titanium White is then laid up to the other colours and evenly dispersed across the canvas with a large palette knife. If you don’t have a large palette knife you can use a sheet of card. The colours are then dragged over the white coat. You can do this a couple of times or until you are happy with the coverage.
The third pour is called a travel pour. Essentially the canvas is divided by 2 contrasting colours, in this case Black and White.
It is not shown in the clip but we cut the bottom out of a water bottle and also a hole in the cap, placed it onto the canvas and it was then filled with Cadmium Red, Light Purple and Pink . The bottle is then slowly pulled in between the colours.
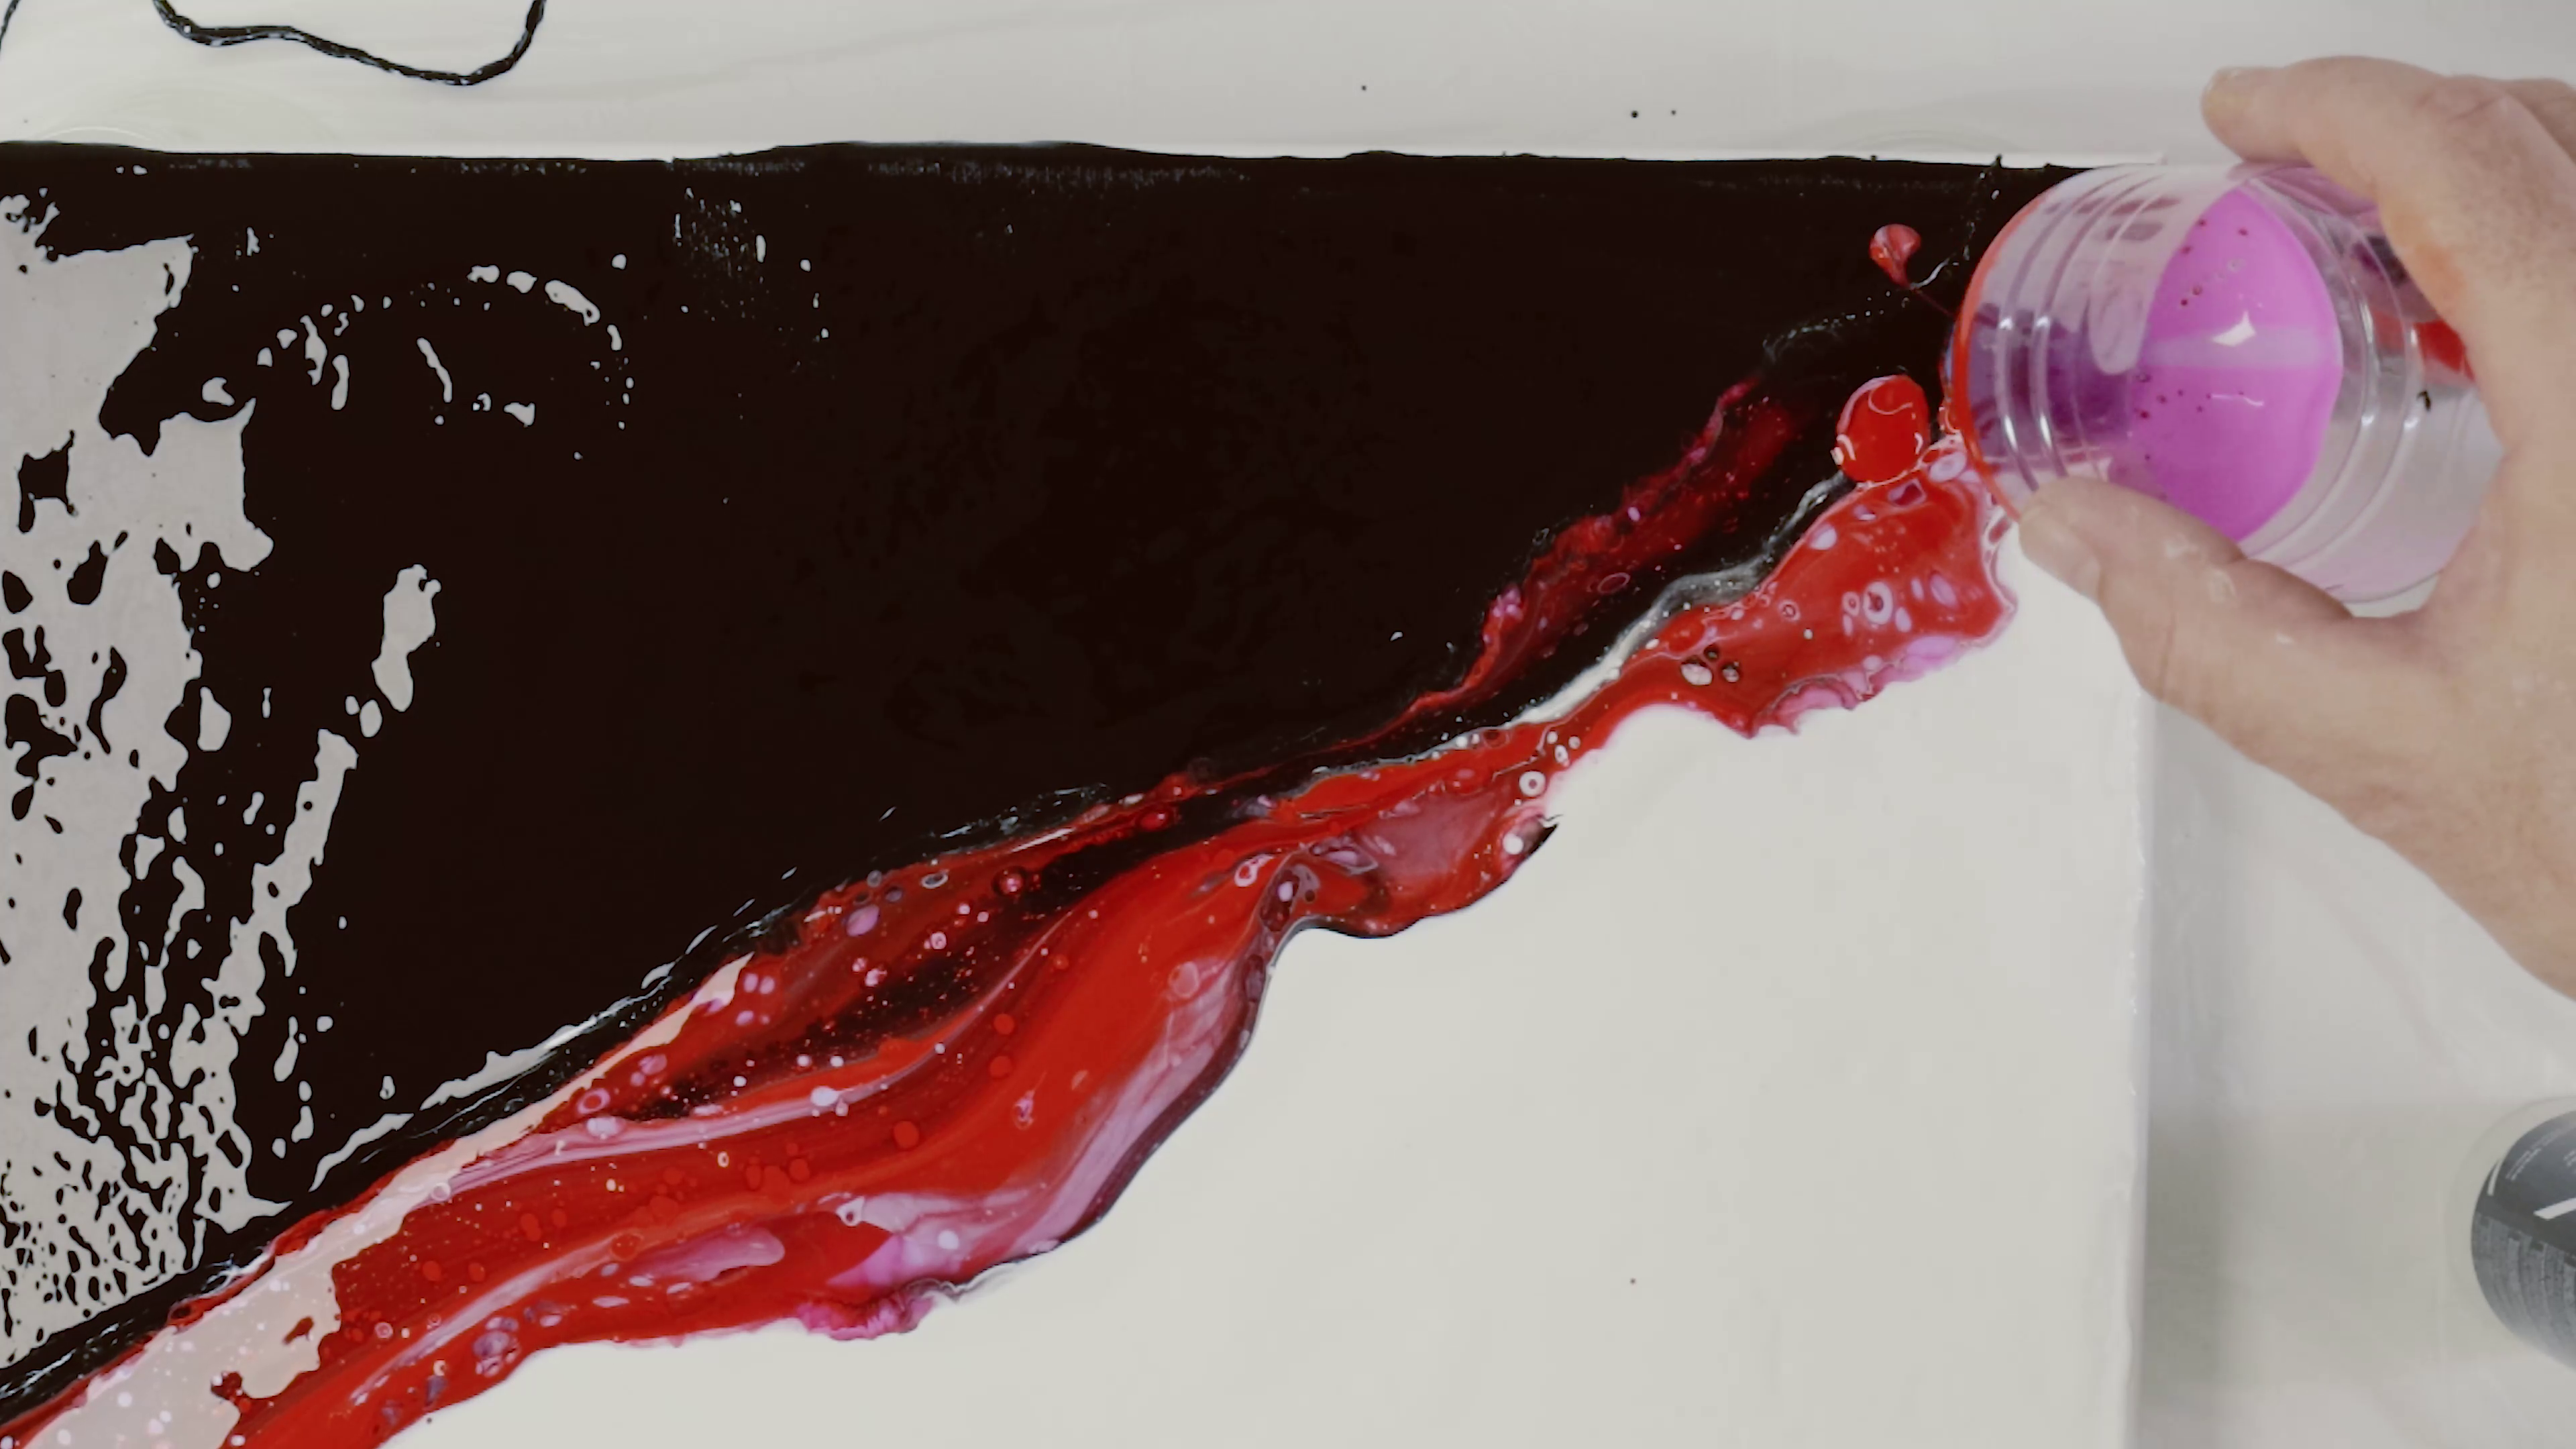
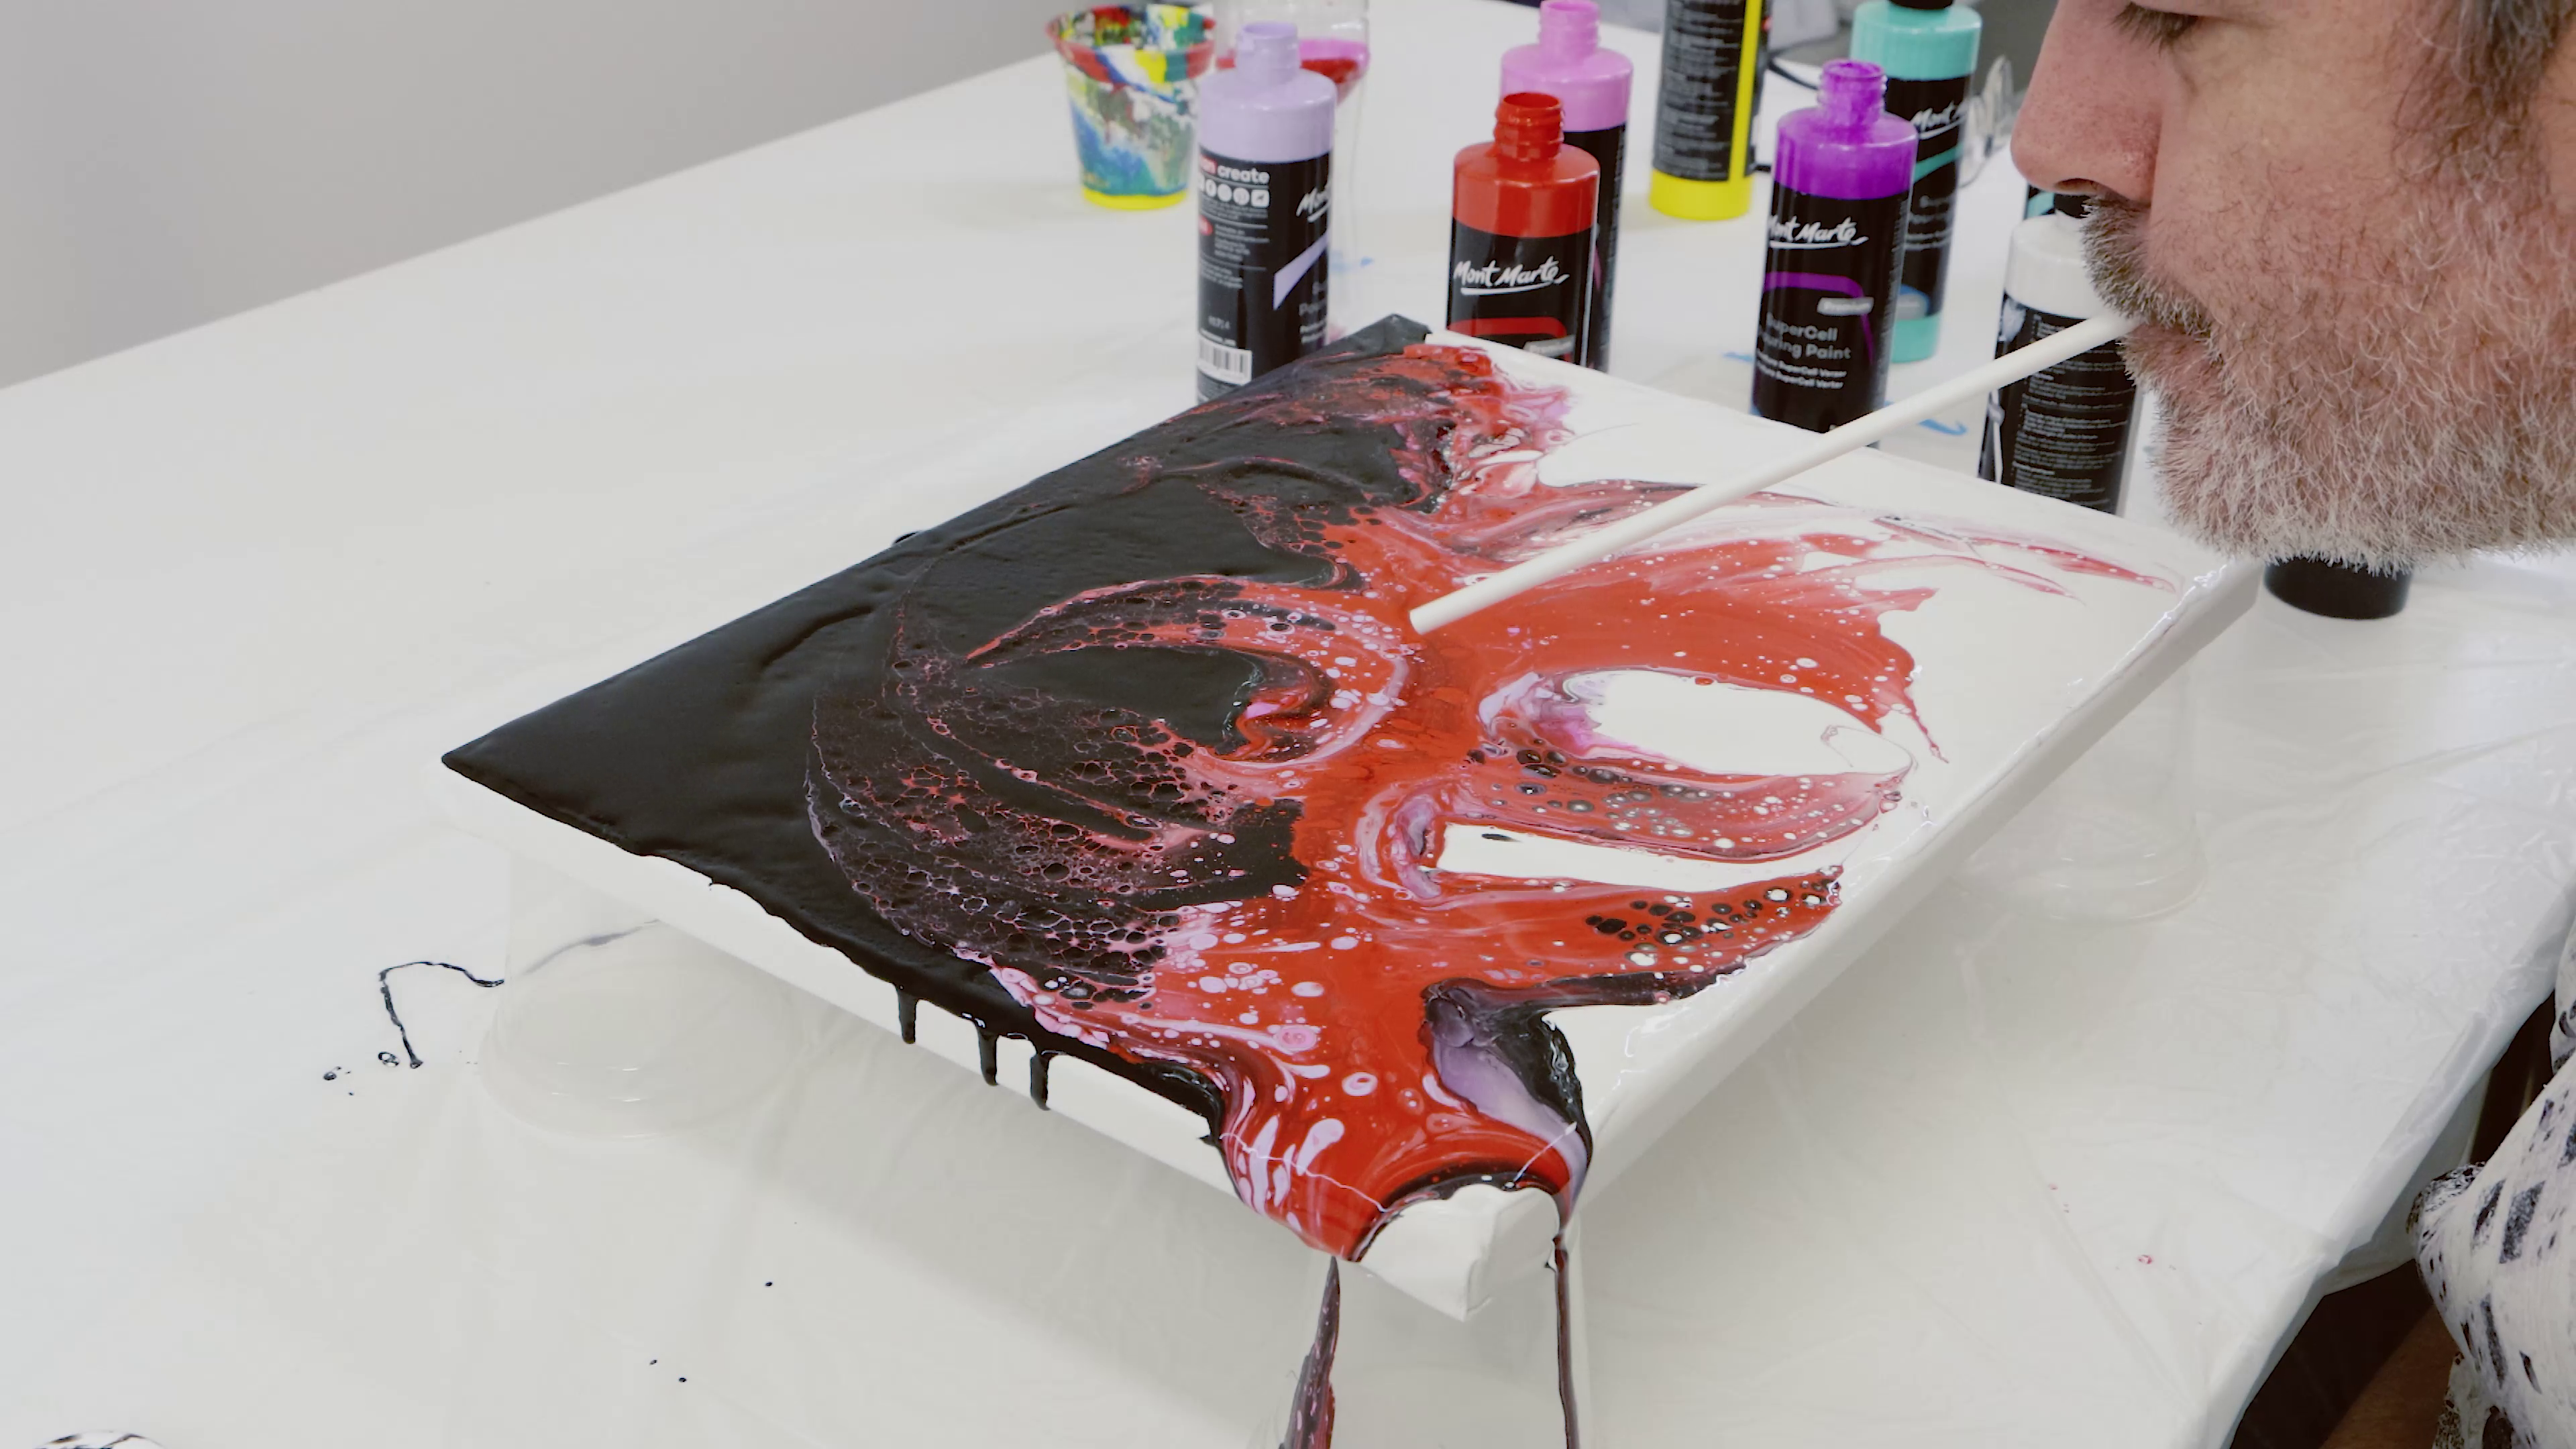
Once it is down the colour is dragged into the black and white with a palette knife. More interesting effects can be created if a straw is used to blow the colour around the canvas.
Well we hope you enjoyed this little tutorial and are inspired to pick up some Supercell pouring paint and create some lovely art works with them.
Create the first pour with:
- PMPS0010 SuperCell Pouring Paint Premium 240ml (8.1 US fl.oz) - Teal: https://www.montmarte.com/products/supercell-pouring-paint-premium-240ml-8-1-us-fl-oz-teal
- PMPS0008 SuperCell Pouring Paint Premium 240ml (8.1 US fl.oz) - Light Aquamarine: https://www.montmarte.com/products/supercell-pouring-paint-premium-240ml-8-1-us-fl-oz-light-aquamarine
- PMPS0009 SuperCell Pouring Paint Premium 240ml (8.1 US fl.oz) - Turquoise: https://www.montmarte.com/products/supercell-pouring-paint-premium-240ml-8-1-us-fl-oz-turquoise
- PMPS0012 SuperCell Pouring Paint Premium 240ml (8.1 US fl.oz) - Gold: https://www.montmarte.com/products/supercell-pouring-paint-premium-240ml-8-1-us-fl-oz-gold
- CSST3040 Single Thick Canvas Signature 30 x 40cm (11.8 x 15.8in): https://www.montmarte.com/products/single-thick-canvas-signature-30-x-40cm-11-8-x-15-8in
- Plastic cup
- Bin liner
Create the second pour with:
- PMPS0002 SuperCell Pouring Paint Premium 240ml (8.1 US fl.oz) - Bright Yellow: https://www.montmarte.com/products/supercell-pouring-paint-premium-240ml-8-1-us-fl-oz-bright-yellow
- PMPS0012 SuperCell Pouring Paint Premium 240ml (8.1 US fl.oz) - Gold: https://www.montmarte.com/products/supercell-pouring-paint-premium-240ml-8-1-us-fl-oz-gold
- PMPS0003 SuperCell Pouring Paint Premium 240ml (8.1 US fl.oz) - Cadmium Red: https://www.montmarte.com/products/supercell-pouring-paint-premium-240ml-8-1-us-fl-oz-cadmium-red
- PMPS0001 SuperCell Pouring Paint Premium 240ml (8.1 US fl.oz) - Titanium White: https://www.montmarte.com/products/supercell-pouring-paint-premium-240ml-8-1-us-fl-oz-titanium-white
- CSST3040 Single Thick Canvas Signature 30 x 40cm (11.8 x 15.8in): https://www.montmarte.com/products/single-thick-canvas-signature-30-x-40cm-11-8-x-15-8in
- Sheet of card
- Palette knife
Create the third pour with:
- PMPS0011 SuperCell Pouring Paint Premium 240ml (8.1 US fl.oz) - Lamp Black: https://www.montmarte.com/products/supercell-pouring-paint-premium-240ml-8-1-us-fl-oz-lamp-black
- PMPS0003 SuperCell Pouring Paint Premium 240ml (8.1 US fl.oz) - Cadmium Red: https://www.montmarte.com/products/supercell-pouring-paint-premium-240ml-8-1-us-fl-oz-cadmium-red
- PMPS0001 SuperCell Pouring Paint Premium 240ml (8.1 US fl.oz) - Titanium White: https://www.montmarte.com/products/supercell-pouring-paint-premium-240ml-8-1-us-fl-oz-titanium-white
- PMPS0006 SuperCell Pouring Paint Premium 240ml (8.1 US fl.oz) - Light Purple: https://www.montmarte.com/products/supercell-pouring-paint-premium-240ml-8-1-us-fl-oz-light-purple
- PMPS0004 SuperCell Pouring Paint Premium 240ml (8.1 US fl.oz) - Hot Pink: https://www.montmarte.com/products/supercell-pouring-paint-premium-240ml-8-1-us-fl-oz-hot-pink
- CSST3040 Single Thick Canvas Signature 30 x 40cm (11.8 x 15.8in): https://www.montmarte.com/products/single-thick-canvas-signature-30-x-40cm-11-8-x-15-8in
- Plastic bottle
- Palette knife
Find the products used!
You may also like
Create a paint pour heart with SuperCell Pouring Paint
