


If you want to expand your earring collection, you’re in for a real treat. We’ve searched high and low to bring you 14 DIY polymer clay earrings that are bound to bring in the compliments. Whether you’re looking for something bold or a little more subtle, we hope this roundup leaves you feeling inspired and ready to create your very own earrings.
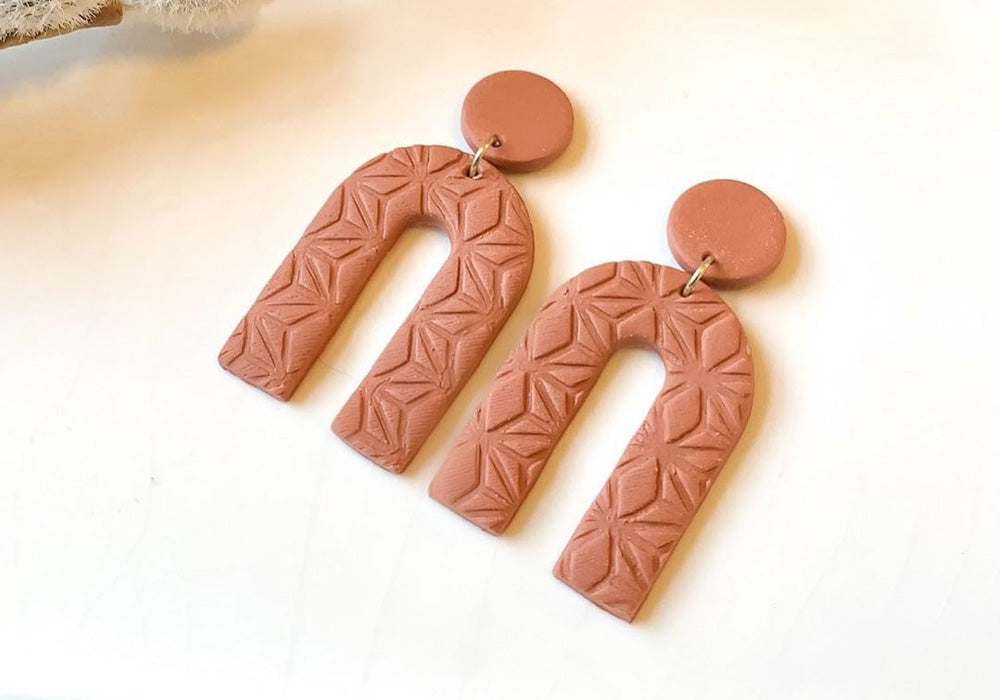
1. Earthy tones

Fans of earthy tones will love this boho design from Clover and Coast Designs. As you can see, it’s made up of 3 pieces, so you’ll need some jewellery pliers and loops for this project. We’d suggest either cutting the pieces by hand using a stencil and a hobby knife or using a shaped cutter (if you can find one to match the design).
2. Mirrored design

We don’t know about you, but we love these mirrored polymer clay earrings by The Watermark Design. If you look closely, you can see that they use two of each shape (with different coloured polymer clay) and flip them to create a beautiful, balanced design. These make a fun statement whether you wear them to brunch with a friend or to a party. The best part is, if someone asks where you bought them from you can say that you made them yourself!
3. Knot studs

Knot studs can take a bit of time to master, but we think they make a super cute addition to your outfit. Try out a few different knots until you find one that you like and then mimic it to create a pair. Remember, you can always knead the clay back into a ball and roll it again if you don’t like the design the first time around.
4. Tear drop dangles

These dreamy DIY polymer clay earrings are perfect for adding a touch of boho style to your day. We love the way the Spring-time colour palette in the image above looks with the natural tear drop shapes. To make sure your shapes all come out the same, use a stencil and hobby knife or clay cutter.
5. Squiggly studs

You might have seen paper garlands, but did you know that you can also make them using air dry clay? Simply cut out your shapes and put a hole through them using a needle or skewer so that you can thread string through once they’re dry.
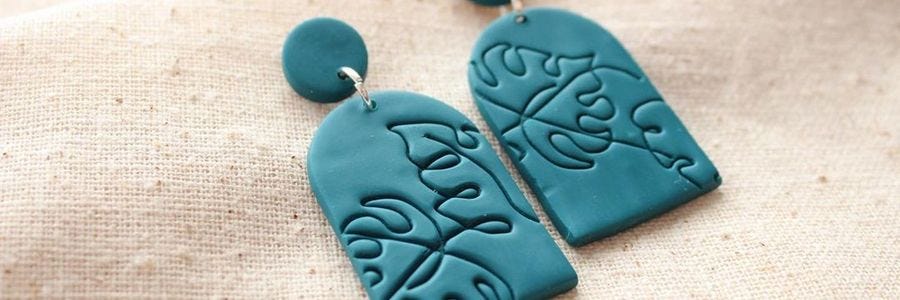
6. Botanical drawing designs

Create a tropical vibe with a stylish line art Monstera design. To add your design to the clay, we’d suggest using a needlepoint clay tool (simply hold it like a pen and start drawing). You might like to practice on paper first to refine your design, or trace over a piece of paper with a ballpoint pen to make a light imprint in your clay that you can use as a guide.
7. Coloured hoops

Fancy some funky hoops? This DIY polymer clay earring design from Terrebonne Clay is simple, but makes a statement and adds a bit of flair to any outfit. If you want to mix it up a bit, you can use two different colours or two different tones of the same colour.
8. Sixties style flowers

Welcome the sixties back with some funky and bright flower hoop earrings! You can create any flower you like, but we’re particularly fond of these bright yellow babies by Freckle and Biscuit. Don’t be shy, express yourself!
9. Rainbows

You don’t need a full range of colours to create a rainbow. These modern polymer clay earrings by Hearts of June bring together different pink tones to create a trendy ombre effect. You can do this by starting with a base polymer clay colour, then mixing it with more and more white polymer clay to create a range of different tones. Then, roll them into tiny coils and push them together into an arch shape. Don’t forget to poke a hole in the top before you pop them into the oven to set.
10. Textured studs

Want to play around with some textures? Stamps, fabrics, objects you have laying around the house and clay tools can all be used to add patterns and interesting effects to your polymer clay. So, roll out some clay and start experimenting! The possibilities are endless.
11. Lifesaver-inspired hoops

If you like to keep your style fresh, you’ll love these Lifesaver-inspired hoops by Harry and Herne. Choose any colours you like, mould them into beads, then bake them before threading them onto some wire hoops.
12. Monochrome shapes

These minimalistic, monochrome earrings are great for those who like to keep it simple. Choose a subtle and sophisticated colour like The Hunters True in the image above, or go bright and bold. The best part about DIY polymer clay earrings is that you get to tailor them to suit your personal style.
13. Imprints
Create interesting effects like Clover and Coast Designs by gently pressing stamps or other textured objects into your polymer clay. We’d suggest stamping your clay before you cut it so that you don’t distort the shape when you press into it.
14. Donut studs


Don these donut studs to add some extra personality to your outfit. These little beauties can be created by rolling a ball of polymer clay, flattening it slightly and poking a hole through the middle using a clay tool. Once you’ve created the basic shape, decorate them to your heart’s content with a few little sprinkles or acrylic paint details.
Are you ready to create your own DIY polymer clay earrings? If you need some pointers on baking polymer clay, we’ve put together a handy little guide that walks you through some common questions and tricks that you might like to keep up your sleeve.
Want to share your creative projects with us? Tag us on Instagram or Facebook using #montmarteart so that we can check it out!


